RiverRidge X-FRAME BATH SPACESAVER-WHITE 06-003 Assembly Instructions Manual
Bath spacesaver
Hide thumbs
Also See for X-FRAME BATH SPACESAVER-WHITE 06-003:
- Assembly instructions manual (9 pages)
Table of Contents
Advertisement
Quick Links
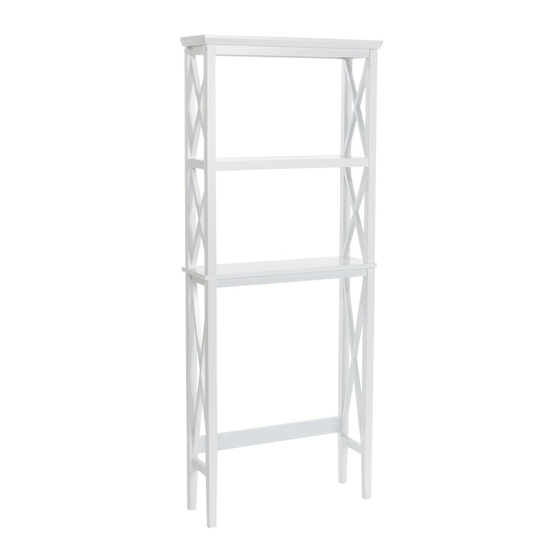
RiverRidge® X-FRAME BATH SPACESAVER-WHITE
RiverRidge® X-FRAME BATH SPACESAVER-ESPRESSO
This product requires assembly by an adult because of the small parts. Care should be
taken in unpacking and assembling this item to keep the small parts away from children.
WARNING
Young children can be seriously injured or killed, if furniture tips over.
Don't use this item for a TV stand.
Use angle-braces or anchors to secure furniture to the wall.
ASSEMBLY INSTRUCTIONS
ADULT ASSEMBLY REQUIRED
ITEM# 06-003
ITEM# 06-004
Advertisement
Table of Contents

Related Manuals for RiverRidge X-FRAME BATH SPACESAVER-WHITE 06-003


Summary of Contents for RiverRidge X-FRAME BATH SPACESAVER-WHITE 06-003
- Page 1 ASSEMBLY INSTRUCTIONS RiverRidge® X-FRAME BATH SPACESAVER-WHITE ITEM# 06-003 RiverRidge® X-FRAME BATH SPACESAVER-ESPRESSO ITEM# 06-004 ADULT ASSEMBLY REQUIRED This product requires assembly by an adult because of the small parts. Care should be taken in unpacking and assembling this item to keep the small parts away from children.
- Page 2 Send requests for missing or damaged parts replacements by email to : customer.service@ssi-rr.com or call toll free 1-(844)-223-5201 or order parts on line at www.riverridgehome.com THIS SHELF UNIT WILL HOLD UP TO 25 POUNDS PER SHELF OR A TOTAL OF 75 POUNDS. DO NOT LOAD EACH SHELF WITH MORE THAN 25 POUNDS.
- Page 3 PARTS LIST PARTS DESCRIPTION TOP BOARD 2PCS UPPER SIDE FRAME BOTTOM BOARD SHELF LEFT LOWER SIDE FRAME REAR TOP BOARD CROSS BAR 3PCS CROSS BAR REAR LOWER CROSS BAR RIGHT LOWER SIDE FRAME 18PCS LONG WOOD SCREW 5x45mm 12PCS WOOD SCREW 4x35mm 2PCS PLASTIC ANCHOR 2PCS...
- Page 4 STEP 1 STEP 1 1. Put the top board (1) and bottom board (3) upside down on a soft padded surface. 2. Attach the rear top board cross bar (6) to the top board (1) by inserting 3 wood screws (B) through the holes on the rear top board cross bar (6) and tighten to the top board (1).
- Page 5 STEP 3 STEP 3 1. Repeat STEP 2 to assemble the other upper side frame (2). STEP 4 STEP 4 1. Attach the bottom board (3) to bottom side of the 2 upper side frames (2) by inserting 4 long wood screws (A) through the holes on the bottom board (3) then tighten to the 2 upper side frames (2) by using the Allen wrench (F).
- Page 6 STEP 5 STEP 5 1. Insert 4pc wooden dowel (G) into the holes on the Rear bottom cross bar (8). 2. Attach 1 Left lower side frame (5) to the bottom board (3) and Rear lower cross bar (8) by inserting the wooden dowel (G) into the holes on the Left lower side frame(5) and inserting 3 long wood screws (A) through the holes on the Left lower side frame (5) then tighten to the 2 cross bars (7) on the bottom board (3) and Rear lower cross bar(8) by using the Allen wrench (F).
- Page 7 STEP 6 STEP 6 1. Press 14 plastic caps (E) into the wood screw holes on the 2 upper side frames (2) and 2 lower side frames (5). 2. If added pressure is needed to keep the plastic cap in place – cover the cap with a piece of paper and tap lightly with a hammer to secure the cap.
- Page 8 Take appropriate action necessary to correct the hazard such as tightening of screws and taking any damaged parts away from children. Thank you for purchasing this RiverRidge® Home Products item. We hope you enjoy it, and consider purchasing other RiverRidge® items.
Need help?
Do you have a question about the X-FRAME BATH SPACESAVER-WHITE 06-003 and is the answer not in the manual?
Questions and answers