Table of Contents
Advertisement
Quick Links
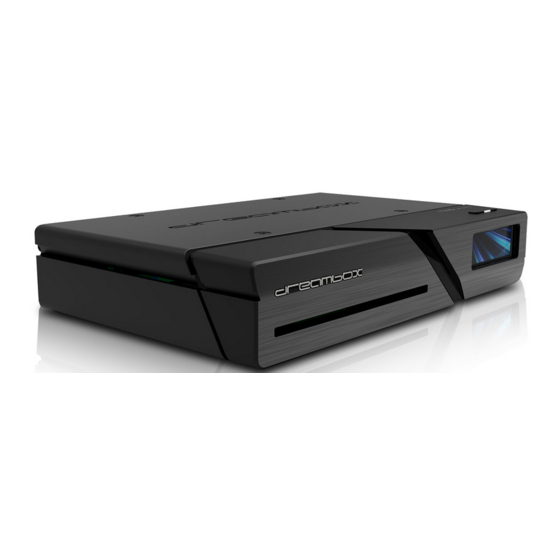
Dreambox Two UltraHD
User Manual
Digital satellite receiver to receive free and
encrypted DVB programs.
UltraHD
Twin DVB-S2x tuner
Gigabit network interface
WIFI 2.4 / 5 GhZ
Bluetooth
1x Smartcard-Reader Dreamcrypt
1x Common Interface slot
1x USB 2.0
1x USB 3.0
HDMI 2.0 out
Dreambox OS
Dreambox API
TM
Advertisement
Table of Contents

Summary of Contents for Dreambox Two UltraHD
- Page 1 Dreambox Two UltraHD User Manual Digital satellite receiver to receive free and 1x Smartcard-Reader Dreamcrypt encrypted DVB programs. 1x Common Interface slot UltraHD 1x USB 2.0 Twin DVB-S2x tuner 1x USB 3.0 Gigabit network interface HDMI 2.0 out WIFI 2.4 / 5 GhZ...
- Page 2 Please note that the functional scope of your Dreambox is constantly expanding through software updates. If you have updated the software of your Dreambox or find errors in the operating instructions, please have a look in the download area of our homepage www.leontechltd.com...
-
Page 3: Table Of Contents
Television ........................ 8 Turning the device on ..........................8 Start wizard 3 Basic operation .................... 10 Turning your Dreambox on and off ........................11 Service selection ..................11 Changing channel using the service list ......................12 Controlling the volume ......................12 Changing the audio track ........................ - Page 4 4.7 Parental control ........................4.8 Common-Interface ........................5 Setup 5.1 Language ..........................5.2 Customize ........................... 5.2.1 Simple Mode ....................... 5.2.2 Intermediate mode: ....................5.3 Timezone ..........................5.4 A/V Settings ........................... 5.5 Network ..........................5.5.1 Connection via network cable ..................5.5.2 Integrated wireless (WLAN) ..................
- Page 5 8 Updating the software 8.1 Backing up your settings ....................... 52 8.2 Restoring your settings ......................... 52 8.3 Updating a new software ......................53 8.3.1 With browser ........................53 9 Troubleshooting 10 Technical data 11 Features 12 Service & Support Information...
-
Page 7: Before Starting Up The Receiver
• Make sure to have enough space around the Dreambox for sufficient ventilation. • Do not cover the top of the Dreambox and allow enough space to other devices. The louvers of the devices must be free at all times to allow sufficient heat transfer from inside the device. - Page 8 Shut down • In case your Dreambox is in use for a longer period of time disconnect the power plug from the power outlet. • During thunder storm the unit should also be physically disconnected from the power outlet. Additional safety instructions •...
-
Page 9: Scope Of Delivery
Disposal instructions The packaging of the Dreambox only consists of reusable materials. Please recycle if possible. This symbol on the product or on its packaging indicates that this product must not be disposed of with your other household waste. Instead, it is your responsibility to dispose of your waste equipment by handing it over to a designated collection point for the recycling of waste electrical and electronic equipment. -
Page 10: Device Views
1x smart card reader Insert your Dreamcrypt smart card with the chip facing downwards and forwards into the smart card reader. IR-Sensor receives the infrared signals from your Dreambox remote control. SD-Card reader standby button switches your Dreambox on or off... -
Page 11: Rear View
LNB-Input (2x DVB-S2x Tuner) Connect the coaxial cable from your LNB here. HDMI -Output You can connect a TV to the HDMI® out of your Dreambox if your TV has the right input. S/PDIF optical audio You can connect your Dreambox with an optical (Toslink) cable to your HiFi- Amplifier or DSP. -
Page 12: Start Up
Safety instructions on page In the following is described how to connect the dreambox to , an a/v receiver, a tv-device and a network. 2.1.1 Satellite Dish (DVB-S/S2) Connect the (LNB) with a suitable coax cable to the LNB-Input of your Dreambox. -
Page 13: Television
Connect the dreambox with the hdmi-cable to the TV-input of your television. mit ein At least use the hdmi-interface for getting the best picture quality (through digital transmission). You can use the supplied HDMI cable for connecting the dreambox with the hdmi-input of your television. -
Page 14: Turning The Device On
2.3 Start wizard If you switch on your Dreambox for the first time, you will see the setup wizard. The setup wizard will guide you through the first time installation. Follow the instructions on the screen and use the Navigation- Buttons (▲▼◄►) and the OK-Button. - Page 15 Parental control makes it possible to lock selected channels. Detailed information can be found under Chapter Parental control on pag 26. Network The network wizard will assist you with the network setup of your Dreambox. Detailed information can be found under Chapter Network on page 33.
-
Page 16: Basic Operation
3. Alternatively you can push down the Standby-Button on your Dreambox for 5 seconds. If no OSD Menu is visible on the screen this will also put your dreambox into Standby-Mode. (If the OSD Menu is still open press the EXIT-Button). -
Page 17: Service Selection
Sleep Timer Put your Dreambox into Standby after a duration of time that can be chosen freely. (See Chapter 3.12 Sleep timer on page Idle Mode Puts your Dreambox into Idle mode. Restart Your Dreambox will be rebooted. Standby Puts your Dreambox into Standby-Mode. -
Page 18: Controlling The Volume
3.4 Controlling the volume The Volume +/- Buttons control the volume of the audio. Pressing + will make turn it up and pressing - will turn it down. downdown Pressing the MUTE-Button mutes the volume. A crossed speaker symbol will appear on the screen. 3.5 Changing the audio track Pressing the AUDIO-Button in TV or Radio Mode. -
Page 19: Subtitles
3.8 Subtitles Follow these steps: 1. In TV- or Radio Mode press the AUDIO-Button. 2. By pressing the yellow Options-Button a list with the available subtitles will show up. 3. With the Navigation-Buttons ( ▲▼) select a desired subtitle and press the OK-Button to activate. The screenshot on the left shows you an example how a subtitle looks. -
Page 20: Infobar
3.9 Infobar The Infobar appears when switching a channel and shows all necessary information about the selected service. By pressing the OK-Button you can open the Infobar if needed! INFO MENU... -
Page 21: Electronic Program Guide - Epg
3.10 auf Seite 19). The Dreambox automatically searches for similar broadcasts in the background. If one or more similar broadcasts are found the label “Similar” will appear in the red window. Pressing the red Options-Button opens a listing of similar broadcasts. - Page 22 Single-EPG In this view you are supplied with detailed information about the currently selected channel’s programming. Follow this steps: 1. Press the INFO-Button. 2. Press the yellow Options-Button for getting the “Single-EPG” view. You can also access this view by pressing: 1.
- Page 23 Multi-EPG Follow these steps: 1. Press the Info-Button. 2. Press the blue Options-Button for switching to “Multi-EPG” view. Use the blue and yellow Options-Buttons to switch between the now, next and more views. Pressing the green Options-Button will give you the possibility to automatically copy the start and end time of the selected show into a recording timer.
- Page 24 Time/Date Input Press the Menu-Button in the Multi-EPG view. A window will appear where you can enter a time and date. After you have entered the desired time and date press the OK-Button to activate your selection. Graphical Multi-EPG You have another option to view the EPG of di.erent services and successive shows. The Graphical Multi- EPG displays the EPG overview for the upcoming hours (can be set to 1-5 hours with the Buttons 1-5 on the Numeric-Keypad) for the chosen bouquet.
-
Page 25: Teletext (Videotext)
Time/Date Input Press the Menu-Button in the Multi-EPG view. A window will appear where you can enter a time and date. After you have entered the desired time and date press the OK-Button to activate your selection. 3.11 Teletext (Videotext) TEXT-Button 1. - Page 26 Teletext Konfigurationsmenü: If the Teletext page 100 is shown you can press the MENU- Button to enter the Teletext configuration menu. You have the following options: Scale filter and Scale filter zoom You can choose between following scale options: • bilinear •...
- Page 27 TeleText and Picutre TeleText on the left and TV picture on the right side of your TV. TeleText in Picture TeleText will be shown as small picture in graphics (pig). Position and size (see "‘Position and size"’). Background caching If you switch o. background caching, searching for the page will not start before you entered the last number.
-
Page 28: Sleep Timer
3.12 Sleep timer Using the sleep timer you can put your Dreambox into standby or turn it o. after a predetermined amount of time. Follow these steps: 1. Press the Menu-Button to open the main OSD menu. 2. With the Navigation-Buttons ( ▲▼) choose the option “Standby / Restart” and press the OK- Button. -
Page 29: Edit The Channellist
Chapater 4 Edit the channellist What is a bouquet? A bouquet can be thought of something like a folder. Every channel equals a page in this folder and the pages are sorted into categories. This way you can create a bouquet called “Kids”, for example, under which you “file” all children’s stations. Another example would be to create a bouquet called “Sports”... -
Page 30: Add A Service To Favorites
4.2 Add a service to favorites If you want to add a service to your Favorites-view you can choose from services in the All-, Satellitesand Provider-views. You can switch views by pressing the red, green, yellow and blue Options- Buttons. At this point we only describe the process from the All-Bouquet since it is the same for the others. -
Page 31: Remove A Service From Favorites
4.4 Remove a service from favorites 1. Press the Navigation-Buttons ( ▲▼) to open the channellist. 2. With the Navigation-Buttons ( ▲▼) choose the channel you want to delete. 3. By pressing the MENU-Button the “Channellist menu” will open up. 4. -
Page 32: Parental Control
5. Use the Numeric-Keypad on your remote control to enter the name for the new bouquet. The according letters are printed on button. The Mute-Button deletes a character. 6. Press the OK-Button, to add the marker to your favorites list. If you have added two markers use the Arrow-Left and Arrow-Right-Buttons to jump between those two markers. - Page 33 If you have selected whitelist under the “Parental control type” then this channel will be the only one that can be viewed without entering the right pincode. Change service pin 1. With the Navigation-Buttons ( ▲▼) choose the option “Change service PIN” and press the OK- Button.
-
Page 34: Common-Interface
4.8 Common Interface 1. Press the Menu-Button to open the main OSD menu. 2. Withthe Navigation-Buttons ( ▲▼) chooset he option “Setup” and press the OK-Button. 3. With the Navigation-Buttons ( ▲▼) choose the option “Devices” and press the OK-Button. 4. -
Page 35: Setup
Chapter 5 Setup 5.1 Language 1. If no OSD menu is visible on your screen, press the Menu-Button to open the main OSD menu. 2. With the Navigation-Buttons ( ▲▼) choose the option “Setup” and press the OK-Button. 3. With the Navigation-Buttons ( ▲▼) choose the option “System” and press the OK-Button. 4. -
Page 36: Simple Mode
5.2.2 Intermediate mode: These settings supplement the settings in simple mode. Automatic wakeup from standby for zap timers If this option is set to “Yes” your Dreambox will wakeup from standby even for zap-timers and not only for recordings. Recordings always have priority If this option is set to “Yes” your Dreambox will automatically switch to the service which is supposed to be recorded in case there is a conflict with an existing timer. -
Page 37: Timezone
Alternative radio mode Set this option to “Yes” if you want the handling in the Radio mode to be the same as in the TV mode. Action on long powerbutton press Set your desired option what is supposed to happen if you push the Standby-Button for a few seconds. - Page 38 Video output This option selects to which output the video signal will be sent to. HDMI® If you have connected your TV to the HDMI® output of your Dreambox set the “Output type” option to “HDMI”. Modus Use the Navigation-Buttons to select the desired screen resolution (◄►)
-
Page 39: Network
OSD visibility With the Navigation-Buttons (◄►) you can change the transparency of the gui. Scaler sharpness With the Navigation-Buttons (◄►) you can change the sharpness of the screen. 5.6 Network 5.6.1 Connect via network cable Adapter-Settings 1. Press the Menu-Button to open the main OSD menu. 2. -
Page 40: Connection Via Network Cable
Enter the DNS-Server’s IP address here. DNS is used to translate a Domain name to an IP address. Normally, if the Type is set to LAN, there is no need for a DNS entry. If the Dreambox is connected to the Internet over a router, enter the router’s IP address here. -
Page 41: Integrated Wireless (Wlan)
3. With the Navigation-Buttons ( ▲▼) choose the option “Network” and press the OK-Button. 4. With the Navigation-Buttons ( ▲▼) choose the option “Network Setup” and press the OK-Button. 5. Please put your WiFi-USB-Stick in one of the USB ports of your Dreambox. 6. A new menu entry "‘WiFi"’ will show. -
Page 42: Skin
4. With the Navigation-Buttons ( ▲▼) choose the option “Factory reset” and press the OK-Button. You will be asked if you really want to reset all your settings to the factory defaults. If you select “yes” all your settings and bouquets will be lost. Afterwards your Dreambox will be restarted automatically. -
Page 43: Service Searching
Service searching In this chapter you will learn how to setup the tuner configuration for the reception with a satellite-dish (DVB-S/S2), via cable television (DVB-C) or via digital terrestrial television (DVB-T/T2) in your dreambox and how to perform a service scan. -
Page 44: Dvb-S2 Tuner-Configuration
If you use one or two dishes to achieve this. Connect the two coax cables from the two LNBs to a so-called Toneburst switch and connect the coax cable from the Toneburst switch to your Dreambox. Two satellites via Toneburst Follow these steps: 1. -
Page 45: Two Satellites Via Diseqc A/B
6. With the Navigation-Buttons ( ▲▼) choose the option “DVB-S2 Tuner” and press the OK-Button. 7. With the Navigation-Buttons ( ▲▼) choose the option “Mode”. 8. With the Navigation-Buttons (◄►) choose the option “Toneburst A/B”. 9. With the Navigation-Buttons ( ▲▼) choose the option “Port A”. 10. -
Page 46: Four Satellites Via Diseqc A/B/C/D
2. With the Navigation-Buttons ( ▲▼) choose the option “Setup” and press the OK-Button. 3. With the Navigation-Buttons ( ▲▼) choose the option “Services and Recordings” and press the OK-Button. 4. With the Navigation-Buttons ( ▲▼) choose the option “Service Searching” and pressthe OK-Button. 5. -
Page 47: Stab Positioner Using Usals
6.1.5 Stab Positioner using USALS Use this type of configuration if you want to receive many satellites with a Stab positioner from a Single Universal LNB. The coax cable is directly connected from your Dreambox to the LNB. - Page 48 The rest is done automatically by your Dreambox with build-in USALS. USALS is a model for calculating the position of all satellites in orbit with a margin of error less than 0.1 degrees. USALS was developed by the Stab company.
-
Page 49: Stab Positioner Without Usals
6.1.6 Stab Positioner without USALS Use this type of configuration if you want to receive many satellites without a Stab positioner from a Single Universal LNB. The coax cable is directly connected from your Dreambox to the LNB. Stab Positioner without USALS Follow this steps: 1. -
Page 50: Dvb-C Tuner-Configuration
12. Press the Navigation-Button ( ►). 13. With the Navigation-Buttons ( ▲▼) choose the option “DiSEqC-Modus”. 14. With the Navigation-Buttons (◄►) choose the option “1.2”. 15. With the Navigation-Buttons ( ▲▼) choose the option “Use usals for this sat”. 16. With the Navigation-Buttons (◄►) choose the option “No”. 17. -
Page 51: Dvb-T Tuner-Configuration
Frequency bands This type of searching scans the frequencies used by most cable providers. This setting is the default. 1. With the Navigation-Buttons ( ▲▼) choose the option “Used service scan type”. 2. With the Navigation-Buttons (◄►) choose the option “Frequency bands”. 3. -
Page 52: Automatic Scan
4. With the Navigation-Buttons ( ▲▼) choose the option “Service Searching” and press the OK-Button. 5. With the Navigation-Buttons ( ▲▼) choose the option “Tuner configuration” and press the OK-Button. 6. With the Navigation-Buttons ( ▲▼) choose the “DVB-T/T2 Tuner” and press the OK-Button. 7. - Page 53 Use the Navigation-Buttons (▲▼◄►) to set the “Clear before scan” option to “Yes” if you want to delete all services before the scan starts. Otherwise leave the setting to “No” which results in only new services being added to the channel list. In order to find the new services, follow this steps: 1.
- Page 54 You can see the progress of the scan here. The scan is done once you see this menu. It shows how many channels were found during the scan Press the OK-Button to store the found channels or the EXIT-Button to cancel.
-
Page 55: Manual Scan
7.5 Manual scan Follow this steps: 1. Press the Menu-Button to open the main OSD menu. 2. With the Navigation-Buttons ( ▲▼) choose the option “Setup” and press the OK-Button. 3. With the Navigation-Buttons ( ▲▼) choose the option “Services and Recordings” and press the OK-Button. 4. -
Page 56: Systeminformation
Systeminformation 7.1 Service This window shows detailed technical information about the current service. Channel-Information Follow this steps: 1. Press the MENU-Button in order to open the main menu. 2. Navigate to the option “Information” and press theOK-Button. The “Information” menu will open up. 3. - Page 58 7.2 About (Hard- and Sotware ) This window shows all relevant information about the Hard- and Software of your Dreambox. Hardware- und Software-Informationen Follow this steps: 1. Press the MENU-Button in order to open the main menu. 2. Navigate to the option “Information” and press theOK-Button.
-
Page 59: Updating The Software
Chapter 8 Updating the software 8.1 Backing up your setting Before installing newer software on your Dreambox you should backup your settings, otherwise they will be lost. 1. Press the Menu-Button to open the main OSD menu. 2. With the Navigation-Buttons ( ▲▼) choose the option “Setup” and press the OK-Button. -
Page 60: With Browser
The following steps assume you have a DHCP server. Usually dhcp-server is activated by default in delivery condition of your router. First of all, power down the Dreambox to standby and then switch it o. by the power switch on the back. Idle mode is not enough! Follow these steps: 1. - Page 61 2. Click on “Online recovery” on the given site in your Browser. 3. Click on “GO” to start the recovery process. Your dreambox will try to download and install the latest software now. If there is no internet connection available at this moment, it will try to install the software from a previous recovery session.
-
Page 62: Troubleshooting
Delete no longer needed recordings more Remote control is not working Batteries are inserted incorrectly Remove batteries and check polarity Batteries are empty Insert new batteries Wrong remote control mode Press Dream-Mode or TV- (Dream-Mode, TV-Mode) Mode button Software Reboot Dreambox... -
Page 63: Technical Data
Chapter 10 Technical data Dreambox OS Dreambox API 53.000 DMIPS 6 Core Prozessor MPEG2 / H.265 Hardware decoding (DVB compliant) 1x Smartcard-Reader (DreamcryptTM) 1x HDMI 2.0 Connector 10/100/1000 MBit/s compatible Gigabit Ethernet Port ... - Page 64 Additional information: DVB-S Tuner with DVB-S2x: Input Frequenzy 950 ... 2150 MHz Demodulation DVB-S (QPSK); DVB-S2x ((8PSK,QPSK) Symbolrate DVB-S: 2 ... 45 Mbaud/s, SCPC/ MCPC DVB-S2: 10 – 31 Mbaud/s (8PSK) , 10 –30 Mbaud/s (QPSK) Videode decoder: Videocompression MPEG-2 und MPEG-1 compatible, H.265 Video Formats 4:3 / 16:9 Letterbox for 4:3 TV-Device Audio decoder:...
- Page 65 Mini-USB Service-Connector: Function: Update of Firmware Ethernet: Gigabit compatible Ethernet-Port Function: Update of Firmware WIFI: 2.4 GHz 2400MHz-2483MHz 5 GHz 5150MHz-5848MHz Bluetooth: 2.4GHz Class2 2402MHz-2480MHz USB: 1x USB 2.0 Host Anschluss 1x USB 3.0 Host Anschluss SD-Card reader LNB power and polarisation per tuner: LNB Current 400mA max.
-
Page 66: Features
• Parental control • Sleeptimer • Easy expansion of the base function with the use of Plugins • Remote controllable via Web-Interface and streaming of the TV-/Radio stations to any PC connected to the Dreambox through network • mp3 playback... - Page 67 4 Kam Hong Street North Point Hong Kong Technical Support E-Mail: support@dreambox.de Tel.: +49 (0)180 - 3 44 11 30 990 0,09 euro/min from germany, mobile tari.s max. 42 ct/min on the phone: Mo. – Fr. 9:00 – 15:00 Uhr...
Need help?
Do you have a question about the Two UltraHD and is the answer not in the manual?
Questions and answers