Table of Contents
Advertisement
Advertisement
Table of Contents

Related Manuals for BlueStar RNB-30


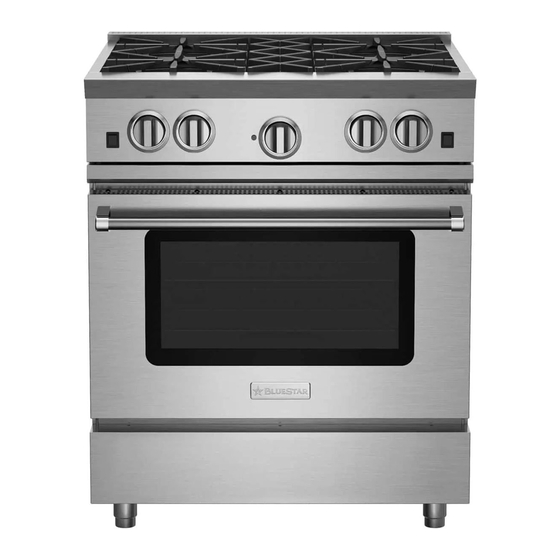
Summary of Contents for BlueStar RNB-30
- Page 1 INSTRUCTIONS FOR THE SERVICE OF GAS RANGES & COOKTOPS FOR THE HOME MODELS: RNB-30 RPB-30, RGTNB-30, RNB-36,RPB-36, RGTNB-36, RNB-48, RGTNB-48, RNB 60, RGTNB-60, RCS-30, and RCS-36 Service Manual Free-Standing Gas Range 600 Arlington Street, Reading, PA 19611 United States of America...
- Page 2 Since 1880, we have been dedicated to Quality! Our belief is that our success can only be measured by the continuing success of our customers. We achieve customer satisfaction by ensuring that each of our employees understands, meets, and exceeds our customer’s expectations. You as an authorized service agency are considered an employee to us.
-
Page 3: Table Of Contents
TABLE OF CONTENTS Range & Cooktop Identification ......4 Complete Door Removal ........27 Warranty Serial Plate Identification & Location..4 Indicator Light Removal ........28 Product Warranty ............5 Oven Light Switch Removal.........29 Installation..............6 I/R Broiler Spud (Orifice) Change ......30 Proximity to Side Cabinets Installation ....7 Top Burner Removal ..........31 Rangetop Cutout and Specifications .....8 Open Top &... -
Page 4: Range & Cooktop Identification
RANGE AND COOKTOP IDENTIFICATION (RANGE) (COOKTOP) EXAMPLE: EXAMPLE: RPB48-4GCB NAT-SS RGTPB48-4GCB NAT-SS R= RESIDENTIAL R= RESIDENTIAL P= POWER (Burner) G= GAS B= BURNER T= TOP SECTION 48= 48” WIDE** P= POWER (Burner) 4= 4 OPEN TOP BURNERS B= BURNER G= GRIDDLE (Optional) 48= 48”... - Page 5 Limited Warranty WHAT IS COVERED? FULL ONE (1) YEAR WARRANTY This warranty covers all functional components of your unit. All repair, labor and replacement parts for parts found to be defective due to materials or workmanship which occurs during normal household use within one (1) years from the documented delivery date will be repaired or replaced at the discretion of the manufacturer, free of charge, when the range is located in the continental United States and Canada.
-
Page 6: Installation
INSTALLATION REQUIREMENTS This unit has been designed to be installed directly against rear walls and side base cabinets. It cannot, however, be installed directly against tall side cabinets, sidewalls, tall appliances, or base cabinets extending beyond 24”. (see, 'Proximity to Side Cabinets'). - Page 7 PROXIMITY TO CABINETS 1. Base Cabinets: The unit may be installed directly adjacent to base cabinets at a maximum height of 36". IMPORTANT: The unit's side trim pieces (both left and right) MUST be 11/16" above adjacent base cabinet counter top. 2.
-
Page 8: Rangetop Cutout And Specifications
RANGETOP CUTOUT AND SPECIFICATIONS Unit Size Cutout Width 30” 30” 36” 36” 48” 48” 60” 60” Depth – 24” Height – 7 ¼” Lower Support Ledge 1 ½” Maximum - 8 -... -
Page 9: Unpacking
UNPACKING Check the packaging for any damage. If damage is visible on the packaging, you should mark the bill of lading for possible concealed damage. Check to make sure that the container is upright. If unit is not upright, major damage may occur. If damage is discovered, do not refuse delivery, but contact the carrier and file the appropriate freight claims. -
Page 10: High Shelf/Standard Backguard/Island Trim
HIGH-SHELF / STANDARD BACKGUARD / ISLAND TRIM A standard backguard for the unit must be mounted before the unit is placed in its final position. Installation instructions are located with your backguard, high-shelf and/or island trim. (6) Sheet Metal Screws Note: If the island trim option is used without the 6”... -
Page 11: Positioning
POSITIONING POSITIONING A rolling lift jack, air sled, or pallet jack should be used for positioning the unit. Do not push against the edges or sides of the unit in an attempt to slide it into position. Although all metal parts are deburred during manufacture, serious injury could occur if the unit were to move suddenly while being positioned by hand. -
Page 12: Btu Requirements
B.T.U. RATING REQUIREMENTS These are the total approximate B.T.U. Ratings based on twelve inch cooking sections of unit. The gas line size must lie within compliance with the state code 248CMR for the Commonwealth of Massachusetts. Model Number Approximate BTU Line Size RPB-30-IR 115,000... - Page 13 WCI to the manifold. (WCI=Water Column Inches) - 13 -...
-
Page 14: Gas Conversion
GAS CONVERSION WARNING IN ORDER TO AVOID A FIRE OR EXPLOSION, CAUSING PROPERTY DAMAGE, PERSONAL INJURY OR DEATH; PRECAUTION MUST BE TAKEN WHEN PERFORMING A CONVERSION BY ENSURING THAT THE VALUES IN THE GAS PRESSURE CHARTS ARE EMPLOYED WHERE APPLICABLE. Gas conversions should only be performed by Any field gas conversions will automatically void the manufacturers warranty!! a licensed plumber or licensed gas fitter in the Commonwealth of Massachusetts to assure a complete and... -
Page 15: Product Troubleshooting Monitor Checklist
PRODUCT TROUBLESHOOTING MONITOR CHECKLIST (Must be performed prior to oven temperature calibration) Below are a list of requirement’s needed to be monitored prior to trouble-shooting the product for miscellaneous dysfunctions or reported poor performance. 1. Monitor house voltage before and during testing of product. Must maintain voltage at minimum: 117 VAC. -
Page 16: Oven Temperature Calibration
OVEN TEMPERATURE CALIBRATION Be sure the thermostat bulb is straight and properly spaced from the oven liner. The sensor bulb clips should be in place. Place a weighted thermo-couple in the center of the oven cavity. Set oven temperature control to 350 degrees Fahrenheit (convection oven, 325 degrees Fahrenheit). Cycle oven five times. -
Page 17: Accessibility To Service Parts
ACCESSIBILITY TO SERVICE PARTS Front Accessible Electrical 703303 Oven Burner Igniter 703303 Broiler Burner Igniter 702901 Oven Thermostat (Large Oven) 719501 Oven Thermostat (Small Oven) 729201 Re-ignition Spark Module 732901 Switch-Dual Simmer 733301/733302 Electrode Assemblies 705101 Thermostat Griddle 703303 Griddle Burner Igniter 703303 Char-broiler igniter 157101... -
Page 18: Disassembly Procedure Of Product
DISASSEMBLY PROCEDURE OF PRODUCT Below is a brief summary of components and the required parts needed to be disassembled from the unit during replacement or repair. Component Removal Parts Oven Burner Igniters Oven Bottom Kick Panels (for wire disconnect) Broiler Burner Igniters None Oven Thermostat Control Panel... -
Page 19: Control Panel Removal
CONTROL PANEL REMOVAL The following procedure must be performed to properly remove the control panel. 1. Shut off power to the unit. 2. Remove the control panel, by first removing all the control knobs from the valve or thermostat stems. Continue to remove the securing screws located in the upper flange located underneath the plate rail and the screws located on the lower flange located above the pull out grease pan handles. -
Page 20: Testing Procedure For Bake/Broil Igniters
TESTING PROCEDURE FOR BAKE/BROIL IGNITERS The bake and broil, igniters are mounted to the bake and broil burner and ignite the gas flowing into the burner. During a bake or broil operation, current flows through the igniter, gas valve and thermostat to neutral. As the igniter starts heating and glowing, its internal resistance decreases allowing more current to flow through the bake or broil circuit. - Page 21 - 21 -...
-
Page 22: Oven Igniter Removal
OVEN IGNITER REMOVAL The following procedure must be performed to properly replace the oven glow-coil igniter. Shut off power to the oven. Remove oven bottom from oven cavity. Remove (2) sheet metal bite screws holding igniter to burner bracket. Remove (2) top securing screws and loosen (2) lower securing screws located under the lower kick panel, and remove completely from the Product. -
Page 23: Broiler Igniter Removal
BROILER IGNITER REMOVAL The following procedure must be performed to properly replace the broiler glow-coil igniter. 1. Shut off power to the unit. 2. Remove (4) sheet metal bite screws securing the igniter to the oven top liner. 3. The wiring of the igniter at the back of the range is designed to be able to gently pull the two wires, one at a time from the back of the range through the exit hole located at the back of the oven cavity. -
Page 24: Testing Procedure For The Dual Gas Valve
TESTING PROCEDURE FOR THE DUAL GAS VALVE The bake and broil gas valve, supplies gas flow to the bake or broil burners. The valve contains a bi-metal arm attached to the valve seat and is wound with a small electric heater coil. When a current range of approximately 3.2 to 3.6 amps flows through the bake or broil circuit the bi-metal arm is heated causing it to flex or bend, allowing gas to flow to the burner where it is ignited by the burner igniter. -
Page 25: Oven Burner Air Shutter Adjustment
OVEN BURNER AIR SHUTTER ADJUSTMENT Before attempting to adjust the oven burner air shutter, assure the following has been reviewed and is correct: 1. Gas: a. Proper Type (must match serial plate) b. Proper regulator setting (utilizing a manometer) 2. Orifice: a. -
Page 26: Bake/Broil Thermostat Replacement
BAKE/BROIL THERMOSTAT REPLACEMENT The following procedure must be performed if the Thermostat control is not rendering any power to the oven or broiler surface igniters: 1. Shut off all power to the product. 2. Remove (all) the control knobs that are on the front of the range. 3. -
Page 27: Convection Fan Removal
CONVECTION FAN REMOVAL The Following procedure is required to replace the convection fan located in the oven cavity of the range. 1. Shut off power to the unit. 2. Remove the oven racks located in the oven cavity. 3. Remove fan shield cover assembly, by removing the (4) screws that hold the shield to the oven cavity back 4. -
Page 28: Oven Gasket Removal
OVEN GASKET REMOVAL The following procedure is required to replace the oven door gasket seal. 1. Assure the oven cavity temperature is ambient to the touch. 2. Open the oven door assembly. 3. Starting from either end of the door seal gasket, gently pull gasket material from the front frame of the range. The gasket is snapped into the front frame holes by tiny wire clips. -
Page 29: Door Panel Removal
DOOR PANEL REMOVAL INSTRUCTIONS Remove the (2) screws located above the kick panel. Loosen the (2) screws located below the kick panel on each side. Remove kick panel by lifting gently and pulling away. After kick panel is removed, remove the (5) screws located on the bottom flange of the door. With the screws removed pull door panel away from the bottom of the door while lifting the door off the door liner. -
Page 30: Indicator Light Removal
INDICATOR LIGHT REMOVAL The following procedure must be performed to properly replace the oven indicator light. 1. Shut off power to the unit. 2. Remove the control panel, by first removing all the control knobs from the valve or thermostat stems. Continue to remove the securing screws located in the upper flange located underneath the plate rail and the screws located on the lower flange located above the pull out grease pan handles. -
Page 31: Oven Light Switch Removal
OVEN LIGHT & FAN SWITCH REMOVAL The following procedure is required to test the operation of the oven light switch and to properly replace if required. 1. Shut off power to the unit. 2. Remove the control panel, by first removing all the control knobs from the valve(s) or thermostat stems. Continue to remove the securing screws located in the upper flange located underneath the plate rail and the screws located on the lower flange located above the pull out grease handles. - Page 32 INFRARED BROILER ORIFICE SPUD CONVERSION (CONVERSIONS ON RANGE VOID WARRANTY) The following procedure must be performed to properly convert the orifice located in the venturi tube. 1. Assure the main gas valve to the range is shut off. 2. Pull or slide range from the cabinetry, in-order to gain accessibility to the rear of the range. 3.
-
Page 33: Top Burner Removal
TOP BURNER REMOVAL (AND/OR IGNITER) The following procedure is required to replace any top burner assembly or igniter that is needed to ignite the burner assembly requiring service. 1. Shut off power to the product. 2. Shut off gas to the product. 3. - Page 34 OPEN TOP, GRIDDLE, AND CHARBROILER BURNER AIR SHUTTER ADJUSTMENTS Before attempting to adjust any top burner air shutter, assure the following information has been reviewed and is correct. 1. Gas: a. Proper Type (must match serial plate on product) b. Proper regulator setting (utilizing a manometer) 2.
-
Page 35: Griddle Burner Removal
GRIDDLE BURNER REMOVAL Lift and remove griddle plate. Replace burner by placing into orifice first Remove (2) screws holding the hot surface and sliding the rear of the burner into igniter in place. position Move the hot surface igniter out of the way. Replace screw into rear of burner Remove (1) screw from the rear of the Place igniter into position and replace (2) -
Page 36: Troubleshooting Guide
TROUBLESHOOTING GUIDE Problem Probable Cause Correction No operation in bake or No voltage to thermostat. Check for 120VAC at the thermostat terminals BA to broil. Position of thermostat Neutral. If no voltage is present check for broken setting. wiring. See schematic attached. No operation in bake. - Page 37 Fan motor does not operate a) No power to fan motor a) Check for 120VAC supplied to the fan motor. If no voltage is present, check the selector switch for continuity and check for broken wiring between the selector switch and fan motor. If voltage is present, then proceed to next step.
- Page 38 ports c) An orifice hood out of line c) Align orifice hood with burner venturi. burner throat will reduce primary air injection d) Faulty drilling or dirty d) Clean orifice or replace faulty drilled orifice. orifice Lifting flames – flames rise Lifting burner flames result Reduce primary air or adjust (making port smaller) air from the ports to burn some...
- Page 39 - 39 -...
- Page 40 - 40 -...
- Page 41 - 41 -...
- Page 42 - 42 -...
- Page 43 - 43 -...
- Page 44 - 44 -...
- Page 45 - 45 -...
- Page 46 - 46 -...
- Page 47 Attention Service Agent! The page numbers listed below refer to the installation manual, located with the unit! SAMPLE MANUFACTURERS’ PERFORMANCE CHECKLIST This checklist has been developed to assure proper installation of your range or cooktop as well as instruction on using this unit. To validate your warranty, you must mail or fax this form with a copy of your receipt to: Warranty Department, 600 Arlington Street, Reading, PA 19611.
Need help?
Do you have a question about the RNB-30 and is the answer not in the manual?
Questions and answers