Advertisement
Quick Links
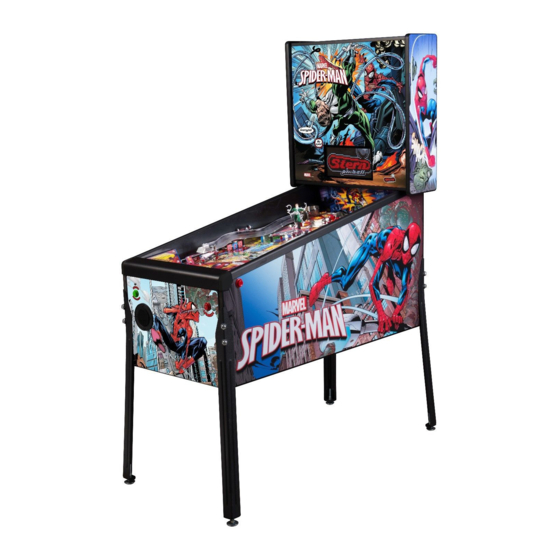
SETUP GUIDE
1-800-KICKERS - parts.service@sternpinball.com
www.sternpinball.com - facebook.com/sternpinball
Stern Pinball machines are assembled in Elk Grove Village, Illinois,
USA; each pinball machine has unique characteristics that make it
a one-of-a-kind American-made product. Each machine will have
variations in appearance resulting from differences in the machine's
particular wood parts, individual silk screened art and mechanical
assemblies. Stern Pinball has inspected each game element to insure it
meets our quality standards.
Advertisement

Related Manuals for Stern Pinball Marvel Spider-man The Pin


Summary of Contents for Stern Pinball Marvel Spider-man The Pin
- Page 1 American-made product. Each machine will have variations in appearance resulting from differences in the machine’s particular wood parts, individual silk screened art and mechanical assemblies. Stern Pinball has inspected each game element to insure it meets our quality standards.
- Page 2 IMPORTANT SAFETY INSTRUCTIONS - PLEASE READ FIRST 1. Read these instructions. 2. Save these instructions. 3. Heed all warnings. 4. Follow all instructions. 5. Do not operate this apparatus near water. 6. Clean only with a dry cloth. 7. Do not block any ventilation openings. Install in accordance with the manufacturer’s instructions. 8.
-
Page 3: Table Of Contents
PARTS LIST 1 GAME CABINET 1 MARQUEE BACKBOX 8 CABINET LEG BOLTS 4 LEGS AND LEVELERS 2 WASHERS 1 ALLEN WRENCH POWER CORD SETUP GUIDE 4 PINBALLS 2 WING NUTS INDEX INITIAL SETUP • 4 TILT & INITIALIZATION • 8 VOLUME ADJUSTMENT •... -
Page 4: Initial Setup
INITIAL SETUP OPEN CARTON UNBOX GAME REMOVE SMALLER BOX FROM CARTON GRAB UNDER FRONT OF CABINET AND PULL GAME OUT FROM CARTON CAREFULLY TILT CARTON FORWARD ONTO THE FLOOR REMOVE 4 LEGS STAND GAME ON FROM CARTON INSTALL EACH FRONT LEG CHECK THAT BOTTOM LEG USING 2 OF THE 8 BOLTS LEVELERS ARE FULLY SEATED... - Page 5 WITH ASSISTANCE AGAIN, WITH ASSISTANCE, CAREFULLY LIFT THE BACK ROCK THE CABINET FORWARD OF THE CABINET AND PLACE ON A STURDY SUPPORT OBJECT UNTIL THE FRONT LEGS ARE INSTALL AND TIGHTEN BOTH ON THE FLOOR BACK LEGS USING 2 BOLTS EACH NOTE: USE CAUTION AS TO NOT PINCH ANY WIRES...
- Page 6 BACKBOX ACCESS ATTACH WASHERS AND WING NUTS TO THE BACKBOX BOLTS INSIDE THE CABINET TO SECURE BACKBOX PLUG 3 CABLE CONNECTORS TOGETHER REMOVE 2 PHILLIPS SCREWS ON THE TOP OF THE BACKBOX NOTE: EACH CONNECTOR IS UNIQUE TO ITS PANEL REMOVE GLASS BRACKET AND CONNECTOR LIFT GLASS UP AND OUT...
- Page 7 CAUTION: DO NOT LIFT THE REMOVE THE PLAYFIELD PLAYFIELD BY THE PLASTIC SCREW AT THE BOTTOM ARCH CENTER OF THE PLAYFIELD LIFT THE PLAYFIELD UP AND THEN PULL SLIGHTLY TOWARDS YOU PLAYFIELD SHOULD STOP SLIDING AT A NOTCH ABOUT A FOOT AWAY FROM THE BACK OF THE CABINET LIFT THE PLAYFIELD UP...
- Page 8 TILT ADJUSTMENT TO SET THE SENSITIVITY OF FROM THE BACK REMOVE THE THE PLUMB BOB, LOOSEN 2 PHILLIPS SCREWS HOLDING THE THUMB SCREW, SLIDE THE PLASTIC COVER ON THE THE PLUMB BOB UP OR DOWN RIGHT SIDE OF THE CABINET THE HANGER TO THE DESIRED SENSITIVITY AND RETIGHTEN NOTE: DO NOT OVERTIGHTEN...
-
Page 9: Volume Adjustment
VOLUME ADJUSTMENT Volume Menu Control: Start - Start Game Left Flipper - Decrease Volume Right Flipper - Increase Volume Launch - Exit to Attract Mode Press both flipper buttons at the same time. Hold for a few seconds and a menu with ‘Service’ and ‘Volume’ should appear. Press the right flipper button to enter the Volume Adjustment Menu. - Page 10 SERVICE MENU CONTINUED DIAGNOSTICS The Diagnostics Menu is used to access various tests to verify that your machine is working properly or to help diagnose potential problems. SWITCH Switch Test: Close each switch by hand and observe the display. If the switch is working properly it will display the name and corresponding number of the switch when it is actived.
- Page 11 SERVICE MENU CONTINUED GAME Bank: Tests the functionality of the 3-Bank Drop Target Assembly. Manually hit the drop targets and watch the display. The display should indicate any dropped targets. Useful for checking the functionality of switches in the drop target bank. If any of the targets are recessed, press the start button to reset them.
-
Page 12: Service Menu Adjustments
SERVICE MENU ADJUSTMENTS ADJUSTMENTS The Adjustments Menu is used to makes changes to settings related to the gameplay of the pinball machine. Use the flipper buttons to cycle through all the game options. Press the start button to select an adjustment. The adjustment will flash when it is selected. -
Page 13: Driver Reference
DRIVER REFERENCE NODE BOARD ID INSTRUCTION SHEET PLAYFIELD FRONT THE PIN NODE 8b CONSUMER PIN 036-6254-14B 036-6254-14B BACKBOX NODE 8a CN23 SD CARD NODE 0 CN24 CN25 BATTERY LINE 520-6936-01 RESET SPIKE CPU SPIKE NODE BUS AMPLIFIED AUDIO DIP S2 CN22 CN18 CN21... - Page 14 Driver Location Map...
-
Page 15: Switch Reference
SWITCH REFERENCE ID Name Node Node Conn. Input Input Ground Location Type Address Part Number Wire Wire Shooter CN10 2 7/8/9 BLK Playfield Rollover 8-SW-28 500-9935-03 Lane (H)ERO CN11 4 LGN RED 11 Playfield Rollover 8-SW-17 500-9935-03 H(E)RO CN11 5 Playfield Rollover 8-SW-18 500-9935-03... - Page 16 Switch Location Map...
- Page 17 SWITCH REFERENCE CONTINUED 35 W(E)B Lane 8 CN13 8 PNK BLU 10 Playfield Rollover 8-SW-6 500-9935-03 36 WE(B) Lane 8 CN13 9 PNK VIO 10 Playfield Rollover 8-SW-7 500-9935-03 37 Left/Right CN13 2 PNK BLK 10 Playfield Leaf 8-SW-0 180-5232-00 Pop Bumper 38 Bottom Pop CN13 4...
- Page 18 LIGHT REFERENCE ID Name Node Node Conn. Ret. Ret. Src. Src. Location Type Light Address Part Ext. Wire Wire Color Number (H)ERO CN14 6 ORG VIO 7/8 YEL Playfield Feature White 8-LP-3 520-5307-00 H(E)RO CN14 5 7/8 YEL Playfield Feature White 8-LP-4 520-5307-00 HE(R)O CN14 4...
- Page 19 Light Location Map...
- Page 20 LIGHT REFERENCE CONTINUED 50 Rescue MJ RED Playfield Feature White 8-LP-41 520-5307-00 52 (W)EB YEL VIO 1 RED Playfield Feature White 8-LP-35 520-5307-00 53 W(E)B YEL GRY 1 RED Playfield Feature White 8-LP-36 520-5307-00 54 WE(B) YEL WHT 1 RED Playfield Feature White 8-LP-37 520-5307-00 56 Center Arrow RED Playfield Feature White 8-LP-39 520-7011-00 57 Center Circle...
- Page 21 PLAYFIELD TOP ASSEMBLIES Part Number Description 545-9908-00 Universal Ramp 880-6180-03 Doc Ock 626-5057-01 Rubber Pads 511-7781-00 Spinner Assembly 535-9079-00 1-Way Gate Assembly - Bracket Gate 535-5307-02 1-Way Gate Assembly - Wire Gate 511-5033-01 Electric Gate Assembly 516-0033-WHT Pop Bumper - Top Assembly 516-6794-08 Pop Bumper - Top Assembly 260-5000-00...
- Page 22 PLAYFIELD BOTTOM ASSEMBLIES Part Number Description 511-1013-02 Auto Launch Assembly 500-9820-4BALL Trough Assembly 500-6543-13-ND Left Flipper Assembly 500-6543-03-ND Right Flipper Assembly 500-9920-01 Left Slingshot 500-9920-01 Right Slingshot 520-7011-00 3-LED Board 520-7008-00 Center LED Board 500-7216-13 Drop Target Assembly 520-7017-72 Core Node Board 515-6459-04-ND Pop Bumper - Bottom Assembly...
- Page 23 PLAYFIELD RUBBER PARTS Size (ID) Size (OD) Durometer Color Part Number 3/16" Black 545-5348-01 5/16" Black 545-5348-02 3/4" Black 545-5348-04 1" Black 545-5348-05 1-1/2" Black 545-5348-07 2-1/2" Black 545-5348-09 7/16" Black 545-5348-17 Description Color Part Number Kicker Tip Black 545-5216-01 Flipper Rubber Black 545-5277-00...
- Page 24 1-800-KICKERS SPIDER-MAN #500-55H8-01 MANUAL #780-50H8-00 PARTS.SERVICE@STERNPINBALL.COM WWW.STERNPINBALL.COM *780-50H8-00* FACEBOOK.COM/STERNPINBALL...
Need help?
Do you have a question about the Marvel Spider-man The Pin and is the answer not in the manual?
Questions and answers