
Related Manuals for Better Packages BP555e


Summary of Contents for Better Packages BP555e
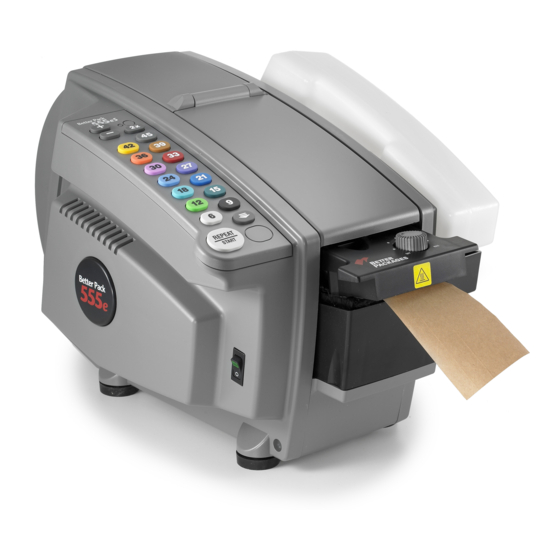
- Page 1 Model BP555e Tape Dispenser BP555e SERVICE MANUAL B B B B ETTER ETTER ETTER ETTER ® P P P P ACKAGES ACKAGES ACKAGES ACKAGES 255 Canal Street Shelton, CT 06484 Web Site: www.betterpackages.com File Name: BP555e Service Manual Rev06.doc...
- Page 2 Packages reserves the right to revise this publication and make changes from time to time, in its content. Better Packages ASSUMES NO LIABILITY WHAT SO EVER FOR ANY LOSSES OR DAMAGES INCURRED AS A RESULT OF INFORMATION CONTAINED IN THIS MANUAL Proprietary Notice This publication contains information proprietary and confidential to Better Packages.
- Page 3 Better Packages Inc. TABLE OF CONTENTS Safety Precautions Technical Data Maintenance and Repair Recommended Periodic Maintenance Brush Cleaning Blade Oiling Cleaning Heater Replacement. Motor Brush Replacement Motor Replacement Shear Blade Replacement Feed Wheel / Blade Height Adjustment Keypad and membrane Replacement...
- Page 4 Better Packages Inc. Troubleshooting Tape Feed Problems Tape Jams Tape Strips too short Constant Feed or Extremely Long Tape Piece Tape Feeds too slowly No Tape Feed Tape Hits Blade or Left Hand Corner of Tape Folded Tape Strips not Correct Lengths...
- Page 5 This machine is designed for sealing cartons with water activated tape. Any other use will void all warranties and any responsibility or liability of Better Packages, Inc. Read all Safety Precautions and Operating Instructions before powering on and using the machine.
- Page 6 Better Packages Inc. TECHNICAL DATA Size: 20”Lx12.5”Wx12”H (51 x 32 x 30 cm) Dispensing Speed: Up to 45” (114 cm) per second Water Bottle Capacity: 2 pints 2 oz. (1 liter) Shipping Weight: 32 lbs. (15 kg) Power Requirements: 555es, eSA, eL, eLA – 115 volts, 60 Hz, 4 Amps 555eMA, eFA –...
- Page 7 Better Packages Inc. MAINTENANCE AND REPAIR The machine is designed for easy maintenance. Regular maintenance will insure a long dependable machine life. Recommended Preventative Maintenance Clean Brushes and Tank - Weekly Clean the brushes on a weekly basis or when glue build up effects proper moistening of the tape.
- Page 8 Better Packages Inc. Lubricating the Felt Blade Oiler - Monthly The blade oiler is a felt pad soaked with oil that presses lightly on the back of the shear blade. The oil will keep your shear blades lubricated for clean, fast cutting and prolong the life of the blades.
- Page 9 Better Packages Inc. Heater It is recommended that the Heater be replaced by a Better Packages supplied Heater to maintain safety compliance. (Note: Always unplug machine when performing service to machine) Procedure 1. Remove the water bottle and tank and brushes.
- Page 10 Better Packages Inc. Motor Brush The motor brushes will last a long time but usually not as long as the rest of the machine. If the motor stops working or runs excessively slow, the motor brushes may need replacing. (Note: Always unplug machine when performing service to machine) Procedure 1.
- Page 11 Better Packages Inc. Motor (Note: Always unplug machine when performing service to machine) Procedure 1. Remove the water bottle, tank and brushes 2. Remove the right side cover from the machine by removing the (5) screws that fasten the cover to the frame.
- Page 12 Better Packages Inc. Shear Blade (Note: Always unplug machine when performing service to machine) Procedure 1. Remove the water bottle, tank and brushes 2. Remove the right side cover from the machine by removing the (5) screws that fasten the cover to the frame 3.
- Page 13 Better Packages Inc. Feed Wheel / Blade Height Adjustment When a dispense key is pressed the tape cutter blade and the lower feed wheel lift up. The machine has an adjustment set screw that sets the height of the blade and lower feed wheel.
- Page 14 Better Packages Inc. Keypad and Membrane Switch (Note: Always unplug machine when performing service to machine) Procedure 1. Remove the water bottle ,tank and brushes 2. Remove the (5) screws that fasten the left side cover onto the frame. Gently lift the cover and remove the membrane switch from the pc board.
- Page 15 Better Packages Inc. Replace Keypad Only 1. Unplug machine and remove water bottle. 2. Insert a thin flathead screwdriver in-between the keypad bezel and the cover . Lift the bezel up with your fingers and remove the old keypad and replace it with the new keypad.
- Page 16 Better Packages Inc. Motor Chain Adjustment ( Note: Always unplug machine when performing service to machine) Procedure 1. Remove water bottle and water tank assembly 2. Remove the left side cover 3. Loosen the 2 nuts that hold the motor onto the motor bracket (Be sure not to remove the nut completely) 4.
- Page 17 Better Packages Inc. Control Board ( Note: Always unplug machine when performing service to machine) Procedure 1. Remove bottle, tank and brushes 2. Lay machine onto right side 3. Remove the 5 screws from the left side cover, lift the cover and remove the keypad membrane from the board 4.
- Page 18 Better Packages Inc. Front and Rear Cover Assembly (Note: Always unplug machine when performing service to machine) Procedure 1. Remove bottle, tank and brushes 2. Remove right cover. Remove left cover and remove keypad membrane from board 3. Remove the 2 retaining rings holding the bracket assembly to the right and left frame.
- Page 19 Better Packages Inc. Length Sensor (Note: Always unplug machine when performing service to machine) Procedure 1. Remove left side cover. Remove the keypad membrane from the control board and lay the cover on the bench 2. Remove the 2 screws holding the sensor in place and remove connector from board 3.
- Page 20 Better Packages Inc. Tape Sensor (Note: Always unplug machine when performing service to machine) Procedure 1. Remove left side cover 2. Remove sensor from back of heater assembly and remove connector from board 3. Replace sensor onto the back of the heater assembly 4.
- Page 21 Better Packages Inc. Feed Wheel ( Note: Always unplug machine when performing service to machine) Procedure 1. Remove bottle, tank and brushes. Than remove the right and left side covers 2. Loosen set screw on feed wheel shaft sprocket 3. Remove encoder disc from shaft 4.
- Page 22 Better Packages Inc. Fuses (Note: Always unplug machine when performing service on machine) There are 2 fuses in this machine.1 is on the control board and 1 is in the connector plate Procedure 1. To change the fuse in the connector plate unscrew fuse holder on the plate above where the machine is plugged in.
- Page 23 Better Packages Inc. Solenoid Replacement ( Note: Always unplug machine when performing service to machine) Procedure 1. Remove the water bottle and tank assembly 2. Remove the right cover 3. Remove the left cover being careful not to pull the cover off before removing the keypad membrane from the PCboard 4.
- Page 24 Better Packages Inc. Solenoid connector to pc board Blade Oiler (Note: Always unplug machine when performing service on machine) Procedure 1. Remove bottle, tank and brushes 2. Remove right and left side covers. 3. Loosen the screw on the upper right side frame holding the retainer bracket in place 4.
- Page 25 Better Packages Inc. TROUBLESHOOTING Tape Feed Problems • Tape Jams • Tape Strips too short • Tape Lengths too Long or constant feed. • Tape Feeds too slowly • No Tape Feed • Tape Hits Blade or Left Hand Corner of Tape Folded...
- Page 26 Better Packages Inc. Tape Jams • Tape path dirty • Tape pieces stuck in machine • Brushes positioned incorrectly • Upper tape plate missing • Roll Guide Misadjusted • J-Plate bent • Heater Plate Bent • Blade height needs adjusting •...
- Page 27 Better Packages Inc. Tape Strips to Long If the controller board does not see all the encoder pulses the tape produced will be long • Encoder Problem Verify the length encoder is plugged into the controller board and none of the wires are broken.
- Page 28 Better Packages Inc. • Low Line Voltage Low line voltage can slow the motor speed down as much as 20% but it will still dispense quickly. Usually the solenoid will chatter or the machine will stop dispensing all together by the time the line voltage is low enough...
- Page 29 Better Packages Inc. No Tape Feed If the power indicator lamp is illuminated but the motor does not start check the following: • Interlock Circuit The interlock circuit disables the motor and solenoid from operating when the top cover is open. When the cover is closed, it actuates a switch that applies power to the controller board for motor and solenoid only.
- Page 30 Better Packages Inc. WIRING DIAGRAMS • BP555e Wiring Diagram • Power Switch Assy • Length Sensor Assy • Tape Sensor Assy • Heater Wiring Diagram • Keyboard Schematic...
- Page 31 Better Packages Inc.
- Page 32 Better Packages Inc.
- Page 33 Better Packages Inc.
- Page 34 Better Packages Inc.
- Page 35 Better Packages Inc.
- Page 36 Better Packages Inc.
Need help?
Do you have a question about the BP555e and is the answer not in the manual?
Questions and answers