Table of Contents
Advertisement
Advertisement
Table of Contents

Related Manuals for Techno Gears Marble Mania Genius


Summary of Contents for Techno Gears Marble Mania Genius
- Page 2 Thank you for your purchase of Techno Gears Marble Mania Genius! Included in this instruction manual you will find the following: • A list of components • Operating instructions on the motorized gear unit (please note the gear on the motorized unit should not be removed) •...
- Page 3 Motorized Gear - Part 1 Motorized Gear - Part 1 that might occur during the building and completion of Marble Mania Genius. Te recomendamos estar al pendiente de “Las rápidas recomendaciones para los engranes” las cuales te Chamber of Sound - Part 46 permitirán resolver problemas que se puedan llegar a...
- Page 4 6 Way connectors (part ) have multiple connecting ends, On the side of each construction make sure part is placed onto Marble Mania Genius correctly step a panel will show the exact as illustrated in each specific image step. number of parts needed to complete the steps shown.
- Page 5 Parts and Accessories Partes y accesorios Color of Pieces May Vary El color de las piezas puede variar = 154 pcs. = 1 pc. = 20 pcs. = 4 pcs. assorted colors = *3 pcs. = 1 pc. = 2 pc. = *7 pcs.
- Page 6 = 1 pc. = 1 pc. = 43 pcs. Parts and Accessories = 6 pc. = 1 pc. = 2 pc. Partes y accesorios Color of Pieces May Vary El color de las piezas puede variar = 2 pc. = 4 pc. = 2 pc.
- Page 7 Let’s Practice Building Gears Quick Tip Vamos a practicar construyendo figuras Step 2. The motorized gear contains 2 Place rotating shaft pieces onto bases. separate switches, one on/off Motorized Gear - Part 1 switch for continuous motion, and Coloque los ejes de rotación sobre las bases. one button for on demand play.
- Page 8 Building Marble Mania Quick Tips 1. Make sure all base plates are facing the same direction. 2. Use below diagram and paint Motorized Gear - Part 1 marks to place connectors in proper location on base plates, ensuring proper operation. Make sure unit is built on a flat surface.
- Page 9 STEP 2 STAGE 1...
- Page 10 STEP 3 STAGE 1...
- Page 11 STEP 4 STAGE 1...
- Page 12 STEP 5 STAGE 1...
- Page 13 STEP 6 STAGE 1...
- Page 14 Pre-assembled Item 15 27 Pre-assembled Item 15 27 Pre-assembled Item 15 27 STEP 7 STAGE 1...
- Page 15 Quick Tip Press cork screw firmly onto base to ensure smooth marble movement. Motorized Gear - Part 1 Presiona la espiral firmemente en la base para asegurar un movimiento suave de la canica. Chamber of Sound - Part 46 STEP 8 STAGE 1...
- Page 16 STEP 9 STAGE 1...
- Page 17 STEP 10 STAGE 1...
- Page 18 STEP 11 STAGE 1...
- Page 19 STEP 12 STAGE 1...
- Page 20 STEP 13 STAGE 1...
- Page 21 X 14 STEP 14 STAGE 1...
- Page 22 STEP 15 STAGE 1...
- Page 23 STEP 16 STAGE 1...
- Page 24 Quick Tip Part only connects to & La parte se conecta con las partes únicamente. Motorized Gear - Part 1 Chamber of Sound - Part 46 STEP 17 STAGE 1...
- Page 25 STEP 18 STAGE 1...
- Page 26 STEP 19 STAGE 1...
- Page 27 STEP 20 STAGE 1...
- Page 28 STEP 21 STAGE 1...
- Page 29 STEP 22 STAGE 1...
- Page 30 STEP 23 STAGE 1...
- Page 31 STEP 24 STAGE 1...
- Page 32 STEP 25 STAGE 1...
- Page 33 STEP 26 STAGE 1...
- Page 34 Quick Tip At the end of each building stage you can view the construction progress of your Marble Mania Genius! The colorful portion is what you’ve built; Motorized Gear - Part 1 the gray & black portion is what you have left to build. ¡Al terminar cada una de las etapas de construcción, usted podrá...
- Page 35 STEP 27 STAGE 2...
- Page 36 STEP 28 STAGE 2...
- Page 37 STEP 29 STAGE 2...
- Page 38 STEP 30 STAGE 2...
- Page 39 STEP 31 STAGE 2...
- Page 40 STEP 32 STAGE 2...
- Page 41 STEP 33 STAGE 2...
- Page 42 STEP 34 STAGE 2...
- Page 43 STEP 35 STAGE 2...
- Page 44 STEP 36 STAGE 2...
- Page 45 STEP 37 STAGE 2...
- Page 46 STEP 38 STAGE 2...
- Page 47 STEP 39 STAGE 2...
- Page 48 STEP 40 STAGE 2...
- Page 49 LONG END STEP 41 STAGE 2...
- Page 50 STEP 42 STAGE 2...
- Page 51 STEP 43 STAGE 2...
- Page 52 STEP 44 STAGE 2...
- Page 53 STEP 45 STAGE 2...
- Page 54 STEP 46 STAGE 2...
- Page 55 STEP 47 STAGE 2...
- Page 56 Congratulations! Stage 2 Complete!
- Page 57 STEP 48 STAGE 3...
- Page 58 STEP 49 STAGE 3...
- Page 59 STEP 50 STAGE 3...
- Page 60 STEP 51 STAGE 3...
- Page 61 STEP 52 STAGE 3...
- Page 62 STEP 53 STAGE 3...
- Page 63 STEP 54 STAGE 3...
- Page 64 STEP 55 STAGE 3...
- Page 65 STEP 56 STAGE 3...
- Page 66 Quick Tip Slide part under purple channel. Desliza la parte por debajo del canal morado, como Motorized Gear - Part 1 se muestra. Chamber of Sound - Part 46 STAGE 3...
- Page 67 STEP 57 STAGE 3...
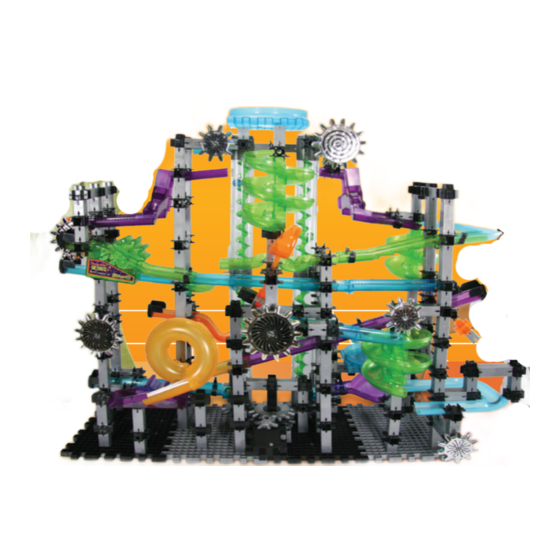
- Page 68 Congratulations! Now add some marbles and let’s play. ¡Felicitaciones! Ahora coloca las canicas y vamos a jugar.
- Page 69 Helpful Hints Recomendaciones Press to ensure Press along gear alignment between mill axis to ensure two 6-way connectors. axis alignment. Presione para asegurarse Presione a lo largo del eje que los conectores de 6 del conductor con el molino entradas están bien para asegurarse de que alineados.
- Page 70 ¡Las posibilidades son interminables! OUR WEBSITE Please visit www.marblemaniaextreme.com (http://www.marblemaniaextreme.com) to see more exciting Marble Mania Genius Construction Plans. If you have a favorite Marble Mania Genius Design, please share it with us. See the website for more information. NUESTRA PÁGINA WEB Favor de visitar www.marblemaniaextreme.com (http://www.marblemaniaextreme.com) para poder ver mayor información relacionada a las instrucciones de...
- Page 72 For replacement parts, and for assistance with instructions please call: 1.877.839.3969...
Need help?
Do you have a question about the Marble Mania Genius and is the answer not in the manual?
Questions and answers