Advertisement
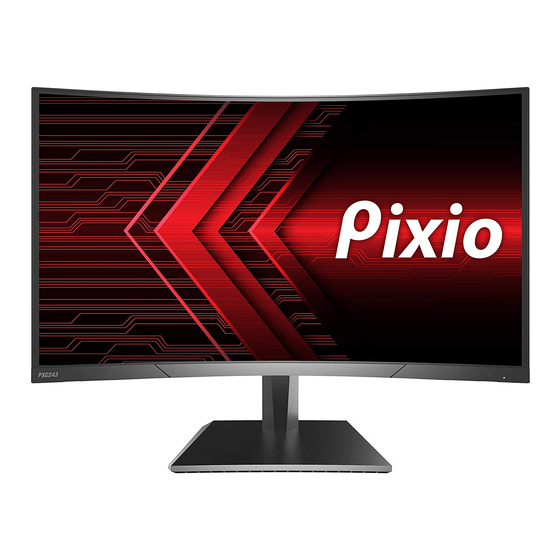
PXC243
The color and the appearance may differ depending on the product, and the specifications are subject to change without prior
notice to improve the performance.
The contents of this manual are subject to change without notice to improve quality.
Copyright © 2019 Pixio USA Inc. I Pixio is a registered trademark of Pixio USA Inc. I All Rights Reserved.
Use or reproduction of this manual in parts or entirety without the authorization of Pixio USA Inc is prohibited.
All other trademarks are owned by their respective owners. Rev.1.01Copyright © 2019 Pixio USA Inc. I Pixio is a registered trademark of Pixio USA Inc.
All Rights Reserved.
Advertisement
Table of Contents

Summary of Contents for Pixio PXC243
- Page 1 Use or reproduction of this manual in parts or entirety without the authorization of Pixio USA Inc is prohibited. All other trademarks are owned by their respective owners. Rev.1.01Copyright © 2019 Pixio USA Inc. I Pixio is a registered trademark of Pixio USA Inc.
- Page 2 23.6in 144Hz Gaming Monitor PXC243 190617019EMC-1...
- Page 4 RISK OF ELECTRIC SHOCK DO NOT OPEN THE MONITOR. OPENING MONITOR BACK COVER WILL VOID YOUR WARRANTY. This symbol indicates that high voltage is present inside. It is dangerous to make any kind of contact with any internal part of this product.
-
Page 5: Before Using The Product
Before Using the Product. Installation Space Ensure some space around the product for ventilation. An internal temperature rise may cause fire and damage the product. Make sure to allow some space. Do not install near heater or any other high temperature product or humidifier. Do not place the monitor near heat sources, such as radiators, and do not expose the monitor to direct sunlight for an extended period of time. - Page 6 Please do not try to take off the back panel to repair the monitor yourself. You may run the risk of shock and void the warranty as well. Contract Pixio directly for all RMA issues. Take note of elevation and temperature zone warnings on the adapters.
-
Page 7: Cleaning The Product
Cleaning the Product. Take the following steps when cleaning. 1 Power off the product and computer. 2 Disconnect the power cord from the product. Hold the power cable by the plug and do not touch the cable with wet hands. Otherwise, an electric shock may result. - Page 8 Notice.
-
Page 9: Product Includes
Preperation. Product Includes: Monitor Stand Stem Stand Base DisplayPort Cable Power Adapter... -
Page 10: Product Assembly
Product Assembly: Foam Stand Stem Monitor Stand Base 1. Open the package, take out the product with foam still 2. If you connect the stand stem to the base and hear a "click" attached, and gently place it on a desktop or table. sound, it means the installation is complete. -
Page 11: Product Disassembly
Product Disassembly: 3. Lift up the black small bar underneath the stand stem slightly, and then pull out the stand stem. -
Page 12: Dimension And Weight
Dimension & Weight. 10.43mm 536.66mm 3.56Kg = 7.85lb with stand... -
Page 13: Monitor Inputs
Monitor Inputs. DisplayPort 1.2, 144Hz, FreeSync On/Off 60Hz HDMI 120Hz, FreeSync On AUDIO OUT NOTICE: Use a DisplayPort 1.2 cable for 144Hz and FreeSync. HDMI port supports up to 120Hz. -
Page 14: Control Panel
Control Panel. Menu Short Cut Select mode from Standard, Movie, FPS, RTS, and Eye Saver. Jog Button Standard Multi directional button that helps navigate. Volume Adjustment Short Key Menu Left Volume Select input mode from DVI, HDMI, and DisplayPort. Right HDMI LEFT RIGHT... -
Page 15: How To Reconfigure
Main OSD Navigation How to Reconfigure MENU Key: Press this key to pop up the main menu/back to the previous menu (in case of main menu, exit). LEFT RIGHT When the menu is opened, the progress bar value decreases. DOWN When the menu is activated, press this button to activate the selected function. - Page 16 OSD Menu. BRIGHTNESS CONTRAST •Brightness: Adjust the display brightness value from 0 to 100. •Contrast: Adjust the display contrast value from 0 to 100.
- Page 17 MODE Return Standard Movie Eye Saver Return •DCR: ON: Activate dynamic contrast. •Mode: Select Mode from Standard, Movie, FPS, RTS, and OFF: Inactivate dynamic contrast. Eye Saver.
- Page 18 COLOR TEMP. ASPECT Cool Warm User Return Auto 16:9 Return •Color Temp.: Select color temperature from cool, warm and •Aspect: Select Aspect from Auto, 16:9, and 4:3. User.
- Page 19 INPUT ADJUST HDMI DisplayPort Return Auto adjust Auto color Gamma Return •Input: Select input mode from DVI, HDMI, and DisplayPort. •Auto Adjust: Automatically adjust the horizontal/vertical location, focusing and clock of pictures. •Auto Color: Adjust the white balance of pictures. *Auto Adjust/Auto Color only activate in DVI.
- Page 20 OTHER •Language: Change the OSD menu display language. •Power Off: ON: Automatically turn off after saving power for 1min. OFF: Inactivate the function of timed switch-off. •Reset: Select from YES or NO. •OD(Over Driver): Turn OD ON or OFF ON: Reduce Motion Blur OFF: Normal Mode Language Power Off...
- Page 21 Adaptive-Sync. (AMD FreeSync or Nvidia G-Sync.) FreeSync technology is solution that eliminates screen tearing without all the usual lag and latency. This feature will eliminate screen tearing and lag during game play. Improve your gaming experience. The displayed FreeSync menu items on the monitor may vary, depending on the monitor model and compatibility with the AMD graphics card.
- Page 22 If you have any questions or comments, please contact us below. USA: cs@pixiogaming.com JAPAN: support@pixiogaming.jp www.pixiogaming.jp/support www.pixiogaming.com For your warranty information, please visit...


Need help?
Do you have a question about the PXC243 and is the answer not in the manual?
Questions and answers
What is dc?
The DC for the Pixio PXC243 is 12V.
This answer is automatically generated