Table of Contents

Related Manuals for Miele KWT 6422 iG


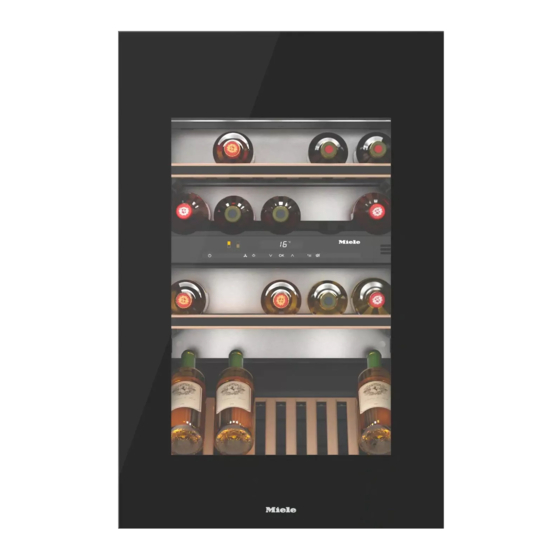
Summary of Contents for Miele KWT 6422 iG
- Page 1 Operating and installation instructions Wine conditioning unit To avoid the risk of accidents or damage to the appliance it is essential to read these instructions before it is installed and used for the first time. en-GB M.-Nr. 11 324 200...
-
Page 2: Table Of Contents
Contents Warning and Safety instructions................ 4 Caring for the environment ................ 12 How to save energy..................... 13 Guide to the appliance .................. 14 Control panel ......................14 Symbols......................... 15 Using the door-opening mechanism correctly ............17 Accessories ...................... 18 Accessories supplied .................... 18 Optional accessories..................... - Page 3 Contents Storing wine bottles .................... 35 Wooden shelves ....................36 Moving the wooden shelves................36 Adjusting the wooden shelves ................. 37 Annotating wooden shelves ................38 Setting up the 3D bottle presenter ..............38 Maximum capacity ....................40 Automatic defrosting .................. 41 Cleaning and care ....................
-
Page 4: Warning And Safety Instructions
They contain important notes on installation, safety, use and maintenance. Miele cannot be held liable for non-compliance with these instruc- tions. Keep these instructions in a safe place and ensure that new users are familiar with the contents. - Page 5 The wine conditioning unit is not suitable for use in areas where there is a risk of explosion. Miele cannot be held liable for damage resulting from improper or in- correct use of the appliance. ...
- Page 6 – avoid naked flames or anything which creates a spark, – disconnect the appliance from the mains electricity supply, – ventilate the room where the wine conditioning unit is located for several minutes, and – contact the Miele Service Department.
- Page 7 If the electrical connection cable is faulty it must only be replaced by a Miele authorised service technician to protect the user from danger. Do not connect the wine conditioning unit to the mains electrical supply by a multi-socket adapter or extension lead.
- Page 8 Miele authorised service technician. Other- wise the warranty is invalidated. Miele can only guarantee the safety of the appliance when genu- ine original Miele replacement parts are used. Faulty components must only be replaced by Miele spare parts.
- Page 9 Do not operate any electrical equipment inside the wine condition- ing unit. Danger of sparking and explosion. Only use genuine original Miele accessories and spare parts with this appliance. Using accessories or spare parts from other manu- facturers will invalidate the warranty, and Miele cannot accept liabil-...
- Page 10 Warning and Safety instructions Cleaning and care Do not use any oils or grease on the door seals, as these will cause the seals to deteriorate and become porous with time. Do not use a steam cleaning appliance to clean this wine condi- tioning unit.
- Page 11 Warning and Safety instructions Transporting the appliance Always transport the wine conditioning unit in an upright position and in its original transport packaging to avoid damage in transit. Danger of injury and damage. The wine conditioning unit is very heavy and must be transported by two people.
-
Page 12: Caring For The Environment
/ recycling centre for electrical and electronic ap- pliances, or contact your dealer or Miele for advice. You are also respons- ible (by law, depending on country) for deleting any personal data that may be stored on the appliance being disposed... -
Page 13: How To Save Energy
How to save energy Normal energy consump- Increased energy con- tion sumption Installation / In a ventilated room. In an enclosed, unventilated Maintenance room. Protected from direct sun- In direct sunlight. light. Not near to a heat source Near to a heat source (radi- (radiator, oven). -
Page 14: Guide To The Appliance
Guide to the appliance Control panel a For switching the whole wine conditioning unit on and off b Optical interface (for Service technicians only) c For selecting the upper or lower wine conditioning zone d For switching the DynaCool function (constant humidity) on and off e For switching the feature lighting on and off f For setting the temperature (... -
Page 15: Symbols
To prevent inadvertent switching off and al- tering of settings Audible tones Choice of sensor tone and door alarm tone Miele@home Only visible when a communication module or communication stick is fitted and signed Demo mode For switching off Demo mode... - Page 16 Guide to the appliance a Door-opening mechanism (Push2open) b Lighting strip (in both wine conditioning zones) c Wooden shelves with labels (FlexiFrames with Noteboard) d Active AirClean filter e Control panel for the upper and lower wine conditioning zones/ isolation plate for thermal separation of the zones f Isolation strips for thermal separation of the temperature zones g 3D bottle presenter...
-
Page 17: Using The Door-Opening Mechanism Correctly
Guide to the appliance Using the door-opening mech- anism correctly The Push2open system on your wine conditioning unit makes it easy to open the appliance door. The appliance door on your wine conditioning unit is sensit- ive to pressure. The Push2open system is deactivated ... -
Page 18: Accessories
Metal base plate If you wish to combine your Miele Wine unit with two built-in appliances in- stalled one above the other, you will need a special metal base plate for in- stalling in between them. -
Page 19: Switching On And Off
Switching on and off Before using for the first time Operating the wine condition- ing unit Packaging material A light touch of the finger on the Remove all packaging material from sensors is all that is required to operate the inside of the appliance. - Page 20 Switching on and off The interior lighting will come on when Selecting settings the door is opened. A different setting can be set for each wine conditioning zone. Touch the sensor for the wine condi- tioning zone you want to adjust the settings for.
-
Page 21: Switching Off
Switching on and off Switching off Switching off for longer peri- ods of time If the wine conditioning unit is not going to be used for a longer period of time: switch it off, Touch the On/Off sensor. If this does not work, the safety lock ... -
Page 22: Selecting Further Settings
Selecting further settings Certain settings on the wine condition- ing unit can only be selected in settings mode. The door alarm is automatically dis- By touching the or sensor, you abled when the appliance is in set- can now select whether the safety tings mode. -
Page 23: Audible Tones
Selecting further settings Audible tones The wine conditioning unit has audible tones such as the sensor tone and the door and temperature alarms. Touch the or sensor now to se- lect: You can switch the sensor tone or the 0: keypad tone off;... -
Page 24: Display Brightness
Selecting further settings Display brightness The display brightness can be adjusted to suit lighting conditions in the room. By touching the or sensor you The display brightness can be adjusted can now alter the brightness of the in steps from 1 to 3. -
Page 25: The Optimum Temperature And Air Quality
The optimum temperature and air quality Wine keeps on maturing depending on Fluctuations in temperature put wine the surrounding conditions. The length under stress and interrupt the maturing of time for which wine can be kept in process. It is therefore very important to good condition will therefore depend maintain a constant temperature. -
Page 26: Setting The Temperature
The optimum temperature and air quality Safety device in case of low ambient Setting the temperature temperatures The temperatures in the wine condition- The appliance is equipped with a safety ing zones can be set independently of thermostat to protect your wine against one another. -
Page 27: Temperature Range
The optimum temperature and air quality Temperature range – Touching a sensor once: The last temperature selected In both zones it is possible to set tem- flashes. peratures between 5 and 20 °C. – Each subsequent touch of the A room temperature above 32 °C sensor: may cause the temperature in the Adjusts the temperature shown in... -
Page 28: Air Quality And Humidity
The optimum temperature and air quality Using Air quality and humidity DynaCool (constant humidity) In most refrigerators the humidity is too low for wine and therefore a refrigerator DynaCool raises the relative humidity is not suitable for wine storage. High inside the whole of the wine condition- humidity levels are necessary when ing unit. -
Page 29: Air Filtration With The Active Airclean Filter
The optimum temperature and air quality Switching off DynaCool Air filtration with the Active AirClean filter The wine conditioning unit uses The Active AirClean filter achieves op- slightly more energy and is a little timum air quality by filtering the incom- noisier when the DynaCool function is ing air. -
Page 30: Temperature And Door Alarm
Temperature and door alarm This wine conditioning unit is equipped Switching the temperature alarm off with an alarm system so that the tem- early perature cannot rise or fall unnoticed, If the noise disturbs you, you can thus possibly damaging the wine. switch the alarm off if you wish. - Page 31 Temperature and door alarm Door alarm An alarm will sound if the appliance door has been left open for longer than approx. 2 minutes. The sensors for the wine conditioning zones will flash in the control panel. The alarm symbol lights up in the display. As soon as the door is closed, the alarm will stop.
-
Page 32: Feature Lighting
Feature lighting The interior lighting can be set to re- Setting the brightness of the feature main on when the door is closed so lighting your wines can be on display at all The brightness of the feature lighting times. can be adjusted. -
Page 33: Lighting Duration Of The Feature Lighting
Feature lighting Lighting duration of the feature light- The lighting duration for the feature lighting is set to 30 minutes as stand- Touch the OK sensor to confirm your ard. choice. The lighting duration can be set to 30, 60, 90 minutes up to 00 (unlimited). The The set brightness is saved to memory. - Page 34 Feature lighting By touching the sensor – lighting duration is reduced by 30 minutes – lighting duration is increased by 30 minutes. Touch the OK sensor to confirm your choice. The selected lighting duration is saved and the temperature reappears in the display.
-
Page 35: Storing Wine Bottles
Storing wine bottles Vibration and movement have a negat- Risk of injury from falling wine ive effect on the maturing process, bottles. which can in turn affect the taste of the Wine bottles may become wedged in wine. the wooden shelves above and fall To avoid disturbing other bottles when out of the wine conditioning unit removing a bottle of wine, store bottles... -
Page 36: Wooden Shelves
Storing wine bottles Moving the wooden shelves Wooden shelves The wooden shelves can be removed and replaced again if required. The wooden shelves are on telescopic runners which can be pulled out to make it easier to store and remove bottles. -
Page 37: Adjusting The Wooden Shelves
Storing wine bottles Adjusting the wooden shelves The slats in the wooden shelves can be individually adjusted to suit, so that every bottle is stored in perfect safety regardless of shape or size. Slide the wooden shelf back into the appliance as far as it will go . -
Page 38: Annotating Wooden Shelves
Storing wine bottles Annotating wooden shelves For quick and easy identification of the wines stored, you can write on the blackboard-painted surface on the magnetic strips on the wooden shelves. Use the chalk supplied. You can write directly on the magnetic strip or remove it from the wooden shelf. - Page 39 Storing wine bottles If you do not wish to use the 3D bottle presenter for presentation pur- poses or would like to make use of the maximum storage capacity of your wine conditioning unit, simply fold down the rear struts. ...
-
Page 40: Maximum Capacity
Storing wine bottles With Maximum capacity 3D bottle presenter set up Risk of damage! Do not exceed the maximum load- bearing capacity of 25 kg for each wooden shelf. Do not stack bottles on the wooden shelves. Exception: you can stack bottles on the 3D bottle presenter when it is fol- ded down in the bottom of the appli- ance. -
Page 41: Automatic Defrosting
Automatic defrosting The wine conditioning unit defrosts automatically. -
Page 42: Cleaning And Care
Cleaning and care Cleaning agents Do not let water get into the elec- tronic unit or the lighting. To avoid damaging the surfaces of your appliance, do not use Risk of damage due to moisture – Cleaning agents containing soda, ingress. -
Page 43: Before Cleaning
Cleaning and care Before cleaning Interior, accessories and appli- ance door Switch off the wine conditioning unit. Clean the wine conditioning unit at Disconnect it from the mains. least once a month. Take any wine bottles out of the wine Remove soiling immediately to pre- conditioning unit and store them in a vent it from drying on. -
Page 44: Cleaning The Ventilation Gaps
Place the wine bottles back in the brush or vacuum cleaner (e.g. use the dusting brush for Miele vacuum wine conditioning unit and close the cleaners) door. -
Page 45: Active Airclean Filters
Active AirClean filters can be obtained from your Miele dealer, Miele or from the Miele website. Press the top right-hand cover in until you hear it click and then release it. - Page 46 Active AirClean filters To confirm the filters have been changed Touch the OK sensor to confirm your selection. The selected setting is applied, the Touch the settings sensor. symbol flashes. All symbols available for selection will appear in the display and the symbol flashes.
-
Page 47: Problem Solving Guide
Check whether the mains fuse has tripped. If it has there could be a fault with the appliance, the house- hold electrical wiring or another electrical appliance. Contact a qualified electrician or Miele. The symbol is dis- Demo mode is turned on and the symbol is illumin- played, the wine condi- ated in the display. - Page 48 Problem solving guide Problem Cause and remedy The compressor is The temperature in the wine conditioning unit is set switching on more fre- too low. quently and for longer Adjust the temperature. periods of time, the The appliance door is not properly closed. temperature in the wine ...
- Page 49 Problem solving guide Display warnings Message Cause and remedy The alarm symbol is The door alarm has been activated. lit in the display and Close the appliance door. Both sensors for the both sensors for the wine conditioning zones and the alarm symbol wine conditioning zones will go out and the audible alarm will stop.
- Page 50 Problem solving guide The interior lighting is not working. Problem Cause and remedy The LED interior lighting The wine conditioning unit is not switched on. is not working. Switch the wine conditioning unit on. To avoid overheating, the LED lighting switches itself off automatically after approx.
- Page 51 Change the door seal. A replacement is available placed. from Miele or from specialist retailers. There is no audible This is not a fault. The alarm tone has been switched alarm although the door off in settings mode (see “Selecting further settings –...
-
Page 52: Noises
Noises Normal noises What causes them Brrrrr ... A humming noise is made by the motor (compressor). This noise can get louder for brief periods when the motor switches Blubb, blubb ... A gurgling noise can be heard when coolant is circulating through the pipes. -
Page 53: Service
Please quote the model and serial num- ber of your appliance when contacting Miele. This information can be found on the data plate. The data plate is located inside the wine unit. -
Page 54: Installation
Installation Location Danger of damage. Do not install a vacuum sealing Risk of damage and injury from drawer under the wine conditioning wine conditioning unit tipping over. unit. The wine conditioning unit is very heavy and can tip forwards when the appliance door is open. - Page 55 Installation Danger of damage. The wine conditioning unit has an elongated glass door and must not be set down vertically at any time.
- Page 56 Installation This appliance should be installed in a Risk of damage due to corrosion. dry, well-ventilated room. In environments with high humid- When deciding where to install your ity, condensation may appear on the wine conditioning unit, please bear in external surfaces of the wine condi- mind that it will use more energy if in- tioning unit.
-
Page 57: Climate Range
Installation Climate range Ventilation The wine conditioning unit is designed Risk of fire and damage due to for use within a certain climate range insufficient ventilation. (ambient temperatures) and should not If the wine conditioning unit is not be used outside this range. The climate ventilated sufficiently, the com- range of the wine conditioning unit is pressor will run more frequently and... - Page 58 Installation Air intake occurs via the plinth at the The ventilation gap at the top of the ap- bottom of the appliance and the air es- pliance can be constructed in different ways: capes at the top at the back of the housing unit.
-
Page 59: Building-In Dimensions
Installation Building-in dimensions The mains connection cable is 2000 mm long. The socket must be easily accessible in an emergency, not concealed be- hind the appliance. Side view... -
Page 60: Adjusting The Door Hinges
Installation Adjusting the door hinges Changing the door hinging The door hinges on the wine condition- The wine conditioning unit is supplied ing unit are set ex-works to enable the right-hinged. If left-hand hinging is re- appliance door to be opened wide. quired, the hinges must be changed. - Page 61 Installation Danger of injury and damage to the appliance. The appliance door is not secure once the screws in the hinges have been removed. The second person must support the appliance door. Open the appliance door and remove covers ...
- Page 62 Installation Risk of damage. The wine conditioning unit has an elongated glass door and must not be set down vertically at any time. Carefully place the dismantled appli- ance door on a soft surface. Now undo the screws completely. ...
- Page 63 Installation Remove the stopper from the ap- Tip: Take care not to let the screws that pliance door. you have loosened fall through the slits in the appliance door. Remove the spacer from the appli- ance door, rotate it 180° and fit it on ...
- Page 64 Installation Unscrew the mounting plates from both hinges and then screw each mounting plate onto the other hinge. Unscrew the hinges from the appli- ance door. Secure the hinges diagonally on the opposite side.
- Page 65 Installation Refit the covers . Screw on the cover and the sup- plied cover . To do so use the screws that you put to one side that were previously used for the transport safety device . Secure the seal . ...
- Page 66 Installation Refit covers and . Fit the screws loosely through hinges at the top and bottom. Refit the appliance door and then tighten the screws, first at the bot- tom, then at the top. Replace the top covers and and click them into place.
-
Page 67: Installing The Wine Conditioning Unit
Installation Check that the wine conditioning unit Risk of damage and injury from is standing securely in the niche and wine conditioning unit tipping over. that the door closes properly. There is an increased risk of injury and damage if the wine conditioning Installing the wine conditioning unit is installed by a single person. -
Page 68: Setting Up The Wine Conditioning Unit
Installation All fitting instructions given are for a right-hinged appliance. If you have converted the appliance to left hand hinging you will need to adapt these instructions accordingly. Setting up the wine conditioning unit Feed the power cable through to the socket. - Page 69 Installation Slide the filler panel supplied from the front into the holders on the wine conditioning unit as shown. Push the wine conditioning unit two thirds of the way into the build- ing-in niche. If the wine conditioning unit is left- hinged, allow for the position of the lug (see illustration above).
- Page 70 Installation Unscrew the transport safety device from the front of the wine conditioning unit, if you have not already done so. Tip: Keep this device in a safe place for refitting should the appliance need to be moved in the future. ...
- Page 71 Installation Fit the stopper supplied onto the fixing bracket also supplied. Screw the supplied fixing bracket loosely with the screws supplied into the bottom of the wine condition- ing unit. Do not tighten the screws so that you can adjust the position of this part.
- Page 72 Installation Installing the wine conditioning unit If the wine conditioning unit is pushed too far into the niche, the door will not close properly. This can cause ice to build up, condensate to accumulate and lead to faults in the appliance.
- Page 73 Installation This will create a gap all round of 42 mm to the front edges of the hous- ing unit side walls. Close the appliance door and align the wine conditioning unit flush with the surrounding cabinetry, pulling the wine conditioning unit forwards if ne- cessary.
- Page 74 Installation board screws and through the hinge plates at the top and bottom (3. + 4.). Push the fixing brackets and against the housing unit wall. Now tighten screws and . Snap off any protruding ends from securing brackets and . They are no longer required and can be dis- posed of.
- Page 75 Installation If not already done, remove the trans- For additional stability of the wine con- port safety device as follows: ditioning unit in the housing unit, push the stabilising rods supplied in under- neath the appliance between it and the floor of the housing unit: ...
- Page 76 Installation Adjusting the appliance door Screw the supplied cover into pos- ition. Align the appliance door by width (X) with neighbouring cabinetry fronts. Risk of damage! When adjusting the appliance door take care not to damage furniture fronts of units adjacent to the hinged ...
- Page 77 Installation Remove the seal from the appliance door and remove the covers. Refit covers . Loosen screw and move it to posi- tion . Loosen screw . Carry out these steps for the lower door as well. ...
- Page 78 Installation The following confirms that the wine unit is correctly installed: – The appliance door closes properly. – The appliance door does not touch the housing unit. – The seal on the top corner of the handle side is firmly seated. ...
-
Page 79: Electrical Connection
Installation Do not connect the appliance to the Electrical connection mains electricity supply by an extension The appliance is supplied with a mains lead. Extension leads do not guarantee cable with moulded plug for connection the required safety of the appliance to a 50 Hz 220–240 V supply. -
Page 80: Information For Dealers
Information for dealers Demo mode The wine conditioning unit can be demonstrated in the showroom or at exhibitions in “Demo mode”. In this Leave your finger on the sensor mode the control panel and interior until the symbol appears in the dis- lighting are active but the compressor play. - Page 81 Information for dealers Touch the or sensor until 0 ap- pears (means: Demo mode is switched off). Touch the OK sensor to confirm your selection. The selected setting is applied, the symbol flashes. Touch the settings sensor to leave settings mode.
- Page 83 Tel: +65 6735 1191 Fax. +971 4 3418 852 Fax: 011-46 900 001 Fax: +65 6735 1161 800-MIELE (64353) E-mail: customercare@miele.in E-Mail: info@miele.com.sg E-Mail: info@miele.ae Internet: www.miele.in Internet: www.miele.sg Website: www.miele.ae Manufacturer: Miele & Cie. KG, Carl-Miele-Straße 29, 33332 Gütersloh, Germany...
- Page 84 KWT 6422 iG en-GB M.-Nr. 11 324 200 / 00...
Need help?
Do you have a question about the KWT 6422 iG and is the answer not in the manual?
Questions and answers