Advertisement
Quick Links
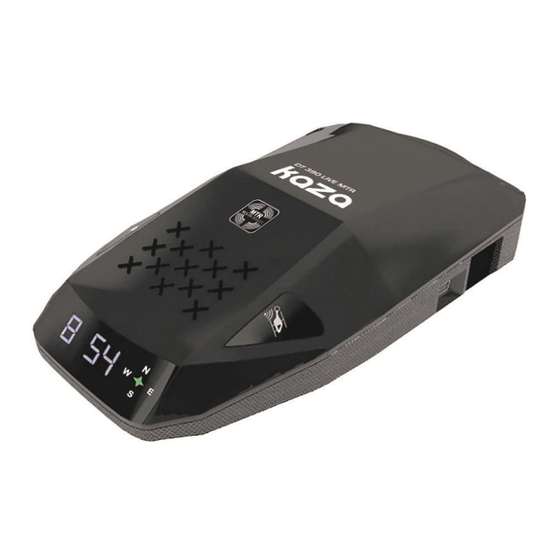
MOBILE AND FIXED RADAR DETECTOR KAZA LIVE DT 390 MTR
EUROPEAN MODEL – Default settings for SPAIN
1. Introduction
Thank you for purchasing the Mobile and Fixed Radar Detector KAZA LIVE DT 390 MTR.
The KAZA LIVE DT 390 MTR Radar Detector uses the most advanced GPS technology and new
detector digital channel antenna. It has been specifically designed and developed for the Spanish
market, optimizing its sensitivity to detect mobile radars; it works with a verified and efficient
database to detect fixed radar warnings, for the exclusive use of KAZA LIVE DT 390 MTR owners.
If you use a SIM with Internet connection, you will have the updated database at all times, as well as
connection to the LIVE Community with warnings in real time by other users.
Connecting to the LIVE Community cloud (www.kazalive.com) entails a third protection shield, since
you will be able to receive warnings in real time reported by KAZA users. You will receive warnings
regarding: hidden mobile radars, PEGASUS helicopter sightings, accidents, traffic jams, etc.
This exclusive and innovative interactive technology between your KAZA and the LIVE Community
will allow you to inform and to be informed in real time, allowing you to anticipate possible road risks.
1
Advertisement

Related Manuals for CDP NUEVO KAZA DT 390 LIVE MTR

Summary of Contents for CDP NUEVO KAZA DT 390 LIVE MTR
- Page 1 MOBILE AND FIXED RADAR DETECTOR KAZA LIVE DT 390 MTR EUROPEAN MODEL – Default settings for SPAIN 1. Introduction Thank you for purchasing the Mobile and Fixed Radar Detector KAZA LIVE DT 390 MTR. The KAZA LIVE DT 390 MTR Radar Detector uses the most advanced GPS technology and new detector digital channel antenna.
-
Page 2: Important Notice
Its connectivity features will also allow you to automatically update the database of your KAZA without requiring complex downloads. The new KAZA DT 390 MTR LIVE is not a normal detector or warning unit, it is a device that receives and transmits input from thousands of KAZA users in real time. - Page 3 The radar detector antenna, located in front of the vehicle, captures and detects the existence of a radar by receiving the radio wavelengths (Ghz) emitted by the radar. The radar warning by GPS, located inside the vehicle, identifies the position of the vehicle at all times and the fixed radars by means of an incorporated complete and updated database.
- Page 4 The fixed Autovelox (photo 3) are cross-laser type (CANNOT BE DETECTED THROUGH ANY SYSTEM) and will therefore be announced sufficiently in advance by means of the GPS warning unit. (Photo 3) Other radars that don't emit wavelengths and will only be announced by the GPS warning unit include induction and tract control radars: The induction-loop radars are cables located under the asphalt that calculate the speed of the vehicle when it passes over them;...
- Page 5 KA bands in 34.3 and 35.5 Ghz and Multa Radar CD/CT. In Spain, KA band and Multa radar CD/CT are used for both fixed and mobile radars. In the KAZA CDP DT 390 MTR model, these bands are the factory setting. See examples (photo 6). (Photo 6) RADARS NOT DETECTED BY ANY ANTI-RADAR UNIT.
- Page 6 (Photo 7) Important warning: At times, the antenna of your detector won't produce any alarm when you pass by a radar. This could be due to the following reasons: 1. The radar is off. 2. The radar is damaged (see photo 6). 3.
- Page 7 The detector antenna doesn't seem to react to the radars. Make sure that nothing blocks the field of vision of the antenna and that it is correctly connected. Also check there are no radar interferences memories recorded by mistake. Try deleting the radar interferences memory.
- Page 8 5. Characteristics of the unit. 1. Time zone selection. 2. Clock announcing time change. 3. K, KA, Multa Radar CD/CT and LASER bands with the possibility of turning bands on or off (depending on version) and possibility of turn Off the RD antenna. 4.
- Page 9 USB cable for database update. 6. Beginning to use the equipment. This device can work connected to the LIVE Community or by itself if with its updateable local database. If you connect the device to the cloud, you will always have relevant information in real time in a radius of 100 km.
- Page 10 To disconnect it, carry out the same operation. Don’t forget to check the appropriate legislation in your country regarding the detector! To turn off the equipment, use the red adapter button. 7. Installation with the supports supplied. Both the suction pads and the “Cradle” will be inserted in the device and will be placed in the vehicle as shown in the photos.
- Page 11 They will light up as required or by pressing any key. It informs that the dangerous points and alert service points are activated. Informs that the system is connected to the cloud. Laser detection is activated. KA Band is activated. K Band is activated.
- Page 12 Statistic of dangerous points, curves, crossings... Other... Warnings of the LIVE Community in real time: Helicopter or aircraft Control of mobile speed Traffic disturbances Accident Police Control 10. Programming and menu options. Adjust Volume Press the “+ or -” key briefly to change the intensity of the volume. Every time you press “+ or -”, the screen will show numbers from 1 to 5 in circular form.
- Page 13 The Mobile Radar (on the left) and Helicopter (on the right) keys allow you to easily report these types of points to the LIVE Community using only one click. “M” key menu Every time you press the “M” key, you will go to one of the menu options 1 to 11. In this option, the "+ or –"...
- Page 14 Menu 3: Activate / Deactivate MTR, K, KA1, KA2, KA3 and Laser bands Press the "M" key three times. You will hear " Attention Multa Radar", by pressing the "+" or "-" key you can activate or deactivate it. (By default, leave it activated. If you keep pressing you will hear K band, KA1 band, KA2 band, KA3 band and finally Laser.
- Page 15 Menu 8: Continuous warning sound due to excessive cruising speed Press the “M” key thirteen times. You will hear “Continuous warning". Press the "+ or - key to turn this option on or off. If it is activated, this option will repeat the excessive speed warning. If it is disabled, it will only warn you when you exceed the speed but it will not remind you again unless you decrease the speed and then exceed it again.
- Page 16 The GPS has not issued a warning for a Fixed Radar inside a tunnel. Inside a tunnel there is no GPS coverage, so the unit will warn you before entering the tunnel but not once you are inside it. 12. False alarms of the detector antenna. The detector antenna of the KAZA is a microwaves receiver.
- Page 17 13. Updating the database To update the unit’s database, you must register the detector in the webpage: http://www.kazaradares.com OPCION 1 Click the link to go to the registration form, and follow the registration process. Once you are registered, you may download the program and database to update your unit. If you have any doubts during the process, click on “If you have doubts regarding the registration process see the video - click here”.
- Page 19 Download the program the first time and the database every time you wish to update. Copy them on your PC. Execute the update program: Connect the GPS to the USB cable supplied and wait until the program detects it. The buttons that were disabled will be activated and the form’s header will show the message “GPS connected”...
- Page 20 Disconnect the GPS and close the program. Note: To change voices to another language, follow the same process, but download the corresponding voice file and database file. OPCION 2 You can also use the "AutoUpdate" program, easier, if you have to enter the web and automatic. When you connect the unit to the PC, it will appear as if it were an external hard drive ...
- Page 21 The program will first download the internet database, then it will update the device, so do not disconnect it in any of the two downloads it does. 14. Time adjustments, band frequencies, screen brightness and display or non-display the frequency detected.
- Page 22 Screen light at night time: Write a number from 15 to 23 to select the intensity of the display during the night. For example, if you enter 20, this means that the intensity of the screen will decrease starting at 8 pm. Radar Frequency display or not: If you activate this function when a band is detected, the approximate frequency will be shown and a voice will issue a warning.
-
Page 23: Important Note
16. Contact data. C.D.Products S.A. Calle Kanna 2, local 3 Polígono Industrial P-29. 28400 Collado Villalba – Madrid. www.cdpsa.es www.kazaradares.com email: clientes@cdpsa.es Technical specifications of the KAZA DT 390 MTR Operating frequencies: Band Ka 34.300, 34,700, 35.500 GHz ± 200 MHz Band K 23.880 to 24.150 Ghz Banda Multa Radar CD/CT Detector laser:...
Need help?
Do you have a question about the NUEVO KAZA DT 390 LIVE MTR and is the answer not in the manual?
Questions and answers