Rangemaster RMB9048BL/SS User Manual & Installation & Service Instructions
Hide thumbs
Also See for RMB9048BL/SS:
- User manual (24 pages) ,
- User manual & installation & service instructions (28 pages)

Related Manuals for Rangemaster RMB9048BL/SS


Summary of Contents for Rangemaster RMB9048BL/SS
- Page 1 RMB9048BL/SS Electric Oven User Guide & Installation & Service Instructions U110593-01...
-
Page 3: Table Of Contents
Contents Before You Start... Oven Overview Function Overview Cooking Tips Cooking Table Cleaning Your Oven Oven Shelves Troubleshooting Installation 10. Circuit Diagram 11. Technical Data 12. Warranty/After Sales Service... -
Page 5: Before You Start
1. Before You Start... Thank you for buying a Rangemaster oven. It should give you Use dry oven gloves when applicable – using damp many years trouble-free cooking if installed and operated gloves might result in steam burns when you touch a correctly. -
Page 6: Oven Overview
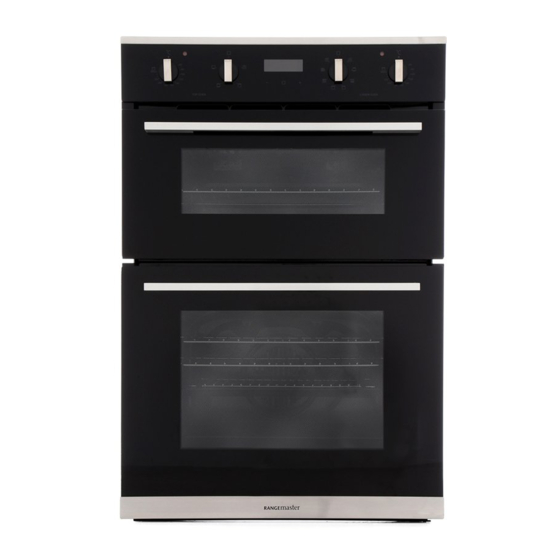
2. Oven Overview DocNo.024-0005 - Overview - R9049 oven Fig. 2.1 Top Oven ArtNo.325-0014 - BI oven R9049 1. Half Grill 2. Full Grill 3. Conventional 4. Base Heat Main Oven 1. Oven Light 2. Fanned Grill 3. Defrost 4. Fan Oven 5. -
Page 7: Function Overview
Function Overview Main Oven Function Modes Fan with Lower heat No Function Mode Selected This function is ideal for one-pot dishes such as casseroles Oven Light Top Oven Function Modes The oven light will operate on all selected No Function Mode Selected function. - Page 8 Oven Shelf levels Fig. 3.1 Always count shelf levels from the bottom upwards (Fig. 3.1) Programming the Oven Note: The alarm will cut off after two minutes if it is not switched off manually. Setting the clock • The clock is preset to 12:00, and will revert to this after a power failure.
- Page 9 Semi-automatic cooking Fig. 3.5 The oven can be set to switch off automatically at a preset time up to a maximum of 10 hours. To set a semi-automatic cooking programme: • Select an oven function and temperature (the oven will switch on).
-
Page 10: Cooking Tips
4. Cooking Tips Tips on Cooking with the Timer General Oven Tips If you want to cook more than one dish, choose dishes that The wire shelves should always be pushed firmly to the back require approximately the same cooking time. However, of the oven. -
Page 11: Cooking Table
5. Cooking Table DocNo.031-0004 - Cooking table - electric & fan single cavity The oven control settings and cooking times given in the table below are intended to be used Top (T) AS A GUIDE ONLY. Individual tastes may require the temperature to be altered to provide a ArtNo.050-0007 preferred result. -
Page 12: Cleaning Your Oven
6. Cleaning Your Oven Essential Information Fig. 6.1 Allow the oven to cool and isolate the electricity supply before carrying out any thorough cleaning and maintenance. Never use paint solvents, washing soda, caustic ArtNo.325-0001 - BI oven door hinges cleaners, biological powders, bleach, chlorine based bleach cleaners, coarse abrasives or salt. - Page 13 Oven Fig. 6.4 DO NOT use steel wool, oven cleaning pads, or any other materials that will scratch the surface. To remove the inner glass The door and inner glass are held together by corner cap pieces. ● Depending on the model of the oven, the door top corner pieces can be removed either by pressing the buttons shown in position “A”...
- Page 14 Back light Fig. 6.5 Fig. 6.5 ● Remove all shelves and the grill pan from the oven. ● Unscrew the protective cover. We recommend that you wash and dry the glass cover at this point. Always use a clean cloth or gloves. ...
-
Page 15: Oven Shelves
7. Oven Shelves Removing the runners in the top oven Removing the runners in the main oven Check the oven is cool and switched off. Check the oven is cool and switched off. Open the top oven door. Open the main oven door. Remove all shelves (Fig. -
Page 16: Troubleshooting
8. Troubleshooting DocNo.054-0001 - Troubleshooting BI oven Steam is coming from the oven. A dish of water when placed on the shelf should be the When cooking foods with a high water content (e.g. same depth all over. (For example, if it is deeper at the oven chips) there may be some steam visible at the top back, then the back of the cooker should be raised up or of the door. -
Page 17: Installation
INSTALLATION Check the appliance is electrically safe when you have finished. 9. Installation Dear Installer Location of the Oven Before you start your installation, please complete the details The oven may be installed in a kitchen/kitchen diner but NOT BELOW. in a room containing a bath or shower. - Page 18 INSTALLATION Check the appliance is electrically safe when you have finished. Positioning the Oven The oven can be installed at high level in a tall kitchen unit and is designed to fit into a standard 560 mm wide oven housing (Fig. 9.1). The oven is 595mm across the trims and an unrestricted opening of 540mm minimum depth is needed, as measured from the front of the cabinet door to the rear of the housing.
- Page 19 INSTALLATION Check the appliance is electrically safe when you have finished. Fig. 9.1 ArtNo.325-0024 - R9044/R9049 dimensions min. All dimensions in mm Fig. 9.2 ArtNo.325-0024 - R9044/R9049 dimensions...
- Page 20 INSTALLATION Check the appliance is electrically safe when you have finished. Electrical Connection 220 - 240V This appliance must be installed by a qualified electrician to comply with the relevant Institute of Engineering and Technology (I.E.T.) regulations and also the local electricity supply company requirements.
-
Page 21: Circuit Diagram
• DocNo.094-0004 - Circuit diagram R9044 oven 10. Circuit Diagram... -
Page 22: Technical Data
Housing Height 888 mm Width 595 mm Depth 556 mm 555 (min) Oven Data Brand Rangemaster Model identification RMB9048BL/SS Type of oven Electric Mass Number of cavities Top Oven Efficiency Fuel type Electric Cavity type Multifunction* *Drop Down Door Volume... -
Page 23: Warranty/After Sales Service
12. Warranty/After Sales Service DocNo.111-0003 Warranty No.10 If consultation or technical assistance is needed, please provide the local authorised service agent with the purchase invoice and the product code/serial number. The 2 years free maintenance for the operation of the appliance started from the date of purchase of this product. - Page 24 Clarence Street, Royal Leamington Spa, Warwickshire, CV31 2AD, England. Tel: +44 (0) 1926 457400 Fax: +44 (0) 1926 450526 E-mail: consumers@falconappliances.co.uk...
Need help?
Do you have a question about the RMB9048BL/SS and is the answer not in the manual?
Questions and answers