Table of Contents
Advertisement
Quick Links
Advertisement
Table of Contents

Related Manuals for Taurus T9.5


Summary of Contents for Taurus T9.5
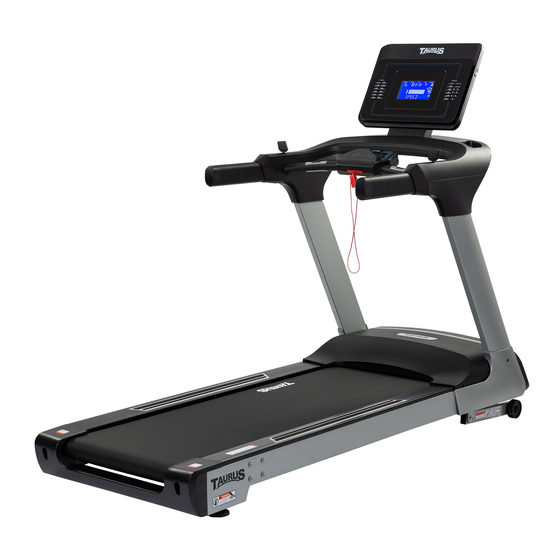
- Page 1 Assembly and Operating Instructions TFT95.02.02 Art. No. TF-T95-2 Treadmill T9.5...
- Page 2 T9.5...
-
Page 3: Table Of Contents
Contenu GENERAL INFORMATION Technical Data Personal Safety Electrical Safety Set-Up Place ASSEMBLY General Instructions Scope of Delivery Assembly OPERATING INSTRUCTIONS Console Display Button Functions Fitness programmes 3.3.1 Quick Start 3.3.2 Manual programme 3.3.3 Pre-set programmes 3.3.4 User-defined programmes 3.3.5 Heart rate-oriented programmes 3.3.6 Training programme Body fat test STORAGE AND TRANSPORT... - Page 4 ORDERING SPARE PARTS Serial Number and Model Name Parts List Exploded Drawing WARRANTY CONTACT T9.5...
- Page 5 With Taurus® fitness equipment, the focus is on what sport is all about: maximum performance! Therefore, the equipment is developed in close consultation with athletes and sports scientists.
- Page 6 This notice indicates potentially hazardous situations which, if not avoided, will result in death or serious injuries! NOTICE This notice indicates further useful information. Retain these instructions in a safe place for future reference, maintenance or when ordering replacement parts. T9.5...
-
Page 7: General Information
GENERAL INFORMATION Technical Data LCD display of speed in km/h training time in min training distance in km calories burnt in kcal heart rate (when using the hand sensors or a chest strap) incline in % Motor output: 3.0 HP continuous output (DC motor) Speed range: 0.5 - 22 km/h Speed hot keys:... -
Page 8: Personal Safety
Make sure that nobody is within the range of motion of the equipment during training so as not to endanger you or other persons. ड ATTENTION Do not insert any objects of any kind into the openings of the device. T9.5... -
Page 9: Electrical Safety
Electrical Safety DANGER ⚠ In order to reduce the risk of an electric shock, always unplug the equipment from the mains socket immediately after your workout, before assembly or dismantling, and before maintenance or cleaning. Do not pull on the cable. ⚠... -
Page 10: Set-Up Place
10°C and 35°C). The equipment should not be used outdoors or in rooms with high humidity (over 70%) like swimming pools. A floor protective mat/equipment underlay can help to protect high-quality floor coverings (parquet, laminate, cork, carpets) from dents and sweat and can help to level out slight unevenness. T9.5... -
Page 11: Assembly
ASSEMBLY General Instructions ⚠ DANGER Do not leave any tools, packaging materials such as foils or small parts lying around, as otherwise there is a danger of suffocation for children. Keep children away from the equipment during assembly. ⚠ WARNING Pay attention to the instructions attached to the equipment in order to reduce the risk of injuries. -
Page 12: Scope Of Delivery
In the event of complaints, the contractual partner must be contacted directly. CAUTION ⚠ If parts of the scope of delivery are missing or damaged, the assembly must not be carried out. 105L 105R STEP1 KH-264D2 STEP3 STEP2 11 M5*0.8*15L 4PCS STEP4 11 M5*0.8*15L 2PCS (mm) T9.5... -
Page 13: Assembly
Assembly Before assembly, take a close look at the individual assembly steps shown and carry out the assembly in the order given. NOTICE First loosely screw all parts together and check that they fi t properly. Then tighten the screws using the tool only when you are instructed to do so. - Page 14 Connect the two cables (120 and 121) with one another. ड ATTENTION Be careful not to pinch the cables in the following step. Fix the handlebar set (4) to the two handlebar posts (2 and 3) with four allen screws (91). M10x1.5x45L 105R 105L Step2 T9.5...
- Page 15 Step 3: Assembly of the console Fix the supporting tube (7) to the handlebar (4) with two allen bolts (142), two spring washers (143) and two fl at washers (27). Connect the cables (93, 98, 118 and 120) with their counterparts of the console (84). ड...
- Page 16 Fix the covers (8L and 8R) to the main frame (1) by pressing the lugs on the inside of the covers into the corresponding drill holes of the main frame until they engange audibly. Finally fi x the covers (8L and 8R) to the handlebar posts (2 and 3) with two cross bolts (11). M5x0.8x15L Step4 T9.5...
- Page 17 Step 5: Alignment of the feet If the floor is uneven, you can stabilize the treadmill by turning the two setting screws under the main frame. Lift the treadmill on the desired side and rotate the setting screws under the main frame.
-
Page 18: Operating Instructions
To enable the safety key to detach from the contact point of the cockpit in the event of a fall, the safety key clip must be firmly attached to your clothing! Make sure that the safety key is not accessible to children. T9.5... -
Page 19: Console Display
Console Display INCLINE Indicates the current incline level between 1 - 15 %. DISTANCE Indicates the covered distance between 0.0 - 9999 km. TIME Indicates the already elapsed or remaining training time between 00:00 – 99:59 minutes. PULSE Indicates your current heart rate between 40 - 220 bpm. CALORIES Indicates the burnt calories between 0 –... -
Page 20: Button Functions
ENTER With this button you confirm your entries. PROGRAM In the main menu, this button will take you directly to the pre-set programmes. T9.5... -
Page 21: Fitness Programmes
Fitness programmes In the main menu you can choose from many different programmes. This includes a manual programme, pre-set programmes, heart rate-oriented programmes, a training programme and a body fat test. 3.3.1 Quick Start When you are in the main menu, press the START button to start a training session via quick start. Alternatively you can also press the SPEED- or INCLINE buttons or use the switches on the handrails to select the quick start programme manually. -
Page 22: Pre-Set Programmes
5.1. Press the STOP button again to end your training. Press the STOP button one more time to return to the main menu. 5.2. Press the START button to continue with your training. → Upon completion of the programme the console will start the cool down phase automatically. T9.5... -
Page 24: User-Defined Programmes
7.1. Press the STOP button again to end your training. Press the STOP button one more time to return to the main menu. 7.2. Press the START button to continue with your training. → Upon completion of the programme the console will start the cool down phase automatically. T9.5... -
Page 25: Heart Rate-Oriented Programmes
3.3.5 Heart rate-oriented programmes ⚠ WARNING Your training equipment is not a medical device. The heart rate measurement of this equipment may be inaccurate. Various factors can affect the accuracy of the heart rate measurement. The heart rate measurement serves only as a training aid. There are three different heart rate-oriented programmes. -
Page 26: Training Programme
If you have covered the distance in exactly in the set time period, this symbol will appear. If you have covered the distance in a longer period of time than the one you have defined at the beginning, this symbol will appear. T9.5... -
Page 27: Body Fat Test
Body fat test When you are in the main menu, use the SPEED- or INCLINE buttons or the switches on the handrails to select the body fat test (FAT). Confirm with the ENTER button. Put your hands around the hand pulse sensors. In 10 seconds the console will calculate your body fat percentage and will display the result in form of a rating. -
Page 28: Storage And Transport
After that, you easily can move the equipment to a new position. For long transport distances the equipment should be disassembled and safely packed. Select the new location by following the instructions in the section 1.4 of this manual. T9.5... -
Page 29: Troubleshooting, Care And Maintenance
TROUBLESHOOTING, CARE AND MAINTENANCE General Instructions ⚠ WARNING Do not make any improper changes to the equipment. CAUTION ⚠ Damaged or worn components may affect your safety and the life of the equipment. Therefore, immediately replace damaged or worn components. In such a case, contact the contract partner. -
Page 30: Care And Maintenance
¼ turn anticlockwise. Then observe the mat for about 30 seconds, as the change is not immediately visible. Repeat this procedure until the running mat is straight again. If the running mat cannot be adjusted, please contact your contract partner. T9.5... -
Page 31: Re-Tensioning The Running Mat
5.3.2 Re-tensioning the Running Mat If the running mat slips over the rollers during operation (if this is the case, there is a noticeable jerk during running), the running mat must be re tightened. In most cases, the slipping is caused by stretching of the mat through use. This is perfectly normal. NOTICE Re-tensioning is carried out using the same adjusting screws that are used for adjustment. -
Page 32: Maintenance And Inspection Calendar
The materials can be recycled as per their symbols. Through the reuse, recycling of materials or other forms of recovery of old equipment, you make an important contribution to the protection of the environment. T9.5... -
Page 33: Recommended Accessories
RECOMMENDED ACCESSORIES To make your training experience even more effi cient and pleasant, we recommend that you add suiting accessories to your fi tness equipment. This could be a fl oor mat, for example, which makes your fi tness equipment stand more securely and also protects the fl oor from falling sweat, but it could also be additional handrails on some treadmills or silicone spray to keep moving parts in good shape. -
Page 34: Ordering Spare Parts
The exact position of this sticker is shown in the following illustration. Enter the serial number in the appropriate field. Serial number: Brand / Category: Taurus / treadmill Model Name: T95-2 Article Number: TF-T95-2 T9.5... -
Page 35: Parts List
Parts List Name Supplier Parts No. Specification Qty. Main frame 264D3-3-1000-Aa0 Left handlebar post 264A1-3-1300-Aa0_ x000D_ Right handlebar post 264A1-3-1400-Aa0_ x000D_ Handlebar set 264D3-3-1500-Aa0 Left handpulse handlebar 264D3-3-1550-Aa0 Right handpulse handlebar 264D3-3-1560-Aa0 Stabilizer 26200-3-1600-Aa1 Computer supporting tube 264A1-3-2000-Aa0 Lower cover for handlebar post(- 264A1-6-1371-Aa0 520.7*225.6*52.3 left) - Page 36 Socket 26100-6-2413-00 Cross screw 53329-2-0009-D0 ST2.9x9.5L Power supplier board 26100-6-2414-B0 130*45*6T Switching mode power supplier 261D8-6-2411-00 Buffer 55308-4-0020-G9 D10.5*20L overcurrent protector 261D1-6-2412-00 Flat washer 55105-1-1208-DA D12*D5.2*0.8T Nylon nut 55205-1-2005-DA M5*0.8*5T Lower motor cover 264A1-6-2402-B0 812.5*237.2*180.6 Allen bolt 54010-8-0050-C4 M10*1.5*50L_x000D_ T9.5...
- Page 37 Plastic flat washer 55110-1-2404-BF D10*D24*0.4T Incline 264D2-6-1975-02 JS19-B Allen bolt 54010-8-0065-C4 M10*1.5*65L_x000D_ Wheel 26200-6-1087-B0 D82*35L Allen bolt 50308-5-0020-UF0 M8*1.25*20L_x000D_ Flat washer 55108-1-2115-FA D21*D8.5*1.5T End cap 55310-2-2550-B8 25*50*14_x000D_ Axle 26200-6-1673-N0 D18.7*41L Nylon washer 55121-1-3730-0F D21*D37*3T Flat washer 55108-1-2520-FA D25xD8.5x2T Buffer 55308-2-0010-B3 D26*10*M8*1.25 Upper fixing plate for handle pulse 737L6-6-2491-B0...
- Page 38 1100 Lower computer cable 264D3-6-1773-00 123A Upper cover of button 264D3-6-2092-B0 265*180*47 123B Lower cover of button 264D3-6-2093-B0 265*180*29.5 Filter 261D1-6-1067-00 Inductance 261A2-6-1066-00 Electric cable 26100-6-1775-02 1700L Overlay 264D2-6-1706-B0 399*248*16 Allen cross spanner 58030-6-1051-N0 M6*130L Allen spanner 58030-6-1052-N0 M8*120L T9.5...
- Page 39 Speaker cover 264A1-6-1762-B0 USB module 264D3-6-1723-00 PA-AB00321-K1 CSK cross self-tapping screw 51004-2-0010-N0 ST4*1.41*10L Cross round-head self-tapping 54723-2-0008-C0 ST2.3*8L screw Button PCB board 264D3-6-1759-00 PA-AA01172-K7 Lower controller 264D3-6-1779-00 DC3.0,PA-AE00117EH neutral wire 450L 261A2-6-1791-00 450L Pad of tablet support 264A1-6-1777-B0 409*15*2T Cross tube of computer suppor- 261D8-6-2001-Aa0 10*20*1.5T*320L ting tube...
-
Page 40: Exploded Drawing
Exploded Drawing T9.5... -
Page 41: Warranty
WARRANTY Training equipment from Taurus® is subject to strict quality control. However, if a fitness equipment purchased from us does not work perfectly, we take it very seriously and ask you to contact our customer service as indicated. We are happy to help you by phone via our service hotline. - Page 42 For that reason, we also want to resolve your queries quickly and in a straightforward manner. Thus, please always keep your customer number and the serial number of the faulty equipment handy. T9.5...
-
Page 43: Contact
CONTACT TECHNICAL SUPPORT TECHNICAL SUPPORT & SERVICE TECHNICAL SUPPORT & SERVICE �� �� �� +49 4621 4210-900 80 90 16 50 +33 (0) 172 770033 +49 4621 4210-945 +49 4621 4210-933 �� +49 4621 4210-698 �� �� info@fitshop.dk service-france@fitshop.fr �� technik@sport-tiedje.de ��... - Page 44 The company employs numerous sports scientists, fitness trainers and competitive athletes. Visit us also on our social media platforms or our blog! T9.5...
- Page 45 Notes...
- Page 46 Notes T9.5...
- Page 48 Treadmill T9.5...
Need help?
Do you have a question about the T9.5 and is the answer not in the manual?
Questions and answers