Advertisement
Quick Links
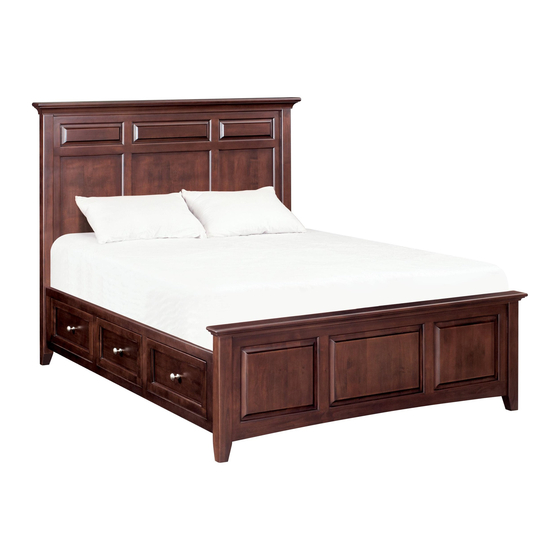
Model #
1316AUFf
McKenzie Queen
Storage Bed
Assembly Instructions
Thank you for allowing us to help you furnish your
home. We are certain you will be delighted with
your new furniture for many years to come.
If you ever have questions about your furniture, please do not hesitate to contact us. In the unlikely event you need a
replacement part; we can make those parts available through an authorized Whittier Wood Furniture dealer. If you
cannot order replacement parts through your dealer, please contact our customer service department.
Customer Service: 800-653-3336 • Outside the U.S.: 541-687-0213
CUSTOMER SERVICE
Hours: Our friendly customer service staff can be reached:
Monday-Friday 8:00 a.m. to 5:00 p.m. (Pacific Time).
You may leave a message 24 hours a day, seven days a week.
Fax: 541-687-2060• Email: info@whittierwood.com
P.O. Box 2827
Eugene, OR 97402 USA
IMPORTANT NOTES:
• For normal household use only. Not recommended for commercial use.
• Remove items before you move this unit.
• Do not overload the drawers.
• Before you begin your project, completely read the Assembly
Instructions and Finishing Hints.
• This assembly requires two people.
Drilling, sawing, sanding or machining wood products can expose you to
wood dust, a substance known to the state of California to cause cancer.
Avoid inhaling wood dust or use a dust mask or other safeguards for
personal protection.
For more information go to: www.p65warnings.ca.gov/wood
This product can expose you to chemicals, including formaldehyde,
which are known to the State of California to cause cancer.
For more information go to: www.p65warnings.ca.gov/furniture
DESIGN SUBJECT TO CHANGE WITHOUT NOTICE.
Production Code:
VN
WARNING
05/17
Advertisement

Related Manuals for Whittier Wood Furniture McKenzie Queen Storage Bed


Summary of Contents for Whittier Wood Furniture McKenzie Queen Storage Bed
- Page 1 If you ever have questions about your furniture, please do not hesitate to contact us. In the unlikely event you need a replacement part; we can make those parts available through an authorized Whittier Wood Furniture dealer. If you cannot order replacement parts through your dealer, please contact our customer service department.
- Page 2 1316AUFf McKenzie Queen Storage Bed Parts List Please identify the parts and check that quantities received match those on this list. If you need to replace a part, refer to the following letter and part name. 1319AUFf Headboard/Footboard Kit (x1)
- Page 3 1316AUFf McKenzie Queen Storage Bed Parts List 1318AUFe Pedestal Kit (x2) Part Description Quantity #8 x 1-1/4" Black Screw (inserted) Pedestal Kit Small Drawer Box (assembled) Large Drawer Box (assembled) Small Drawer Face (attached) Large Drawer Face (attached) #8 x 1-1/2" Machine Screw Tuscan (installed)
- Page 4 1316AUFf McKenzie Queen Storage Bed Assembly Instructions This assembly requires two people. Tools Required: Phillips screwdriver, 7/16" open end or box end wrench and Tape measure Remove the Trestles (Db) and Assembled Feet (Ub) from the backs of the Headboard (A) and Footboard (Bb) and place them off to the side.
- Page 5 1316AUFf McKenzie Queen Storage Bed Assembly Instructions This assembly requires two people. To attach the Footboard (Bb) to the Pedestal Assembly (Id), align the Brackets and slide the Pedestal Assembly down on to the Footboard (Bb). See Figures 3 and 3a.
- Page 6 1316AUFf McKenzie Queen Storage Bed Assembly Instructions This assembly requires two people. Align the Brackets on both sides and slide the Pedestal/Footboard assembly down on to the Headboard (A). See Figure 5. Fig. 5 1316AUFf — Page 6 — 05/17...
- Page 7 1316AUFf McKenzie Queen Storage Bed Assembly Instructions This assembly requires two people. Open the drawers. Face the Footboard and stand in between the first and second braces. Place a Trestle with T-Nuts (Db) on the outside surfaces of the first upper left and right braces so that the T-Nuts (ZU) sit near the top.
- Page 8 1316AUFf McKenzie Queen Storage Bed Assembly Instructions This assembly requires two people. Face the Headboard and stand in between the third and fourth braces. Place a Trestle with T-Nuts (Db) on the outside surfaces of the third upper left and right braces so the T-nuts sit near the top.
- Page 9 1316AUFf McKenzie Queen Storage Bed Assembly Instructions This assembly requires two people. NOTE: There are blocks mounted on the back side of the Footboard to support the end of the pedestal eliminating the need for an Assembled Foot in this position where it would be easily visible.
- Page 10 1316AUFf McKenzie Queen Storage Bed Assembly Instructions This assembly requires two people. NOTE: There are blocks mounted on the back side of the Footboard to support the end of the pedestal eliminating the need for an Assembled Foot in this position where it would be easily visible.
- Page 11 1316AUFf McKenzie Queen Storage Bed Assembly Instructions This assembly requires two people. 10. Facing the Footboard, attach the Pedestal Assembly to the Footboard with a 90º Bracket (YG) and four #6 x 1/2" Philtruss Screws (YD). Repeat for the other side. See Figures 10 and 10a.
- Page 12 1316AUFf McKenzie Queen Storage Bed Assembly Instructions This assembly requires two people. 11. To make sure the bed is square, measure the distance between opposing corners. If one of the measurements is larger, tap on a footboard leg until the measurement is equal. See Figure 11.
- Page 13 Whittier Finishing Hints instructions call for a slow drying glue. Carefully read the Checklist of materials □ □ □ label and instructions of the glue manufacturer. Your unit Rubber gloves Tack cloth #220 & #320 may not need glue. □ □...
-
Page 14: Preparing The Surface
Whittier Finishing Hints Preparing the surface apply additional coats. Lightly sand and wipe surface with a lint-free rag or tack cloth between coats. Sand each piece with #220 grit sandpaper. Sand with the grain of the wood on flat surfaces and opposite the Some finishes tend to slightly raise the grain.
Need help?
Do you have a question about the McKenzie Queen Storage Bed and is the answer not in the manual?
Questions and answers