Amped Wireless APA2600M User Manual
Athena-ap
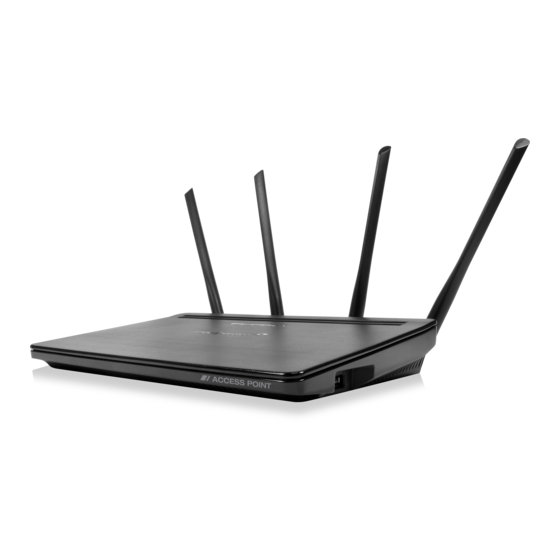
high powertm ac2600 wi-fi access point
Hide thumbs
Also See for APA2600M:
- User manual (21 pages) ,
- Installation and configuration manual (22 pages)
Table of Contents
Advertisement
Quick Links
Advertisement
Table of Contents

Related Manuals for Amped Wireless APA2600M


Summary of Contents for Amped Wireless APA2600M
- Page 1 User’s Guide ATHENA-AP HIGH POWER AC2600 WI-FI ACCESS POINT ® APA2600M...
-
Page 2: Table Of Contents
CONTENTS INTRODUCTION ............2 Basic Settings: Guest Networks (2.4GHz) ...... 26 GETTING STARTED ............3 Advanced Settings (2.4GHz) .......... 27 Package Contents ............3 Wireless Coverage Controls (2.4GHz) ......28 LED Indicators ..............4 Access Schedule (2.4GHz) ..........29 Back Panel Description ........... 5 Wi-Fi Protected Setup –... -
Page 3: Introduction
INTRODUCTION Thank you for purchasing the ATHENA-AP High Power AC2600 Wi-Fi Access Point with MU-MIMO. At Amped Wireless, we strive to provide you with the highest quality products through innovation and advanced technology. We pride ourselves on delivering products that outperform the competition and go beyond your expectations. -
Page 4: Getting Started
GETTING STARTED Package Contents Check to make sure you have all the contents within your package: ATHENA-AP – High Power AC2600 Wi-Fi Access Point with MU-MIMO 4 x Detachable High Gain Dual Band Antennas Power Adapter RJ-45 Ethernet Cable ... -
Page 5: Led Indicators
LED Indicators Power/WPS: Indicates when the Router is powered on. The LED will remain on. Blinks when Wi-Fi Protected Setup (WPS) is activated and the Router awaits a connection. 5.0GHz Wireless Activity: Blinks rapidly when wireless data traffic is transmitted or received over the 5GHz wireless network. -
Page 6: Back Panel Description
Back Panel Description From Left to Right Antenna Connectors: RJ-SMA antenna connectors. Attach the included high gain antennas to these connectors. Power On/Off: Push to turn the Access Point on or off. Power: Power adapter port. Output: 12V 2A, Input: 100-240v. USB 2.0 Port: Attach USB storage devices, such as USB flash drives and external hard drives, for file sharing. - Page 7 Gigabit Router/Switch Port: Indicates when a networking device is connected to a wired port on the back of the Access Point. The LED will blink rapidly when wired data traffic is transmitted or received. The green LED displays when a there is an active gigabit connection. LED On/Off: Push to turn LED indicators on or off.
-
Page 8: Plug And Play Setup Guide
PLUG AND PLAY SETUP GUIDE Connect the Access Point to your Router Attach the antennas to the antenna connectors on the Access Point. Attach the Power Adapter to the Access Point’s PWR port and plug it into a power outlet. Connect a cable from the Access Point’s NETWORK port to your router’s local network port (LAN) or network... -
Page 9: Connect Your Pc To The Access Point
Connect your PC to the Access Point Connecting Wirelessly: With your PC or Mac, scan for available wireless networks and locate the wireless networks for the Access Point: By default, the Access Point will have SSIDs with the names: Amped_AthenaAP_2.4 Amped_AthenaAP_5.0 The default WPA security key is: wireless... - Page 10 Wired Connections: Attach any wired devices to the Access Point using Ethernet cables. Your Plug and Play setup is now complete. You may now use the Access Point to access your network.
-
Page 11: Setup Wizard
Open your Web Browser to Access the Setup Wizard Open your web browser b. Type in: http://setup.ampedwireless.com into the web address bar If the web menu fails to open, type in the following IP address into your web address bar: http://192.168.80.240... - Page 12 Welcome to the Setup Wizard If this is your first time setting up the Access Point, the Setup Wizard should automatically load. If you wish to manually configure your Access Point you can also choose to skip the Setup Wizard. Double check that the Access Point is connected to your network router or switch port.
- Page 13 Network Connection Detection The Wizard will try to detect your network settings. Please be patient. If there is a problem with the Automatic Configuration, the wizard will notify you of the issue. If the network detection was successful, you will see a green check mark.
- Page 14 Personalize your Wi-Fi Settings The default SSID of the Access Point is “Amped_AthenaAP_2.4” and “Amped_AthenaAP_5.0” To change it, enter a new name in the SSID field. Users connecting wirelessly to the Access Point will use this ID to identify your wireless network. Depending on the capabilities of your wireless adapter, you may connect to either the 2.4 or 5GHz wireless networks.
- Page 15 Create a Password for your Access Point This password is NOT your Wi-Fi connection password. This password is to access the web menu of the Access Point to configure additional settings. Leave this blank if you do not wish to have a password. Click Apply to save your settings.
- Page 16 Print the Setup Summary details and save it for future reference. If you have any wired devices that you would like to attach to the Access Point you may do so now as well. Enjoy your Amped Wireless network.
- Page 17 WEB MENU DASHBOARD Welcome to the Dashboard Once you have completed the Access Point Setup Wizard, going to http://setup.ampedwireless.com will now bring you to the Access Point’s Dashboard. The Dashboard provides you with information regarding your network connection and basic Access Point settings. From here you can enable or disable guest networks, have a quick glance the basic configuration of your Access Point.
-
Page 18: 5Ghz Wi-Fi Settings
5GHz WI-FI SETTINGS 5GHz Wi-Fi Settings: Basic Settings (5.0GHz) The Basic Settings page allows you to adjust settings for your 5GHz local wireless network. Disable 5.0GHz Wireless Connections: Disabling will turn off all 5GHz Wi-Fi activity. Users will no longer be able to connect wirelessly to your 5GHz network. - Page 19 than others. If your performance is unstable, try a different channel number. If you are using a repeater with this network, it is recommended you set a static channel, instead of using "Auto". WMM: Prioritizes multimedia data over the wireless network. Associated Clients: Shows the active users connected wirelessly to your 5GHz network.
-
Page 20: Guest Networks (5.0Ghz)
5GHz Wi-Fi Settings: Guest Networks (5.0GHz) Click “Enable” to create a Guest Network. Guest Networks provide a separate wireless network, with unique settings for users to connect to. SSID: This is the name of your Guest Network. Broadcast SSID: Disable to hide your SSID from public view. -
Page 21: Advanced Settings (5.0Ghz)
5GHz Wi-Fi Settings: Advanced Settings (5.0GHz) Advanced Wireless Settings should only be adjusted by technically advanced users. It is not recommended that novice users adjust these settings to avoid degrading wireless performance. Fragment Threshold: The default and recommended setting is at 2346, meaning the Access Point will never fragment any frames that it sends to wireless users. -
Page 22: Wireless Coverage Controls (5.0Ghz)
5GHz Wi-Fi Settings: Wireless Coverage Controls (5.0GHz) Adjust the output power of the Access Point to control the coverage distance of your 5GHz wireless network. For a smaller coverage area, you can select a lower output power. For the maximum wireless coverage, select the 100% selection. -
Page 23: Access Schedule (5.0Ghz)
5GHz Wi-Fi Settings: Access Schedule (5.0GHz) Access Schedules will enable or disable your 5.0GHz wireless access at a set time based on your predefined schedule. This feature is often used for restricting access to all users (such as children, employees, guests) during specific times of the day for parental control or security reasons. -
Page 24: Wi-Fi Protected Setup - Wps (5.0Ghz)
5GHz Wi-Fi Settings: Wi-Fi Protected Setup – WPS (5.0GHz) WPS is a Wi-Fi feature created to make Wi-Fi setup simple and easy. Some wireless Access Points and adapters support this feature with varying names (i.e. one touch setup or WPS). You may enable WPS setup here by selecting the type of WPS setup you wish to use. -
Page 25: 2.4Ghz Wi-Fi Settings
2.4GHz WI-FI SETTINGS 2.4GHz Wi-Fi Settings: Basic Settings (2.4GHz) The Basic Settings page allows you to adjust settings for your 2.4GHz local wireless network. Disable 2.4GHz Wireless Connections: Disabling will turn off all 2.4GHz Wi-Fi activity. Users will no longer be able to connect wirelessly to your 2.4GHz network. - Page 26 Channel Number: Wi-Fi networks operate on specific wireless channels. Some network channels may have more interference than others. If your performance is unstable, try a different channel number. If you are using a repeater with this network, it is recommended you set a static channel, instead of using "Auto." WMM: Prioritizes multimedia data over the wireless network.
-
Page 27: Basic Settings: Guest Networks (2.4Ghz)
2.4GHz Wi-Fi Settings: Basic Settings: Guest Networks (2.4GHz) Click “Enable” to create a Guest Network. Guest Networks provide a separate wireless network, with unique settings for users to connect to. SSID: This is the name of your Guest Network. Broadcast SSID: Disable to hide your SSID from public view. -
Page 28: Advanced Settings (2.4Ghz)
2.4GHz Wi-Fi Settings: Advanced Settings (2.4GHz) Advanced Wireless Settings should only be adjusted by technically advanced users. It is not recommended that novice users adjust these settings to avoid degrading wireless performance. Fragment Threshold: The default and recommended setting is at 2346, meaning the Access point will never fragment any frames that it sends to wireless users. -
Page 29: Wireless Coverage Controls (2.4Ghz)
2.4GHz Wi-Fi Settings: Wireless Coverage Controls (2.4GHz) Adjust the output power of the Access point to control the coverage distance of your 2.4GHz wireless network. For a smaller coverage area, you can select a lower output power. For the maximum wireless coverage, select the 100% selection. -
Page 30: Access Schedule (2.4Ghz)
2.4GHz Wi-Fi Settings: Access Schedule (2.4GHz) Access Schedules will enable or disable your 2.4GHz wireless access at a set time based on your predefined schedule. This feature is often used for restricting access to all users (such as children, employees, guests) during specific times of the day for parental control or security reasons. -
Page 31: Wi-Fi Protected Setup - Wps (2.4Ghz)
2.4GHz Wi-Fi Settings: Wi-Fi Protected Setup – WPS (2.4GHz) WPS is a Wi-Fi feature created to make Wi-Fi setup simple and easy. Some wireless access points and adapters support this feature with varying names (i.e. one touch setup or WPS). You may enable WPS setup here by selecting the type of WPS setup you wish to use. -
Page 32: Network Settings
NETWORK SETTINGS IP Address: The IP address of the Access Point. Subnet Mask: The subnet of the Access Point. Default Gateway: The access point to another network, normally your router. DHCP: The Access Point includes a feature to help manage the IP addresses within your network automatically. - Page 33 DHCP Client Range: The range of IP addresses the Access Point’s DHCP server will assign to users and devices connecting to the Access Point. Domain Name: The Domain Name allows you to change the URL which is used to access the Setup Menu for the Access Point.
-
Page 34: Usb Storage
USB STORAGE USB Storage: Local Sharing Share USB storage devices with computers on the local network of the Access Point. Insert a USB storage device, such as a flash drive or external hard drive, to the USB port on the back of the Access and follow the directions below for your operating system. - Page 35 Windows 7 and Vista To access the drive from your Windows desktop: Note: If the USB drive does not appear automatically under your Networked devices (Windows 7, Vista or Mac OS X), you will need to Map the Network Drive. a) Click the Start button.
- Page 36 Windows XP To access the drive from your Windows desktop: Note: If the USB drive does not appear automatically under your Networked devices (Windows 7, Vista or Mac OS X), you will need to Map the Network Drive. a) Click the Start button.
- Page 37 Mac OS X To access the drive from your Mac desktop: Note: If the USB drive does not appear automatically under your Networked devices, you will need to Map your Network Drive (Instructions below). a) Open Finder. b) On the left-hand menu, under Shared, click AMPED_USB. To Map the network drive: a) Open Finder.
-
Page 38: Management Features
MANAGEMENT FEATURES The Management features on the Access Point allow you to view the status of your Access Point and your wireless network. System Status The Access Point System Status page provides full information regarding the system, wireless network and configurations as well as the current IP settings of the Access Point. -
Page 39: System Clock
Management: System Clock Maintain the internal clock for the Access Point by syncing with your computer’s time or over the Internet. Your system clock settings need to be accurate in order for logs and wireless access schedules to work correctly. -
Page 40: System Logs
System Logs are useful for viewing the activity and history of the Access Point. The System Logs are also used by Amped Wireless Elite Support Concierges to help troubleshoot your Access Point when needed. It is recommended that you enable all logs in the event that troubleshooting is required. All log entries are... -
Page 41: Upgrade Firmware
Manual Firmware Upgrade: In the case that the Range Extender does not have access to the Internet, you can manually upgrade the firmware by downloading the firmware file from the Amped Wireless Elite Support website. The firmware update is downloaded as a zip file and you will need to have an unzipping program to open the file. - Page 42 To manually upgrade your firmware: a) Download the file from ampedwireless and remember the location where you saved it. Firmware files may also be provided by Amped Wireless Elite Support Concierges. b) Click Choose File and locate the file. Click Upload to begin upgrading.
-
Page 43: Save/Reload Settings
Management: Save/Reload Settings Saving your current settings allows you to back- up your current settings which may be reloaded at a later time. This feature may be useful for testing new features and settings without having to worry about returning to a stable platform. To save current settings: To load previously saved settings: Click Save... -
Page 44: Password Settings
Management: Password Settings By default, the Access Point does not require a password to log on to the web menu. If you wish to enable a password to protect unauthorized access to the web menu, you may enter one here. -
Page 45: Technical Specification
TECHNICAL SPECIFICATION Wireless Standard: 802.11a/b/g/n/ac Ports: 1 x RJ-45 10/100 /1000 Network port Frequency Band: 2.4/5GHz 4 x RJ-45 10/100/1000 LAN ports Wireless Speed: 2.4GHz: 800Mbps (Tx/Rx) 1 x USB 2.0 Port for Storage Devices 5.0GHz: 1733Mbps (Tx/Rx) 1 x USB 3.0 Port for Storage Devices Amplifier: 4 x 2.4GHz Amplifiers Warranty: 1 Year 4 x 5GHz Amplifiers... -
Page 46: Default Settings
DEFAULT SETTINGS The default settings for your Access Point are listed here. If for some reason you need to return your Access Point back to default settings, hold down the Reset button on the back panel for 10 seconds. The Access Point will reset back to factory settings as listed below: IP Address: 192.168.80.240 Web Menu Access:... -
Page 47: Troubleshooting & Support Information
TROUBLESHOOTING & SUPPORT INFORMATION We are here to help. If you have any issues with your Access Point please contact us. - Page 48 Troubleshooting The tips in this guide are listed in order of relevance. Try solution (a) before trying solution (b), etc. Troubleshooting: Web Menu Access Issues I entered setup.ampedwireless.com and it failed to open the web menu. Make sure your computer is connected to the Access Point wirelessly and NOT using a network cable. Ensure the power is plugged in and on.
- Page 49 Troubleshooting: Connection Issues I do not have Internet access when connecting to the Access Point. Your router or original network may not have Internet access. First check to see if you are able to access the Internet by connecting directly with your router. If you cannot, there is a problem with your router that needs to be fixed first.
- Page 50 My Access Point was working fine previously, but now I can no longer access the Internet through the Access Point. The settings on your router’s network may have changed or you may have lost internet connection on your home router. Any changes to the DHCP settings of your home router may affect the Internet connection of the Access Point.
- Page 51 Reset the Access Point back to default settings and try the Basic Setup again. To reset the Access Point back to default settings, hold the Reset Button (on the back panel) down for five (5) to ten (10) seconds. After the Access Point has fully reset, use an Ethernet cable and connect to the Access Point. Log in to the web menu at http://setup.ampedwireless.com and reconfigure the settings for your Access Point.
- Page 52 Troubleshooting: Wireless Issues I am only getting 3 or 4 wireless signal bars on my wireless computer and I am within 10 feet of the Access Point. Step back at least 10 feet from the Access Point and check your signal again. The Access Point emits high power, long range Wi-Fi signals that may confuse your wireless adapter signal reading at close range.
- Page 53 Your Access Point may be installed in a poor location. Avoid setting up your Access Point in areas with high interference, such as near fridges, microwaves, metallic objects and low surfaces. Install the Access Point in a higher location if possible. d.
- Page 54 Troubleshooting: USB Storage Issues I cannot access my USB storage device after I plug it into the router. Follow the instructions below for your operating system. Windows 7 and Vista To access the drive from your Windows desktop: Note: If the USB drive does not appear automatically under your Networked devices (Windows 7, Vista or Mac OS X), you will need to Map the Network Drive.
- Page 55 d) Select a drive letter (any), then enter in the folder field either of the following depending on which USB port is being used: \\AMPED_USB\usb3\ \\router’s LAN IP address\usb3\ \\AMPED_USB\usb2\ \\router’s LAN IP address\usb2\ e) If the drive fails to open, click browse and locate Amped_USB...
- Page 56 d) If the drive fails to open, click browse and locate Amped_USB under Network. Mac OS X To access the drive from your Mac desktop: Note: If the USB drive does not appear automatically under your Networked devices (Windows 7, Vista or Mac OS X), you will need to Map the Network Drive.
- Page 57 Make sure your USB storage device is not corrupted and is working properly and try again. Additional USB Storage troubleshooting tips may be available online at the Amped Wireless Elite Support Center. Please check the Elite Support Center for the latest updates and features for USB Storage support.
- Page 58 My Wireless Access Schedule is being erratic and not working at the correct times. You need to adjust your Time Zone Settings from the Management web menu page. Wi-Fi Protected Setup (WPS) is not working. Push button configuration does not detect the connection. The Access Point supports WPS connections, however, some companies may use proprietary code for their own push button configurations.
Need help?
Do you have a question about the APA2600M and is the answer not in the manual?
Questions and answers