Table of Contents
Advertisement
Available languages
Available languages
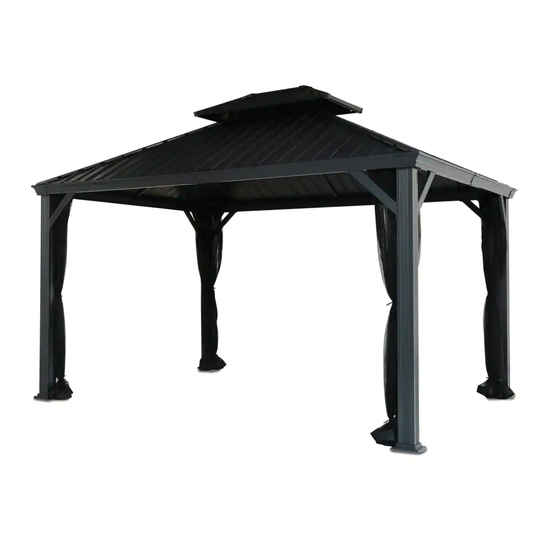
SKYLINE 10'x12' DOUBLE-
TIER GAZEBO
PRODUCT NO. 088-2278-0
Assembly INSTRUCTIONS
HAVING TROUBLE?
TOLL-FREE:
1-888-670-6684
IMPORTANT: Please read this manual carefully
before beginning assembly of this product.
Keep this manual for future reference.
Scan the QR
code for online
assembly
instruction video.
Advertisement
Table of Contents

Related Manuals for Canvas 088-2278-0


Summary of Contents for Canvas 088-2278-0
- Page 1 SKYLINE 10'x12' DOUBLE- TIER GAZEBO PRODUCT NO. 088-2278-0 ASSEMBLY INSTRUCTIONS HAVING TROUBLE? TOLL-FREE: Scan the QR 1-888-670-6684 code for online assembly instruction video. IMPORTANT: Please read this manual carefully before beginning assembly of this product. Keep this manual for future reference.
- Page 2 We would love to hear from you and welcome your thoughtful feedback. Visit our website at canadiantire.ca to tell us about your experience, and share your photos with us using #mycanvasstyle. Show us how you bring CANVAS ® products to life. We can’t wait to see!
- Page 3 IMPORTANT HOW TO USE OUR QR CODES follow the steps below to scan our QR codes and access helpful assembly videos. Open the Wait for the camera on camera to your smart recognize device and and scan point it at the QR code the QR code Tap the...
- Page 4 TABLE OF CONTENTS Warnings Required and Recommended Tools Important Safety Information Parts List Hardware List General Preparations Step-By-Step Guide Caring for Your Item Warranty WARNING! TO REDUCE THE RISK OF SERIOUS INJURY, READ THE FOLLOWING SAFETY INFORMATION. Caution! Always keep children under close supervision while they are playing around this product.
- Page 5 TOOLS REQUIRED 8-Foot Ladder 15-Foot Tape (Qty. 2 recommended) measure people RECOMMENDED TOOLS Socket wrench with Cordless drill or Driver bit extension driver with 4mm 10mm socket (4-inch recommended) Allen head bit 4mm Allen or Hex bit SKYLINE 10'X12' DOUBLE-TIER GAZEBO...
- Page 6 IMPORTANT SAFETY INSTRUCTIONS CAUTION! • Proper placement of the gazebo is essential. Do not place the product underneath electrical lines. • Keep children under close supervision while they are playing around this product. This product contains small parts which can be swallowed by children. •...
- Page 7 PARTS LIST ITEM DESCRIPTION THUMBNAIL QUANTITY Post leg Long side left beam Long side right beam Short side left beam Short side right beam Corner rafter Long side rafter branch assembly Short side rafter branch assembly Corbel Crossbeam support bracket Roof corner cap Long side left roof panel...
- Page 8 PARTS LIST ITEM DESCRIPTION THUMBNAIL QUANTITY Left middle roof panel (long & short side) Right middle roof panel (long & short side) Left small roof panel (long & short side) Right small roof panel (long & short side) Short side center roof panel Long side center roof edge cap...
- Page 9 PARTS LIST ITEM DESCRIPTION THUMBNAIL QUANTITY Beam corner cover Beam center cover Netting & wall curtain hook (installed) Netting 2nd tier netting Chandelier hook (weight capacity 25lb) 2nd tier corner rafter 2nd tier corner cap 2nd tier long beam 2nd tier short beam 2nd tier short side roof panel 2nd tier long side...
- Page 10 PARTS LIST ITEM DESCRIPTION THUMBNAIL QUANTITY Magnet Long fiberglass rod Short fiberglass rod Tieback bracket SKYLINE 10'X12' DOUBLE-TIER GAZEBO...
- Page 11 EXPLODED PARTS SKYLINE 10'X12' DOUBLE-TIER GAZEBO...
- Page 12 EXPLODED PARTS SKYLINE 10'X12' DOUBLE-TIER GAZEBO...
- Page 13 HARDWARE LIST ITEM DESCRIPTION THUMBNAIL QUANTITY M6x10 bolt M6x15 bolt M6x40 bolt M6x55 bolt 10mm nut with M6 threads Roof bolt Washer Nut cap Stake Hex key Wrench SKYLINE 10'X12' DOUBLE-TIER GAZEBO...
- Page 14 STEP-BY-STEP GUIDE GENERAL PREPARATIONS • When choosing the location for your gazebo build, plan to have at least 6 feet (approximately 1.8 meter) of clearance beyond the footprint of the gazebo to allow for installing parts. This is in conjunction with the Important Safety Instructions. •...
- Page 15 STEP-BY-STEP GUIDE STEP-BY-STEP GUIDE STEP 1 NOTE: Install all bolts by hand loosely threaded BEFORE fully tightening any bolts. Once all bolts are installed loosely, then secure the bolts before moving on to the next step. SKYLINE 10'X12' DOUBLE-TIER GAZEBO...
- Page 16 STEP-BY-STEP GUIDE STEP-BY-STEP GUIDE STEP 2 NOTE: The beam ends have a plastic insert for easier assembly. This part is critical for a complete assembly of your gazebo. If any of your beams are missing this plastic insert please contact us at 1-888-670-6684 NOTE: Install all bolts by hand loosely threaded BEFORE fully tightening...
- Page 17 STEP 3 NOTE: The beam ends have a plastic insert for easier assembly. This part is critical for a complete assembly of your gazebo. If any of your beams are missing this plastic insert please contact us at 1-888-670-6684 NOTE: NOTE: Install all bolts by hand loosely threaded BEFORE fully tightening...
- Page 18 STEP-BY-STEP GUIDE STEP-BY-STEP GUIDE STEP 4 TIP: Sometimes holes aren't completely aligned. You can use the hex keys provided to help you align bolt holes while threading in the bolts by hand. For a video of this method, scan the QR code provided. NOTE: Install all bolts by hand loosely threaded BEFORE fully tightening...
- Page 19 STEP 5 Ground TIP: Re-use the cardboard packaging to prevent damage to parts NOTE: during this step. Install all bolts by hand loosely threaded BEFORE fully tightening any bolts. Once all bolts are installed loosely, then secure the bolts before moving on to the next step.
- Page 20 STEP-BY-STEP GUIDE STEP-BY-STEP GUIDE STEP 6 NOTE: Install all bolts by hand loosely threaded BEFORE fully tightening any bolts. Once all bolts are installed loosely, then secure the bolts before moving on to the next step. SKYLINE 10'X12' DOUBLE-TIER GAZEBO...
- Page 21 STEP 7 NOTE: Install all bolts by hand loosely threaded BEFORE fully tightening any bolts. Once all bolts are installed loosely, then secure the bolts before moving on to the next step. SKYLINE 10'X12' DOUBLE-TIER GAZEBO...
- Page 22 STEP-BY-STEP GUIDE STEP-BY-STEP GUIDE STEP 8 NOTE: Install all bolts by hand loosely threaded BEFORE fully tightening any bolts. Once all bolts are installed loosely, then secure the bolts before moving on to the next step. SKYLINE 10'X12' DOUBLE-TIER GAZEBO...
- Page 23 STEP 9 IMPORTANT: Squaring the gazebo frame is a very important step to ensure easier assembly and proper fitment of parts. To do this, measure the distance between the legs from the outside corners of each leg post in the following order: A to B C to D These measurements should be the same.
- Page 24 STEP-BY-STEP GUIDE STEP-BY-STEP GUIDE STEP 10 NOTE: Part 9 has a pin on one end. This pin should face upward towards the beam during installation and install in the hole provided. NOTE: Install all bolts by hand loosely threaded BEFORE fully tightening any bolts.
- Page 25 STEP 11 NOTE: Install all bolts by hand loosely threaded BEFORE fully tightening any bolts. Once all bolts are installed loosely, then secure the bolts before moving on to the next step. SKYLINE 10'X12' DOUBLE-TIER GAZEBO...
- Page 26 STEP-BY-STEP GUIDE STEP-BY-STEP GUIDE STEP-BY-STEP GUIDE STEP-BY-STEP GUIDE STEP 12 STEP 12 TIP: TIP: If you plan to move the gazebo If you plan to move the gazebo after fully assembling it, you can after fully assembling it, you can skip this step and the next step skip this step and the next step (Steps 12 &...
- Page 27 STEP 13 STEP 13 NOTE: NOTE: Install all bolts by hand loosely Install all bolts by hand loosely threaded BEFORE fully tightening threaded BEFORE fully tightening any bolts. Once all bolts are installed any bolts. Once all bolts are installed loosely, then secure the bolts before loosely, then secure the bolts before moving on to the next step.
- Page 28 STEP-BY-STEP GUIDE STEP-BY-STEP GUIDE STEP 14 NOTE: Install all bolts by hand loosely threaded BEFORE fully tightening any bolts. Once all bolts are installed loosely, then secure the bolts before moving on to the next step. SKYLINE 10'X12' DOUBLE-TIER GAZEBO...
- Page 29 STEP 15 NOTE: Install all bolts by hand loosely threaded BEFORE fully tightening any bolts. Once all bolts are installed loosely, then secure the bolts before moving on to the next step. SKYLINE 10'X12' DOUBLE-TIER GAZEBO...
- Page 30 STEP-BY-STEP GUIDE STEP-BY-STEP GUIDE STEP 16 NOTE: Install all bolts by hand loosely threaded BEFORE fully tightening any bolts. Once all bolts are installed loosely, then secure the bolts before moving on to the next step. SKYLINE 10'X12' DOUBLE-TIER GAZEBO...
- Page 31 STEP 17 NOTE: Install all bolts by hand loosely threaded BEFORE fully tightening any bolts. Once all bolts are installed loosely, then secure the bolts before moving on to the next step. SKYLINE 10'X12' DOUBLE-TIER GAZEBO...
- Page 32 STEP-BY-STEP GUIDE STEP-BY-STEP GUIDE STEP 18 CAUTION: When setting the second tier in place, hoist long ways through the understructure as shown and rest it on the Main Roof Rafter Hub (25). The second tier may be heavy and/or awkward for two people. If you find it to be difficult you may want to get assistance from a third person.
- Page 33 STEP 19 NOTE: Secure bottom and sides of mosquito netting by pressing the hook and loop closures together. Velcor TIP: The fiberglass rods are flexible so that you can bend them to fit into the receiving holes. They should be straight once fully installed in the holes. Start by inserting one end of the rod into the receiving hole, then flex the rod by pulling the center of the rod towards you with one hand while holding the other end with the other hand.
- Page 34 STEP-BY-STEP GUIDE STEP-BY-STEP GUIDE STEP 20 CAUTION: Be careful when unfolding the rafter branches to avoid injury or pinching. NOTE: Install all bolts by hand loosely threaded BEFORE fully tightening any bolts. Once all bolts are installed loosely, then secure the bolts before moving on to the next step.
- Page 35 STEP 21 NOTE: Install all bolts by hand loosely threaded BEFORE fully tightening any bolts. Once all bolts are installed loosely, then secure the bolts before moving on to the next step. SKYLINE 10'X12' DOUBLE-TIER GAZEBO...
- Page 36 STEP-BY-STEP GUIDE STEP-BY-STEP GUIDE STEP 22 TIP: NOTE: Make sure holes at bottom Install all nuts by hand loosely of panels align before threaded BEFORE fully tightening tightening nuts fully. For a any nuts. Once all nuts are installed video of this method, scan loosely, then secure the nuts the QR code provided.
- Page 37 STEP 23 STEP 23 NOTE: NOTE: TIP: TIP: Install all bolts by hand loosely Install all bolts by hand loosely threaded BEFORE fully tightening threaded BEFORE fully tightening Make sure holes at bottom Make sure holes at bottom any bolts. Once all bolts are installed any bolts.
- Page 38 STEP-BY-STEP GUIDE STEP-BY-STEP GUIDE STEP-BY-STEP GUIDE STEP-BY-STEP GUIDE STEP 24 STEP 24 NOTE: NOTE: TIP: TIP: Install all bolts by hand loosely Install all bolts by hand loosely threaded BEFORE fully tightening threaded BEFORE fully tightening Make sure holes at bottom Make sure holes at bottom any bolts.
- Page 39 STEP 25 STEP 25 NOTE: NOTE: Place roof edge caps (Parts 19, Place roof edge caps (Parts 19, 20, & 21) over the ends of the 20, & 21) over the ends of the roof panels as shown below. roof panels as shown below. 21 20 19 21 20 19 2 3 4 5...
- Page 40 STEP-BY-STEP GUIDE STEP-BY-STEP GUIDE STEP 26 TIP: To install Roof Corner Cap (Part 11), start by locating the end pin into the receiving hole of the 2nd Tier Corner Rafter (Part 33) leg. Once the pin is inserted, swing the Roof Corner Cap down into position.
- Page 41 STEP 27 TIP: TIP: There are five (5) grommets on the If you skipped Steps 12 & 13 earlier, move your short sides and seven (7) grommets gazebo into its final position now. Repeat the on the long sides. Start hanging the frame squaring procedure from Step 9 after netting by working your way from left moving the gazebo and then complete Steps...
- Page 42 STEP-BY-STEP GUIDE STEP-BY-STEP GUIDE STEP-BY-STEP GUIDE STEP-BY-STEP GUIDE STEP 28 STEP 28 NOTE: NOTE: Magnet Magnet Insert magnet (part 40) Insert magnet (part 40) connection connection into the magnet pocket on into the magnet pocket on here here the back of the curtain. the back of the curtain.
- Page 43 CARING FOR YOUR ITEM GAZEBO Always keep children under close supervision while they are using or around this product. Never leave children unattended. This product is intended for domestic outdoor use only. Do not light any fires below or near the product. Use &...
- Page 44 WARRANTY 3 YEARS LIMITED WARRANTY* This CANVAS product carries a three (3) year warranty against defects in workmanship and materials on the frame and 1 year warranty for the remaining parts. Trileaf Distribution agrees to replace a defective product free of charge within the stated warranty period, when returned by the original purchaser with proof of purchase.
- Page 46 ABRI DE JARDIN À TOIT À DEUX NIVEAUX DE 10 X 12 PI D’ARTICLE : 088-2278-0 INSTRUCTIONS D’ASSEMBLAGE DES DIFFICULTÉS? Balayez le code NUMÉRO SANS FRAIS : QR pour visionner 1 888 670-6684 la vidéo sur les instructions d’assemblage en IMPORTANT : Veuillez lire attentivement le ligne.
- Page 47 CANVAS Qu’il soit question de meubles tendance, de décorations des Fêtes ou d’articles essentiels de Vie au jardin, CANVAS vous permet de rafraîchir facilement votre espace afin qu’il unique et votre façon de vivre au quotidien.
- Page 48 IMPORTANT COMMENT UTILISER NOS CODES QR Suivez les étapes ci-dessous pour balayer nos codes QR et accéder à des vidéos d’assemblage utiles. Ouvrez la Attendez que caméra de la caméra votre appareil reconnaisse intelligent et et balaie le pointez-le sur code QR le code QR Appuyez sur...
- Page 49 TABLE DES MATIÈRES Avertissement Outils recommandés Renseignements de sécurité importants Liste des pièces Liste du matériel Préparation générale Directives détaillées Entretien de votre article Garantie AVERTISSEMENT! POUR RÉDUIRE LE RISQUE DE BLESSURES GRAVES, LISEZ LES CONSIGNES DE SÉCURITÉ SUIVANTES. Attention! Ayez toujours les enfants sous étroite surveillance pendant qu’ils jouent à...
- Page 50 OUTILS NÉCESSAIRES Échelle de 8 pi Ruban à mesurer (quantité recommandée : 1) de 15 pi personnes OUTILS RECOMMANDÉS Clé à douille avec Perceuse sans fil ou Rallonge de mèche tournevis avec embout douille de 10 mm (4 po recommandé) Allen de 4 mm Embout hexagonal ou Allen de 4 mm...
- Page 51 CONSIGNES DE SÉCURITÉ IMPORTANTES ATTENTION! • O Il est essentiel d'installer l'abri de jardin à un endroit approprié. Ne placez pas l'article sous des lignes électriques. • Ayez toujours les enfants sous étroite surveillance pendant qu’ils jouent à proximité du produit. Cet article contient de petites pièces que les enfants peuvent facilement avaler.
- Page 52 LISTE DES PIÈCES ÉLÉMENT DESCRIPTION ILLUSTRATION QUANTITÉ Pied Poutre latérale gauche longue Poutre latérale droite longue Poutre latérale gauche courte Poutre latérale droite courte Chevron de coin Assemblage de la branche de chevron du côté long Assemblage de la branche de chevron du côté...
- Page 53 LISTE DES PIÈCES ÉLÉMENT DESCRIPTION ILLUSTRATION QUANTITÉ Panneau de toit central gauche (côtés long et court) Panneau de toit central droit (côtés long et court) Petit panneau de toit gauche (côtés long et court) Petit panneau de toit droit (côtés long et court) Panneau de toit central court Capuchon de bord de...
- Page 54 LISTE DES PIÈCES ÉLÉMENT DESCRIPTION ILLUSTRATION QUANTITÉ Protège-poutre de coin Protège-poutre central Crochet pour moustiquaire et rideau (installé) Moustiquaire Moustiquaire de 2e niveau Crochet pour lustre (poids maximal : 25 lb) Chevron de coin de 2e niveau Capuchon de coin de 2e niveau Poutre longue de 2e niveau...
- Page 55 LISTE DES PIÈCES ÉLÉMENT DESCRIPTION ILLUSTRATION QUANTITÉ Magnet Tige en fibre de verre longue Tige en fibre de verre courte Support de fixation arrière ABRI DE JARDIN À TOIT À DEUX NIVEAUX DE 10 X 12 PI...
- Page 56 VUE ÉCLATÉE ABRI DE JARDIN À TOIT À DEUX NIVEAUX DE 10 X 12 PI...
- Page 57 VUE ÉCLATÉE ABRI DE JARDIN À TOIT À DEUX NIVEAUX DE 10 X 12 PI...
- Page 58 LISTE DU MATÉRIEL ÉLÉMENT DESCRIPTION ILLUSTRATION QUANTITÉ Boulon M6x10 Boulon M6x15 Boulon M6x40 Boulon M6x55 Écrou de 10 mm avec filets M6 Boulon de toit Rondelle Capuchon d’écrou Piquets Clé hexagonale Clé ABRI DE JARDIN À TOIT À DEUX NIVEAUX DE 10 X 12 PI...
- Page 59 STEP-BY-STEP GUIDE PRÉPARATIONS GÉNÉRALES • Au moment de choisir l’emplacement de l’abri de jardin, prévoyez un dégagement d’au moins 6 pi (environ 1,8 m) au-delà de l’espace de l’abri de jardin pour permettre l’installation des pièces. Cela est jumelé avec les consignes de sécurité importantes. •...
- Page 60 STEP-BY-STEP GUIDE DIRECTIVES DÉTAILLÉES ÉTAPE 1 REMARQUE : Installez tous les boulons à la main, sans les serrer, AVANT de les serrer complètement. Une fois que tous les boulons sont installés, serrez-les avant de passer à l’étape suivante. ABRI DE JARDIN À TOIT À DEUX NIVEAUX DE 10 X 12 PI...
- Page 61 STEP-BY-STEP GUIDE STEP-BY-STEP GUIDE DIRECTIVES DÉTAILLÉES ÉTAPE 2 REMARQUE : Les extrémités des poutres ont des embouts en plastique pour faciliter l'assemblage. Cette pièce est essentielle pour l'assemblage complet de votre abri de jardin. S'il manque un embout en plastique sur l'une des poutres, veuillez communiquer avec nous au 1 888 670-6684 REMARQUE :...
- Page 62 ÉTAPE 3 REMARQUE : Les extrémités des poutres ont des embouts en plastique pour faciliter l'assemblage. Cette pièce est essentielle pour l'assemblage complet de votre abri de jardin. S'il manque un embout en plastique sur l'une des poutres, veuillez communiquer avec nous au 1 888 670-6684 REMARQUE : REMARQUE :...
- Page 63 STEP-BY-STEP GUIDE STEP-BY-STEP GUIDE DIRECTIVES DÉTAILLÉES ÉTAPE 4 ASTUCE : Parfois, les trous ne sont pas complètement alignés. Vous pouvez utiliser les clés hexagonales fournies pour aligner les trous de boulon à la main. Pour une vidéo de cette méthode, balayez le code QR fourni. REMARQUE : Installez tous les boulons à...
- Page 64 ÉTAPE 5 MISE À LA TERRE ASTUCE : Réutilisez l’emballage en carton pour éviter d’endommager les REMARQUE : pièces à cette étape. Installez tous les boulons à la main, sans les serrer, AVANT de les serrer complètement. Une fois que tous les boulons sont installés, serrez-les avant de passer à...
- Page 65 STEP-BY-STEP GUIDE STEP-BY-STEP GUIDE DIRECTIVES DÉTAILLÉES ÉTAPE 6 REMARQUE : Installez tous les boulons à la main, sans les serrer, AVANT de les serrer complètement. Une fois que tous les boulons sont installés, serrez-les avant de passer à l’étape suivante. ABRI DE JARDIN À...
- Page 66 ÉTAPE 7 REMARQUE : Installez tous les boulons à la main, sans les serrer, AVANT de les serrer complètement. Une fois que tous les boulons sont installés, serrez-les avant de passer à l’étape suivante. ABRI DE JARDIN À TOIT À DEUX NIVEAUX DE 10 X 12 PI...
- Page 67 STEP-BY-STEP GUIDE STEP-BY-STEP GUIDE DIRECTIVES DÉTAILLÉES ÉTAPE 8 REMARQUE : Installez tous les boulons à la main, sans les serrer, AVANT de les serrer complètement. Une fois que tous les boulons sont installés, serrez-les avant de passer à l’étape suivante. ABRI DE JARDIN À...
- Page 68 ÉTAPE 9 IMPORTANT : L’équerrage du cadre de l’abri de jardin est une étape très importante pour faciliter l’assemblage et assurer un bon ajustement des pièces. Pour ce faire, mesurez la distance entre les pieds et les coins extérieurs de chaque pied dans l’ordre suivant : A à...
- Page 69 STEP-BY-STEP GUIDE STEP-BY-STEP GUIDE DIRECTIVES DÉTAILLÉES ÉTAPE 10 REMARQUE : La pièce 9 comporte une goupille à une extrémité Cette goupille doit être orientée vers le haut vers la poutre pendant l’installation et installée dans le trou prévu. REMARQUE : Installez tous les boulons à...
- Page 70 ÉTAPE 11 REMARQUE : Installez tous les boulons à la main, sans les serrer, AVANT de les serrer complètement. Une fois que tous les boulons sont installés, serrez-les avant de passer à l’étape suivante. ABRI DE JARDIN À TOIT À DEUX NIVEAUX DE 10 X 12 PI...
- Page 71 STEP-BY-STEP GUIDE STEP-BY-STEP GUIDE DIRECTIVES DÉTAILLÉES STEP-BY-STEP GUIDE STEP-BY-STEP GUIDE DIRECTIVES DÉTAILLÉES ÉTAPE 12 ASTUCE : ASTUCE : Si vous prévoyez déplacer l’abri de Si vous prévoyez déplacer l’abri de jardin après l’avoir assemblé com- jardin après l’avoir assemblé com- plètement, vous pouvez sauter cette plètement, vous pouvez sauter cette étape et l’étape suivante (étapes 12 et...
- Page 72 ÉTAPE 13 REMARQUE : REMARQUE : Installez tous les boulons à la main, Installez tous les boulons à la main, sans les serrer, AVANT de les serrer sans les serrer, AVANT de les serrer complètement. Une fois que tous les complètement.
- Page 73 STEP-BY-STEP GUIDE STEP-BY-STEP GUIDE DIRECTIVES DÉTAILLÉES ÉTAPE 14 REMARQUE : Installez tous les boulons à la main, sans les serrer, AVANT de les serrer complètement. Une fois que tous les boulons sont installés, serrez-les avant de passer à l’étape suivante. ABRI DE JARDIN À...
- Page 74 ÉTAPE 15 REMARQUE : Installez tous les boulons à la main, sans les serrer, AVANT de les serrer complètement. Une fois que tous les boulons sont installés, serrez-les avant de passer à l’étape suivante. ABRI DE JARDIN À TOIT À DEUX NIVEAUX DE 10 X 12 PI...
- Page 75 STEP-BY-STEP GUIDE STEP-BY-STEP GUIDE DIRECTIVES DÉTAILLÉES ÉTAPE 16 REMARQUE : Installez tous les boulons à la main, sans les serrer, AVANT de les serrer complètement. Une fois que tous les boulons sont installés, serrez-les avant de passer à l’étape suivante. ABRI DE JARDIN À...
- Page 76 ÉTAPE 17 REMARQUE : Installez tous les boulons à la main, sans les serrer, AVANT de les serrer complètement. Une fois que tous les boulons sont installés, serrez-les avant de passer à l’étape suivante. ABRI DE JARDIN À TOIT À DEUX NIVEAUX DE 10 X 12 PI...
- Page 77 STEP-BY-STEP GUIDE STEP-BY-STEP GUIDE DIRECTIVES DÉTAILLÉES CAUTION : ÉTAPE 18 Lors de la mise en place du deuxième niveau, hissez les côtés longs à travers la structure inférieure comme illustré et déposez-les sur le moyeu de chevron de toit principal (25). Le deuxième niveau peut être lourd ou gênant pour deux personnes.
- Page 78 ÉTAPE 19 REMARQUE : Fixez le bas et les côtés du moustiquaire en pressant les fermetures autoagrippantes ensemble. Les tiges en fibre de verre sont flexibles et vous pouvez les plier pour les insérer dans les trous de réception. Velcor ASTUCE : Elles doivent être droites une fois qu’elles sont complètement installées dans les trous.
- Page 79 STEP-BY-STEP GUIDE STEP-BY-STEP GUIDE DIRECTIVES DÉTAILLÉES ÉTAPE 20 CAUTION : Soyez prudent lorsque vous dépliez les branches de chevron pour éviter les blessures ou les pincements. REMARQUE : Installez tous les boulons à la main, sans les serrer, AVANT de les serrer complètement.
- Page 80 ÉTAPE 21 REMARQUE : Installez tous les boulons à la main, sans les serrer, AVANT de les serrer complètement. Une fois que tous les boulons sont installés, serrez-les avant de passer à l’étape suivante. ABRI DE JARDIN À TOIT À DEUX NIVEAUX DE 10 X 12 PI...
- Page 81 STEP-BY-STEP GUIDE STEP-BY-STEP GUIDE DIRECTIVES DÉTAILLÉES ÉTAPE 22 ASTUCE : REMARQUE : Assurez-vous que les Installez tous les écrous à la main, trous au bas des panneaux sans les serrer, AVANT de les sont bien alignés avant de serrer complètement. Une fois que serrer les écrous.
- Page 82 ÉTAPE 23 REMARQUE : REMARQUE : ASTUCE : ASTUCE : Installez tous les boulons à la main, Installez tous les boulons à la main, sans les serrer, AVANT de les serrer sans les serrer, AVANT de les serrer Assurez-vous que les trous Assurez-vous que les trous complètement.
- Page 83 STEP-BY-STEP GUIDE STEP-BY-STEP GUIDE DIRECTIVES DÉTAILLÉES STEP-BY-STEP GUIDE STEP-BY-STEP GUIDE DIRECTIVES DÉTAILLÉES ÉTAPE 24 REMARQUE : REMARQUE : ASTUCE : ASTUCE : Installez tous les boulons à la main, Installez tous les boulons à la main, sans les serrer, AVANT de les serrer sans les serrer, AVANT de les serrer Assurez-vous que les trous Assurez-vous que les trous...
- Page 84 ÉTAPE 25 REMARQUE : REMARQUE : Placez les capuchons de bords de Placez les capuchons de bords de toit (pièces 19, 20 et 21) sur les toit (pièces 19, 20 et 21) sur les extrémités des panneaux de toit, extrémités des panneaux de toit, comme illustré...
- Page 85 STEP-BY-STEP GUIDE STEP-BY-STEP GUIDE DIRECTIVES DÉTAILLÉES ÉTAPE 26 ASTUCE : Pour installer le capuchon de bord de toit (pièce 11), commencez par insérer la goupille d’extrémité dans le trou de réception du chevron de coin de 2e niveau (pièce 33). Une fois la goupille insérée, abaissez le capuchon de coin de toit en position.
- Page 86 ÉTAPE 27 ASTUCE : ASTUCE : Il y a cinq (5) œillets sur les côtés Si vous avez sauté les étapes 12 et 13 plus tôt, courts et sept (7) œillets sur les côtés déplacez votre abri de jardin à son longs.
- Page 87 STEP-BY-STEP GUIDE STEP-BY-STEP GUIDE DIRECTIVES DÉTAILLÉES STEP-BY-STEP GUIDE STEP-BY-STEP GUIDE DIRECTIVES DÉTAILLÉES ÉTAPE 28 REMARQUE : REMARQUE : Raccord de l’aimant ici Raccord de l’aimant ici Insérez l’aimant (pièce 40) Insérez l’aimant (pièce 40) dans la pochette aimantée dans la pochette aimantée à...
- Page 88 ENTRETIEN DE VOTRE ARTICLE ABRI DE JARDIN Surveillez toujours attentivement les enfants lorsqu’ils utilisent cet article ou jouent à proximité de celui-ci. Ne laissez jamais les enfants sans surveillance. Cet article est exclusivement conçu pour un usage résidentiel extérieur. Instructions d’utilisation N’allumez pas de feu sous cet article ou à...
- Page 89 GARANTIE GARANTIE LIMITÉE DE 3 ANS* Cet article CANVAS est accompagné d’une garantie de trois (3) ans contre les défauts de fabrication et de matériaux sur le cadre et de un (1) an sur les autres pièces. Distribution Trifeuil consent à remplacer l’article défectueux sans frais lorsqu’il est retourné, accompagné...
Need help?
Do you have a question about the 088-2278-0 and is the answer not in the manual?
Questions and answers