
Related Manuals for Samsung SGH-C414M


Summary of Contents for Samsung SGH-C414M
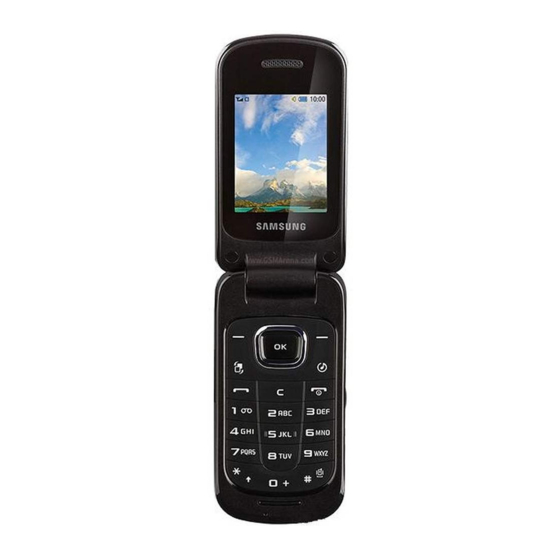
- Page 1 SGH-C414M P O R T A B L E Q u a d - B A N D M O B I L E P H O N E User Manual Please read this manual before operating your phone, and keep it for future reference.
- Page 2 All Intellectual Property, as defined below, owned by or which is otherwise the property of Samsung or its respective suppliers relating to the SAMSUNG Phone, including but not limited to, accessories, parts, or software relating there to (the “Phone System”), is proprietary to Samsung and protected under federal laws, state laws, and international treaty provisions.
- Page 3 (including, via cable, Bluetooth® or otherwise) of such content may be an infringement of privacy or copyright law. Neither Samsung Electronics Canada Inc. nor any of its affiliates shall be liable or responsible for any data or content disclosed, reproduced, downloaded or distributed by the user of this equipment.
- Page 4 Dynamic Noise Suppression from Audience™ Your phone is equipped with an advanced voice processing chip that delivers clear mobile calls by suppressing background noise, intermittent sounds (like a siren or nearby conversation), and echoes, allowing you to hear and be heard nearly anywhere. How Does It Work? Based on the intelligence of the human hearing system, the technology:...
- Page 5 EXCEPT AS SET FORTH IN THE EXPRESS WARRANTY CONTAINED ON THE WARRANTY PAGE ENCLOSED WITH THE PRODUCT, THE PURCHASER TAKES THE PRODUCT "AS IS", AND SAMSUNG MAKES NO EXPRESS OR IMPLIED WARRANTY OF ANY KIND WHATSOEVER WITH RESPECT TO THE PRODUCT, INCLUDING BUT NOT LIMITED TO THE MERCHANTABILITY OF THE PRODUCT OR ITS FITNESS FOR ANY PARTICULAR PURPOSE OR USE;...
-
Page 7: Table Of Contents
Table of Contents Section 1: Getting Started ............1 Setting Up Your Phone ................1 Charging a Battery .................. 5 Switching the Phone On or Off ............... 7 Setting Up Your Voice Mail ..............7 Section 2: Understanding Your Phone ........9 Features of Your Phone ................ - Page 8 Data Counter ..................36 Section 5: Messaging ...............38 Types of Messages ................38 Creating and Sending Messages ............39 Viewing New Received Messages ............41 Using Message Options ............... 41 Outbox ....................42 Drafts ....................42 Voicemail ....................42 Deleting Messages ................43 Messaging Settings ................
- Page 9 Section 9: Photos ..............68 Section 10: Videos ..............71 Record Video ..................72 Section 11: Tools ..............73 Camera ....................73 Music Player ..................73 Using Playlists ..................77 Voice Recognition ................. 78 Record Audio ..................81 Alarms ....................82 Calendar ....................84 Tasks ....................
- Page 10 Adding a New Contact ................ 103 Using Contacts ................... 106 Contacts Entry Options ..............107 Finding My Own Phone Number ............108 FDN Mode ..................108 Group Settings ................... 109 Adding Speed Dial Entries ..............111 Using the Service Dialing Numbers ............ 111 Managing Contact Entries ..............
- Page 11 Section 16: Warranty Information .........155 Standard Limited Warranty ..............155 Index ..................161...
-
Page 13: Section 1: Getting Started
Section 1: Getting Started This section explains how to start using your phone by first configuring your hardware, activating your service, and then setting up your voice mail. Setting Up Your Phone Prior to use it is necessary to install both the battery and SIM into their corresponding internal compartments. - Page 14 Installing the SIM Card When you subscribe to a cellular network, you are provided with a plug-in SIM card loaded with your subscription details, such as your PIN, available optional services, and many others features. Important!: The plug-in SIM card information and its contacts can be easily damaged by scratching or bending, so be careful when handling, inserting, or removing the card.
- Page 15 Installing the Battery 1. Insert the battery into the opening on the back of the phone, making sure the connectors align (1). 2. Gently press down to secure the battery (2). 3. Replace the battery cover on the back of the phone (1) and slide it into place until you hear it securely click (2).
- Page 16 Note: Make sure the battery is properly installed before switching on the phone. Installing a Memory Card Your phone also supports the use of a memory card (microSD) for data storage of such things as data, music, pictures, and video files. This type of memory card is designed for use with this mobile phone and other devices.
-
Page 17: Charging A Battery
Your phone is powered by a rechargeable Li-ion battery. The Travel Adapter that is used to charge the battery is included with your phone. Use only Samsung-approved batteries and chargers. Note: Long backlight settings, searching for service, vibrate mode, browser use, and other variables may reduce the battery’s talk and standby times. - Page 18 2. Plug the small connector of the Travel Adapter into the Power/ Accessory Interface connector as shown and the other end into a standard AC wall outlet. 3. When charging is finished, remove the connector- from the interface connector jack on the phone. Note: Failure to unplug the wall charger before you remove the battery, can cause damage to the phone.
-
Page 19: Switching The Phone On Or Off
Switching the Phone On or Off 1. Press and hold until the phone switches on. The phone launches the activation splash screen and then proceeds to search for the network. Once the network has been found, you can make or receive calls. Note: The display language is preset to English at the factory. - Page 20 Accessing Your Voice Mail 1. In Idle mode, press and hold 2. When connected, follow the voice prompts from the voice mail center. Accessing Your Voice Mail From Another Phone 1. Dial your wireless phone number. 2. When you hear your voicemail greeting, press 3.
-
Page 21: Section 2: Understanding Your Phone
Section 2: Understanding Your Phone This section outlines some key features of your phone. It also displays the screen and the icons that display when the phone is in use. Features of Your Phone Your phone is lightweight, easy-to-use and offers many useful features, including: User friendly, menu driven access to features and options •... - Page 22 receiving an incoming call, briefly press either volume key to mute the ring tone. Press and hold either volume key to reject a call and send it directly to voicemail. 2. Memory card port: Your phone has an external memory port for a microSD...
-
Page 23: Open View Of Your Phone
Open View of Your Phone 1. Earpiece: allows you to hear the caller. 2. Display: shows the information needed to operate your phone, such as the received signal strength, phone battery level, time, etc. 3. Left Soft key: allows you to select actions or menu items corresponding to the bottom left line on the display screen. - Page 24 4. Multitasking key: opens the application switch window, which allows you to select different applications without having to exit from the currently active application. These options include Call, Messaging, Browser, Music Player, Games and Apps, and End all. 5. Talk/Send key: allows you to power on the phone, make or answer a call, and access Recent Calls.
-
Page 25: Display Layout
14. OK/Menu key: when navigating through a menu accepts the highlighted choice in the menu. Press once in Idle mode to open the menu. 15. Navigation keys: these keys allow you to scroll through phone menu options and provide shortcuts to phone functions from standby mode. - Page 26 Indicator Icons This list identifies the symbols you’ll see on your phone’s display and Indicator area: Displays your current signal strength. The greater the number of bars, the stronger the signal. Indicates that the Airplane Mode is active. You cannot send or receive calls or access online information.
- Page 27 Displays when an internal microSD memory card is detected. Displays when the phone is connected to a computer via USB cable connection. Displays within the Indicators area when a new text message is received. Displays within the Indicators area when a new Multimedia message is received.
-
Page 28: Menu Navigation
Displays when the Sound profile is set to Driving. Displays when the Sound profile is set to Outdoor. Displays when Bluetooth is activated. Displays when a Bluetooth stereo headset has been paired with the phone. For more details on configuring your phone’s settings, see “Changing Your Settings”... - Page 29 Accessing a Menu Function by Scrolling 1. In Idle mode, press the key and scroll using the Navigation keys to reach a main menu item, Settings for example. Press the Select soft key or the key to enter the menu. 2.
-
Page 30: Multitask Functions
Multitask Functions Pressing the Multitasking key allows you to choose one of the following functions: Call: allows you to make a voice call while using the handset for other tasks. • If Music Player is active, it is muted during the call. Messaging: allows you to send a text or multimedia message while using the •... -
Page 31: Section 3: Entering Text
Section 3: Entering Text This section outlines how to select the desired text input mode when entering characters into your phone. It also describes how to use the T9 predictive text entry system to reduce the number of key strokes associated with entering text. - Page 32 T9 Predictive Text Input Method (T9 ab, T9 Ab, and T9 AB) This input method allows you to enter words with only one keystroke per letter. Each key on the keypad has more than one letter; for example, pressing the key can enter J, K, or L.
-
Page 33: Using The T9 Predictive Text Input Method
2. After you have selected an input method, keep pressing the key to choose from the following options: If in Multitap mode: Quick press the key to toggle abc (all lowercase), Abc (initial capitalization), ABC (all uppercase), and 123 (numeric). If in T9 Predictive Text mode: Quick press the key to toggle T9 ab (completed words are all lowercase), T9 Ab... - Page 34 Enter a Word in T9 Mode 1. In T9 method, begin entering a word by pressing the 2 to 9 keys. Press each key only once for each letter. The built-in dictionary lists words that match the entered keystrokes. 2. Example: To enter “Hello”, press The word that you are typing displays on the screen.
-
Page 35: Using The Alphabetic Input Method
4. Press the Add soft key or the key. The word is added to the T9 dictionary and becomes the first word for the associated keypress series. Note: This feature may not be available for some languages. To enter periods, hyphens, colons, or parenthesis, press and hold the •... -
Page 36: Using The Symbols Input Method
Note: The cursor moves to the right when you press a different key. When entering the same letter twice or a different letter on the same key, just wait for a few seconds for the cursor to move to the right automatically, and then select the next letter. -
Page 37: Section 4: Call Functions
Section 4: Call Functions This section describes how to make or answer a call. It also includes the features and functionality associated with making or answering a call. For more information, refer to “Call Settings” on page 130. Displaying Your Phone Number Press Settings Phone... - Page 38 1. From the Idle screen, use the keypad to enter the phone number. 2. Press and hold to add a two-second pause (P), and use the keypad to enter the additional numbers. Tip: You can create pauses longer than two seconds by entering multiple two- second pauses.
-
Page 39: Making A Call Using Speed Dial
2. Press the Down Navigation key to highlight a recent call in the All calls list. – or – Press the Left or Right Navigation key to display All calls, Missed calls, Calls Made, or Calls Received, then press the Down Navigation key to highlight the call. -
Page 40: Answering A Call
For further details about the Contacts feature, see “Finding a Contact Entry” on page 107. Answering a Call When a call is received, the phone rings and displays the caller’s phone number, or name if stored in Contacts. 1. From the Incoming call screen, press or Accept. - Page 41 Putting a Call on Hold You can place the current call on hold whenever you want. You can also make another call while you have a call in progress if your network supports this service. To put a call on hold: 1.
- Page 42 Press Options End and then select Active call, Held call, or All calls and press In-Call Options 1. During a call, press the Mute soft key to mute the microphone. Press Spkr on to put the call on speakerphone. Press the Options soft key to access the following: •...
- Page 43 2. If you are engaged in a call, you can place the active call on hold by selecting the New call option and either dialing another number or answering another incoming call. Once the second call is activated, the following options are available: •...
-
Page 44: Recent Calls
2. Press Unmute to deactivate the Mute function and reactivate the microphone. Searching for a Number in Contacts 1. During the active call, press Options Contacts. 2. Highlight a contact entry. For further details about the Contacts feature, see “Finding a Contact Entry”... - Page 45 Recent Calls All calls). The All Calls list displays all calls made, missed, or received. 2. Highlight a call and press the Options soft key to view the following options: • Details: allows you to view the caller’s name, phone number, time and date called as well as the length of the call.
- Page 46 2. Scroll through the list of missed calls. As the call highlights, the details display. 3. To move to another call type, press the left or right navigation key to make your selection. Saving a Missed Call to Contacts 1. From the Idle Screen, briefly press and use the Right navigation key to scroll to the Missed calls screen.
-
Page 47: Call Time
2. Highlight the desired missed call. 3. Press Options Send Message. 4. From the Create screen, highlight the empty text field and use the keypad to type a message. For more information, refer to “Creating and Sending Messages” on page 39. Deleting a Missed Call 1. -
Page 48: Data Counter
Data Counter The Data Counter measures to the amount of data sent to and from the phone. 1. Press Recent Calls Data counter. The following data items display: • Last Sent: shows the size of the last data packet (measured in KB - kilobytes) sent by the phone since the last time this counter was reset. - Page 49 To answer a call while you have a call in progress: 1. Press to answer the next incoming call. The first call is automatically placed on hold. 2. To switch between the two calls, press Options Swap. Swap places the current call on hold and then activates the previous call.
-
Page 50: Section 5: Messaging
Section 5: Messaging This section describes how to send or receive different types of messages. It also includes the features and functionality associated with messaging. Types of Messages Your phone provides the following message types: Text Messages • Multimedia Messages •... -
Page 51: Creating And Sending Messages
Creating and Sending Messages 1. From the Idle screen, press Messaging Create Message. Tip: In Idle mode, you can create a new message by pressing up on the Navigation key. 2. Use the keypad to enter a message. For more information, refer to “Entering Text”... - Page 52 • Contact Info: allows you to tap on an existing Contacts entry, then add it to your message by pressing Select. 4. Review your message and press Send to. 5. Enter a phone number or email address in the Recipients field. –...
-
Page 53: Viewing New Received Messages
7. Press Send to, then add recipient(s). 8. Press Send. Viewing New Received Messages 1. In Idle mode, new messages are indicated by icons and a New Message pop-up. 2. Press the View button from the New Message pop-up. Note: If you accidentally exit from this notification screen, navigate to ... -
Page 54: Outbox
– Move to Phone/Move to SIM Card: If a message is stored in the SIM card, it is saved to the phone’s memory. If a message is stored in the phone’s memory, it is then saved to the SIM card. –... -
Page 55: Deleting Messages
2. Follow the prompts to configure options or receive messages. Deleting Messages When your phone’s memory is full, a notification message displays and you cannot receive any new messages. Use the Delete option to erase obsolete messages, freeing memory for new messages. You can delete the messages either individually or all at one time. - Page 56 Text Message This option allows you to change your Text Message settings. You can change the following: Delivery Options: allows you to choose character support (GSM alphabet, • Unicode or automatic), Reply Path, Get Delivery Report, and Keep a Copy. Text Message Center: this option allows you to select the Text Message •...
- Page 57 Receiving Options: you can specify the category of messages you want to • receive. Allows you to set the following: Home Network : allows you to set the message receipt options for your home – network. Choose from Auto Download, Manual or Reject. Roaming Network : allows you to set the message receipt options for your –...
- Page 58 – Warning: sends a warning when unsupported content is included in a message. – Restricted: prevents you from including unsupported content. Default Style: you can specify the default visual parameters used by this • type of message: – Font Color –...
-
Page 59: Templates
My Channels: Lets you create a channel list. • Language: Selects languages for incoming broadcast messages. • Templates You can speed message composition by including copies of stored message content in your message. and select Messaging → Templates. From Idle mode, press The following options are available: Text Templates –... -
Page 60: Delete By Folder
2. Select a template from the Multimedia Templates list and press Options → Send. The template displays in a new message. Creating a Multimedia template 1. From Idle mode, press and select Messaging → Templates → Multimedia Templates. 2. Select Options → Create. 3. -
Page 61: Section 6: Calendar
Section 6: Calendar The Calendar feature allows you to view the Month, Week, and Day layout views. It also shows any Missed Alarm Events that occurred. To display your calendar: Press Calendar. The Calendar displays in the default • (Month) view. - Page 62 Calendar Options Options for the Calendar include: • View: allows you to view a specified date. • View By: allows you to choose between month view, day view or week view. • Create: allows you to select an event category: Appointment, Anniversary, Holiday, Important or Private event.
- Page 63 Deleting an Event 1. Press Calendar Options Event List. 2. Select an event type, then press the Select soft key or the key. The events in the selected category display. 3. Highlight an event to delete and press Options Delete and ...
-
Page 64: Section 7: Browser
Section 7: Browser Your phone includes a WAP (Wireless Application Protocol) browser that allows wireless access and navigation of the Web using your phone. To access the browser via the menu: From Idle mode, press and select Browser. The following options are available: Home Selecting this menu connects the phone to the network and loads the default homepage. - Page 65 Entering Text in the browser When you are prompted to enter text, the currently active text input mode is indicated in the upper right corner of the screen. To change the text input mode, press the Options soft key and select Text Mode →...
-
Page 66: Enter Url
– Homepage: reopens the default homepage. – Full screen/Normal screen: controls whether the icon bar and page title are displayed at the top of the display, or the area is used to show more of the accessed Web page. – Smart-width view/Standard view: lets you change the page magnification. –... -
Page 67: Bookmarks
4. Press For further details about entering characters, see “Entering Text” on page 19. Bookmarks This menu stores up to 100 URL addresses, simplifying future access. To store a URL address: 1. From Idle mode, press and select Browser → Bookmarks. -
Page 68: Saved Pages
• Delete: allows you to delete the Selected address or Multiple addresses. • Set as homepage: allows you to set the selected bookmark as a homepage. or Options → Open. Your 6. Select a URL and press browser displays the site. Saved pages This option displays a list of the pages that were saved while navigating the browser. - Page 69 Empty Cookies Cookies identify who you are when you revisit web sites; however, they are also used to track your web surfing habits. Deleting cookies increases security. Cookie Options Cookie mode allows you to Accept all cookies, Reject all cookies, or Prompt you when a site wants to deposit a cookie.
-
Page 70: Section 8: Camera
Section 8: Camera This section explains how to use the camera in your phone. You can take photographs and shoot video by using the built-in camera functionality. Your 2.0 megapixel camera produces photos in JPEG format. Important!: Do not take photos of people without their permission. Do not take photos in places where cameras are not allowed. -
Page 71: Camera Options
4. Press the Camera key or the key until the shutter sounds. (The picture automatically stores within your designated storage location. If no microSD card is installed, all pictures are stored on the Phone.) 5. Press to return to Idle mode. Camera Options Options are represented by icons across the top of the screen when you press the Menu key. - Page 72 White Balance: allows you to set this option from the following choices: • Auto, Daylight, Incandescent, Fluorescent, or Cloudy. Metering: allows you to set how the camera measures or meters the light • level of the image area: Matrix, Center-weighted, or Spot. Effects: allows you to change the color tone or apply special effects to •...
- Page 73 Note: To receive better GPS signals, avoid using your device in the following conditions: - inside a building or between buildings - in a tunnel or underground passage - in poor weather - around high-voltage or electromagnetic fields - in a vehicle with tinted windows Settings: Setup tab –...
- Page 74 • Delete: allows you to delete the picture or video. • Set as: allows you to set the photo as a Main Display wallpaper, Front Display wallpaper, or Caller ID (this option only appears in Camera). • Edit: allows you to edit the picture (this option only appears in Camera).
- Page 75 • Crop: allows you to crop the image. Use the Navigation keys to place the red box around the image until you center a portion in the box. To change the box, press Options, select Size or Shape, use the navigation keys to modify the size or shape.Press Options Crop.
-
Page 76: Using The Camcorder
Assigning an Image as a Wallpaper 1. Press My Downloads Photos <image>. 2. Press Options Set as Main Display or Cover Display. The wallpaper appears as a preview. 3. If you are setting the wallpaper for the main display, press Select to set the wallpaper. -
Page 77: Camcorder Options
5. Press Stop or the Camera key to stop recording and save the video file. 6. Once the file saves, press Options Play to review the video. 7. Press to return to Idle mode. Camcorder Options Options are represented by icons across the top of the screen when you press the Options key. - Page 78 Settings: allows you to customize your camcorder settings. Choose from the • following options: Settings: Video tab – Quality: allows you to set the image quality to: Economy, Fine or Superfine. – Audio recording: allows you to select whether audio is recorded with a video recording.
- Page 79 • Move: allows you to choose the Selected or Multiple videos to move. • Copy: allows you to copy a selected or multiple videos. • Record Video: allows you to record another video. • Create Folder: creates a new My Downloads folder on either the Phone or Memory Card.
-
Page 80: Section 9: Photos
Section 9: Photos Use Photos to manage photos saved on your phone. 1. In Idle mode, press and select Photos (or My Downloads Photos). When you access this menu, your phone displays the photos in Line view, which shows them as small images. Use the Navigation keys to scroll through the photos. - Page 81 • Copy: allows you to copy the Selected photo or Multiple photos to another location. • Take Photo: allows you to take another photo. • Create Folder: allows you to create a new folder in which to place this photo. •...
- Page 82 4. To delete a multiple photos, choose Multiple and press the Select soft key or OK key. Highlight each file to be deleted and press Check to place a checkmark in the selection box. Press the Delete soft key to confirm the deletion. 5.
-
Page 83: Section 10: Videos
Section 10: Videos From the Videos menu you can record a video, or view the list of videos downloaded from the web server or received in picture messages. You can also view a video saved to your Videos folder or memory card. -
Page 84: Record Video
• Sort by: allows you to sort and view videos by Date, Type, Name, or Size. • Bluetooth visibility: makes Selected or Multiple voice files visible to a Bluetooth device. • Lock/Unlock: locks the voice file to protect it from deletion, or unlocks the voice file to allow deletion. -
Page 85: Section 11: Tools
Section 11: Tools Tools are feature options that allow you to use your handset for a variety of non-phone related activities. To access any of the tools: Press Tools. • Camera For information on using the camera, see “Camera” on page 58. Music Player The Music Player is an application that can play music files. - Page 86 • Set as: allows you to set this music file as Call Ringtone, Caller Ringtone or Alarm tone. • Properties: displays Basic details about the selected music file. Press the right or left navigation key to view Media information. • Settings: set Background Playing, and Sound Effects (equalizer setting: Normal, Rock, Pop, Dance, Classic, Jazz, Wide, Dynamic, Surround).
- Page 87 • Set as: allows you to set this music file as Call Ringtone, Caller Ringtone or Alarm tone. • Add to Playlist: adds the currently active song to either a new or current playlist. • Send via: sends the selected music file in a message or to a Bluetooth enabled device.
- Page 88 Playing Music while Using the Phone The Music Player allows you to play music in the background while performing other tasks on your phone. The music pauses when an incoming call is accepted, and the music resumes when the call ends. Music continues to play when you receive messages.
-
Page 89: Using Playlists
Important!: When finished using the Music Player function, press the twice to stop the function and prevent the battery from losing its charge. Pausing the player continues to use the battery. Using Playlists Playlists are used to assign songs to a list of preferred media which can then be grouped into a list for later playback. -
Page 90: Voice Recognition
2. Highlight a previously created playlist. 3. Press the Options soft key, select Add Tracks and press the Select soft key or the key. 4. Select each song you want to add to the playlist and press the key to place a check mark next to the song. You can also select All to add all songs on the list. - Page 91 your phone. Nuance software automatically voice activates up to 1,000 contacts for voice dialing and searching. No pre-recording or training is needed. Speak a contact name naturally to dial, and use your voice to look up contacts, launch applications and navigate phone menus. 1.
- Page 92 If the phone does not recognize your command the Command not recognized screen displays with two options: Help: provides instructions on how to use voice commands. • Restart: press and try the command options again. • Speak clearly when giving your command. There is no need for you to speak slowly or with added emphasis.
-
Page 93: Record Audio
When you add or change contacts, the software automatically reloads and voice-activates the list when you add or modify a contact. Record Audio Record Audio allows you to record voice memos. It also allows you to send your audio clip to other people as an attachment of an MMS message. -
Page 94: Alarms
• Set as: allows you to set the current memo as a Call Ringtone, Caller Ringtone or an Alarm Tone. • Delete: allows you to delete the current memo. • More: displays the following additional options: – Rename: allows you to rename the audio file. –... - Page 95 Press Options Create alarm. 3. Set the following options: • Name: allows you to use a specific name for the alarm. The name you enter will display on the screen when the alarm activates. • Alarm activation: use the Left or Right Navigation key to select On or Off. •...
-
Page 96: Calendar
1. Press Tools Alarms. 2. Highlight Auto power and press the key. 3. Select On and press Save. Note: If the menu option is set to Off, and the phone is switched off at the specified time, the alarm does not ring. Turning Off an Alarm To cancel the alarm when it rings, press any key (except Snooze). - Page 97 • Alarm: allows you to trigger an alarm for this task. Press Check to select this option. • Alarm date: enter a date for this alarm (format is MM/DD/YYYY). • Alarm time: enter a time for this alarm to sound. Press Save to assign the new time.
-
Page 98: Memo
• Used Space: shows the number of tasks created out of a possible 100. Memo This option allows you to create and save memos. 1. Press Tools Memo. 2. Press Options Create. 3. Use the keypad to enter a new note and press Save. While in the memo list, press Options to access the following options: •... -
Page 99: Tip Calculator
Note: Enter a decimal point, left bracket or right bracket by pressing the left soft key 1, 2, or 3 times. Use the keys to move forward and backward in the number to make corrections. 3. Enter the operation for your calculation by using the Navigation keys to select the arithmetic function. -
Page 100: World Clock
• Currency • Length • Weight • Volume • Area • Temperature 1. Press Tools Converter. 2. Select the required converter function and press the key. • Each converter function has a field for the type of unit to convert, and the type of unit to convert to. - Page 101 1. Press Tools World Clock. 2. Press Options Add. 3. Press the Left or Right Navigation key until you locate the desired global region. Important!: Time zones display in Greenwich Mean Time (GMT). 4. If the location supports Daylight Savings Time, highlight Daylight saving and press the Check key.
-
Page 102: Timer
Timer You can use this menu to set a timer to count down a preset amount of time (hours, minutes, and seconds). 1. Press Tools Timer. 2. Press Set and use the keypad to enter a countdown time length for the alert by setting the Hours, Minutes, and Seconds value, then press the OK soft key. -
Page 103: Section 12: My Downloads
Section 12: My Downloads Photos For information on using Photos to manage photos saved on your phone, see “Photos” on page 68. Music Your phone’s Music features allow you to play and manage the music files stored on your phone. and select My Downloads →... -
Page 104: Images
• Copy: copies the Selected or Multiple files to another location. • Create Folder: allows you to create a new folder in which to store music files. • Sort by: lists the files by Date, Type, Name, or Size. • Bluetooth visibility: allows you share the Selected file or Multiple files with other Bluetooth devices. - Page 105 • Set as: sets the image as Main Display wallpaper, Cover display wallpaper, or as a Caller ID. • Take Photo: allows you to take a photo that can be used as a wallpaper. • Create Folder: creates a new folder in which to contain your own images.
-
Page 106: Sounds
• Take Photo: allows you to take another photo with the camera. • Create Folder: allows you to create a new folder in which to store images. • Sort by: lists images by Date, Type, Name, or Size. • Bluetooth visibility: allows you share the Selected file or Multiple files with other Bluetooth devices. - Page 107 Sounds Use Sounds to manage sounds on your phone. Highlight an item in the Sounds menu and press the Options soft key. The following options are available: • Play: plays the selected sound. • Send via: allows you to send this voice file as a Message or to a Bluetooth enabled device.
- Page 108 • Properties: displays Basic Details such as sound name, format, size, forwarding, date, and location. Press the left or right navigation key to display Media information such as Track length and Format. Voice list Voice list contains your recorded audio messages. Highlight an item and press the Options soft key.
- Page 109 • Properties: displays Basic details about this voice file such as: Name, Format, Size, Forwarding, Date created, and Location. Voice recorder Use Voice Recorder to record an audio file. 1. From Idle mode, press and select My Downloads → Sounds → Voice list →...
-
Page 110: Videos
Lock/Unlock : locks the voice file to protect it from deletion, or unlocks the – voice file to allow deletion. Bluetooth visibility : makes Selected or Multiple voice files visible to a – Bluetooth device. Properties : displays details about the voice recording, such as Name, –... -
Page 111: Other Files
Apps → Get New Games. 2. Follow the onscreen instructions to browse and download games. Note: When downloading games, charges may apply. MIDlet game options differ depending on the MIDlet selected. Get New Applications You can download apps from your service provider’s website using the Get New Applications option. - Page 112 • View: opens the highlighted file. • Send via: allows you to send this file in a Message (when possible) or to a Bluetooth enabled device. • Delete: deletes Selected or Multiple files. • Rename: allows you to rename the selected file. •...
- Page 113 Press the left or right navigation keys to scroll between the memory status On phone or On memory card.
-
Page 114: Section 13: Contacts
Section 13: Contacts This section allows you to manage your contact information by storing names and numbers in Contacts. You can sort entries by name, entry, or group. Now, managing and keeping your contacts safe and accessible has never been easier! Note: When storing a contact entry into your SIM card, note that only the name, phone number, group, and slot location are initially offered as fields (some SIM cards may allow an address as well). -
Page 115: Adding A New Contact
• Used Space: displays the memory storage allocation (total available and remaining) within your Phone, SIM card, Additional No. 1, Additional No. 2, Email, Nickname, and FDN Contacts. Adding a New Contact Use the following procedure to store a new contact to Contacts. New contacts are stored on your phone by default. - Page 116 11. Select a tone to represent this contact and press Options Select. 12. Highlight the Notes field and use the keypad to enter a note. For more information, refer to “Entering Text” on page 19. 13. Press Options Save ...
- Page 117 3. Highlight the field to delete and press Options Delete Field. Note: Only certain new fields may be deleted. If you have not added any new fields to the contact, the Delete Field button does not display. 4. Press Options Save.
-
Page 118: Using Contacts
Adding Pauses to Contact Numbers When you call automated systems, you are often required to enter a password or account number. Instead of manually entering the numbers each time, you can store the numbers in your Contacts along with special characters called pauses. To add a pause to a Contact: 1. -
Page 119: Contacts Entry Options
Finding a Contact Entry You can store phone numbers and their corresponding names onto your SIM card and phone’s onboard memory. The two locations are physically separate but are used as a single entity, called the Contact List. Depending on your particular SIM card, the maximum number of phone numbers the SIM card can store and how they are stored may differ. -
Page 120: Finding My Own Phone Number
• Send Business Card via: allows you to send a business card to the selected contact via Message or Bluetooth. • Mark as Default Number allows you to Change, Save, or Reset the Default number and Message for a contact. •... -
Page 121: Group Settings
Important!: With Fixed Dial Mode enabled, you are NOT able to dial any number other than those created as FDN numbers. Creating New FDN Numbers With the Fixed Dial mode On, follow these procedures: 1. In Idle mode, press Contacts FDN Contacts. - Page 122 4. Press Options Group Settings. 5. Highlight the Picture field and press the key. 6. Select an image and press Options Select or the key. The selected image displays in the Picture field and displays the name of the image to the right. 7.
-
Page 123: Adding Speed Dial Entries
4. Highlight a member from the list or highlight All and press Check. A checkmark beside the name indicates removing this person from the group. 5. Press the Remove soft key. Renaming a Caller Group 1. In Idle mode, press Contacts Groups. -
Page 124: Managing Contact Entries
2. Scroll through the numbers by using the Up or Down Navigation key. 3. Press to dial the selected number. Managing Contact Entries You can copy, delete, and view the memory status for the Phone and SIM entries on your phone. Copying an Entry to the SIM Card Note: When storing a contact entry into the SIM card, note that only the name, phone number, group, and slot location are initially offered as fields (some... - Page 125 Copying an Entry to the Phone 1. In Idle mode, press Contacts SIM Management Copy Contacts from SIM. The phone displays a list of your current contacts stored on the SIM card. Note: If the entry’s associated Group image has a SIM location icon on it, then the entry exists on the SIM card.
- Page 126 Deleting all entries from the SIM 1. In Idle mode, press Contacts SIM Management Delete Contacts from SIM. 2. Highlight a member from the list or highlight All and press to create a checkmark. 3. Press Delete. 4. At the prompt, press Yes to delete the contact, or No to cancel. 5.
-
Page 127: Section 14: Changing Your Settings
Section 14: Changing Your Settings This section includes tips on how to use your phone’s features, as well as how to change and customize the display settings, call handling, security settings, and other settings associated with your phone. Sound Profile The Sound Profile menu allows you to specify how you are informed of incoming calls and messages as well as other notification sounds your phone can make. - Page 128 tones. You can modify Outdoor settings for Call, Message and Phone. Editing the Normal - Call Profile 1. In Idle mode, select OK Settings Sound Profile 2. Highlight Normal and press Edit. 3. Highlight the Call tab. 4. Highlight Call Alert Type and press 5.
- Page 129 2. Highlight Normal and press Edit. 3. Highlight the Message tab. 4. Highlight Message Alert Type and press 5. Select one of the following: • Melody: the phone rings using the ring melody selected in the Message Alert Tone menu. •...
- Page 130 3. Highlight the Phone tab. 4. Highlight Keypad Tone and press . Select one of the following tones and press OK: • Beep • Lucid • Mute 5. Highlight Power On Type and press 6. Select one of the following and press OK: •...
-
Page 131: Display
Display In this menu, you can change various settings for the display. 1. In Idle mode, press Settings Display. 1. The following options are available: • Main Display • Front Display • Light Settings 2. Select an option, then press the key to access the following: Main Display... - Page 132 Medium, or Small. Press the Save soft key or the key to confirm your selection. Font Color: allows you to select a colour for the selected font. Press the – Left or Right Navigation keys to make your selection. Choose from Monochrome, Gradation, or Basic.
-
Page 133: Time And Date
options and the keypad to enter your slogan. Press the Save soft key or key to confirm your selection. Greeting Message: allows you to enter the text to display on the screen • when the phone powers on. Light Settings Note: Light settings can affect the length of time before battery recharge is necessary. - Page 134 • Manual only : you need to manually set the time zone, time and date. • Prompt first: you are prompted before a time change is applied. • Automatic: the phone automatically updates the time and date according to the current time zone using the network service. Important!: Current time zones are based upon Greenwich Mean Time.
-
Page 135: Phone Settings
Phone Settings You can customize various phone settings. In Idle mode, select Settings Phone. • Language This menu allows you to select a display language for Text language and Text Input mode. 1. In Idle mode, select Settings Phone Language. - Page 136 2. Use the Navigation keys to select the Up, Down, Right, or Left key. 3. Press Options Change. Highlight a new application to assign to the previously selected key. 4. Press the Save soft key or the key to assign the new application.
- Page 137 Note: You are prompted to create a password the first time this feature is enabled. To change the phone password, see “Change Phone Password” on page 127. Once you enter the correct password, you can use the phone until you switch it off. The following options are available: –...
- Page 138 Note: Before disabling the Check PIN Code feature, you must enter your PIN. You can obtain your PIN from a customer service representative. Lock Applications Using this option you can lock various applications. Once you lock the contents, you must enter the phone’s password to access the associated menus.
- Page 139 • A full length number with a specific contact name can be entered into the FDN list. • Wildcard entries allow you to dial a range of number with a single entry: ex. 555 – All dialed numbers that begin with 555 are allowed. Numbers that do not match the conditions in the FDN list are restricted.
- Page 140 Reset Phone You can easily reset your phone to its default settings. To reset your phone: 1. In Idle mode, select Settings Phone Reset Phone. 2. At the All Settings reset to factory defaults. Continue? prompt, press Yes to reset, or No to cancel. 3.
-
Page 141: T-Coil Mode
Warning!: When performing the Restore Phone option, do not remove your battery until the phone completes the task and restarts, otherwise phone damage may occur. Airplane Mode Airplane Mode allows you to use many of your phone’s features, such as Calendar, Games, Voice notes, etc., when you are in an area where making or receiving calls or data transmission is prohibited. -
Page 142: Call Settings
Call Settings In Idle mode, select Settings Calls. • Adjusting the General Call Settings 1. Press General and select from the following options: • Show My Number: allows you to show or hide your number on the caller display of the phones you call. Select Set by Network, Show Number, or Hide Number. -
Page 143: Connectivity
• Call Forwarding: incoming calls are re-routed to a secondary number that you specify. Select the condition for the call forward action: – Always activates an automatic forward of all incoming calls regardless of condition. – Busy activates an forward function only when your number is currently in use and the caller receives a busy signal. - Page 144 Bluetooth Bluetooth is a short-range wireless communications technology capable of exchanging information over a distance of about 30 feet without requiring a physical connection. Unlike infrared, you don't need to line up the devices to beam information with Bluetooth. If the devices are within connectivity range of one another, you can exchange information between them, even if they are located in different rooms.
- Page 145 Discoverable The Discoverable option allows your phone to wirelessly transmit its phone name and status to every device within its range. This transmission can pose a security risk and allow unauthorized connection to your phone. It is recommended that you remain hidden whenever possible.
- Page 146 4. Enter the passkey (if applicable). If connecting to a Bluetooth wireless device, consult your Bluetooth device user manual for your assigned PIN. If connecting to another handset, enter the same user-defined PIN on both handsets. 5. Press Options Settings, highlight the Connection Options ...
- Page 147 Note: The default input entry method is Abc, where the initial character is Uppercase and each consecutive character in that same word is left as lowercase text. 3. Press Options Save when you are finished. Remote SIM Mode In Remote SIM mode, you can make or answer calls only with a connected Bluetooth hands-free car kit via the SIM card on your phone.
-
Page 148: Network Selection
Mode” pop-up when you connect to the PC. You can choose from either: Samsung PC Studio, Media Player, or Mass Storage. • Samsung PC Studio: sets PC Studio to launch as the default application when a USB connection is detected. -
Page 149: Network Profile Configuration
Network Profile Configuration Configuring your Network Profiles Your phone is wirelessly connecting to the Internet via a built in WAP browser. Use this menu to create and customize the profiles containing the settings for connecting your phone to the network. Although you can change the active connection, please ask your local retailer or customer service representative to assist. - Page 150 • Auth type: select the type of authentication used for this WAP connection: None, Normal, or Secure. • User ID: enter the User ID required to connect to the network. • Password: enter the user password required to connect to the network.
-
Page 151: Applications Settings
– Traffic class: select the traffic class, press the Edit soft key, select a Traffic Class (Subscribed, Conversation, Streaming, Interactive, or Background) and press the OK soft key. Applications Settings The Applications Settings feature allows you to configure the functional parameters for most of the onboard applications. - Page 152 • Clear Caches: deletes the information stored in the cache. The cache stores the most recently accessed web pages. • Cookies: – Empty Cookies: deletes cookies. Cookies are pieces of personal information sent to a web server while navigating the web. –...
- Page 153 Record Audio Settings To configure the maximum length for a recording: 1. In Idle mode, select Settings Applications Settings Record Audio Settings. 2. Select one of the following options: • Output format: allows you to set the format of saved audio files (amr or mp3) •...
-
Page 154: Memory Management
Contact Settings For information on Contact Settings, see see “Contact Settings” on page 102. Memory Management You can easily check the amount of memory being used for storing data, such as messages, media, calendar data, or contacts entries. You can also delete any selected information from your phone: 1. - Page 155 4. Enter the user-defined password and press Confirm to clear the memory settings. For more information, refer to “Change Phone Password” on page 127. – or – Press Back to cancel. Check the Used Space 1. In Idle mode, select Settings Memory Management ...
-
Page 156: Section 15: Health And Safety Information
Handle and dispose of batteries and chargers with care Use only Samsung-approved batteries and chargers specifically designed for your phone. Incompatible batteries and chargers can cause serious injuries or damage to your phone. - Page 157 Never dispose of batteries or phones in a fire. Follow all local regulations when disposing used batteries or phones. Never place batteries or phones on or in heating devices, such as microwave ovens, stoves, or radiators. Batteries may explode when overheated.
-
Page 158: Safety Precautions
Follow all safety warnings and regulations Comply with any regulations that restrict the use of a mobile phone in a certain area. Use only Samsung-approved accessories Using incompatible accessories may damage your phone or cause injury. Turn off the phone near medical equipment Your phone can interfere with medical equipment in hospitals or health care facilities. - Page 159 Turn off the phone or disable the wireless functions when in an aircraft Your phone can cause interference with aircraft equipment. Follow all airline regulations and turn off your phone or switch to a mode that disables the wireless functions when directed by airline personnel. Avoid interference with other electronic devices Your phone emits radio frequency (RF) signals that may interfere with unshielded or improperly shielded electronic equipment, such as...
-
Page 160: Warranty Disclaimer: Proper Use Of A Touch Screen Handset
Avoid using or storing your phone in dusty, dirty areas to prevent • damage to moving parts. Your phone is a complex electronic device—protect it from impacts • and rough handling to avoid serious damage. Do not paint your phone, as paint can clog moving parts and prevent •... -
Page 161: Ul Certified Travel Adapter
UL Certified Travel Adapter The Travel Adapter for this phone has met applicable UL safety requirements. Please adhere to the following safety instructions per UL guidelines. FAILURE TO FOLLOW THE INSTRUCTIONS OUTLINED MAY LEAD TO SERIOUS PERSONAL INJURY AND POSSIBLE PROPERTY DAMAGE. - Page 162 Understanding How Your Phone Operates Your phone is basically a radio transmitter and receiver. When it’s turned on, it receives and transmits radio frequency (RF) signals. When you use your phone, the system handling your call controls the power level. Allow only qualified personnel to service your phone Allowing unqualified personnel to service your phone may result in damage to your phone and will void your warranty.
- Page 163 Ensure access to emergency services Emergency calls from your phone may not be possible in some areas or circumstances. Before travelling in remote or undeveloped areas, plan an alternate method of contacting emergency services personnel. Correct disposal of this product The product and its electronic accessories (e.g., charger, headset, USB cable) should not be disposed of with other household waste at the end of their working life.
-
Page 164: Radio Frequency Safety
Radio frequency safety The design of your phone complies with updated NCRP standards described below. In 1991-92, the Institute of Electrical and Electronics Engineers (IEEE) and the American National Standards Institute (ANSI) joined in updating ANSI’s 1982 standard for safety levels with respect to human exposure to RF signals. - Page 165 However, there is no guarantee that interference will not occur in a particular installation; if this equipment does cause harmful interference to radio or television reception, which can be determined by turning the equipment off and on, the user is encouraged to try to correct the interference by one or more of the following measures: •...
- Page 166 Maximum measured SAR values for the C414M are: GSM 850: Head 0.15 W/kg, Body-worn 0.52 W/kg • GSM 1900: Head 0.36 W/kg, Body-worn 0.50 W/kg • UMTS V: Head 0.12 W/kg, Body-worn 0.24 W/kg • UMTS II: Head 0.52 W/kg, Body-worn 0.35 W/kg •...
- Page 167 SAMSUNG; (b) defects or damage resulting from excessive force or use of a metallic object when pressing on a touch screen;...
- Page 168 Product; (j) any other acts which are not the fault of SAMSUNG; or (i) Product used or purchased outside the United States or Canada.
- Page 169 Product, call Samsung Customer Care at 1-800-SAMSUNG. Upon receipt, SAMSUNG will promptly repair or replace the defective Product. SAMSUNG may, at SAMSUNG’s sole option, use rebuilt, reconditioned, or new parts or components when repairing any Product or replace Product with a rebuilt, reconditioned or new Product.
- Page 170 What Are The Limits On Samsung's Warranty/liability? EXCEPT AS SET FORTH IN THE EXPRESS WARRANTY CONTAINED HEREIN, PURCHASER TAKES THE PRODUCT "AS IS," AND SAMSUNG MAKES NO WARRANTY OR REPRESENTATION AND THERE ARE NO CONDITIONS, EXPRESS OR IMPLIED, STATUTORY OR OTHERWISE, OF ANY KIND...
- Page 171 PROFITS OR BENEFITS, OR FOR DAMAGES ARISING FROM ANY TORT (INCLUDING NEGLIGENCE OR GROSS NEGLIGENCE) OR FAULT COMMITTED BY SAMSUNG, ITS AGENTS OR EMPLOYEES, OR FOR ANY BREACH OF CONTRACT OR FOR ANY CLAIM BROUGHT AGAINST PURCHASER BY ANY OTHER PARTY. SOME STATES DO NOT ALLOW...
- Page 172 THE CASE MAY BE. This Limited Warranty allocates risk of Product failure between Purchaser and SAMSUNG, and SAMSUN G's Product pricing reflects this allocation of risk and the limitations of liability contained in this Limited Warranty. The agents, employees, distributors, and dealers of SAMSUNG are not authorized to make modifications to this Limited Warranty, or make additional warranties binding on SAMSUNG.
- Page 173 Index Accessing a Menu Function Adding a New Contact Adding More Fields Deleting Fields During a Call Idle Screen Alarms setting up auto power-up alarm Application Settings Calendar Reset Applications Alarms Calendar Memo Using the Camcorder Using the Camera World Clock Auto Delete Inbox Back key Battery...
- Page 174 Low Battery Indicator Bluetooth Activation Discoverable mode My Bluetooth Info My Devices Bluetooth Device Stereo Bookmarks Browser Clear cache cookies Enter URL Entering text History Home Preferences Saved pages Settings Business Card attaching to a message Calendar Deleting an Event Viewing an Event Call Functions 3-Way Calling (Multi-Party Calling)
- Page 175 Answering a Call Call Time Call Waiting Correcting the Number Data Counter Deleting Missed Call Dialing a Recent Number Ending a Call International Call Making a Call Manual Pause Dialing Recent Calls Searching for a Number in Address Book Send Message to Missed Call Using the Speakerphone Viewing All Calls Viewing Missed Calls...
- Page 176 Camera key Changing Your Settings Charging battery Clear Phone Memory Connectivity Configuring Your Network Profiles Contact Settings Contacts Adding a New Contact Adding Pauses to Contact Numbers Assigning an Image Copying Entry to Phone Copying Entry to SIM Card Deleting an Address Book entry Dialing a Number FDN (Fixed Dialing Number) Mode Finding an Address Book Entry...
- Page 177 Font Type Display Front Display icons Light Settings Main Display Downloaded images Drafts Editing a Photo Entering Text Using Alphabet Input Method Using Numeric Input Method Using Predictive Text Using Symbols Input Method Changing the Status Creating New Numbers Front Display Greeting Message Wallpaper Games and Apps...
- Page 178 Group Adding an Entry Creating New Group Removing an Entry Renaming a group Health and Safety Information Hold call Icons, description Images In-Call Options International Call Light Settings Backlight Time Brightness Main Display Settings Dialing Display Greeting Message Menu Style Wallpaper...
- Page 179 Memo Memory Card Installation Memory card port Memory Management Clear Phone Memory Used Space Menu Navigation Using Shortcut Numbers Messaging Creating and Sending Text Messages Settings Types of Messages Using Message Options microSD card Installing Missed calls Multi-Party Calling Multitasking Functions Multitasking key Music...
- Page 180 Images Music Other Files Sounds Videos Navigation keys Network Profile Configuration Network Selection OK/Confirm key Other Files Outbox Own Number Phone icons Own Number Shortcuts Side View Switching On/Off Phone Settings Photos Accessing pictures Deleting pictures...
- Page 181 Playing Music Through a Stereo Bluetooth Device Playlists Adding songs to a Playlist Creating a Playlist Removing songs from a Playlist Powering Recent Calls Record Audio Remote SIM Mode Reset Phone Restore Phone Ringtones get new Security Change Phone Password Change PIN Code Change PIN2 Code Check PIN Code...
- Page 182 Service Dialing Numbers Set FDN Mode Settings Applications Call Settings Contacts Display Music Player Phone Record Audio Sound Time and Date Silent Profile key SIM card installation Installing Soft key Sound Profile Driving Outdoor Silent...
- Page 183 Sounds Speakerphone Key Specific Absorption Rates (SAR) Speed Dial Standard Limited Warranty T9 Mode Add a New Word Enter a word T-Coil Mode Text Input Method ABC (Alphabetic) Input Method (abc, Abc, and ABC) Changing Numeric Symbols T9 mode Time and Date Tip Calculator Tools Alarms...
- Page 184 World Clock Travel Adapter Using Understanding Your Phone Features of Your Phone Front View Side Views Voice list Voice Mail Accessing From Another Phone Setup Voice Recognition Voice recorder Voicemail key Volume keys Wallpaper Assigning and IMage Wallpapers Warranty Information World Clock Deleting an Entry...