Table of Contents
Advertisement
Quick Links
Advertisement
Table of Contents

Related Manuals for DSP SEED-XDS560v2

Summary of Contents for DSP SEED-XDS560v2
- Page 1 SEED-XDS560v2 JTAG Emulator User’s Guide 2011-05 DSP Development Systems...
- Page 2 SEED-XDS560v2 JTAG Emulator Installation User’s Guide Version: A 2011.7 http://www.seeddsp.com...
- Page 3 IMPORTANT NOTICE SEED Electronic Technology Ltd reserves the right to make changes to its products or to discontinue any product or service without notice. Customers are advised to obtain the latest version of relevant information to verify that the data being relied on is current before placing orders.
-
Page 4: Read This First
This document describes the installation and operations of the SEED-XDS560v2 Emulator. The SEED-XDS560v2 Emulator is used for the development platform of Texas Instruments DSP processor. The SEED-XDS560v2 Emulator is a high speed emulator and adapts to all series of Texas Instruments DSP processor. -
Page 5: If You Need Assistance
If You Need Assistance … Web: http://www.seeddsp.com/eng Beijing Headquarter Address: Unit 1201, Pan-Pacific Plaza, No. 12A, South Street Zhongguancun, Haidian District, Beijing, P.R.China Zip: 100081 Tel: +86-010-62109765 Fax: +86-010-62109678 E-mail: info@seeddsp.com To help us Improve Our Documentation … If you would like to make suggestions or report errors in documentation, please email us. -
Page 6: Caution
Minimizing Personal Injury: To minimize the risk of personal injury, always turn off the power to your PC and unplug the power cord before connect the SEED-XDS560v2 JTAG Emulator Minimizing Electrical Shock and Fire Hazard: To minimize the risk of electric shock and fire hazard, be sure that all major components that you interface with SEED devices are limited in energy and certified by one or more of the following agencies: UL, CSA, VDE, or TUV. -
Page 7: Table Of Contents
Contents ..........................6 Chapter 1 ..........................8 SEED-XDS560v2 Instruction ....................8 Product Outline ....................8 1.1.1 SEED-XDS560v2 Hardware Features ............8 1.1.2 SEED-XDS560v2 Software Features ............. 8 Product Support ....................12 Chapter 2 ..........................13 SEED-XDS560v2 Driver Installation ..................13 CCS4 Installation .................... - Page 8 Cautions when using SEED-XDS560v2 ................... 28 Appendix A .......................... 29 JTAG Adaptor Introduction ....................29 A.1 SEED-XDS560v2_6014_v0.3..................29 A.2 SEED-XDS560v2_6020_v0.3..................30...
-
Page 9: Chapter 1
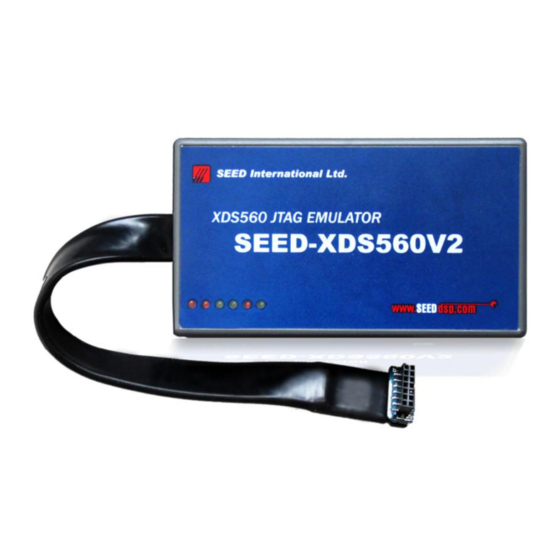
Product Outline SEED-XDS560v2 fully supports XDS560v2 from Texas Instruments, support real-time emulation, debugging and system trace function. SEED-XDS560v2 have two kinds of communication interface: USB2.0 High speed (480MB/S) and Ethernet RJ45 (10/100M). It supports CCS4.1.3 and versions above, suitable for all the platform classes of TI including DM816x and C66xx. - Page 10 Figure1 XDS560v2 Emulator Ethernet port, USB interface and power interface on one side of the Emulator Six LED indicators on SEED-XDS560v2 : COM-LED1, COM-LED2, COM-LED3, EMU-LED1, EMU-LED2, EMU-LED3 (from left to right) Table1 LED Information Color Description COM-LED1...
- Page 11 USB A/B Cable There exists an USB interface on SEED-XDS560v2, when you are debugging by USB or you are configuring emulator IP, please connect the A-end of the USB Cable with the USB port on the PC, B-end is used to connect USB port on the emulator...
- Page 12 Ethernet Cable There exists an Ethernet port on SEED-XDS560v2, when you are debugging by network, please connect the net port on 560v2 and PC (or Router) with this Ethernet cable. 5V Power When powering the emulator, please connect the power port on the emulator with the right side 5V Power ...
-
Page 13: Product Support
Note: SEED is updating the software time to time, please pay attention to the news on www.seeddsp.com/eng to upgrade your driver. Product Support Please contact your local distributor to get directly product support You can also send email to SEED International directly: tech-support@seeddsp.com... -
Page 14: Chapter 2
Windows XP Professional edition Code Composer Studio™V4.1.3.00038 Note SEED-XDS560v2 only supports Code Composer Studio with CCS 4.1.3.00038 and version above Before installing driver, please make sure you have installed CCS already. The manual take CCS4.2.3.00004 as an example. Caution... - Page 15 2. Click “Next “. 3. Choose “I access the terms of the license agreement “, click “Next “.
- Page 16 4. Choose CCS Installation Path, choose “Next “ (the default install path is recommended) 5. Click “Install “.
- Page 17 6. Install driver 7. Click “Finish “, finish the installation of driver.
-
Page 18: Install Emulator Hardware Devices
2.2.2 Install emulator hardware devices 1. Use the USB Cable to connect the emulator with the computer; 2. Power the emulator with the 5V power, COM-LED3 light turns green, XDS560v2 starts loader. 3. Please wait until the COM-LED3 green light is off and the lights “COM-LED1” & “COM-LED2” turn red, that means loader finish, PC will display “found new hardware “. - Page 19 5. Choose “Install the software automatically (Recommended)“, click “Next “ 6. PC is installing emulator driver. 7. Click “Finish “, the emulator finish driver intallation.
- Page 20 8. Open “Device Manager “. Windows will confirm that the SEED-XDS560v2 has been installed successfully shown in following figure: Unplug the emulator power.
-
Page 21: Chapter 3
Chapter 3 SEED-XDS560v2 Usage SEED-XDS560v2 Emulator could connect the target board via network or USB. Details of the two ways introduction are as following. This article take CCS V4.2.3.00004 as an example, the target board is SEED-DEC28335 (a kind of EVM board produced by SEED International which has the similar function as TI’s EVM board), target chip is TMS320F28335. - Page 22 2. You can use the default file name or also rename it, then click “Finish“. 3. Connection: choose “SEED XDS560V2 USB Emulator” Device: write “28335” And choose the option “TMS320F28335” Then click “Target Configuration”...
- Page 23 4. Click C28XX, choose the “gel” file though “Browse” 5. Click “SEED XDS560V2 USB Emulator_0”, you can find some configurations, you need to revise the parameter according to different chips. For chip TMS320F28335, please choose default parameter, then click “Save” 6.
- Page 24 7. After uploading, it is showed as the following figure: 8. Choose “Target\Connect Target”, connect the board. 9. At this time, the board has been connected with the emulator; you can debug the chip now. Meanwhile, EMU-LED3 turns green.
-
Page 25: 3.2 Network Debug
“SEED-XDS560v2 Configuration Tools Users' Guide” 3.3.1 Hardware connection 1. Connect SEED-XDS560v2 to PC with the USB cable (If the IP has been configured already, you can also don’t use the USB cable) 2. Connect SEED-XDS560v2 to PC with the Ethernet cable. - Page 26 Connection: choose “SEED XDS560V2 LAN Emulator” Device: write “28335” Choose the option “TMS320F28335”, and then click “Target Configuration” Click “SEED XDS560V2 LAN Emulator_0”, input the IP address on the option of “The Emulator IP Address”. This article set the IP as “192.168.253.183”; Click “C28XX”, choose the “gel”...
- Page 27 Choose “Target\Launch TI Debugger”; After uploading, it shows as the following figure: Choose “Target\Connect Target”;...
- Page 28 At this time, the board and the emulator have been connected, you can start the debugging. Meanwhile, EMU-LED3 turns green.
-
Page 29: Chapter 4
Chapter 4 Cautions when using SEED-XDS560v2 1. Do not plug or unplug emulator JTAG cable when it is working 2. When using the configuration tools, it is necessary to use USB cable to connect XDS560v2 with the computer; 3. When configuring network IP of the emulator, ensure that the emulator’s IP and the computer’s IP are in the same network segment;... -
Page 30: Jtag Adaptor Introduction
Appendix A JTAG Adaptor Introduction A.1 SEED-XDS560v2_6014_v0.3... -
Page 31: A.2 Seed-Xds560V2_6020_V0.3
A.2 SEED-XDS560v2_6020_v0.3... - Page 32 X-ON Electronics Largest Supplier of Electrical and Electronic Components Click to view similar products for manufacturer: SEEDDSP Other Similar products are found below : SEEDDSP...
Need help?
Do you have a question about the SEED-XDS560v2 and is the answer not in the manual?
Questions and answers