Table of Contents
Advertisement
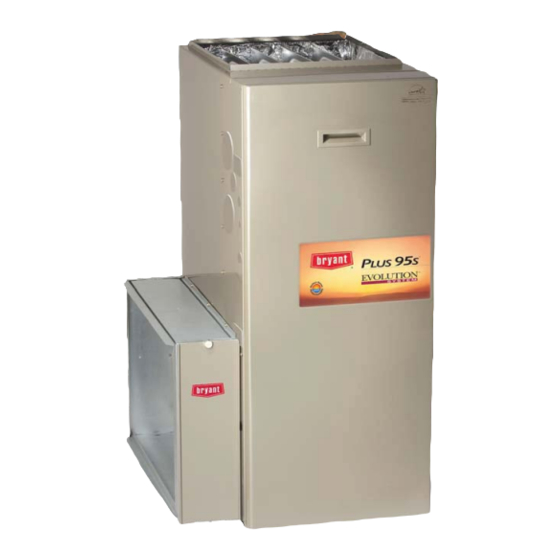
PLUS 95S - - MODEL 355CAV, SERIES A
DIRECT- -VENT 4- -WAY MULTIPOISE
CONDENSING GAS FURNACE
WITH PERFECT SENSET PERFECT HUMIDITYT
Visit www.Bryant.com
NOTE:
Read the entire instruction manual before starting
the installation.
Please retain these instructions with the furnace after installation
for future reference.
NOTE: This furnace can be installed as a
or (1-pipe) non-direct vent
Special Venting Requirements for Installations in Canada
Installation in Canada must conform to the requirements of CSA
B149 code. Vent systems must be composed of pipe, fittings,
cements, and primers listed to ULC S636. The special vent
fittings and accessory concentric vent termination kits and
accessory external drain trap have been certified to ULC S636 for
use with those IPEX PVC vent components which have been
certified to this standard. In Canada, the primer and cement must
be of the same manufacturer as the vent system - - IPEX System
636, PVC/CPVC Primer, Purple Violet for Flue Gas Venting and
(1)
IPEX System 636
t, PVC Cement for Flue Gas Venting, rated
Class IIA, 65 deg C. must be used with this venting system - - do
not mix primers and cements from one manufacturer with a vent
system from a different manufacturer. Follow the manufacturer's
instructions in the use of primer and cement and never use primer
or cement beyond its expiration date.
The safe operation, as defined by ULC S636, of the vent system
is based on following these installation instructions, the vent
system manufacturer's installation instructions, and proper use of
primer and cement. All fire stop and roof flashing used with this
system must be UL listed material. Acceptability under Canadian
standard CSA B149 is dependent upon full compliance with all
installation instructions. Under this standard, it is recommended
that the vent system be checked once a year by qualified service
personnel.
The authority having jurisdiction (gas inspection authority,
municipal building department, fire department, etc) should be
consulted before installation to determine the need to obtain a
permit.
(1) System 636 is a trademark of IPEX Inc.
Installation Instructions
(2-pipe) direct vent
condensing gas furnace.
ISO 9001:2000
REGISTERED
Consignes spéciales pour l'installation de ventillation au Canada
L'installation faite au Canada doit se conformer aux exigences du
code CSA B149. Ce systême de ventillation doit se composer de
tuyaux, raccords, ciments et apprêts conformes au ULC S636. La
tuyauterie de ventillation des gaz, ses accessoires, le terminal
concentrique mural ainsi que l'ensemble du drain de condensat
extérieur ont été certifiés ULCS 636 pour l'application des
composantes IPEX PVC qui sont certifiées à ce standard. Au
Canada l'apprêt et le ciment doivent être du même manufacturier
que le systême de ventillation - - IPEX Système 636, Apprêt
PVC/CPVC. Mauve Violette pour conduit en évacuation des gaz
et IPEX Système 636
t, ciment pour PVC pour conduit en
(1)
évacuation des gaz, évalué CLASSE IIA, 65 deg. C. doit ëtre
utilisé avec ce systèeme d'évacuation - - ne pas mélanger l'apprêt
et le ciment d'un manufacturier avec le systême de ventillation
d'un autre manufacturier. Bien suivre les indications du
manufacturier lors de l'utilisation de l'apprêt et du ciment et ne
pas utiliser ceux- -ci si la date d'expiration est atteinte.
L'opération sécuritaire, tel que définit par ULC S636, du système
de ventilation est basé sur les instructions d'installation suivantes,
ainsi que l'usage approprié de l'apprêt et ciment. Tout arrët feu et
solin de toit utilisés avec ce système doivent être des matériaux
listés UL. L'acceptation du standard Canadien CSA B419 est
directement relié à l'installation conforme aux instructions ci- -
haut mentionnées. Le standard Canadien recommande l'
inspection par un personel qualifié et ce, une fois par année.
Les autoritées ayant juridiction (inspecteurs de gas, inspecteurs en
bâtiments, département des incendies, etc) devraient être
consultées avant l'installation afin de déterminer si un permis est
requis.
ama
CERTIFIED
Advertisement
Table of Contents

Related Manuals for Bryant SERIES A 355CAV


Summary of Contents for Bryant SERIES A 355CAV
-
Page 1: Installation Instructions
Installation Instructions Visit www.Bryant.com NOTE: Read the entire instruction manual before starting the installation. Please retain these instructions with the furnace after installation for future reference. NOTE: This furnace can be installed as a or (1-pipe) non-direct vent condensing gas furnace. - Page 2 The Commonwealth of Massachusetts requires compliance with regulation 248 CMR as follows: 5.08: Modifications to NFPA- -54, Chapter 10 2) Revise 10.8.3 by adding the following additional requirements: (a.)For all side wall horizontally vented gas fueled equipment installed in every dwelling, building or structure used in whole or in part for residential purposes, including those owned or operated by the Commonwealth and where the side wall exhaust vent termination is less than seven (7) feet above finished grade in the area of the venting, including but not limited to decks and porches, the following requirements shall be satisfied:...
- Page 3 Failure to follow this caution may result in unit damage. Improper installation or misapplication of furnace may require excessive servicing or cause premature component failure. This furnace can be vented as either a direct vent (2- -pipe) furnace or as an optional ventilated combustion air application.
- Page 4 SIDE INLET (25mm) (UPFLOW) " TYP ⁄ (684 mm) NOTES: 1. Minimum return-air openings at furnace, based on metal duct. If flex duct is used, UNIT SIZE 060---14 / 042060 080---14 / 042080 080---20 / 060080 100---20 / 060100 120---20 / 060120 In Canada, refer to the current editions of the National Standards of Canada CAN/CSA- -B149.1 and .2 Natural Gas and Propane...
- Page 5 When a furnace is installed so that supply ducts carry air circulated by the furnace to areas outside the space containing the furnace, the return air shall also be handled by ducts sealed to the furnace casing and terminating outside the space containing the furnace.
- Page 6 335122-201 REV. B LIT TOP A08435 Fig. 3 - - Clearances to Combustibles / 27 C / 16 C 18-IN. (457.2 mm) MINIMUM TO BURNERS A06745 A93044 Fig. 4 - - Return- -Air Temperature Fig. 5 - - Installation in a Garage...
-
Page 7: Codes And Standards
The furnace shall be installed so that the electrical components are protected from water. For accessory installation details, refer to applicable installation literature. CODES AND STANDARDS Follow all national and local codes and standards in addition to these instructions. The installation must comply with regulations of the serving gas supplier, local building, heating, plumbing, and other codes. - Page 8 Trap Tubing section for drain tube extension details. (See Fig. 6.) Condensate Trap Tubing (Factory- -Shipped Orientation) NOTE: See Fig. 7 or tube routing label on main furnace door to confirm location of these tubes. 1. Collector Box Drain, Inducer Housing Drain, Relief Port, and Pressure Switch Tubes.
- Page 9 5. Fill unused condensate trap casing holes with plastic filler caps (factory- -supplied in loose parts bag). Condensate Trap Tubing (Alternate Upflow Orientation) NOTE: See Fig. 8 or tube routing label on main furnace door to confirm location of these tubes. FURNACE...
- Page 10 The LOWER collector box pressure tube (pink label) is factory connected to the pressure switch and should not require any modification. NOTE: See Fig. 7 or 8 or tube routing label on main furnace door to check for proper connections. Upper Collector Box and Inducer Housing (Unused) Drain...
-
Page 11: Downflow Applications
Fig. 10 - - Downflow Tube Configuration (Right- -Hand Trap Configuration) Condensate Trap Tubing NOTE: See Fig. 9 or 10 or tube routing label on main furnace door to check for proper connections. 1. Collector Box Drain Tube a. Remove factory- -installed plug from LOWER collector box drain tube (blue and white striped label). - Page 12 MUST be connected to the pressure switch in DOWNFLOW or HORIZONTAL RIGHT applications. NOTE: See Fig. 9 or 10 or tube routing label on man furnace door to check for proper connections. Relocate tubes as described below.
- Page 13 CONDENSATE TRAP NOTE: LOCAL CODES MAY REQUIRE A DRAIN PAN UNDER THE FURNACE AND CONDENSATE TRAP WHEN A CONDENSING FURNACE IS INSTALLED ABOVE FINISHED CEILINGS. Fig. 12 - - Attic Location and Working Platform for Direct Vent (2- -Pipe) Application A 3-IN.(76mm) MINIMUM CLEARANCE...
- Page 14 6. Fill unused condensate trap casing holes with plastic filler caps (factory- -supplied in loose parts bag). Condensate Trap Tubing NOTE: See Fig. 11 or tube routing label on main furnace door to check for proper connections. 1. Collector Box Drain Tube a.
-
Page 15: Horizontal Right
UPFLOW OR DOWNFLOW Fig. 15 - - Proper Condensate Drainage Condensate Trap Tubing NOTE: See Fig. 14 or tube routing label on main furnace door to check for proper connections. 1. Collector Box Drain Tube a. Remove factory- -installed plug from LOWER collector box drain tube (blue and white striped label). - Page 16 NOTE: See Fig. 14 or tube routing label on main furnace door to check for proper connections. Relocate tubes as described below. 1. Disconnect collector box pressure tube (pink label) at- tached to pressure switch. 2. Extend collector box pressure tube (green label) which...
- Page 17 - -The furnace is controlled by a thermostat. It may not be “hot wired” to provide heat continuously to the structure without thermostatic control.
- Page 18 NOTE: The maximum length of bolt should not exceed 1- -1/2 in. (38 mm). 1. Position furnace on its back. Locate and drill a 5/16- -in. (8 mm) diameter hole in each bottom corner of furnace. (See Fig. 18.) Holes in bottom closure panel may be used as guide locations.
- Page 19 PLENUM FLOOR OPENING Fig. 20 - - Furnace, Plenum, and Subbase Installed on a Combustible Floor A07585 Fig. 21 - - Furnace, Plenum, and Coil Assembly or Coil Box Installed on a Combustible Floor PERFORATED DISCHARGE DUCT FLANGE 210 DEG.
- Page 20 NOTES: 1. A 1 In. (25mm) clearance minimum between top of furnace and combustible material. 2. The entire length of furnace must be supported when furnace is used in horizontal position to ensure proper drainage. 3. For non-direct vent/1-pipe application,...
- Page 21 When a furnace is installed so that the supply ducts carry air circulated by the furnace to areas outside the space containing the furnace, the return air must also be handled by a duct(s) sealed to the furnace casing and terminating outside the space containing the furnace.
- Page 22 See Table 2 to determine correct filter size for desired filter location. Table 2 indicates filter size, location, and quantity shipped with this furnace. See Fig. 2 for location and size of bottom and side return- -air openings. CAUTION CUT HAZARD Failure to follow this caution may result in personal injury.
- Page 23 (See Fig. 27.) An accessible manual shutoff valve MUST be installed external to furnace casing and within 6 ft. (1.8M) of furnace. A 1/8- -in. NPT (3 mm) plugged tapping, accessible for test gauge...
- Page 24 FRONT FILLER PANEL Fig. 26 - - Removing Bottom Closure Panel SUPPLY MANUAL SHUTOFF VALVE (REQUIRED) SEDIMENT TRAP UNION Fig. 27 - - Typical Gas Pipe Arrangement COMBUSTION-AIR PIPE GROMMET COMBUSTION -AIR PIPE GAS LINE VENT PIPE GAS LINE GROMMET VENT PIPE GROMMET NOTE: PIPE GROMMETS AND ENTRY HOLE FILLER PLUGS ARE INCLUDED IN FACTORY-SUPPLIED...
- Page 25 CSA C22.1, Part I, if an external electrical source is utilized. Use a separate branch electrical circuit containing a properly sized fuse or circuit breaker for this furnace. See Table 4 for wire size and fuse specifications. A disconnecting means must be located within sight from and readily accessible to furnace.
- Page 26 14.06 ELECTRIC DISCONNECT SWITCH Fig. 30 - - Disconnect Switch and Furnace Install power entry hole filler plugs (factory- -supplied in loose parts bag) in unused power entry holes. (See Fig. 31.) FIELD 24-V WIRING FIELD 115-, 208/230-, 460-V WIRING...
- Page 27 NOTE: If modulating dampers are used, blower motor automatically compensates for modulating dampers. If manual disconnect switch is to be mounted on furnace, select a location where a drill or fastener will not contact electrical or gas components. 24- -v wiring...
- Page 28 Table 6 with Armaflex- -type insulation. Furnace combustion air and vent pipe connections are sized for 2- - in. pipe. Any pipe size change should be made outside furnace casing in vertical pipe. The transition has to be made as close to the furnace as reasonably possible.
- Page 29 SDR- -21 or - -26 PVC) using perforated metal hanging strap. 12. Slope combustion air piping and vent piping downward towards furnace a minimum of 1/4- -in. per linear ft. with no sags between hangers. 13. Horizontal portions of the venting system shall be installed so as to prevent the accumulation of condensate.
- Page 30 (115 -VAC 1.0 AMP MAX.) 115-VAC (L1) LINE EXAMPLE: VOLTAGE CONNECTIONS HK42FZ022 3407 SOFTWARE PART DATE VERSION NUMBER CODE NUMBER Fig. 33 - - Furnace Control SW4 SETUP SWITCHES HUMIDIFIER TERMINAL (24-VAC 0.5 AMP MAX. ACRDJ – AIR CONDITIONING RELAY DISABLE JUMPER FLASH UPGRADE...
- Page 31 12 inches (30 cm) for applieances >10,000 Btuh(3 kW) and < 100,000 Btuh(30kW), 36 inches (91cm) for appliances > 100,000 Btuh(30kW) A08600 Fig. 34 - - Direct Vent Termination Clearance...
- Page 32 A08601 Fig. 35 - - Ventilated Combustion Air Vent Termination Clearance...
- Page 33 Roof T e rmination (Preferred) At least 36 in. (914mm) Vertical separation between combustion air and vent 8 3/4 in. (222mm)for 3 in. (76mm)kit (457mm) 6 3/4 in. (172mm)for 2 in. (51mm) ki t 18 in. maximum Maintain 12 in. (305mm)min . clearance above highest anticipated snow level...
-
Page 34: Combustion Air Pipe
-air pipe to inlet housing connection, since it may be necessary to remove pipe for servicing. NOTE: A 2- -in. diameter pipe must be used within the furnace casing. Make all pipe diameter transitions outside furnace casing. Attachment of Combustion Air Pipe... - Page 35 The combustion air pipe is terminated in an attic or crawl space that is well ventilated with OUTDOOR AIR and is well isolated from the living space or garage. If the furnace is installed in a well ventilated attic, crawlspace or other enclosure, the combustion air pipe can be terminated in the same space.
- Page 36 Fig. 39. Refer to Vent Termination section for complete details on termination options. VENT PIPE General Furnace vent connection must be attached as shown in Fig. 39. CARBON MONOXIDE POISONING AND PROPERTY DAMAGE HAZARD Failure to follow this warning could result in personal injury or death.
- Page 37 Fig. 41 - - Attic Termination (76.2 mm) minimum (304.8 mm) minimum Fig. 42 - - Crawlspace Termination (304.8mm) minimum A06672 A06673...
- Page 38 Fig. 43 - - Crawlspace Termination 12 ″ MIN (305mm) VENT PIPE COMBUSTION-AIR PIPE HORIZONTAL TO ROOF COMBUSTION-AIR PIPE 12 ″ MIN (304.8mm) VERTICAL TO ROOF NOTE: A 12-in. (304.8mm) minimum offset pipe section is recommended with short (5 to 8 ft / 1.5 to 2.5M) vent systems. This recommendation is to reduce excessive condensate droplets.
-
Page 39: Vent Termination
NOTE: Starting at furnace, slope vent pipe a minimum of 1/4- -in. (6 mm) per linear ft. back toward furnace with no sags between hangers. VENT TERMINATION General Combustion- -air (direct Vent / 2- -pipe system only) and vent pipe must terminate outside structure, either through sidewall or roof. - Page 40 Table 6 – Maximum Allowable Exposed Vent Pipe Length with Insulation in MAXIMUM PIPE WINTER DESIGN UNIT SIZE DIAMETER IN. TEMPERATURE 20° F / --- 7° C 0° F / --- 18° C --- 20° F / --- 29° C 20°...
- Page 41 Table 7 – Maximum Allowable Pipe Length - - Ft (M) Direct Vent (2---Pipe Only) UNIT SIZE ALTITUDE Termination (BTUH) Type 2 Pipe or 2 ---In. (51) 60,000 Concentric 2 Pipe or 2 ---In. (51) 80,000 Concentric 0 to 2000 2 Pipe or 2 ---In.
- Page 42 3. Assume two 45_ elbows equal one 90_ elbow. Long radius elbows are desirable and may be required in some cases. 4. Elbows and pipe sections within the furnace casing and at the vent termination should not be included in vent length or elbow count.
- Page 43 To avoid condensate spillage, select a pump with an overflow switch. Furnace condensate is mildly acidic, typically in the pH range of 3.2 to 4.5. Due to corrosive nature of this condensate, a condensate pH neutralizing filter may be desired. Check with local authorities to determine if a pH neutralizer is required.
- Page 44 Fig. 47 - - A/C or CF Airflow Selection Chart Based on 350 and 400 CFM/Ton Setup Switches (SW1) The furnace control has 8 setup switches that may be set to meet the application requirements. To set these setup switches for the appropriate requirement: 1.
- Page 45 2. Locate setup switch SW4 on furnace control. (See Fig. 33.) 3. See Table 5 for setup switch description. (See Fig. 40 and Fig. 49.) 4. Replace main furnace door and blower access panel. Prime Condensate Trap with Water CAUTION...
- Page 46 A06677 Fig. 49 - - Wiring Diagram...
- Page 47 3. Insert field- -supplied funnel into tube. A99118 Fig. 51 - - Filling Condensate Trap Table 9 – Furnace Setup Switch Description NORMAL POSITION Turn ON to retrieve up to 7 stored status codes for troubleshooting assistance when R thermostat lead is disconnected.
- Page 48 -heating periods of the single- -stage thermostat. The furnace will start up in either medium- -, or high- -heat. The furnace will operate in low- -heat after starting and operating for 1 minute at medium- -heat before transitioning to low- -heat.
- Page 49 W1- -and- -W2 circuits always causes high- -heat operation, regardless of the setting of the low- -heat only switch. The furnace will start up in either medium- -, or high- -heat. The furnace will operate in low- -heat after starting and operating for 1 minute at medium- -heat before transitioning to low- -heat.
- Page 50 -cooling. The furnace control CPU can start up the cooling unit in either low- - or high- -cooling. If starting up in low- -cooling, the furnace control CPU determines the low- -cooling on- -time (from 0 to 20 minutes) which is permitted before switching to high- -cooling.
- Page 51 Terminal EAC- -1 is energized as long as the blower motor BLWM is energized. During a call for heat, the furnace control CPU will transition the blower motor BLWM to continuous blower airflow, low- -heat airflow, or the mid- -range airflow, whichever is lowest. The...
- Page 52 Fig. 52 - - Step- -Modulating Furnace with Single- -Speed Air Conditioning Fig. 53 - - Step Modulating Furnace with Two- -Speed Air Conditioner A06678 Fig. 54 - - Step Modulating Furnace with Single- -Speed Heat Pump (Dual Fuel) A06679 Fig.
- Page 53 Fig. 56 - - Step Modulating Furnace with Single- -Speed Heat Pump Fig. 57 - - Dual Fuel thermostat with Step- -Modulating Furnace and Two- -Speed Heat Pump A06682 Fig. 58 - - Two- -Stage Thermostat with Step Modulating Furnace and Two- -Speed Air Conditioner A06683 Fig.
- Page 54 Manifold pressure: 3.8- -in. wc for high heat 1.6- -in. wc for medium heat 0.6- -in. wc for low heat * Furnace is shipped with No. 45 orifices. In this example, all main burner orifices are the correct size and do not need to be changed to obtain proper input rate.
- Page 55 1.3- - in. wc or more than 1.7- -in. wc for natural gas. CAUTION UNIT DAMAGE HAZARD Failure to follow this caution may result in reduced furnace life. DO NOT bottom out gas valve regulator adjusting screws. This can result in unregulated manifold pressure and result in excess over- -fire and heat exchanger failures.
- Page 56 Table 10 – Orifice Size* and Manifold Pressures for Gas Input Rate (Tabulated Data Based on 20,000 BTUH High Heat / 13,000 Btuh Med- -Heat / 8,000 Btuh Low- -Heat per Burner, ALTITUDE AVG. GAS RANGE HEAT VALUE AT ALTITUDE Orifice ft (m) (Btu/cu ft)
- Page 57 Table 10 - - Orifice Size* and Manifold Pressures for Gas Input Rate (Continued) (Tabulated Data Based on 20,000 BTUH High Heat / 13,000 Btuh Med- -Heat / 8,000 Btuh Low- -Heat per Burner, ALTITUDE AVG. GAS RANGE HEAT VALUE AT ALTITUDE Orifice ft (m)
- Page 58 (See Fig. 33). NOTE: Measured gas inputs (high heat, medium heat, and low heat) must be within +/- -2 percent of that stated on furnace rating plate when installed at sea level or derated as stated above when installed at higher altitudes.
- Page 59 ON position. For high- -heat operation, place setup switch SW1- -2 and SW4- -2 in OFF position and jumper R- -W2 on furnace control. DO NOT forget to return setup switch to OFF position and remove R- -W2 jumper upon completion of testing.
- Page 60 The amp reading should be taken after blower motor has started and furnace is operating in low- -heat. 1. To operate furnace in low- -heat, turn setup switch SW1- -2 to ON position (See Fig. 33) and connect ammeter leads across thermostat subbase R- -W.
- Page 61 Combustion--- Air Pipe Elbow Quantity ________________ Vent Pipe Length ________________ Vent Pipe Elbow Quantity ________________ Pipe Diameter Determined from Sizing Table ________________ Pipe Sloped To Furnace Pipe Insulation ________________ Over Ceilings ________________ Low--- Ambient Exposed Pipes CHECKLIST — INSTALLATION ________________ ________________ ________________...
- Page 62 E2008 Bryant Heating & Cooling Systems 7310 W. Morris St. Indianapolis, IN 46231 Printed in U.S.A. Edition Date: 12/08 Catalog No. II355CAV ---060---4 Manufacturer reserves the right to discontinue, or change at any time, specifications or designs without notice and without incurring obligations.
Need help?
Do you have a question about the SERIES A 355CAV and is the answer not in the manual?
Questions and answers