Advertisement
Quick Links
Step 1A: Mounting & placement
Cielo Breez Plus can be wall mounted using the wall mounting kit or placed on a table using
table stand (both included in the box). Before finalizing the placement, it is recommended to first
power up, register & test the device to find optimal location from where signals can easily reach
the AC. To ensure this place your Breez Plus in ACs line of sight & power it up.
For optimal placement and control:
Place Breez Plus within 13 feet (4 meters) and in the line of sight of your air conditioner. If
•
signal is not reaching the AC, please place it at another suitable location within the room.
To avoid deviated sensor readings, do not place Breez Plus where it may be exposed to
•
excessive sunlight or other heat sources.
Step 1B: Powering up options
Breez Plus can be powered up using a 5V adapter (always use the provided power adapter and
•
USB cable for optimal results).
Through wired connection options of 24V or 12V (from your existing thermostat wiring). For
•
details on wired connections, please refer to
Please DO NOT use any other voltage level to power up Breez Plus.
Please choose ONLY ONE power up option i,e, either 5V OR 24/12V.
Special Note: It is strongly advised that whenever there is a need to use remote control for
AC/Heat Pump, point it towards Breez Plus while performing any action. This way, your
AC/Heat Pump and Cielo Home App will always be in sync.
Step 1C: Prior to app installation
Your Smart Phone
Make sure that your smart phone's Wi-Fi is turned ON.
•
Make sure that your smart phone has internet access.
•
Your Wi-Fi Router
Make sure that you have working internet connection on your Wi-Fi router
•
Make sure that there is no proxy server or authentication server configured on your internet
•
connection.
Make sure that there is no captive portal on your Wi-Fi router.
•
OR
Wired Connection
Advertisement

Subscribe to Our Youtube Channel
Related Manuals for Cielo Breez Plus


Summary of Contents for Cielo Breez Plus
- Page 1 AC. To ensure this place your Breez Plus in ACs line of sight & power it up. For optimal placement and control: Place Breez Plus within 13 feet (4 meters) and in the line of sight of your air conditioner. If •...
- Page 2 Step 2A: App Installation Go to the App Store / Play Store. • In ‘search’ section type ‘Cielo Home’. • Once ‘Cielo Home’ App is displayed, download it. • Open the App after installation is complete. • Step 2B: Login/Register You can either create a new user account or login as an existing user.
- Page 3 Step 3A: Registration - iOS users Note: Registration process is meant to connect the Breez Plus to your home Wi-Fi network through the ‘Cielo Home’ App. Note: For iOS 13.0 & above, location permission is required to complete the registration process.
- Page 4 Step 6: Your phone will show the list of available Wi-Fi networks. Step 7: Select your Wi-Fi network from the list (there should be No captive portal or port blocking on your selected network). Step 8: Enter the password of your Wi-Fi network and tap the ‘Connect’ button.
- Page 5 Step 9: Customize your device with a name of your choice (for example, Bedroom, Lounge, Office, etc.) and tap on ‘Done’. Step 10: If the circle around AC icon is not green please refresh the home screen by swiping downwards (Pull-to-refresh). Step 11: Once the circle around AC icon is green, tap on it to start AC’s remote control configuration proce .
- Page 6 Step 12: Get hold of your AC’s remote and tap ‘Next’. Step 13: Point your AC's remote at Cielo Device and press remote’s 'Power Button' once. It will tart proce ing configuration.
- Page 7 Registration process is complete. Enjoy the unlimited controls! Quick Tip: All four buttons at the bottom of Breez Plus will blink once at the same time after receiving the remote control's signal. If they do not blink, please check the batteries of remote control.
- Page 8 Step 3: Tap the ‘Wi-Fi Settings’ button as shown in red rectangle. Step 4: Connect your phone to Cielo Device Wi-Fi (Cielo_xxxx_xxxxxx). Step 5: Go back to ‘Cielo Home’ App.
- Page 9 Step 6: Select your Wi-Fi from the drop down list (there should be No captive portal or port blocking on your selected network). Step 7: Enter the password of your Wi-Fi network and tap the ‘Connect’ button. Step 8: Customize your device with a name of your choice (for example, Bedroom, Lounge, Office, etc.) and tap on ‘Done’.
- Page 10 Step 10: Once the circle around AC icon is green, tap on it to start AC’s remote control configuration process. Step 11: Get hold of your AC’s remote and tap ‘Next’. Step 12: Point your AC's remote at Cielo Device and press remote’s 'Power Button' once. It will start processing & configuration.
- Page 11 Registration process is complete. Enjoy the unlimited controls! Quick Tip: All four buttons at the bottom of Breez Plus will blink once at the same time after receiving the remote control's signal. If they do not blink, please check the batteries of remote control.
- Page 12 - Refresh home screen by swiping downwards (Pull-to-refresh). Enjoy the unlimited functionalities...
- Page 13 Quick tip: Configuring the right remote control for your AC Cielo Device auto detects relevant remote control for your AC during registration process. If it is not working with your AC, please select your remote model manually. For manual selection, follow these steps: 1.
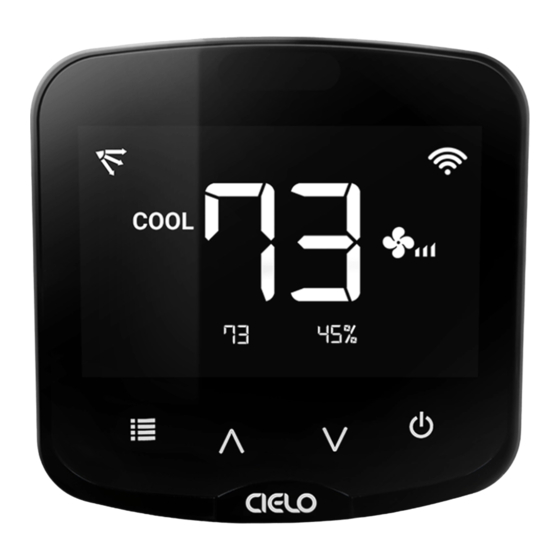
- Page 14 Quick Tip: Remote control model number is usually found at the back side of remote control as shown in the image. Breez Plus - Local control options Adjusting the temperature of your AC: Use the up or down arrows to set the temperature of your choice.
-
Page 15: Troubleshooting Tips
Press and hold Temperature Up and Power buttons simultaneously for six seconds and release. Troubleshooting tips Breez Plus display interface shows 3 types of Wi-Fi status: Case 1: Stable Wi-Fi Icon - Device is connected to internet, showing the strength of Wi-Fi... - Page 16 Changing Wi-Fi network of Cielo Device Scenario 1: Cielo Device & mobile are on same Wi-Fi network - Tap on wrench symbol to enter device settings. Tap on ‘Device Wi-Fi’ then on 'Change Wi-Fi'. List of available networks will appear.
- Page 17 Breez Plus. Step 3: Chose C & R wires. Pull these wires and pass them through the hole of back plate of Breez Plus. Screw in the back plate of Breez Plus into the wall.
- Page 18 Breez Plus has two connections marked as 24V at its back. Connect C & R wires at these two connections. Step 5: Pres fit t e ree plu on it ac plate.
- Page 19 Your Installation is complete. Please switch on the power from the mains.
- Page 20 Note: In case of any doubt, please contact a local professional for making the wired connections. You can also use Breez Plus with a 5V adapter (included in the box). Step 4A: Setting up schedules for your heating and cooling - iOS users 1.
- Page 21 Step 5: If you want to turn the Air-Conditioner / Heat Pump ON/OFF via schedule, select the time, mode, temperature and fan speed of your choice. Select power ON/OFF and select the day/days you want to set the schedule for. You may also choose the schedule name of your choice.
- Page 22 - iOS users You can set up comfy temperature mode for your Air-Conditioner / Heat Pump by performing these steps via Cielo Home app: Step 1: On the Home screen, tap on the Air-Conditioner / Heat Pump you want to set comfy temperature mode on.
- Page 23 Step 4: Tap on ‘Comfy Temperature’. Step 5: Choose your preferred temperature range. Step 6: Select what actions to perform if the temperature falls below or goes above the set range e.g. turning the AC off or on, changing its mode, temperature and fan speed helping it get back into the preferred temperature range.
- Page 24 - iOS users You can set up comfy humidity mode for your Air-Conditioner / Heat Pump by performing these steps via Cielo Home app: Step 1: On the Home screen, tap on the Air-Conditioner / Heat Pump you want to set comfy humidity mode on.
- Page 25 Step 4: Tap on ‘Comfy Humidity’. Step 5: Choose your preferred humidity range. Step 6: Select what actions to perform if the humidity falls below or goes above the set range e.g. turning the AC off or on, changing its mode, temperature and fan speed helping it get back into the preferred humidity range.
- Page 26 AC runs within that range) - iOS users You can set up temperature range control for your Air-Conditioner / Heat Pump by performing these steps via Cielo Home app: Step 1: On the Home screen, tap on the Air-Conditioner / Heat Pump you want to set temperature range control on.
- Page 27 Step 4: Tap on ‘Temperature Range Control’. Step 5: Choose your preferred temperature range. Step 6: Tap 'Done' to enable it.
- Page 28 - iOS users You can configure location based control for your Air-Conditioner / Heat Pump by performing these steps via Cielo Home app: Step 1: On the Home screen, tap on the Air-Conditioner / Heat Pump you want to control through location controls.
- Page 29 Air-Conditioner / Heat Pump ON/ OFF. Step 5: Check the box to mark the location of Cielo device and tap on ‘Next’. Step 6: Select your desired AC settings to be performed when you enter or exit the pre-set location and tap on ‘Done’.
- Page 30 Step 4F: Checking your AC’s Air Filter Status - iOS users You can check the live air filter status of your Air-Conditioner / Heat Pump. Simply, follow the steps listed below: Step 1: On the Home screen, tap on the Air-Conditioner / Heat Pump you want to check the air filter status for.
- Page 31 Step 4: You will see your current air filter status of the AC being used with the Device since registration. When the range is about to fill up, manually remove the AC’s air filter and clean it. Once done place filter back into the AC. Step 5: Tap on ‘I have cleaned the air filter’...
- Page 32 Step 4G: Changing Device Name (e.g. bedroom, lounge etc.) - iOS users Step 1: Tap on ‘Wrench’ of your registered Device. Step 2: In Device settings, tap on ‘Device Preferences’. Step 3: In Device preferences, tap on ‘Change Name’. Step 4: Enter the name of your choice and tap on ‘Update’.
- Page 33 Step 4H: Calibrate Room Temperature (Shown on Device) - iOS users Step 1: Tap on ‘Wrench’ of your registered Device. Step 2: In Device settings tap on ‘Device Preferences’. Step 3: In Device preferences tap on ‘Temperature Calibration’. Step 4: Adjust the temperature and tap on ‘Done’.
- Page 34 Step 4I: Calibrate Room Humidity (Shown on Device) - iOS users Step 1: Tap on ‘Wrench’ of your registered Device. Step 2: In Device settings tap on ‘Device Preferences’. Step 3: In Device preferences tap on ‘Humidity Calibration’. Step 4: Adjust the humidity and tap on ‘Done’.
- Page 35 Step 4J: Change Appliance (Manufacturer/Model Number) - iOS users Step 1: Tap on ‘Wrench’ of your registered Device. Step 2: In Device settings, tap on ‘Change Appliance’. Step 3: Select 'Manual Configuration'. Step 4: Select 'AC / Heat Pump Manufacturer' and 'Remote Control Model Number' from the lists and tap on ‘Update’.
- Page 36 Step 4K: Changing Wi-Fi - iOS users Step 1: Tap on ‘Wrench’ of your registered Device. Step 2: In Device settings, tap on ‘Device Wi-Fi’. Step 3: In Device Wi-Fi settings, tap on 'Change Wi-Fi'. Step 4: Select the Wi-Fi you wish to connect to, just enter the password and tap on ‘Connect’.
- Page 37 Step 4L: Disable Wi-Fi (Operate Device only with local controls) - iOS users Step 1: Tap on ‘Wrench’ of your registered Device. Step 2: In Device settings, tap on ‘Device Wi-Fi’. Step 3: In Device Wi-Fi settings, tap on 'Disable Wi-Fi'.
- Page 38 Note: if you disable the Wi-Fi using your phone, it can ONLY be enabled from the device. To Enable it again, please ‘press and hold the temperature up button on Device for six seconds and release’. Step 4M: Sync AC State (e.g. AC is ON and App is showing it as OFF) - iOS users Step 1: Tap on ‘Wrench’...
- Page 39 Step 4N: Breez Plus Device Display Settings - iOS users 1. Switching Device (Breez Plus) Display Screen ON/OFF Step 1: Tap on ‘Wrench’ of your registered Device. Step 2: In Device settings, tap on 'Device Preferences'. Step 3: In Device preferences for Breez display tap ‘ON/OFF’ to choose your desired display screen setting.
- Page 40 2. Adjusting the brightness of Device (Breez Plus) Screen Step 1: Tap on ‘Wrench’ of your registered Device. Step 2: In Device settings, tap on 'Device Preferences'. Step 3: In Device preferences, adjust brightness of your Device by maneuvering the slider.
- Page 41 Step 4O: Enable or disable touch control function on (Breez Plus) Device - iOS users Step 1: Tap on ‘Wrench’ of your registered Device. Step 2: In Device settings, tap on 'Device Preferences'. Step 3: In Device preferences, enable or disable touch control function on device.
- Page 42 Step 4P: Zone Settings of your connected Air Conditioners - iOS users 1. Creating a zone A zone will allow you to control power of all your registered devices together with a simple tap. To create a Zone in app, follow these steps: Step 1: Tap on ‘Wrench’...
- Page 43 Step 4: Tap on ‘Add’ to create a zone. Step 5: Give your zone a name (e.g. Ground floor, First floor, Basement, etc.) and choose an icon.
- Page 44 2. Adding a Device to a zone Step 1: Tap on ‘Wrench’ of the device you would like to add in a zone. Step 2: In Device settings, tap on 'Device Preferences'. Step 3: In Device preferences, tap on "Move to Zone" Step 4: A list of available zones will appear and you can add your device to one of the existing zones.
- Page 45 3. Removing a Device from a zone Step 1: To remove a Device from a zone, tap on the zone where your Device has been added. Step 2: Tap on ‘Wrench’ of the Device you wish to remove. Step 3: In the Device settings, tap on 'Device Preferences' Step 4: In Device preferences, tap on ‘Delete form Zone’.
- Page 46 4. Editing a zone Step 1: Tap on ‘Wrench’ of the zone you wish to edit. Step 2: In zone settings, tap on ‘Edit Zone’. You can change the icon and name of the zone as you desire.
- Page 47 5. Deleting a zone Note: To delete a zone, you have to remove all the devices added in a zone individually, you may not be allowed to delete a zone otherwise. Step 1: Tap on the zone you wish to delete. Step 2: Inside the zone tap on ‘wrench’...
- Page 48 Step 5: After you have removed all the devices from the Zone, tap on ‘Wrench’ of the Zone you want to delete, tap on ‘Delete Zone’.
- Page 49 Step 4Q: Deleting your Device (Breez Plus) - iOS users Step 1: Tap on ‘Wrench’ of your registered Device. Step 2: In the Device settings, tap on ‘Delete Device’.
- Page 50 Android users 1. Setting up a schedule You can schedule your Air-Conditioner / Heat Pump connected to Breez Plus by performing following steps on your Cielo Home app: Step 1: On the Home screen, tap on the Air-Conditioner / Heat Pump you want to schedule.
- Page 51 Step 4: Tap the ‘+‘ icon as shown in the red circle. Step 5: If you want to turn the Air-Conditioner / Heat Pump ON/OFF via schedule, select the time, mode, temperature and fan speed of your choice. Select power ON/OFF and select the day/days you want to set the schedule for.
- Page 52 Note: You can also link your Comfy Settings to execute within your Schedules and may also enable or disable them to your liking. 2. Deleting/Editing a schedule Step 1: Tap on ‘Schedule’. Here you will see all your set schedule/schedules. Step 2: Tap on the schedule if you wish to edit it.
- Page 53 - Android users You can set up comfy temperature mode for your Air-Conditioner / Heat Pump by performing these steps via Cielo Home app: Step 1: On the Home screen, tap on the Air-Conditioner / Heat Pump you want to set comfy temperature mode on.
- Page 54 Step 5: Choose your preferred temperature range. Step 6: Select what actions to perform if the temperature falls below or goes above the set range e.g. turning the AC off or on, changing its mode, temperature and fan speed helping it get back into the preferred temperature range.
- Page 55 - Android users You can set up comfy humidity mode for your Air-Conditioner / Heat Pump by performing these steps via Cielo Home app: Step 1: On the Home screen, tap on the Air-Conditioner / Heat Pump you want to set comfy humidity mode on.
- Page 56 Step 5: Choose your preferred humidity range. Step 6: Select what actions to perform if the humidity falls below or goes above the set range e.g. turning the AC off or on, changing its mode, temperature and fan speed helping it get back into the preferred humidity range.
- Page 57 AC runs within that range) - Android users You can set up temperature range control for your Air-Conditioner / Heat Pump by performing these steps via Cielo Home app: Step 1: On the Home screen, tap on the Air-Conditioner / Heat Pump you want to set temperature range control on.
- Page 58 Step 5: Choose your preferred temperature range. Step 6: Tap 'Done' to enable it.
- Page 59 - Android users You can configure location based control for your Air-Conditioner / Heat Pump by performing these steps via Cielo Home app: Step 1: On the Home screen, tap on the Air-Conditioner / Heat Pump you want to control through location controls.
- Page 60 Air-Conditioner / Heat Pump ON/ OFF. Step 5: Check the box to mark the location of Cielo device and tap on ‘Next Arrow’. Step 6: Select your desired AC settings to be performed when you enter or exit the pre-set location and tap on ‘Done’.
- Page 61 Step 5F: Checking your AC’s Air Filter Status - Android users You can check the live air filter status of your Air-Conditioner / Heat Pump. Simply, follow the steps listed below: Step 1: On the Home screen, tap on the Air-Conditioner / Heat Pump you want to check the air filter status for.
- Page 62 Step 4: You will see your current air filter status of the AC being used with the Device since registration. When the bar is about to fill up, manually remove the AC’s air filter and clean it. Once done place filter back into the AC. Step 5: Tap on ‘I have cleaned the air filter’...
- Page 63 Step 5G: Changing Device Name (e.g. bedroom, lounge etc.) - Android users Step 1: Tap on ‘Wrench’ of your registered Device. Step 2: In Device settings, tap on 'Device Preferences'. Step 3: In Device preferences, tap on ‘Change Name’. Step 4: Enter the name of your choice and tap on ‘Update’.
- Page 64 Step 5H: Calibrate Room Temperature (Shown on Device) - Android users Step 1: Tap on ‘Wrench’ of your registered Device. Step 2: In Device settings tap on ‘Device Preferences’. Step 3: In Device preferences tap on ‘Temperature Calibration’. Step 4: Adjust the temperature and tap on ‘Done’.
- Page 65 Step 5I: Calibrate Room Humidity (Shown on Device) - Android users Step 1: Tap on ‘Wrench’ of your registered Device. Step 2: In Device settings tap on ‘Device Preferences’. Step 3: In Device preferences tap on ‘Humidity Calibration’. Step 4: Adjust the humidity and tap on ‘Done’.
- Page 66 Step 5J: Change Appliance (Manufacturer/Model Number) - Android users Step 1: Tap on ‘Wrench’ of your registered Device. Step 2: In Device settings, tap on ‘Change Appliance’. Step 3: Select 'Manual Configuration'. Step 4: Select 'AC / Heat Pump Manufacturer' and 'Remote Control Model Number' from the lists and tap on ‘Update’.
- Page 67 Step 5K: Changing Wi-Fi - Android users Step 1: Tap on ‘Wrench’ of your registered Device. Step 2: In Device settings, tap on ‘Device Wi-Fi’. Step 3: In Device Wi-Fi settings, tap on 'Change Wi-Fi'. Step 4: Select the Wi-Fi you wish to connect to, just enter the password and tap on ‘Connect’.
- Page 68 Step 5L: Disable Wi-Fi (Operate Device only with local controls) - Android users Step 1: Tap on ‘Wrench’ of your registered Device. Step 2: In Device settings, tap on ‘Device Wi-Fi’. Step 3: In Device Wi-Fi settings, tap on 'Disable Wi-Fi'.
- Page 69 Note: if you disable the Wi-Fi using your phone, it can ONLY be enabled from the device. To Enable it again, please ‘press and hold the temperature up button on Device for six seconds and release’. Step 5M: Sync AC State (e.g. AC is ON and App is showing it as OFF) - Android users Step 1: Tap on ‘Wrench’...
- Page 70 Step 5N: Breez Plus Device Display Settings - Android users 1. Switching Device (Breez Plus) Display Screen ON/OFF Step 1: Tap on ‘Wrench’ of your registered Device. Step 2: In Device settings, tap on 'Device Preferences'. Step 3: In Device preferences, tap on ‘Turn ON/OFF Display’ to choose your desired setting.
- Page 71 2. Adjusting the brightness of Device (Breez Plus) Screen Step 1: Tap on ‘Wrench’ of your registered Device. Step 2: In Device settings, tap on 'Device Preferences'. Step 3: In Device preferences, tap on ‘LED Brightness’. Step 4: Adjust brightness of your Device by maneuvering the slider.
- Page 72 Step 5O: Enable or disable touch control function on (Breez Plus) Device - Android users Step 1: Tap on ‘Wrench’ of your registered Device. Step 2: In Device settings, tap on 'Device Preferences'. Step 3: In Device preferences, tap on ‘Touch’. Step 4: You can enable or disable on board Device controls.
- Page 73 Step 5P: Zone Settings of your connected Air Conditioners – Android users 1. Creating a zone A zone will allow you to control power of all your registered devices together with a simple tap. To create a Zone in app, follow these steps: Step 1: Tap on ‘Wrench’...
- Page 74 2. Adding a Device to a zone Step 1: Tap on ‘Wrench’ of the device you would like to add in a zone. Step 2: In Device settings, tap on 'Device Preferences'. Step 3: In Device preferences, tap on "Move to Zone" Step 4: A list of available zones will appear and you can add your device to one of the existing zones.
- Page 75 Step 2: Tap on ‘Wrench’ of the Device you wish to remove. Step 3: In the Device settings, tap on 'Device Preferences' Step 4: In Device preferences, tap on ‘Remove form Zone’. 4. Editing a zone Step 1: Tap on ‘Wrench’ of the zone you wish to edit. Step 2: In zone settings, tap on ‘Edit Zone’.
- Page 76 5. Deleting a zone Note: To delete a zone, you have to remove all the devices added in a zone individually, you may not be allowed to delete a zone otherwise. Step 1: Tap on the zone you wish to delete. Step 2: Inside the zone tap on ‘wrench’...
- Page 77 Step 5: After you have removed all the devices from the Zone, tap on ‘Wrench’ of the Zone you want to delete. Step 6: Tap on ‘Delete Zone’.
- Page 78 Step 5Q: Deleting your Device (Breez Plus) - Android users Step 1: Tap on ‘Wrench’ of your registered Device. Step 2: In the Device settings, tap on ‘Delete Device’.
Need help?
Do you have a question about the Breez Plus and is the answer not in the manual?
Questions and answers