Creality Ender-3 Max User Manual
Hide thumbs
Also See for Ender-3 Max:
- User manual (25 pages) ,
- Instructions for assembly (16 pages) ,
- Manual book (12 pages)
Advertisement
Quick Links
Advertisement

Related Manuals for Creality Ender-3 Max


Summary of Contents for Creality Ender-3 Max
- Page 1 En der-3 Max V1 .4...
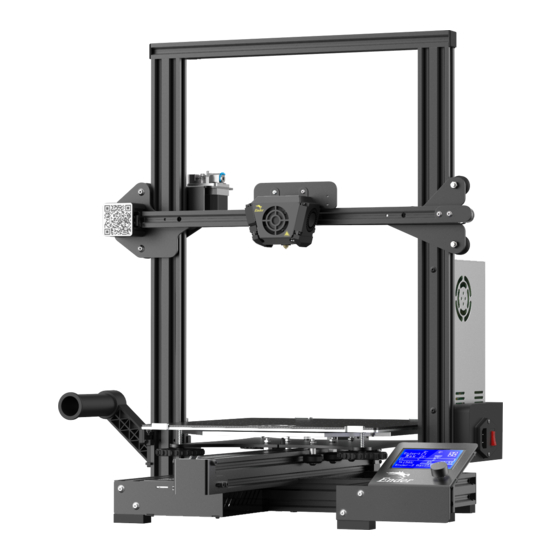
- Page 4 Product Introduction 设备简介 XE-axis kit XE轴组件 P o w er swi tch and socke 电源开关及插座 X-axis limit swi X轴限位开关 Filament detector 断料检测 Print pl a tform 打印平台 Extruder 挤出机 Z-axis limit swi Z轴限位开关 E-axis motor E轴电机 N o zzle kit 喷头套件...
- Page 5 Equipment Parameters 设备参数 Bas ic P arameters 基本参数 Model | 型号 Ender-3 Max Print size | 成型尺寸 300x300x340mm Molding technology | 成型技术 Number of nozzle | 喷头数量 Layer thickness | 打印层厚 0.1mm-0.4mm Nozzle diameter | 喷嘴直径 Standard | 标配 0.4mm XY axis precision | 精度...
- Page 6 Parts List 零部件清单 Screen kit 显示屏组件 P ow er components 电源组件 P ow er cord 电源线 Printer base 底座组件 Gantry frame 龙门架 Rack 料架 Spool 料管 Filament 耗材 M4x25 hexagon socket M5x10 hexagon M5x65 socket head Storage card & button head screws socket button head cap screws card reader...
- Page 7 Install the Gantry Frame 安装龙门架 Put the gantry on the base, tighten and x it with 4 M5*65 combination screws. 用4颗M5*65 内六角圆柱头螺丝 将龙门架放置于底座上,拧紧固定。 Printer base 底座组件 Gantry frame 龙门架 M5x65 socket head cap screws M5x65内六角圆柱头螺丝...
- Page 8 Install the Power Supply 安装电源 Fix the gantry frame with 2 M4*25 hexagon socket at head screws. 用2颗M4*25内六角平圆头螺丝置于龙门架上,拧紧固定。 Power components 电源组件 M4x25 hexagon socket x 2 button head screws M4x25内六角平圆头螺丝...
- Page 9 M5x10 hexagon socket button head screws M5x10内六角平圆头螺丝...
- Page 10 Install the Spool Holder 安装料架 Rack 料架 Spool 料管...
- Page 11 Replace the Platform 更换平台 Power o the printer, the equipment is in shutdonw-condi- tion; After the hot bed is cooled, turn off the clamps on the front platform, then the glass board can be replaced. 将打印机断电 , 设备处于关机状态 ; 热床降温后,转动正面平台板上的 夹子,方可进行玻璃板更换。...
- Page 12 Cable Connection 设备接线 Connect X, E, Z-axis stepper motors according to the yellow label on the 6-pin (4 wires) port. 按照6-pin ( 4根线) 端口上黄色标签提 Connect X, Z-axis limit switches according to the yellow label on the 3-pin (2wires) port. 示连接X、 E、 Z轴步进电机。 按照3-pin (...
- Page 13 Level the Platform 调平平台 Make sure the nozzle returns to origin and turn o the motor. D uring the leveling process, please do not touch the Te on tube and nozzle cable. 确认喷嘴回到原点,方可关闭电机;调平过程中,请不要触碰铁氟龙管及喷头排线。...
- Page 14 1. Move the nozzle near the top of the leveling nut. Screw the nut and adjust the distance between the nozzle and the printing platform. The distance is about 0.1mm. (Thickness of a piece of A4 paper) 2. We can use a piece of A4 paper to assist in leveling, so tha t the nozzle can just scratch the A4 paper.
- Page 15 Preheat 预热 Method 1 方法一...
- Page 16 Preheat 预热 Method 2 方法二...
- Page 17 The end of the lament should be placed as shown in the picture to smoothly load lament. 为了顺利完成装料,耗材的末端位置应如图所示。...
- Page 18 Load Filament 装料 When the temperature reaches the target temperature, press the extruder spring, insert the lament into the small hole of the extruder until the position of the nozzle, and waiting to the lament ows out at the nozzle, which means that the lament has been loaded.
- Page 19 Creality Ender-3 Max Creality Ender-3 Max Creality Ender-3 Max Creality Ender-3 Max Creality Ender-3 Max Creality Ender-3 Max...
- Page 21 Memory card slot 存储卡卡槽...
Need help?
Do you have a question about the Ender-3 Max and is the answer not in the manual?
Questions and answers