Advertisement
Quick Links
Advertisement

Related Manuals for Linksys E9450


Summary of Contents for Linksys E9450
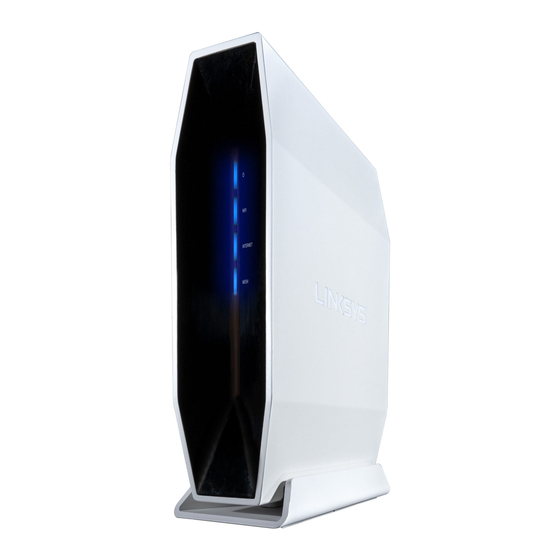
- Page 1 Linksys E9450 WiFi 6 Dual-Band router Training & Installation...
- Page 2 • Set up mode for ONR with Bridge Mode (Manual) • Manual Set up • Adding additional nodes of E9450 (Mesh Parent mode) • Adding additional nodes of E9450 (Mesh mode) • Set as standalone mode (Non-mesh system) • Parental Controls •...
-
Page 3: Product Features
Product Features Buttons and Switch Dual-Band AX5400 at up to 5.4 Gbps • • Wi-Fi Protected Setup (WPS) button 802.11ax Wireless Technology • • Power switch 1.5 GHz Tri-Core processor • • Reset button 2x2 + 4x4 Spatial streams (6 streams) •... - Page 4 • Recommended to connect RG’s Ethernet port to PC via LAN cable (wired). • Else setup wireless using default routers name, “LinksysXXXXX-guest” with the passphrase printed on the sticker label is required. • Without STB, connect FTP to either ONR/ONT then to Linksys. To PC To ONT/ONR...
- Page 5 Physical Set Up (With STB) To PC To PC To ONT/ONR To ONT/ONR...
- Page 6 Set up via Linksys GUI (Recommended)
- Page 7 Set up via Linksys GUI (Recommended) 1. Launch a web browser and enter Router’s GUI http://192.168.79.1 2. Enter default Username and Password Username: admin • Password: admin • 3. ‘Apply’ 4. Set up E9450, Click ‘Next’...
- Page 8 Set up via Linksys GUI (Recommended) 5. Create new router Password Include at least 10 characters in length. • Include at least 1 uppercase letter. • Include at least 1 lowercase letter. • Include at least 1 number. • Include at least 1 special character.
- Page 9 7. Follow the Setup Wizard to change the default administration password, set up a parent node (unless adding a child node to an existing Wi-Fi system), select a transmit region and Name your Wi-Fi. * Only Linksys E9450 child nodes are supported.
- Page 10 Set up via Linksys GUI (Recommended) 8. Follow the Setup Wizard...
- Page 11 Set up via Linksys GUI (Recommended) 9. Choose if you want to set up another node. If ‘No I’m done’ go to step 11. • If ‘Yes’ continue to next slide. •...
- Page 12 Set up via Linksys GUI (Recommended) 10. Click ‘Its Solid Blue’ and follow the instructions.
- Page 13 Set up via Linksys GUI (Recommended) 11. Connect node to modem and ‘Check for latest firmware’...
- Page 14 Set up via Linksys GUI (Recommended) 12. Double check Auto Firmware Upgrade Feature. (‘Check Firmware’) Auto Firmware Upgrade Feature will always keep your device fresh with the latest update. Be it • security patches, features, performance improvements, bug fixes, etc.
- Page 15 Set up via Linksys GUI (Recommended) By default, the router runs in DHCP WAN mode without VLAN tag. This page may appear when E9450 is installed with Singtel ONT that requires VLAN tag Click “Go to the Internet settings” to continue the setup...
- Page 16 Set up via Linksys GUI • To allow full Singtel Home Broadband experience, the E9450 can be configured as Residential Gateway (RG) or Bridge Mode (AP) depending of the Modem Configuration – See the following pages for different configuration with different modem constructs.
- Page 17 Set up mode for ONT (Optical Network Terminal) • If you are using a Singtel ONT, disconnect and remove your old router.
- Page 18 Set up mode for ONT (Singtel Profile) as RG “Singtel” Profile will have DHCP Option 60, IGMP Proxy, DNS Forwarding, Static Router for Multicast STB and support the MioTV STB to work. It also incorporated the multi VLAN on WAN Interface.
- Page 19 Set up mode for ONR (Bridge Mode) as Bridge • If you are using a Singtel ONR/ONR with bridge mode, disconnect and remove your old router/access point.
- Page 20 STB to work behind E9450. DHCP Option 60 Passthrough from STB to ONR for the Multicast Streaming feature. When applying bridge mode, the router will reboot. You will lose the connection to the E9450. To re-access E9450 GUI, you may want to check its IP address from ONR’s DHCP list.
- Page 21 Set up mode for ONR with Bridge Mode (Manual) From factory default mode, follow setup wizard. (recommended to avoid any misconfiguration)
- Page 22 Set up mode for ONR with Bridge Mode (Manual) No need to change any setting in this page. Click Next...
- Page 23 Set up mode for ONR with Bridge Mode (Manual) Make sure Enable NAT and Enable Firewall is checked. Leave the rest as default. Click Next...
- Page 24 Set up mode for ONR with Bridge Mode (Manual) Default DNS from available WAN Interface should be This shows the configuration summary. WAN.1. Click Next Click Apply/Save. If needed, please reboot the router to ensure configuration is applied properly.
- Page 25 Manual Set Up • Create a new SSID (Wi-Fi name) and Passphrase (Wi-Fi Password). Click Apply/Save once done. General > Mesh Setup...
- Page 26 Manual Set Up • Go to General > Internet Setup • Click on Wireless > Radio. Select • Select the preconfigured profile of Singtel and your Country from the drop-down menu, then scroll down and click Apply. click Apply to save settings...
- Page 27 Manual Set Up • Now reboot the modem and wait until the INTERNET indicator light on the front panel of the router turns solid blue.
- Page 28 • The Linksys E9450 connected to the modem is called the parent node. Other Linksys E9450 routers that you will use to extend the Wi-Fi are called child nodes. • The external WPS button is located at the Linksys E9450’s back panel. It is the first button at the top...
- Page 29 Adding additional nodes of E9450 (Mesh Parent mode) There are two ways to add E9450 Child Node into a Parent E9450 • Through Setup Wizard – See slide 6 video • From GUI – General > Internet Setup > Mesh Setup > Add a new node...
- Page 30 Adding additional nodes of E9450 (Mesh Parent mode) Wait for child node to power up properly, Press “It’s Once the Child Node power up completely, press Solid Blue” to continue “Done”...
- Page 31 Adding additional nodes of E9450 (Mesh Parent mode) Press WPS button of the Child Node for at least 3 The countdown has started Monitor the MESH LED of both Parent and Child Node. At this time, it should be blinking blue rapidly.
- Page 32 Adding additional nodes of E9450 (Mesh Parent mode) • Once pairing is complete the MESH indicator light will turn solid blue and the connected child node will now appear on the table of connected child nodes. • To rename the child node, simply enter your preferred Name in the field then click Update once...
- Page 33 Adding additional nodes of E9450 (Mesh mode) • Child Node information should be added into Mesh Setup Page. N.B. With current shipping firmware, it only allow to add up to 2 child nodes in one system. To add more nodes will...
- Page 34 Set as standalone mode (Non-mesh system) In this Mode, the E9450 will disable the Mesh functionality and work as a standalone/traditional router. In this Mode, the SSID format will be change accordingly: • 2.4GHz == XXXXXX • 5GHz == XXXXXX_5G...
- Page 35 Parental Controls (Access Time Restriction) 1. Log into parent node. 2. Advanced setup > Parental Control 3. Under the Access Time Restriction section, click Add button. 4. Enter a user name for the client...
- Page 36 Parental Controls (Access Time Restriction) 5. Select the Other MAC Address radio button and enter the client’s MAC address. NOTE: The Browser's MAC Address automatically displays the MAC address of the LAN device where the browser is running. 6. Choose the days you want to restrict the client from accessing the network...
- Page 37 Parental Controls (Access Time Restriction) 7. Enter the start and end blocking times. 8. Click Apply/Save. Note: To delete a client from parental controls, just check the Remove box and click the Remove button.
- Page 38 Parental Controls (URL Filter) 1. Log into parent node. 2. Advanced setup > Parental Control 3. Under the URL Filter section, select Exclude and click Add button.
- Page 39 Parental Controls (URL Filter) 4. Enter a URL Address and click Apply/Save A URL address will be displayed in the table.
- Page 40 Management Tab (Factory Reset Router) If you encounter any issue, you can always start fresh by factory reset the router. Please note that all the existing configuration will be wiped out, make sure you backup any configuration if needed. Press the Reset Button at least 5 seconds...
- Page 41 Management Tab (Access Control > Passwords) • Make sure to use ‘admin’ as user name.
- Page 42 Router Light Behaviour...
Need help?
Do you have a question about the E9450 and is the answer not in the manual?
Questions and answers