Table of Contents
Advertisement
Quick Links
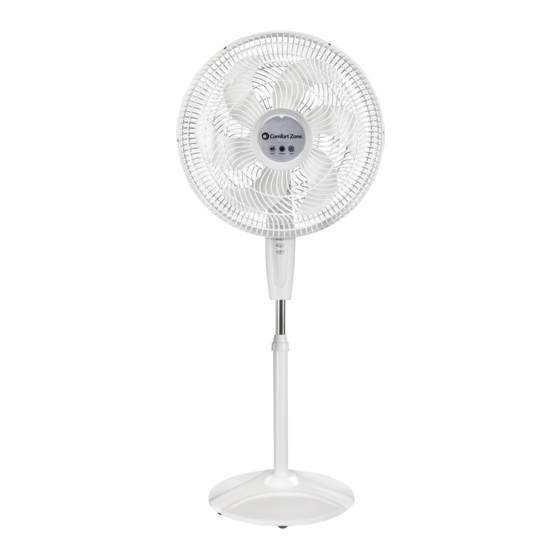
POWR CURVE TECHNOLOGY
with its 6-blade fan design has
30% higher airflow for maximum
cooling.
The TRIPLE-ZONE tri-curve grille
eliminates turbulence for a stronger
airflow with 20% less noise!*
*Note: Compared to a non-curved fan grille
Patent Pending
18" Turbo Performance
Stand Fan
Features:
• 2-In-1 Fan Design: Stand or Wall-Mountable
• Push-Button Control with 3 Speed Settings
and Pilot/Night Light
• Tri-Curve Plastic Safety Grille
• 6 Fan Blades
• Adjustable Tilt Head
• Wide Area Oscillation
• Adjustable Stand up to 53in. Height
• 120V A.C. / 60Hz
www.comfortzoneproducts.com
CZST180 Series
Save These Instructions
Advertisement
Table of Contents

Related Manuals for Comfort Zone POWR CURVE CZST180 Series


Summary of Contents for Comfort Zone POWR CURVE CZST180 Series
- Page 1 CZST180 Series POWR CURVE TECHNOLOGY with its 6-blade fan design has 30% higher airflow for maximum cooling. The TRIPLE-ZONE tri-curve grille eliminates turbulence for a stronger airflow with 20% less noise!* *Note: Compared to a non-curved fan grille Patent Pending 18"...
-
Page 2: Intended Use
• Do not use outdoors. imperfections. For repairs covered under warranty, see warranty • Do not use fan in window. Rain may cause electrical hazard (for statement. For all other repairs contact Comfort Zone Customer ® non-window models). -
Page 3: Parts Identification
www.comfortzoneproducts.com PARTS IDENTIFICATION Step 2: Fig. 2 Using a Philips-head 1. Front grille screwdriver, screw the 2. Rear grille 3x8mm screew with washer top (included 3. Grilles’ clips in the parts kit) into the 4. ST 3x8mm Screw cylinder-shaped housing with washer top: at the top of the grille (secures rear grille... -
Page 4: Base Assembly
www.comfortzoneproducts.com WALL MOUNTING STAND FAN ASSEMBLY: This fan comes with a wall Base Assembly: mounting option. Step 1: Unscrew the L-screw from the Note: It is not recommended to Fig. 1 telescopic tube washer and set install the fan support bracket on prefabricated walls or unstable the tube inside the base's round walls. -
Page 5: Care And Maintenance
www.comfortzoneproducts.com Oscillation Switch: CARE AND MAINTENANCE Cleaning: The oscillation control knob may not be attached when the fan CAUTION-Before cleaning the fan be sure to is first removed from the box. To attach, locate the oscillation disconnect power cord from the plug. Clean the grille surface control knob inside the plastic with a clean damp cloth. -
Page 6: Limited Warranty
www.comfortzoneproducts.com LIMITED WARRANTY This unit is guaranteed to the original retail purchaser against defects in quality or workmanship for a period of one year from the date of original purchase. If this unit fails because of a manufacturing defect within 30 days of purchase, return the unit, with your receipt, to the retailer.
Need help?
Do you have a question about the POWR CURVE CZST180 Series and is the answer not in the manual?
Questions and answers