Table of Contents
Advertisement
Quick Links
USE AND CARE GUIDE
12 IN. MULTI-COLOR LED STRIP KIT (4-PACK)
R
G
Questions, problems, missing parts? Before returning to the store,
8 a.m. - 7 p.m., EST, Monday - Friday, 9 a.m. - 6 p.m., EST, Saturday
We appreciate the trust and confidence you have placed in Commercial Electric through the purchase of this LED
strip kit. We strive to continually create quality products designed to enhance your home. Visit us online to see our
full line of products available for your home improvement needs. Thank you for choosing Commercial Electric!
OFF
ON
B
WW
Flash
Strobe
Fade
Smooth
call Commercial Electric Customer Service
1-877-527-0313
HOMEDEPOT.COM
THANK YOU
Item #0000 000 000
Model # C423100
+12V
R
G
B
W
+12V
R
G
B
W
Advertisement
Table of Contents

Summary of Contents for Commercial Electric C423100
- Page 1 THANK YOU We appreciate the trust and confidence you have placed in Commercial Electric through the purchase of this LED strip kit. We strive to continually create quality products designed to enhance your home. Visit us online to see our...
-
Page 2: Table Of Contents
Table of Contents Table of Contents ............2 Installation ..............5 Safety Information .............2 Operation..............10 Warranty..............3 Care & Cleaning ............11 What is covered .............3 Troubleshooting ............11 What is not covered ..........3 FCC Statement ............11 Pre-Installation ............3 Planning Installation ..........3 Safety Information Always keep the user manual within reach while CAUTION: Danger of eye damage. -
Page 3: Warranty
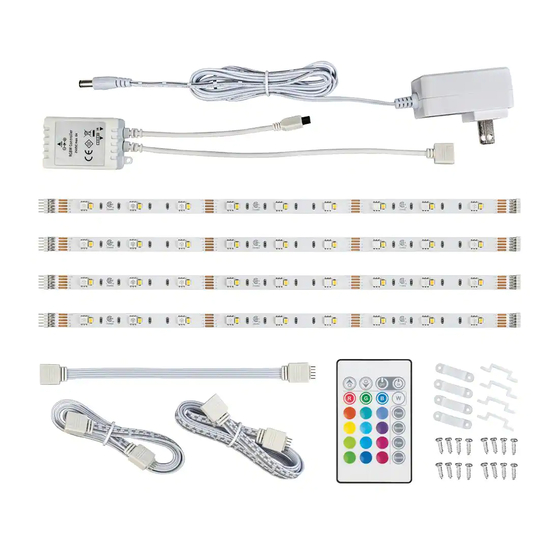
Warranty THREE (3) YEAR WARRANTY WHAT IS COVERED The manufacturer warrants this fixture to be free from defects in materials and workmanship for a period of three (3) years from date of purchase. This warranty applies only to the original consumer purchaser and only to products used in normal use and service. - Page 4 PACKAGE CONTENTS +12V +12V +12V +12V +12V +12V +12V +12V Flash Strobe Fade Smooth Part Description Quantity Adapter 12 in. LED strip Infrared receiver (Assembled to the adapter (A)) Remote Connector wire Connector wire...
-
Page 5: Installation
Installation Installation considerations □ What is the best layout configuration for your installation? □ How will you run and conceal the wires to your LED tape lighting? □ Temporarily mounting the LED light strip using painter’s tape allows you to experiment with tape light positioning before permanent installation. - Page 6 Installation (continued) Cutting the LED strip (optional) □ By cutting the strip and exposing the copper pads, optional connector (C760011) or accessory (C760110) pack can be used for a more custom installation. +12V +12V Cut LED tape in center of copper pads Optional connector Optional accessory (C760011)
- Page 7 Installation (continued) Installing the LED strip □ 4A Tape method: Working from one end to the other, remove the 3M paper backing and press into place. Press between the LEDs to help ensure secure contact with the mounting surface. Avoid pressing on the individual LEDs as this could damage the LED solder connections.
- Page 8 Installation (continued) Installing the infrared receiver □ There are two options: A. Remove the protective tape from the adhesive back of infrared receiver, then place the infrared receiver onto the position and press to insure proper adhesion to the surface. B.
- Page 9 Installation (continued) Connecting to the power supply Connect adapter to power outlet Connect the adapter plug to infrared receiver controller Infrared receiver controller Adapter with plug LED strip light Infrared receiver HOMEDEPOT.com Please contact 1-877-527-0313 for further assistance.
-
Page 10: Operation
Operation Using the remote □ Direct the remote (D) towards the infrared receiver (C) to change RGBW colors of the strip. A--- Use to increase or decrease color brightness and to slow down or accelerate speed. B--- ON/OFF switch. C--- R,G,B,W: Flash Choose color: red, green, blue or warm white. -
Page 11: Care & Cleaning
Care and Cleaning □ To clean the fixture, disconnect the power by unplugging the adapter. Use a dry or slightly dampened, clean cloth to wipe the exterior surface of the fixture. □ Do not use any cleaners with chemicals, harsh abrasives, or solvents. Use only a dry soft cloth to dust or wipe carefully. - Page 12 Questions, problems, missing parts? Before returning to the store, call Commercial Electric Customer Service 8 a.m. - 7 p.m., EST, Monday-Friday, 9 a.m. - 6 p.m., EST, Saturday 1-877-527-0313 HOMEDEPOT.COM Retain this manual for future use.


Need help?
Do you have a question about the C423100 and is the answer not in the manual?
Questions and answers