Advertisement
Quick Links
Advertisement

Related Manuals for Trampoline pro Jump Slammer

Summary of Contents for Trampoline pro Jump Slammer
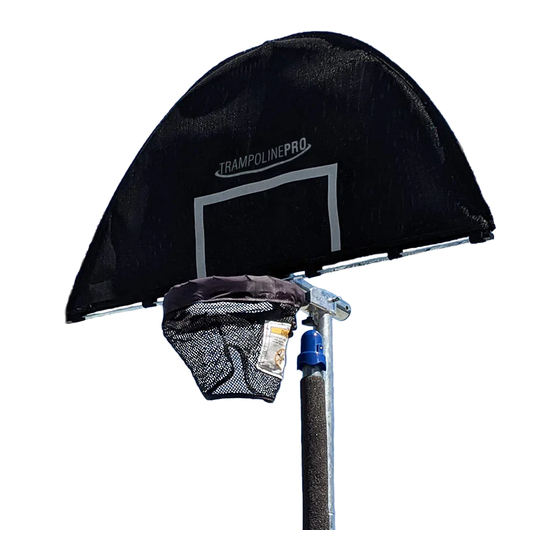
- Page 1 www.trampolinepro.com...
-
Page 2: Warranty
6. To make a warranty claim contact Customer Service at (800) 473-5867 or customerservice@trampoline- pro.com for further instruction on how to return the product to Trampoline Pro under the warranty program. 7. If Trampoline Pro ascertains that material and/or construction defects of the product or its components have occurred during the warranty period, Trampoline Pro will repair or replace, according to its choice, the product free of charge. - Page 3 Components / Komponenten / Onderdelen / Composants 2. Flex Rod Thin ( 6) 1 PC 1. Flex Rod With Connector ( 6) 2PCS 3. Clip Rod ( 6) 1PC 4. Horizontal plate 2 PCS 6. Rim Pin 1PC 5. Baskeball Rim with Net 1PC 7.
- Page 4 11. M8x110mm Bolt 4PCS 10. Securing Bracket 4PCS 8 Adjust Bracket Pin 1PC 12. Twist Knob 4PCS 14. Basketball 1PC...
- Page 5 Assembly steps / Montageschritte / Montage / Assemblée 1. Insert the two Horizontal plates (4) into the Basketball bracket with net (5) as shown. Securing with the Rim Pin (6) as shown in 1A. 2. Insert Flex Rod Thin (2) into the Clip Rod (3) as shown in Pic 2A. Then connect the Flex Rod with connector (1) onto the left and right of Flex Rod Thin (2) as shown in pic 2B.
- Page 6 3. Bend the flex rod and insert the rod ends into the Horizontal plates (4) as shown. 4. Insert the Clip Rod (3) end into the tube as shown.
- Page 7 5. Slide the Backboard with net (9) onto the Flex Rod frame. 6. Insert the Fixed Support (8) pole into the Adjust Bracket (7).
- Page 8 7. Attach the Fixed Support (8) pole to the enclosure pole using the four Securing Brackets (10). M8x110mm Bolts (11) and Twist Knobs (12) as shown in picture. Take caution to avoid injury while installing the Jump Slammer. Use a ladder for safe installation.
- Page 9 8. Place the Basketball Rim with net (5) onto the Adjustment Bracket (7) and secure with the adjustment bracket pin (13). Note: Place the adjustment bracket pin (13) into one of the three adjustment positions to adjust the location of the backboard. So, that it is lined up vertically with your enclosure net.
- Page 10 Jump Slammer should work with most enclosure styles). Attach the backboard with net base (9) by using the small ties to secure the Jump Slammer net to the top of the enclosure net as shown in pictures 10C, 10A.
- Page 11 11. Congratulations! You have finished the Jump Slammer assembly. Do not hang, over jump or lose control while playing with the Jump Slammer. To avoid unnecessary damage or injury, Jump Slammer is for single recreational play only.
- Page 12 Trampoline Pro 709 N 400 W STE 1 North Salt Lake, UT 84054 www.trampolinepro.com...
Need help?
Do you have a question about the Jump Slammer and is the answer not in the manual?
Questions and answers