
Related Manuals for Vax AirTM Lift DRIVE


Summary of Contents for Vax AirTM Lift DRIVE
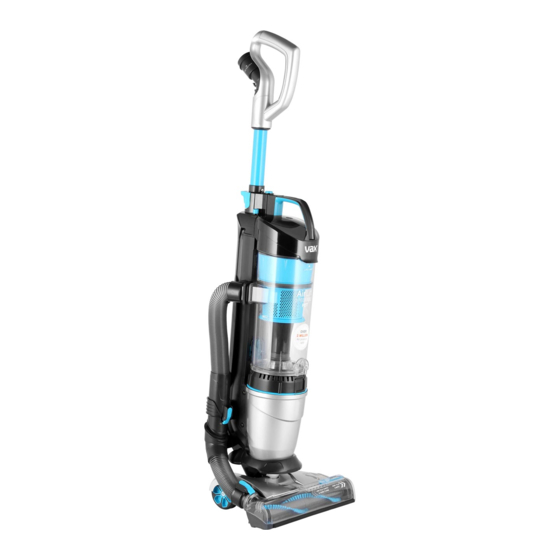
- Page 1 Lift THE UK’S LIGHTEST CORDED LIFT-OUT * WITH DRIVE TECHNOLOGY LET’S GET STARTED. CDUP-ADXS CDUP-ADXA *UK market data January – December 2018.
-
Page 2: Safety Guide
• Keep fingers, hair and loose clothing away from moving parts and openings whilst using the machine. • Only VAX recommended accessories/tools should be used with the machine, use of non-branded accessories/tools will invalidate your warranty. • Always switch off and unplug the machine before performing maintenance or troubleshooting checks. - Page 3 • Always check the floorhead and accessories are free from damage, dirt and debris before use. • Store the machine in a cool, dry area. If the filters have been cleaned as per the user guide instructions ensure they are thoroughly dry before storing away. support.vax.co.uk...
-
Page 4: Warranty & Technical
WARRANTY & TECHNICAL WARRANTY If a VAX machine is used in the way it is intended and it breaks down within the guarantee period, it’s our responsibility to repair or replace it. Here’s what isn’t covered: • Functional parts, tools and accessories after 12 months that may suffer premature failure due to every day wear and tear. -
Page 5: Table Of Contents
Getting in touch Included with your Air Lift Drive and Air Lift Drive Plus 3-in-1 Tool TurboTool Hard Floor Adaptor (Crevice Tool, Dusting Brush and Upolstery Tool) Extra tool included with your Air Lift Drive Plus Flexi Crevice Tool support.vax.co.uk... -
Page 6: Getting To Know Your Machine
Extension tube Power On/Off button Brushbar On/Off button Quick release cord hook 3-in-1 tool storage clip Quick release cord hook Wand release Hose holder TECHNICAL SPECIFICATION VAX Air Lift Drive Series Voltage 220-240V Wattage Full product: 850W Lift-out: 750W Frequency 50Hz... -
Page 7: Getting Started
IMPORTANT: Always switch off the machine before connecting or disconnecting the lift-out/hose/accessories or removing and emptying the dirt container. Assembly Slide the handle with the Place the 3-in-1 tool onto extension tube into the the storage clip. top of the machine until it clicks into place. support.vax.co.uk... -
Page 8: Using Your Machine
The brushbar should be ON for carpets and OFF for hard floors. Whilst using the whole unit, don’t forget to use the handle cord hook so that the cord doesn’t get pulled, caught or tangled in the machine. support.vax.co.uk... - Page 9 To refit the lift-out place the lift-out base onto the back panel and floorhead. In a hinge like manner push the lift-out backwards until it clicks into place. support.vax.co.uk...
- Page 10 ON/OFF Attach the chosen accessory to the end of the hose. Press the On/Off button to switch the machine on. support.vax.co.uk...
- Page 11 Unhook the curved clips from the small wheels on the base of the machine. support.vax.co.uk...
-
Page 12: Maintenance & Cleaning
Tap the filter over a bin Wash the filter under release clip upwards to tab and remove the filter. to remove any dirt/debris. running water (40˚ max). open the container lid. Leave for 24 hours or until fully dry before replacing. support.vax.co.uk... - Page 13 Do not wash, scrub or brush the post-motor filter as this will damage the filter. Ensure all filters are in place before using the machine. Twist the post-motor filter Lift and remove the Check the post-motor filter cover anticlockwise and post-motor filter. for any discolouration, remove. when heavily discoloured it should be replaced. support.vax.co.uk...
- Page 14 Place a foot on the Press the On/Off button Press the brushbar button floorhead and pull the to switch the machine on. to activate the brushbar. handle backwards to The brushbar should be recline. ON for carpets and OFF for hard floors. support.vax.co.uk...
- Page 15 Remove firstly hook the belt over rotate the belt and cog on the side of the floorhead. the belt. the small cog. anticlockwise. During rotation the belt will slide onto the cog. support.vax.co.uk...
- Page 16 2 any blockage in the hose hoses from the hose holders. should then be visible. Using a blunt instrument, push into the stretched out hose to remove the blockage. support.vax.co.uk...
-
Page 17: What To Do If It Goes Wrong
• The filters may need cleaning or replacing. See Cleaning the pre-motor filter page 12 and Post-motor filter maintenance page 13. • There may be a blockage in the hose, check and clear any blockages. See Checking for blockages page 16. support.vax.co.uk... - Page 18 GET IN TOUCH info@vax.co.uk vax.co.uk support.vax.co.uk...
Need help?
Do you have a question about the AirTM Lift DRIVE and is the answer not in the manual?
Questions and answers