Table of Contents
Advertisement
Quick Links
Advertisement
Table of Contents

Related Manuals for Celestron G-9.25


Summary of Contents for Celestron G-9.25
- Page 1 The G-9 Model #11037 INSTRUCTION MANUAL...
-
Page 2: Table Of Contents
Attaching the R.A. Slow Motion Knob ... 9 Attaching the Declination Slow Motion Knob... 10 Attaching the Counterweight Bar and Counterweights ...11 Attaching the Telescope to the Mount ...12 Removing the Lens Cap ...13 Balancing the Telescope in R.A..14 Balancing the Telescope in DEC ... - Page 3 Piggyback ... 44 Eyepiece Projection ...46 Long Exposure Prime Focus ... 48 TELESCOPE MAINTENANCE TELESCOPE MAINTENANCE TELESCOPE MAINTENANCE TELESCOPE MAINTENANCE ... TELESCOPE MAINTENANCE Care and Cleaning of the Optics ...50 Collimation ... 50 Technical Specifications ... 52 OPTIONAL ACCESSORIES OPTIONAL ACCESSORIES ...
-
Page 4: Introduction
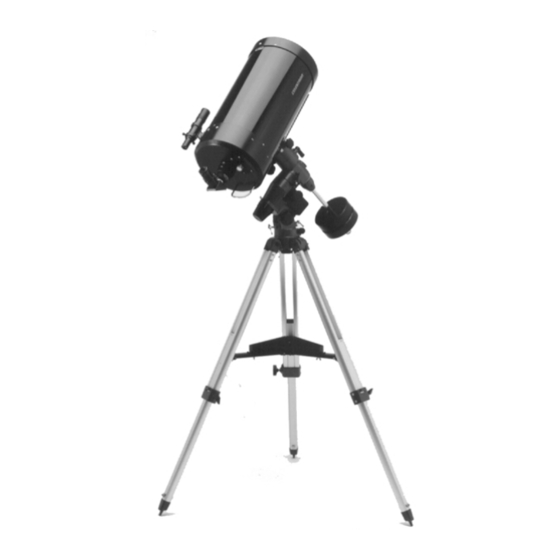
With a mirror diameter of 9.25 inches, your Celestron has a light gathering power of 1,126 times that of the unaided human eye. Yet despite its large aperture, the Celestron G-9 optical system is extremely compact and portable because it utilizes the Schmidt- Cassegrain design. -
Page 5: A Word Of Caution
Your G-9 telescope is designed to give you hours of fun and rewarding observa- tions. However, there are a few things to consider before using your telescope that will ensure your safety and protect your equipment. NEVER LOOK DIRECTLY AT THE SUN WITH THE NAKED... - Page 6 This cross-sectional diagram shows the light path of the Schmidt-Cassegrain optical system. Note that the light rays travel the length of the telescope tube three times, making this a compact optical design. Note that the curve of the corrector plate is greatly exaggerated.
-
Page 7: Unpacking Your
G-9 1/4 G-9 1/4 When setting up the telescope, find a large, clear area where the parts can be laid out without fear of losing them. Start with the tripod and mount. Remove the contents of the box and place them neatly on your work surface. Leave the optical tube in its box until you are ready to attach it to the mount. - Page 8 The G-9 The G-9 The G-9 The G-9 The G-9 1. Lens Cover 2. Dovetail Bar Clamp Knob 3. R.A. Lock Lever 4. Counterweight Shaft 5. Counterweights 6. Tripod 7. Leg Extention Clamp / / / / / 1 1 1 1 1 4 4 4 4 4 Figure 2-1 8.
-
Page 9: Assembling The Cg-5 Equatorialmount
Setting Up the Tripod Setting Up the Tripod Setting Up the Tripod Setting Up the Tripod Setting Up the Tripod The tripod comes fully assembled with the metal plate, called the tripod head, that holds the legs together at the top. In addition, the brackets that support the accessory tray are also attached to the tripod. -
Page 10: Attaching The Accessory Tray
Attaching the Accessory Attaching the Accessory Attaching the Accessory Attaching the Accessory Attaching the Accessory With the tripod set up, you are ready to attach the accessory tray to the tripod. Tray Tray Tray Tray Tray There are three wing bolts that hold the accessory tray to the bracket. 1. -
Page 11: Attaching The Equatorial Mount
Mount easier to attach the mount and telescope. The equatorial mount allows you to tilt the telescope’s axis of rotation so that you can track the stars as they move across the sky. The CG-5 mount is a German equatorial mount that attaches to the tripod head (i.e., metal plate on the tripod). -
Page 12: Attaching The R.a. Slow Motion Knob
With the mount securely in place, you are ready to attach some of the accessories (the telescope tube will be added last). Start with the Right Ascension (R.A.) slow motion knob. The R.A. slow motion knob allows you to make fine pointing adjustments in the direction the telescope is aiming (once it is attached to the mount). -
Page 13: Attaching The Declination Slow Motion Knob
The shaft that the DEC slow motion knob fits over is toward the top of the mount, just below the telescope mounting platform. Once again, you have two shafts to choose from. Use the shaft that is pointing toward the ground. This makes it easy to reach while looking through the telescope, something which is quite important when you are observing. -
Page 14: Attaching The Counterweight Bar And Counterweights
Attaching the Counterweight Bar and Counterweights The last item to be mounted before the telescope tube is the counterweight bar and counterweights. Used to balanced the telescope, the counterweight bar attaches to the opposite side of the mount as the telescope. To install the counterweight bar: 1. -
Page 15: Attaching The Telescope To The Mount
NOTE: NOTE: This illustration shows the correct mounting procedure for the optical tube onto the CG-5 mount. The dovetail slide bar has been attached to the telescope tube and is ready to attach to the CG-5 mount. • The G-9 1/4 With the mount fully assembled, you are ready to attach the telescope to the mount. -
Page 16: Removing The Lens Cap
In addition, proper balancing is crucial for accurate tracking if using an optional motor drive. To balance the mount: 1. Release the R.A. Clamp and position the telescope off to one side of the mount (make sure that the balance bracket thumbscrew is tight). The counterweight bar will extend horizontally on the opposite side of the mount (see figure 2-9). -
Page 17: Balancing The Telescope In Dec
DEC clamp is released. To balance the telescope in DEC: 1. Release the R.A. clamp and rotate the telescope so that it is on one side of the mount (i.e., as described in the previous section on balancing the telescope in R.A.). -
Page 18: Adjusting The Mount In Altitude
The latitude adjustment on the CG-5 mount has a range of 40°, starting at 20° going up to 60°. For rough adjustments in azimuth, simply pick up the telescope and tripod and move it until the R.A. axis is roughly pointed towards north. For fine adjust- ments in azimuth: 1. -
Page 19: Disassembling And Transporting Your
Disassembling and The entire telescope and mount can be picked up and carried outside for a Transporting Your casual observing session. If, however, you want to transport your G-9 remote observing location, you must partially disassemble it. Here’s how: 1. Remove the telescope from the equatorial mount. Return it to the shipping 2. -
Page 20: Attaching The Accessories
This section deals with basic telescope operations that are common to all Celestron Schmidt-Cassegrain telescopes. Attaching the There are several accessories that come standard with all the Celestron Schmidt- Cassegrain telescopes. The installation and use of each of these is described in this Accessories section. -
Page 21: The Eyepiece
The eyepiece, or ocular, is an optical element that magnifies the image focused by the telescope. The eyepiece(s) fits into either the visual back directly (see figure 3-1), the star diagonal, or an erect image diagonal. To attach an eyepiece: To remove the eyepiece, loosen the set screw on the star diagonal and slide the eyepiece out. -
Page 22: Image Orientation
If inserting the eyepiece into the visual back (i.e., without the star diagonal), the image is inverted (upside down and reversed from left-to-right). This holds true for the 6x30 finder as well as the telescope. For correct orientation through the telescope, which is important primarily for terrestrial observing, use the optional 45°... -
Page 23: Focusing
(see figure 3-5). The focusing knob, which moves the primary mirror, is on the rear cell of the telescope. To focus, turn the focusing knob until the image is sharp. If the knob will not turn, it has reached the end of its travel on the focusing mechanism. -
Page 24: Aligning The Finder
Choose a conspicuous object that is over 500 yards away. This will eliminate any possible parallax effect. Point your telescope at the target and center it in the main optics of the tele- scope. Lock the R.A. and DEC clamps to hold the telescope in place. -
Page 25: Your First Look
Your First Look With the telescope fully assembled and all the accessories attached you are ready for your first look. Your first look should be done in the daytime when it will be easier to locate the locking clamps and adjustment handles. This will help to familiarize you with your telescope, thus making it easier to use at night. -
Page 26: Nighttime Observing
10. Take your time and study your subject. If looking at the Moon, look for small details in the craters. That’s all there is to using your Celestron telescope. However, don’t limit your view of an object to a single eyepiece. After a few minutes, try using a different optional eyepiece, a more powerful one. -
Page 27: Calculating Magnification
.55° by 52.5. This produces a field width of 29 feet at one thousand yards. The apparent field of each eyepiece that Celestron manufacturers is found in the Celestron Accessory Catalog (#93685). -
Page 28: General Observing Hints
If you have astigmatism, corrective lenses should be worn at all times. Your Celestron telescope can be used for both terrestrial and astronomical photogra- phy. Your G-9 has a fixed aperture and, as a result, a fixed f/ratio. To properly expose your subjects photographically, you need to set your shutter speed accord- ingly. -
Page 29: The Celestial Coordinate System
Your Celestron telescope comes equipped with setting circles that translate the celestial coordinates into a precise location for the telescope to point. The setting circles will not work properly until you have polar aligned the telescope and set the R.A. - Page 30 Like the Sun, the stars also appear to move across the sky. This motion is caused Motion of the Stars by the Earth’s rotation. For observers in the northern hemisphere, all stars appear to move around the north celestial pole. For observers in the southern hemisphere, all stars appear to move around the south celestial pole.
-
Page 31: Motion Of The Stars
The result is that objects observed through the telescope will appear stationary (i.e., they will not drift out of the field of view). If your telescope does not use a motor drive, all objects in the sky (day or night) will drift out of the field. This apparent motion is caused by the Earth’s rotation. -
Page 32: Finding The Pole
For example, in the northern hemisphere all stars move around the north celestial pole. When the telescope’s polar axis is pointed at the celestial pole, it is parallel to the Earth’s rotational axis. -
Page 33: Latitude Scales
If you are observing from Los Angeles, which has a latitude of 34°, then the celestial pole would be 34° above the northern horizon. All a latitude scale does then is to point the polar axis of the telescope at the right elevation above the northern (or southern) horizon. To align your telescope: 1. -
Page 34: Pointing At Polaris
This method utilizes Polaris as a guidepost to the celestial pole. Since Polaris is less than a degree from the celestial pole, many amateurs simply point the polar axis of their telescope at Polaris. Although this is by no means a perfect alignment, it is close. To align using this method: Align the finderscope with the main optical tube as described in the "Aligning... -
Page 35: Declination Drift
First choose your star near where the celestial equator and the meridian meet. The star should be approximately ±1/2 hour of the meridian and ±5 degrees of the celestial equator. Center the star in the field of your telescope and monitor the drift in declination. -
Page 36: Polar Alignment Finders
. If you don’t, they can be learned by using the Celestron Sky Maps (#93722) or consulting a current astronomy magazine. To align the R.A. setting circle: 1. -
Page 37: Celestial Observing
C E L E S T I A L With your telescope set up, you are ready to use it for celestial observing. This section covers visual observing of both solar system and deep-sky objects. Observing the Moon Observing the Moon... -
Page 38: Observing The Sun
The best time to observe the Sun is in the early morning or late afternoon when the air is cooler. To locate the Sun without a finder, watch the shadow of the telescope tube until it forms a circular shadow. -
Page 39: Observing Deep-Sky Objects
Objects system. They include star clusters, planetary nebulae, diffuse nebulae, double stars, and other galaxies outside our own Milky Way. The Celestron Sky Maps (#93722) can help you locate the brightest deep-sky objects. Most deep-sky objects have a large angular size. Therefore, low-to-moderate power is all you need to see them. -
Page 40: Star Hopping
Star Hopping Star Hopping Star Hopping Star Hopping Star Hopping You can use your setting circles to find these objects (as described earlier in this manual) or try star hopping. Star hopping is done by using bright stars to guide you to an object. - Page 41 5. Move about 1/2° toward Beta ( ) Lyrae, but remaining on a line that connects 6. Look through the telescope and the Ring Nebula should be in the telescope. These two examples should give you an idea of how to star hop to deep sky objects.
-
Page 42: Viewing Conditions
Extended objects, like the Moon, appear to shimmer while point sources (i.e., stars) appear double. Type 1 seeing is caused by currents within or very close to the telescope tube. These currents could be caused by a telescope that has not reached thermal equilibrium with the outdoor surroundings, heat waves from people standing near the telescope, or heated dew caps. - Page 43 If observing with others, make sure no one stands in front of or directly below the telescope tube. The images produced by Type 2 seeing conditions don’t move as quickly as those produced by Type 1 conditions, but the images are quite blurry.
-
Page 44: Celestial Photography
C E L E S T I A L After looking at the night sky for awhile you may want to try photographing it. Several forms of celestial photography are possible with your Celestron G-9 telescope. The most common forms of celestial photography, in order of difficulty are: short exposure prime focus, piggyback, eyepiece projection, and long exposure deep sky. -
Page 45: Short Exposure Prime Focus
It is done with the camera attached to the telescope without an eyepiece or camera lens in place. To attach your camera you need the Celestron T- Adapter (#93633-A) and a T-Ring for your specific camera (i.e., Minolta, Nikon, Pentax, etc.). - Page 46 The exposure times listed here should be used as a starting point. Always make exposures that are longer and shorter than the recommended time. Also, try bracketing your exposures, taking a few photos at each shutter speed. This will ensure that you will get a good photo. If using black and white film, try a yellow filter to reduce the light intensity and to increase contrast.
-
Page 47: Piggyback
Because you are photographing with a low power lens and guiding with a high power telescope, the margin for error is very large. Small mistakes made while guiding the telescope will not show up on film. To attach the camera to the telescope, use the optional piggyback mount (#93598). - Page 48 The longer the focal length, the more accurate your guiding must be. You can continue to increase the focal length of the lens until you are ready for prime focus photography with your Celestron G- Celestial Photography • 45...
-
Page 49: Eyepiece Projection
Keep in mind that the card should be held a few inches in front of the telescope, and not touching it. It is easier if you use two people for this process; one to release the camera shutter and one to hold the card. - Page 50 The following table lists exposures for eyepiece projection with a 10mm eyepiece. All exposure times are listed in seconds or fractions of a second. Planet Planet Planet Planet Planet ISO 50 ISO 50 ISO 50 ISO 50 ISO 50 Moon Moon Moon Moon...
-
Page 51: Long Exposure Prime Focus
This devise allows you to photograph and guide through the telescope simulta- neously. Celestron offers a very special and advanced off-axis guider, called the Radial Guider (#94176). In addition, you will need a T-Ring to attach your camera to the Radial Guider. - Page 52 When getting started, use fast films to record as much detail in the shortest possible time. Here are proven recommendations: • Ektar 1000 (color print) • Konica 3200 (color print) • Fujichrome 1600D (color slide) • 3M 1000 (color slide) •...
-
Page 53: Telescope Maintenance
This will prevent contaminants from entering the optical tube. Internal adjustments and cleaning should be done only by the Celestron repair department. If your G-9 for a return authorization number and price quote. - Page 54 To check the collimation of your telescope you will need a light source. A bright star near the zenith is ideal since there is a minimal amount of atmospheric distortion. Turn your telescope motor drive on so that you don’t have to manually track the star.
-
Page 55: Technical Specifications
TECHNICAL SPECIFICATIONS Below is pertinent technical information on your Celestron G-9 may find useful. OPTICAL TUBE: Optical System: Aperture: Focal Length: F/ratio: Secondary Mirror Diameter Obstruction Aluminized Surface Highest Useful Power Magnification: Lowest Useful Power Magnification: Resolution (arc seconds): Photographic Resolution:... -
Page 56: Optional Accessories
Ultima eyepieces. Model #93507 is a compact achromatic Barlow lens that is under three inches long and weighs only 4 oz. It works very well with all Celestron eyepieces. - Page 57 • Lanthanum Eyepieces (LV Series) - Lanthanum is a unique rare earth Eyepiece Filters - To enhance your visual observations of solar system objects, Celestron offers a wide range of colored filters that thread into the 1-1/ 4" oculars. Available individually are: #12 deep yellow, #21 orange, #25 red, #58 green, #80A light blue, #96 neutral density - 25%T, #96 neutral density - 13%T, and polarizing.
- Page 58 The Celestron Planisphere makes it easy to locate stars for observing and is a great planet finder as well. A map of the night sky, oriented by month and day, rotates within a depiction of the 24 hours of the day, to display exactly which stars and planets will be visible at any given time.
- Page 59 Sky Maps (#93722) - Celestron Sky Maps are the ideal teaching guide for learning the night sky. You wouldn’t set off on a road trip without a road map, and you don’t need to try to navigate the night sky without a map either. Even if you already know your way around the major constellations, these maps can help you locate all kinds of fascinating objects.
-
Page 60: The Messier Catalog
THE MESSIER CATALOG THE MESSIER CATALOG THE MESSIER CATALOG THE MESSIER CATALOG THE MESSIER CATALOG The Messier Catalog, compiled by Charles Messier, was the first extensive listing of star clusters and nebulae. Messier’s primary observational purpose was to discover comets. He compiled this list so that others searching for comets would not be confused by these objects. - Page 61 NGC# NGC# NGC# Const. Const. Const. NGC# NGC# Const. Const. NGC 1960 NGC 2099 NGC 1912 NGC 7092 NGC 2287 NGC 1976 NGC 1982 NGC 2632 NGC 2437 NGC 2422 NGC 2548 NGC 4472 NGC 2323 NGC 5194-5 NGC 7654 NGC 5024 NGC 6715 NGC 6809...
- Page 62 NGC# NGC# NGC# Const. Const. Const. NGC# NGC# Const. Const. NGC 3031 NGC 3034 NGC 5236 NGC 4374 NGC 4382 NGC 4406 NGC 4486 NGC 4501 NGC 4552 NGC 4569 NGC 4548 NGC 6341 NGC 2447 NGC 4736 NGC 3351 NGC 3368 NGC 3587 NGC 4192...
-
Page 63: List Of Bright Stars
LIST OF BRIGHT STARS LIST OF BRIGHT STARS LIST OF BRIGHT STARS LIST OF BRIGHT STARS LIST OF BRIGHT STARS The following is a list of bright stars that can be used to align the R.A. setting circle. All coordinates are in epoch 2000.0. -
Page 64: For Further Reading
FOR FURTHER READING FOR FURTHER READING FOR FURTHER READING FOR FURTHER READING FOR FURTHER READING The following is a list of astronomy books that will further enhance your understanding of the night sky. The books are broken down by classification for easy reference. Astronomy Texts Astronomy Texts Astronomy Texts... - Page 65 CELESTRON ONE YEAR WARRANTY Celestron International (CI) warrants this telescope to be free from defects in materials and workmanship for one year. CI will repair or replace such product or part thereof which, upon inspection by CI, is found to be defective in materials or workmanship. As a condition to the obligation of CI to repair or replace such product, the product must be returned to CI together with proof-of-purchase satisfactory to The Proper Return Authorization Number must be obtained from CI in advance of return.
- Page 66 (310) 212-5835 (310) 212-5835 (310) 212-5835 www.celestron.com www.celestron.com www.celestron.com www.celestron.com www.celestron.com Copyright 1999 Celestron International Copyright 1999 Celestron International Copyright 1999 Celestron International Copyright 1999 Celestron International Copyright 1999 Celestron International All rights reserved. All rights reserved. All rights reserved.
Need help?
Do you have a question about the G-9.25 and is the answer not in the manual?
Questions and answers