Table of Contents
Advertisement
Quick Links
1
APPLICATION .................................................................................. 3
2
DESCRIPTION (FIG A) .................................................................... 3
3
PACKAGE CONTENT LIST ............................................................. 3
4
SYMBOLS ........................................................................................ 3
5
GENERAL POWER TOOL SAFETY WARNINGS .......................... 4
5.1
Work area ................................................................................................................ 4
5.2
Electrical safety ....................................................................................................... 4
5.3
Personal safety ....................................................................................................... 4
5.4
Power tool use and care ......................................................................................... 5
5.5
Service ..................................................................................................................... 5
6
ADDITIONAL SAFETY WARNINGS ............................................... 5
6.1
Before use, remove the transport protection: ....................................................... 6
6.2
Switch off the machine immediately when you discover: .................................... 7
6.3
Replacing cables or plugs ...................................................................................... 7
6.4
Using extension cables .......................................................................................... 7
7
ASSEMBLY ...................................................................................... 7
7.1
Assembly of the bench extensions Fig. F ............................................................. 7
7.2
Assembly of the bench saw on the workbench Fig. B & C ................................... 7
7.3
Assemble undercarriage Fig. G ............................................................................. 8
7.4
Assemble bracket/push stick. ................................................................................ 8
7.5
Assembly and attachment of the rip fence Fig. D ................................................. 8
7.6
Assembly of the riving knife and the protective cap Fig. E .................................. 8
7.7
Assembly of the saw blade..................................................................................... 8
7.8
Mounting the push stick holders ........................................................................... 9
7.9
Use of the mitring set-up Fig. A ............................................................................. 9
8
OPERATION ..................................................................................... 9
8.1
Lengthwise sawing ................................................................................................. 9
8.2
Lengthwise sawing with a(vertical) mitre ............................................................ 10
8.3
Lengthwise sawing of narrow workpieces. ......................................................... 10
8.4
Crosswise sawing ................................................................................................. 10
8.5
Crosswise sawing with a vertical mitre ............................................................... 10
Copyright © 2017 VARO
POWX221
P a g e
| 1
EN
www.varo.com
Advertisement
Table of Contents

Summary of Contents for Powerplus POWX221
-
Page 1: Table Of Contents
POWX221 APPLICATION .................. 3 DESCRIPTION (FIG A) ..............3 PACKAGE CONTENT LIST ............. 3 SYMBOLS ..................3 GENERAL POWER TOOL SAFETY WARNINGS ......4 Work area ........................ 4 Electrical safety ....................... 4 Personal safety ....................... 4 Power tool use and care ..................5 Service ........................ - Page 2 POWX221 Crosswise sawing with a horizontal mitr ............. 10 CLEANING AND MAINTENANCE ..........10 Cleaning......................... 10 Lubrication ......................11 TROUBLE SHOOTING ..............11 TECHNICAL DATA ................ 11 NOISE ..................... 11 SERVICE DEPARTMENT .............. 12 STORAGE ..................12 WARRANTY ................... 12 ENVIRONMENT ................
-
Page 3: Application
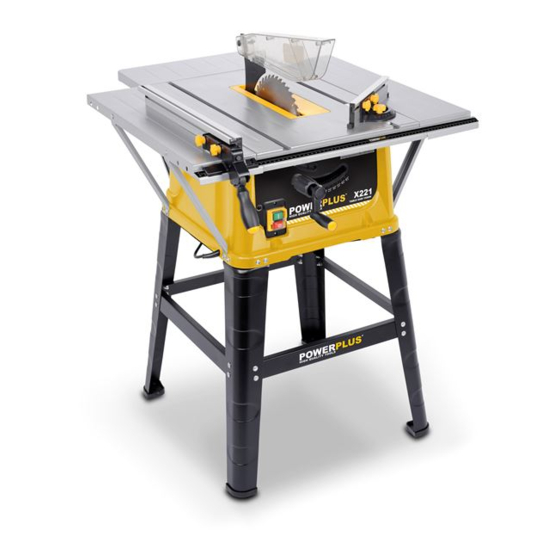
POWX221 SAW TABLE 1500W POWX221 1 APPLICATION The table saw is designed for the cutting of timber and plastic commensurate with the machine’s size. It is not designed for commercial use. WARNING! Read this manual and general safety instructions carefully before using the appliance, for your own safety. -
Page 4: General Power Tool Safety Warnings
POWX221 Read manual before use 5 GENERAL POWER TOOL SAFETY WARNINGS Read all safety warnings and all instructions. Failure to follow all warnings and instructions may result in electric shock, fire and/or serious injury. Save all warnings and instructions for future reference. -
Page 5: Power Tool Use And Care
POWX221 Do not overreach. Keep proper footing and balance at all times. This enables better control of the power tool in unexpected situations. Dress properly. Do not wear loose clothing or jewellery. Keep your hair, clothing and gloves away from moving parts. Loose clothes, jewellery or long hair can be caught in moving parts. -
Page 6: Before Use, Remove The Transport Protection
POWX221 10. Always lock the different degree set-ups before you start processing. 11. Only buy suitable saw blades with a number of revolutions of at least 6000 revolutions per minute. 12. Only use the correct saw blade. Too small or too big saw blades are extremely dangerous. -
Page 7: Switch Off The Machine Immediately When You Discover
POWX221 The handles for height and mitre setting of the saw blade are located in the transport protection inside the machine. Reassemble the bottom plate. Switch off the machine immediately when you discover: A defective mains plug or mains lead;... -
Page 8: Assemble Undercarriage Fig. G
POWX221 Assemble undercarriage Fig. G Turn the machine upside down. Remove the black plastic bottom plate by unscrewing the 6 screws. (Fig. G-1). Unscrew the adjusting knob on the front and tilt the motor (Fig. G-2), then remove the transport packing (Fig. -
Page 9: Mounting The Push Stick Holders
POWX221 Now use the 2 keys: one for the flange and one for the nut and now clamp it. Now put the inlay back in the bench and fasten it. Mounting the push stick holders Mount both push stick holders on the side of the machine using the bolts and rings supplied. -
Page 10: Lengthwise Sawing With A(Vertical) Mitre
POWX221 Lengthwise sawing with a(vertical) mitre This method is practically the same, except that the saw blade is placed at the angle required. With this type of method the fence may only be along the righthand side of the sawblade. -
Page 11: Lubrication
POWX221 Lubrication The machine requires no additional lubrication. 10 TROUBLE SHOOTING In the case that the machine is not functioning properly, we give a number of possible causes and appropriate solutions below. 1. The engine does not start The plug is not in the mains. -
Page 12: Service Department
We also disclaim all liability for any bodily injury resulting from inappropriate use of the tool. Repairs may only be carried out by an authorised customer service centre for Powerplus tools. You can always obtain more information at the number 00 32 3 292 92 90. -
Page 13: Environment
VARO N.V. - Joseph Van Instraat 9 - BE2500 Lier - BELGIUM, declares that, product : Circular table saw 1500W trade mark : POWERplus model : POWX221 is in conformity with the essential requirements and other relevant provisions of the applicable European Directives, based on the application of European harmonized standards.


Need help?
Do you have a question about the POWX221 and is the answer not in the manual?
Questions and answers