Table of Contents
Advertisement
Advertisement
Table of Contents

Related Manuals for Zupapa Dome Climber


Summary of Contents for Zupapa Dome Climber
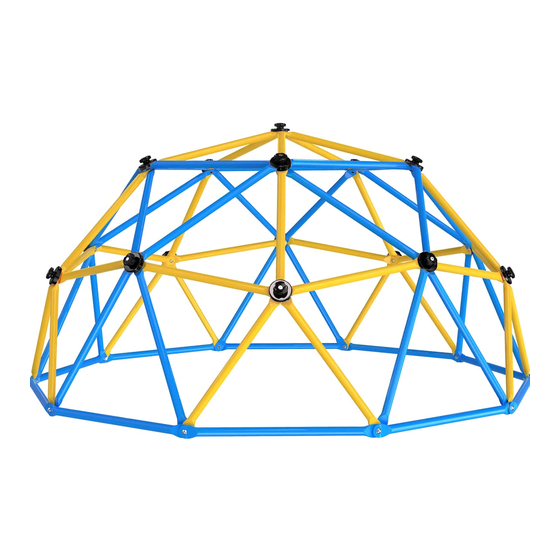
- Page 1 Zupapa Dome Climber User Manual User Manual Read, understand, and follow guidelines in this manual before (dis)assembling, using your dome climber. P L A Y . E N J O Y . B O N D *Not for commercial use...
- Page 2 • If you have any questions, suggestions, and (or) comments, please feel free to contact us at your earliest convenience. Zupapa Customer Happiness Executives are standing behind to help out all the time. We promise you are sure to receive a reply in 12 hours.
- Page 3 And the structure can be placed anywhere spacious and flat – on the lawn, in the backyard, or even indoors. Providing a Zupapa dome climber is also a good way to save the...
- Page 4 Standing behind the excellent products is the industrial-leading after-sales service team. We provide a hassle-free warranty for all Zupapa products, please do not hesitate to reach out to official@zupapa.us. We will try our best to work it out for you.
- Page 5 Player • Do not use the dome climber without an adult’s supervision. • Do not use the dome climber in a manner other than intended. • Do not use the dome climber when it is wet or improperly Players should follow instructions and installed.
- Page 6 SURFACING MATERIALS The data and the information below are excerpted from the CPSC website and publications Public Note Playground Safety Handbook (December 29, 2015). The full version can be obtained by visiting http://www.cpsc.gov. According to the U.S. Consumer Product Safety Commission (“CPSC”) that has long recognized the potential hazards existing with the use of playground equipment, there are more than 200,000 estimated emergency room-treated injuries annually.
- Page 7 When installing these products, tips 1-9 listed below should be followed. Each manufacturer of engineered wood fiber and rubber mulch should provide maintenance requirements for and test data on: • Critical height based on ASTM F1292 impact attenuation testing. • Minimum fill-depth data. •...
- Page 8 Table 2 shows the minimum required depths of loose-fill material needed based on material type and fall height. The depths shown assume the materials have been compressed due to use and weathering and are properly maintained to the given level. Minimum compressed loose-fill surfacing depths Inches (Loose-Fill Material)
- Page 9 You can refer to the following chart for the part number, diagram, description, and quantity of each size. When you need the replacement(s), get in touch with Zupapa® Customer Happiness Executives (official@zupapa.us) at your earliest convenience, we the order number, part number, quantity for each part, and are ready to make you 100% satisfied.
- Page 10 Parts List Part Diagram Description Number Long Pole (packed in the transparent plastic bag) Short Pole (packed in the transparent plastic bag) Grip Long Nut Long Bolt Short Bolt...
- Page 11 Part Diagram Description Number Nut (for the 10 joints of the base layer) Washer Tool Tool Nut (for all other joints except for these of the base layer) Glove 4 (2 Pairs) Long Pole (packed in the red plastic bag)
- Page 12 Don’ts • Do not place the dome climber over any hard surface such as concrete, asphalt, and packed earth. A fall onto a hard surface may result in serious injuries. • Do not place the dome climber near any other recreational devices or structures such as a seesaw, slide, swing, swimming pool, hot tub, etc.
- Page 13 Parts List. If you need any replacement(s), feel free to reach out to Zupapa® Customer Happiness Executives (official@zupapa.us) with the ORDER NUMBER, PART NUMBER, REQUIRED QUANTITY for each part, and photos or video clips (if applicable). 3. Wear the gloves during the whole assembly process.
- Page 14 #F, a part #G, and two part #H. Use the tools (part #I and part #J) to tighten them together. Insert the bolt from the outside of the dome climber. That is, the nut should be inside the climber. ATTENTION...
- Page 15 (b) Repeat until you finish assembling the 10 joints.
- Page 16 • Add all poles anticlockwise. • Insert all bolts from the inside of the dome climber and add the nut from the outside. That is, insert the part #E into the preformed hole, fix it with the part #H and the part #K. See details as shown below.
- Page 17 two part #A and one part #B (b) Move to the next joint, connect anticlockwise with a part #E, a part #H, and a part #K. Use the tools (part #I and part #J) to tighten them together as before. (c) Repeat until you finish assembling all the 10 joints.
- Page 18 STEP 4 - FINISH THE THIRD LAYER (a) Start from any one of the joints created by Step 3. Connect two part #M and one part #B with a part #E, a part #H, and a part #K. Tighten them with the tools part #I and part #J. (b) Move to the next joint, connect one part #M and one part #B with a part #E, a part #H, and a part #K.
- Page 19 STEP 5 - FIX THE CENTRAL JOINT A central joint would come into being after you finish Step 4. Put a part #E, a part #H, and a part #K into the central point, tighten them with the tools part #I and part #J.
- Page 20 #I. The gap of the grip should be next to the top pole as shown below. NOTE Congratulations! Your dome climber is completed. Please feel free to email Zupapa® (official@zupapa.us) if you have any questions about the assembly.
- Page 21 MAINTENANCE With proper maintenance, Zupapa® dome climbers are capable of providing your kids with many years of fun and enjoyment. We recommend you follow regular maintenance as per the guidelines below. • Be careful with the protective coatings of the poles as they are effective against rust.
- Page 22 Our canopies are fit for all 10 feet dome climbers with grips. They bring in endless fun and make the dome climber a great playground when kids want to have a rest after a long-time playing. Please find the step-by-step assembly instructions and the maintenance suggestions below.
- Page 23 STEP 2 - Fix the Elastic Rope Upon the two Bottom Poles (part #A and part #B) as shown below. IMPORTANT The doors should be aligned with the triangle area formed by the long poles (part #A). Maintenance & Storage The canopy is lightweight (only about 5 pounds) and easy to maintain.
- Page 24 Twitter: https://twitter.com/zupapa_us Pinterest: https://www.pinterest.com/Zupapa_Official/ Zupapa Product Categories OUTDOOR TRAMPOLINE Not any kid can refuse the bouncing fun! Zupapa® Saffun & Safump outdoor trampolines are the ultimate gift idea for your kids, making the backyard a safe jumping playground for years.
- Page 25 REBOUNDER A great structure to make home workout easy! Do not hesitate to take a Zupapa® rebounder home as it helps to keep fit and stay in shape. DOME CLIMBER It's the safety, reliability, and versatility that make Zupapa® dome climber stand out from the same category. The...
- Page 26 Providing enjoyable outdoor toys works great to reduce the time that kids spend on computer games and TV series. Zupapa tree swings are a practical choice. Hang it to a playset or underneath a tree, and add a detachable tent (if required),...
- Page 28 P L A Y . E N J O Y . B O N D...
Need help?
Do you have a question about the Dome Climber and is the answer not in the manual?
Questions and answers