Advertisement
Table of Contents
- 1 Get to Know Your Device
- 2 Insert Your Sim Card
- 3 Quick References
- 4 Configure Your Device
- 5 Using the Touch Screen
- 6 Charging Your Device
- 7 Device Icons
- 8 International Roaming
- 9 Troubleshooting
- 10 Precautions and Safety Information
- 11 Rf Safety Information
- 12 Radio Frequency Energy
- 13 Technical Specifications
- Download this manual
TELSTRA 5G WI-FI PRO HOTSPOT
CHECK YOUR SYSTEM REQUIREMENTS
Your 5G Wi-Fi Pro provides 5G internet connectivity to any Wi-Fi enabled device that supports Wi-Fi
802.11 b/g/n/ac/ax.
The 5G Wi-Fi pro also has a wired Ethernet (LAN) connection and USB connection for Windows (not
RT), and MAC operating systems:
Windows 10, 8 (not including RT) / 7 / XP / Vista
MAC OS X 10.7 and above
MU500
USER
MANUAL
Page 1 of 25
Advertisement
Table of Contents

Related Manuals for Huawei ZTE MU500


Summary of Contents for Huawei ZTE MU500
- Page 1 TELSTRA 5G WI-FI PRO HOTSPOT MU500 USER MANUAL CHECK YOUR SYSTEM REQUIREMENTS Your 5G Wi-Fi Pro provides 5G internet connectivity to any Wi-Fi enabled device that supports Wi-Fi 802.11 b/g/n/ac/ax. The 5G Wi-Fi pro also has a wired Ethernet (LAN) connection and USB connection for Windows (not RT), and MAC operating systems: ...
-
Page 2: Get To Know Your Device
GET TO KNOW YOUR DEVICE INSERT YOUR SIM CARD This device supports a nano SIM card ONLY (4FF). The SIM card is pre-installed and needs to be activated. You may need this information if you need to replace or check your SIM card. Locate the SIM tray on the side of the device as shown above. - Page 3 should keep handy. The default Wi-Fi SSID and Password is shown on the device screen at Settings > Wi-Fi > Wi-Fi Name & Password or press Device on the main screen as a shortcut to the Wi-Fi Name & Password screen. You can also connect directly to a computer using the USB lead provided, log into the web interface and access the Wi-Fi SSID and Password from the Wi-Fi Settings menu.
-
Page 4: Quick References
POWER UP YOUR WI-FI HOTSPOT Press and hold the Power key for 1-2 seconds until the screen lights up. The Wi-Fi hotspot will be available after about 30 seconds. To switch your device Off, hold the power key then press OK to shut down. TIPS When running on battery during periods of inactivity it is normal for the screen to go out to preserve battery life. -
Page 5: Using The Touch Screen
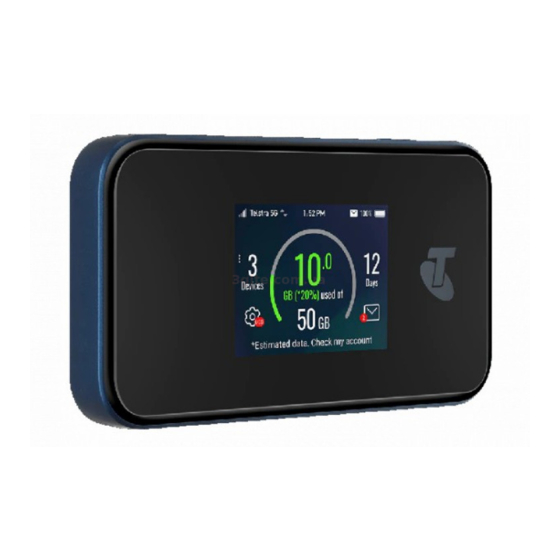
USING THE TOUCH SCREEN Press the power key to light up the display. Touch and hold on the screen to unlock. The screen shows your current data usage. Devices indicates how many devices are connected to your modem. Press this to view the Wi-Fi Name and Password. -
Page 6: Device Icons
DEVICE ICONS Signal bars Battery is fast charging Battery temperature is above 45C and cannot charge. Charging will resume when device cools down. Data transfer is active LAN port is connected SMS Messages Wi-Fi signal Device is roaming. Higher data charges may apply SIM card PIN is active. - Page 7 View Connected Devices. You can Block a device after viewing it. Show the list of Blocked devices Set the maximum number of Wi-Fi devices up to 15 x 2.4GHz and 15 x 5GHz connections. 2.4GHz connections are most commonly used but sometimes the Wi-Fi spectrum can be congested which will slow down your 2.4GHz Wi-Fi speeds.
- Page 8 SETTINGS > UPDATE Check for firmware updates for your modem. Updates may be periodically released and also automatic updates can occur for critical software updates. SETTINGS > RESET Reset the modem to factory conditions. All passwords will be reset, all Messages will be erased. SETTINGS >...
-
Page 9: International Roaming
HOW TO USE THE WEB INTERFACE Connect any device to the modem and open a browser. Enter m.home or 192.168.0.1 in the browser address bar to open the modem homepage. The default administrator password is ‘password’ The home page shows a brief summary of the device status and your remaining data from Telstra. ... - Page 10 Windows users: Start > All Programs > TELSTRA 5G WI-FI > Uninstall MAC Users: Double click the Telstra Modem CDROM on the desktop to install the modem. To uninstall, go to Applications and run Uninstall TELSTRA 5G WI-FI HOME TAB The home tab shows you how many users are connected and shows your network connection state and data usage summary.
- Page 11 SETTINGS > NETWORK SETTINGS > WAN CONNECTION MODE: The default connection setting will automatically connect to the network. The setting is greyed out if you are connected. Press the Disconnect button to change this setting and to enable International Roaming if required. ...
- Page 12 SETTINGS > NETWORK SETTINGS > APN: Press Disconnect to disconnect from the Network Press Add New to create a new APN Add the Profile Name, eg Telstra WAP Enter the correct APN details eg telstra.wap Press Save to save your new APN ...
- Page 13 SETTINGS > WI-FI SETTINGS > BASIC SETTINGS: The Wi-Fi Name (SSID) is the Wi-Fi network name for your device You can change the SSID to something more memorable or personal if preferred You can hide the SSID broadcast so unknown users will not be able to see your network ...
- Page 14 SETTINGS > WI-FI SETTINGS > ADVANCED SETTINGS You can change the Wi-Fi settings to suit your personal choices or for specific requirements of your attached devices. Press Apply to save your changes Press the Help icon to get in context tips SETTINGS >...
- Page 15 SETTINGS > DEVICE SETTINGS > ACCOUNT MANAGEMENT Use the Account Management settings to change the administrator password if required. The default password is password. If you have changed and forgotten the password then you need to restore the device to factory defaults: 1.
- Page 16 SETTINGS > DEVICE SETTINGS > RESET Press Reset to reset your device to factory defaults. SETTINGS > DEVICE SETTINGS > RESTART Press Restart to restart your device. SETTINGS > DEVICE SETTINGS > POWER SAVE If there is no Wi-Fi traffic detected then the device will switch off Wi-Fi as determined by the Wi-Fi sleep setting.
- Page 17 Example software update notification: SETTINGS > FIREWALL > PORT FILTERING Select Enable to turn on the Port Filtering settings You can apply filters based on MAC Address, Source IP Address, Destination IP Address and select the action to drop or accept the packets. ...
- Page 18 SETTINGS > FIREWALL > PORT FORWARDING Select Enable to turn on the port forwarding settings. Port forwarding can be used to allow a specific external server or computer access to devices located on your LAN side or to translate a specific incoming port into a different destination port. ...
- Page 19 SETTINGS > FIREWALL > DMZ Enable the DMZ Setting to open up all ports from the WAN side (mobile network) to the LAN side for this particular allocated IP address. It is advisable to set a Static IP address for this device outside of the DHCP range eg 192.168.0.20 ...
- Page 20 subscription services from Telstra. The configuration required for this feature includes many items being configured on the MU500, your systems connected to the MU500 and the Telstra Business SIM used in the MU500 before it will work. Telstra Business can explain the process and configuration settings which are used for enterprise business connections via your MU500 back to your office network.
- Page 21 Click in the top box to add Contacts You can enter Contact names in the Contacts field and the device will search and list applicable matches Click in the bottom box to type your message Press the Send button when done ...
- Page 22 INFORMATION View the device IMEI number, Signal strength and other details. Change the SSID EXTERNAL ANTENNA PORTS Signal strength can be improved by adding external antennas. It is preferred to use both ports for best quality reception and service. ...
-
Page 23: Troubleshooting
TROUBLESHOOTING If you have any problems with your connection or modem please consult the manual and check this section. If the problem still exists contact your service provider or check our website for more details at ztemobiles.com.au Issue Possible cause Solution The user PC configuration is... -
Page 24: Rf Safety Information
Store the modem out of the reach of children. The modem may cause injury or get damaged. The modem contains sensitive electronic circuitry. Do not expose the modem to any liquids, high temperatures or shock. Only use original accessories or accessories that are authorised by the manufacturer. Using unauthorised accessories may affect your modem’s performance or damage your modem. -
Page 25: Technical Specifications
TECHNICAL SPECIFICATIONS 5G mmW n258, Sub 6G n78, n5, n7 LTE Band 1, 3, 7, 8, 28 Network compatibility UMTS 850, 2100 MHz Chipset SDX55 + QCA6391 Wi-Fi 802.11a/b/g/n/ac/ax 2*2 MIMO Dimensions 133 x 73 x 18.5mm, 230g 5G download speeds depend on available network conditions and combinations.