
Related Manuals for Ispring RO500


Summary of Contents for Ispring RO500
- Page 1 RO500 3-Stage Under Sink Reverse Osmosis System INSTALLATION INSTRUCTIONS & OWNER’S MANUAL Ver. 05/2021 Copyright ©2005-2021 ISPRING WATER SYSTEMS, LLC. All rights reserved.
- Page 2 At iSpring, we strive to develop products to the highest of standards and aim to make excellent drinking water accessible for all households. With affordable pricing, reliable quality, prompt delivery, and top-notch customer service, we hope to assist in bringing you great water for years to come.
-
Page 3: Table Of Contents
Prior to Installation Read this instruction manual carefully prior to installation. Keep this manual readily available for future reference. Table of Contents User Information ..................... 3 Component Identification ..................4 Product Features ..................... 5 Product Structure and Size ..................6 Filter Life Indicator .................... -
Page 4: User Information
User Information The user must adhere to the installation specifications described in this Product Installation and Operation Manual (hereinafter referred to as the "instruction manual"). iSpring is not responsible for damage, loss, or injury resulting from neglect, improper maintenance, or unauthorized modification of products. -
Page 5: Component Identification
Component Identification System Body with Power Supply Smart Faucet filters pre-installed Feed Water Adapter 1/4" and 3/8" PE Pipe Drain Saddle Instruction Manual and 1/4" C-Clip 3/8" C-Clip Warranty Card www.123filter.com | (678) 261-7611 | support@123filter.com Page 4... -
Page 6: Product Features
Product Features 1) Product Scope A. For residential use ONLY. B. Applicable water quality: municipal. 2) Water Treatment Process Municipal tap water → composite filter → reverse osmosis filter → post-activated carbon filter → purified water 3) Filtration Performance Filter Purpose Removes unpleasant chlorine, taste, odors, cloudiness and coloring. -
Page 7: Product Structure And Size
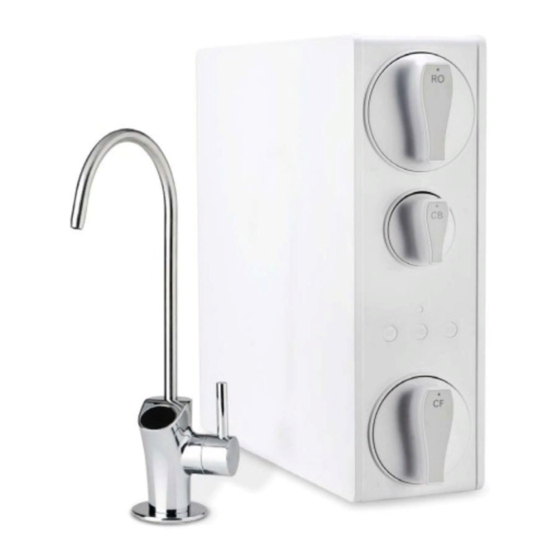
Product Structure and Size 1) Product Overview First-stage composite filter (CF) Third-stage carbon block filter (CB) Second-stage reverse osmosis membrane 2) Dimensions Filter Life Indicator The filter life indicators are controlled by a timer and flow monitor. Change the filter when the light runs red. To reset the indicator after filter replacement, see "Filter Serve Life Reset". -
Page 8: Installation
A. Choose a suitable location for the system. Again, it cannot be mounted and must be placed on a flat surface. B. Check the packing list to confirm all accessories are included in the package. Contact iSpring customer service if any components are missing. C. Required tools: 2) Feed Water Adapter Installation •... -
Page 9: Filter Installation
3) Filter Installation This product features an easy-changing design that allows users to change the filter without shutting off the water supply. To install the filter, follow the steps listed below. Precautions A. Make clean cuts on the tube to ensure a tight, sealed connection. B. -
Page 10: System Installation And Setup
4) System Installation and Setup A. Cut the WHITE 3/8" PE pipe to the appropriate length using a utility knife. B. Insert one end of the tube into the feed water adapter. Tighten the nut using a spanner wrench. C. Insert the other end of the WHITE tube into the 3/8"... - Page 11 G. Choose a spot on the drainpipe that is convenient for installing the drain saddle and tubing. A horizontal pipe is recommended to minimize the dripping sound. H. Drill a 1/4" hole in the drainpipe and paste the black sticky pad around the hole. Cut the 1/4"...
-
Page 12: Faucet Installation
5) Faucet Installation Choose a suitable location on the sink or countertop and install the faucet on a flat surface, as shown in the image below. You will need to drill a 1" hole (no larger than 1 1/2") if your kitchen sink does not have an existing one. -
Page 13: Connecting Faucet Power Supply And Main Power Supply
6) Connect Faucet Power Supply and Main Power Supply Connect the power adapters as shown below. Plug in the main power supply to the "Power" socket on top of the system, then plug the power cable on the faucet to the "Faucet power" socket. -
Page 14: Using The System
Using the System 1) Starting for the First Time A. To start the system, plug it in, turn on the feed water adapter, then turn on the faucet. Vibrations can be expected as the pump starts. B. Rinse the RO membrane for 5 minutes. Turn on the faucet and let it run for at least 30 minutes to flush the system. -
Page 15: Fault Codes
3) Fault Codes Reminder Type Solution Display code Buzzer Once the inlet water pressure returns to The fault light flashes red When the user runs normal, the water water, the machine E1: Water shortage once per second. shortage prompt is will buzz three times. -
Page 16: Machine Function Description
5) Machine Function Description Function Operation Status Indicator 1. The water quality indicator is red and flashes once per second. Rinsing Rinse RO MEMBRANE for 5 minutes, 2. The water quality indicator Prior to the then flush by running water for 30+ shows the real-time data within 6- First Use minutes. -
Page 17: Filter Service Life Reset
6) Filter Service Life Reset To perform a manual reset, press and hold the "Filter Service Life" button for 5 seconds. This action will be accompanied by a "Beep" sound as the filter is resetting. When the filter service life indicator light lit blue, and the buzzer sound gone, indicating the reset was successful. 7) Manual Rinsing Mode - RO Membrane Press and hold the corresponding reset buttons CF+RO+CB for 3 seconds. -
Page 18: Warranty
Warranty This Limited Warranty extends to the original purchaser of the system only. This warranty covers all Manufacturer- supplied items only that prove to be defective in material, workmanship, or factory preparation. This warranty covers parts only; all labor is excluded from this warranty, including, but not limited to, services related to the removal, replacement, installation, adjustment, maintenance, and/or repair of the unit or its components items. -
Page 19: Warranty Registration
Warranty Registration To register your product for the warranty, visit our website at 123filter.com and go to the "Warranty" tab. We provide a 30-day money-back guarantee, a 1-year manufacturer warranty, and lifetime tech support for all of our products. However, we do not have the order information from websites other than 123Filter.com (Amazon, Home Depot, etc.), so please be sure to fill in that information upon registration of your system. - Page 20 Atlanta, GA USA iSpringFilter.com For questions, comments, or technical support, contact us at: support@123Filter.com (678) 261-7611 Monday-Friday 8:30 a.m. - 5:30 p.m. EST...
Need help?
Do you have a question about the RO500 and is the answer not in the manual?
Questions and answers
Stopped pumping water. All 3 lights blink every second in red, and then all 3 blink in blue, accompanied by a beeping sound
When the iSpring RO500 has all 3 lights blinking red and blue and is beeping, it indicates that the UV light has reached the end of its service life. The second and third lights flash red, and a buzzer beeps for 10 seconds. This signals that the UV unit needs to be replaced.
This answer is automatically generated