Table of Contents
Advertisement
Advertisement
Table of Contents

Summary of Contents for SUNPRO Retractable Awning
- Page 1 Retractable Awning Installation Manual IT IS VERY IMPORTANT TO READ THIS MANUAL IN IT’S ENTIRETY. FAILURE TO FOLLOW THE INSTRUCTIONS IN THIS INSTALLATION MANUAL MAY RESULT IN PERSONAL INJURY Installation Support: (941) 374-3222 https://sunproproducts.com/tec hnical-resources/ Page 1...
-
Page 2: Welcome
Please retain your Owner’s Manual and Installation Instructions for future reference regarding operation, care and maintenance, troubleshooting, customer service and warranty information. We know that you will enjoy your SunPro retractable awning by spending more time outside on your deck or patio. -
Page 3: Recommended Tool List
Recommended Tool List ½” & 3/8” drill bits 13”, 14”, 17” & 19” wrenches 3/8” impact driver with 17 mm impact socket 4 FT level Caulk gun Chalk line Crowbar, wonder bar, or Pry bar Hack Saw Blade Hammer Masonry hammer drill SDS (Hilti) Philips head screwdriver &... -
Page 4: Table Of Contents
TABLE OF CONTENTS Welcome Page 2 Recommended Tool List Page 3 Standard Installation Parts Included / Optional Page 5 Get to Know Your Awning Size Page 6-10 Installation for Roof Mount Page 11 Bay Bracket Installation Page 12 Installation on Facia Board Covered w/aluminum Over Brick Page 13 Installation for Soffit Mount Page 14-15... -
Page 5: Standard Installation Parts Included / Optional
STANDARD INSTALLATION PARTS INCLUDED Manual Crank Wand Wall Brackets 12' = Qty 3 Out Button 16' = Qty 4 Stop Button 20' = Qty 5 In Button Standard Wall 6” Bracket Light Button Remote Holder with Hardware Remote 5/16" Retaining Nut 5/16"... -
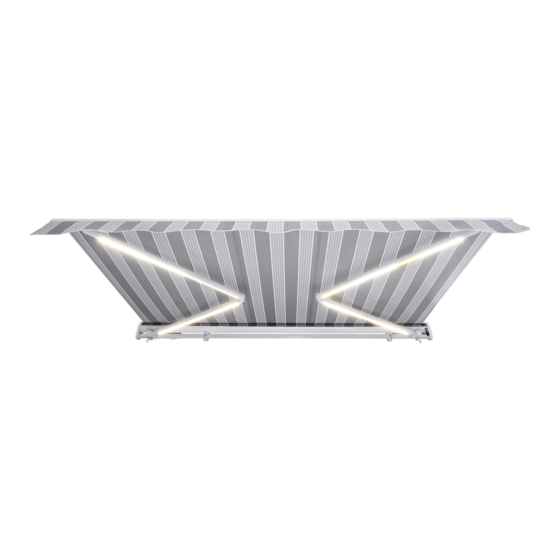
Page 6: Get To Know Your Awning Size
Awning Installation Instructions WARNING: FAILURE TO FOLLOW THESE INSTRUCTIONS COULD RESULT IN PERSONAL INJURY! WARNING: Never attempt to repair or disassemble any part of the awning without following replacement part procedures supplied by the manufacturer. Trying to do so without proper instructions could result in personal injury! Before Starting Before beginning, please familiarize yourself with the components of the awning as shown in Figure 1, and the supplied fasteners/parts shown on pages 5. - Page 7 Tools Needed: For any type of wall installation, you will need an assistant(s), measuring tape, two ladders, 9/16” and 17mm socket, chalk line (or string), Stud finder, Phillips screw-driver, pencil, level, electric drill and a 1/2” or 13mm wrench. If you have a wood frame construction with wood, vinyl or aluminum siding, you will need in addition to the above: 1/8”...
- Page 8 WARNING: Proper location of the brackets is the most important aspect of the awning installation. It is critical that you fasten all the mounting brackets to studs, joists, headers or other major structural members. Even a moderate wind exerts great force on the awning and mounting brackets. This is why it is important that all the brackets will be fastened properly and securely.
- Page 9 Bracket Locations for 10’ Awning Image of shoulder gear with EZ- Adjustable Pitch. Do not adjust more than 20 degrees up or down. Never adjust with awning out more than 4 feet Bracket Locations for 12’ Awning Image of shoulder gear with EZ- Adjustable Pitch.
- Page 10 Bracket Locations for 16’ Awning Image of shoulder gear with EZ- Adjustable Pitch. Do not adjust more than 20 degrees up or down. Never adjust with awning out more than 4 feet Bracket Locations for 20’ Awning Image of shoulder gear with EZ- Adjustable Pitch.
-
Page 11: Installation For Roof Mount
Installation for Roof Mount NOTICE: INSTALLATION OF ROOF MOUNT BRACKETS CAN ONLY BE DONE ON ASPHALT SHINGLES. THEY CAN NOT BE INSTALLED ON TILE SHINGLES!! When installing an awning onto your roof you will need these tools in addition to the tools found in the “installing on any wall surface”... -
Page 12: Bay Bracket Installation
Bay Bracket Installation When installing an awning over a bay window or bay with a sliding glass door you will need the following tools in addition to those found in the “installing on any wall surface”. • ½” and 3/8” metal drill bits •... -
Page 13: Installation On Facia Board Covered W/Aluminum Over Brick
Installation on Facia Board Covered by Aluminum over Brick When installing on facia that is covered in Aluminum over brick you will need the following tools in addition to the tools you already have for “installing on any wall surface” section. •... -
Page 14: Installation For Soffit Mount
Installation for Soffit Mount Note: The following instructions are for installing to a level overhang or soffit. Before beginning, please familiarize yourself with the components of the awning as shown on Page 9 and Page 10. Make sure you ordered soffit brackets as they are optional. Tools Required For installing the awning on the soffit, under the overhang, you will need an assistant, measuring tape, two step-ladders, 9/16"... - Page 15 Installation for Soffit Mount (continued) 3. YOU MUST NOW LOCATE THE RAFTERS IN THE AREA IN WHICH EACH BRACKET MUST BE INSTALLED AS EXPLAINED EARLIER IN “LOCATING THE BRACKETS”. To find the rafters, use a stud finder. Be sure to read the stud finder instructions before usage. Mark the center of each rafter, on which a bracket will be installed with a 7”...
-
Page 16: Installation For Brick Mount
Installation for Brick Mount CAUTION: The masonry fasteners recommended are NOT supplied with this awning and ARE NOT designed for use in the joint between two bricks. They are ONLY to be installed within the main body of a brick, not within 1/2”... -
Page 17: Installation For Siding Mount
Installation for Siding Mount Note: For an attractive, finished appearance on Wood Siding, you can use spacers or siding plates underneath each bracket to make a flat surface. For Vinyl or Aluminum Siding, shimming beneath the siding in each bracket location may provide a more solid surface for mounting - see figure 4. Siding plates are supplied with your awning if specified at the time of sale. -
Page 18: Checking Your Awning For Proper Operation
Checking Your Awning for Proper Operation NOTE: Do not plug the power cord into the outdoor outlet yet. Plug the electric cord into your outdoor ground fault receptacle. We’ve also supplied a wall holder for the remote transmitter - see page 5. CAUTION: Do not permit the hand-held remote transmitter to get wet as this can affect its proper operation. -
Page 19: Ez-Adjustable Pitch
EZ-Adjustable Pitch One of the great features of your awning is the EZ-Adjustable Pitch that came standard on your awning. This allows you to adjust the pitch of the awnings left or right side individually. To adjust the pitch, insert crank handle hook into the loop shown (do not use the black loop as that is for emergency manual override only) and turn clockwise to raise and counter clockwise to lower. -
Page 20: Adjusting In And Out Limits Of The Awning
Adjusting In and Out Limits of the Awning • The motor on your awning is mounted on the right, as you face the house, complete Steps 2 thru 6. • Press the Neutral/Stop button on the remote. • From a stepladder locate the two 4mm limit Allen screws on the motor. These screws will be colored. One will be red, and one will be white. -
Page 21: General Care And Maintenance Of Your Awning
GENERAL CARE AND MAINTENANCE OF YOUR AWNING WARNING: Prior to operating the awning, be sure that no objects or persons can come in contact with it as it opens and closes. Keep children away from any moving parts of the awning as it operates. - Page 22 Care and Maintenance of your Awning WARNING: Any permanent wiring of the awning must be performed by a licensed electrician per your local electrical codes. Failure to do so could result in personal injury. The motor is supplied by Dooya Inc., the recognized world leader in specialized electric tubular motors for awnings and sunshades.
- Page 23 Care and Maintenance of your Awning We use the finest proprietary blend of 100% Solution Dyed Polyester fabric that is also 100% Recyclable! To preserve this finish, cleaning of the fabric must include the following. Standard Maintenance Thoroughly remove the dust from the dry awning fabric by vacuum cleaning, gently beating or brushing.
-
Page 24: Troubleshooting
TROUBLESHOOTING Can I “hard-wire” the awning motor into my home - SunPro cannot be responsible for any changes in electrical configuration of the motorized awning. Have your electrician contact a SunPro Awning representative for information regarding the motor. How low can the pitch be set - As low as a 35-degree angle. - Page 25 TROUBLESHOOTING (CONTINUED) After installing, the awning will not function - Is there power to the receptacle? Verify that the red light is on the remote transmitter comes on when you press and hold a button If red light does not come on, remove battery and reinsert in slot and try pushing button again.
-
Page 26: Accessories
Current Awning Accessories Front Screen Wireless Wind Sensor Wireless wind sensors are used to automatically retract your awning when the wind is too strong. Front Screens add additional shading when a deck or patio faces East or West. Wind Poles These wind poles are connected to your deck or patio and connect right to the base of the front valance bar of... -
Page 27: Front Screen Installation
Front Screen Installation Crank Side Idler Side Center Roll Support Image of 16’ / 20’ awning center support. Differ- ent than 12’ awning support seen below. STEP 1: ASSEMBLE OUTER BRACKETS - Duplicate crank side and idler side assembly STEP 2: CENTER ROLL SUPPORT - Install on the center of front valance bar STEP 3: INSTALLING OUTER BRACKETS - Remove end cap to expose track for bracket install STEP 3: INSTALL ROLL SCREEN - Insert idler side first... -
Page 28: Testing The Remote
Testing the Remote Control DC1600A Awning Remote Out Button Stop Button In Button Light Button P2 Button Pairing a new remote to motor (w/o Original Remote) 1. Apply power to unit 2. press the P2 button twice on back of remote ▲... -
Page 29: Wind Sensor Installation
Wind Sensor Installation Step 1 Step 2 Step 3 Slide the mounting Release the tab and Insert two (2) - AAA plate up and remove. remove control panel batteries into control from housing. panel. Step 4 Step 5 Step 6 Press the “P2”... - Page 30 Wind Sensor Installation Step 7 Step 8 Step 9 Now set your wind Mount the backing Re-insert Black level. We use #4 plate into accessory control into housing track on front mounting bar. Use inch sheet metal flat top Phillip’s head self- tapping Step 10 Selecting a wind level:...
-
Page 31: Limit Adjustment From Fabric Stretching
Limit Adjustment from Fabric Stretching Because the fabric is under tension it will stretch over time and require the motor to be adjusted. • To adjust the motor simply roll the awning in with the remote control. • Once it stops adjust the white “inner” limit on the motor using a 4mm allen wrench rotating it towards the “+”... -
Page 32: Valance Bar Pin
Service Bulletin Valance Bar Pin WARNING Pay special attention to this pin. Sometimes the pin will come loose during transportation and MUST be reinstalled before un- wrapping the awning on the job site. FAILURE TO FOLLOW THESE INSTRUCTIONS COULD RESULT IN PERSONAL INJURY! - Page 33 Page P age 40 3 8...
Need help?
Do you have a question about the Retractable Awning and is the answer not in the manual?
Questions and answers