Table of Contents
Advertisement
Available languages
Available languages
Quick Links
Advertisement
Table of Contents

Related Manuals for Western Co LEONARDO PRO X 3000/48 Li


Summary of Contents for Western Co LEONARDO PRO X 3000/48 Li
- Page 1 Leonardo PRO X 3000/48 Li Manuale utente User manual...
-
Page 3: Descrizione Generale
LEONARDO PRO X 3000/48 Li Manuale utente LEONARDO PRO X 3000/48 Li • Sistema di accumulo a LITIO per impianti fotovoltaici • Funzione EPS anti-blackout (per carichi privilegiati) con tempo di ripristino <10ms • Conforme alla norma CEI 0-21: 2019-04 + v1-2017 •... - Page 4 LEONARDO PRO X 3000/48 Li Manuale utente Istruzioni di sicurezza Pericolo di esplosione a causa di scintille Pericolo di folgorazione ATTENZIONE: non sollevare oggetti pesanti senza assistenza Generale • Si consiglia di leggere attentamente questo manuale prima di installare e utilizzare il prodotto.
- Page 5 LEONARDO PRO X 3000/48 Li Manuale utente FUNZIONAMENTO DEL LEONARDO PRO X 3000/48 Li Il Leonardo PRO X 3000/48 Li è progettato per accumulo di energia da impianti fotovoltaici esistenti, connessi alla rete ON-GRID; Normalmente l'apparecchio è nello stato ON-GRID, per autoconsumo diretto...
- Page 6 (tensione e frequenza); 3. Batteria: è il sistema di accumulo elettrochimico a 48V con il suo profilo di gestione. Il Leonardo PRO X 3000/48 Li possiede un cavo di comunicazione con CAN BUS, con connessione diretta di tipo RJ10, al sistema di gestione interna della batteria LG CHEM;...
-
Page 7: Schemi Di Collegamento
LEONARDO PRO X 3000/48 Li Manuale utente SCHEMI DI COLLEGAMENTO 1. Schema di collegamento con contatore M3 e carichi privilegiati alimentati anche in caso di blackout. Utilizzare questo schema in caso di tariffa omnicomprensiva, utilizzando il contatore M3 e il commutatore in uscita, con topologia in parallelo alla rete. - Page 8 LEONARDO PRO X 3000/48 Li Manuale utente 3. Schema di collegamento con alimentazione di carichi standard e privilegiati. In questo caso saranno alimentati i carichi (standard), con topologia in parallelo alla rete e i carichi privilegiati, anche in caso di blackout.
- Page 9 LEONARDO PRO X 3000/48 Li Manuale utente 5. Schema di collegamento che prevede la connessione di tutti i carichi sull’uscita AC-OUT dell’inverter. In questo caso, anche in caso di blackout, saranno alimentati tutti i carichi dell’abitazione, fino alla potenza di uscita del sistema (3kVA).
- Page 10 PROTEZIONI ESTERNE Protezioni lato corrente alternata Il Leonardo PRO X 3000/48 Li è dotato di un'uscita in corrente alternata EPS ed una linea di ingresso/uscita in corrente alternata AC-IN. Essendo l'apparecchio dotato di collegamento a terra del conduttore NEUTRO - sistema TT, la linea di uscita in corrente alternata AC-OUT può...
- Page 11 LEONARDO PRO X 3000/48 Li Manuale utente INSTALLAZIONE CONTATORE CONTROLLO P1 Il Contatore di controllo P1 prevede un collegamento diretto dei cavi di alimentazione AC dell'impianto FV esistente, al fine di misurare la potenza FV Prodotta. Le morsettiere di ingresso ed uscita possono ospitare cavi di sezione fino a 6 mm ed una corrente massima pari a 45A.
-
Page 12: Installazione Meccanica
1. Installare il Leonardo PRO X 3000/48 Li in un luogo asciutto ed adeguatamente arieggiato, fissato su di una superficie non infiammabile e posizionato in modo da lasciare uno spazio privo di ostacoli di almeno 10cm nell’intorno del dispositivo che ne permette il raffreddamento per convezione forzata dell’aria. - Page 13 VE-Bus: Connessione Bus di controllo per la connessione di un Leonardo PRO X Slave, RJ45 Meter: Connessione del Bus del contatore di produzione P1, 2x2.5mm VE-Bus: Connessione Bus di controllo interno, RJ45 WBUS: Connessione del Bus WESTERN CO, RJ11 (non utilizzato). CAN: Connessione CAN-BUS batteria, RJ10 Ethernet: Connessione alla rete internet, RJ45...
- Page 14 LEONARDO PRO X 3000/48 Li Manuale utente ESPANSIONE DEL SISTEMA CON LEONARDO PRO X 3000/48 Li SLAVE È possibile espandere il proprio impianto installando un LEONARO PRO X 3000/48 Li SLAVE, facendo riferimento agli schemi in figure 13 e 14.
-
Page 15: Avvio Del Sistema
LEONARDO PRO X 3000/48 Li Manuale utente AVVIO DEL SISTEMA Effettuare l'attivazione del sistema, seguendo strettamente il seguente ordine di avvio: 1. dare alimentazione AC-IN in ingresso all’inverter; 2. accendere l’inverter attraverso il suo interruttore – posizione ; verificando l'accensione del display, presente sul pannello frontale del Leonardo PRO X;... -
Page 16: Adv. Setup
LEONARDO PRO X 3000/48 Li Manuale utente DISPLAY INTEGRATO Attraverso il display è possibile visualizzare una serie di informazioni riguardo il funzionamento del Leonardo PRO X. Navigazione Menu: La navigazione tra le varie videate è molto semplice e intuitiva. Il display ha due ambienti di visualizzazione (Fig.15): l'ambiente principale MAIN, composto da 6 videate dove si monitora il funzionamento del sistema;... -
Page 17: Status Bar
LEONARDO PRO X 3000/48 Li Manuale utente Schermate del menu principale MENU 1.0 Produzione Consumo Direzione flussi PV (AC) abitazione (AC) energetici Rete AC in Stato di carica ingresso Barra di stato Immissione o Carica o scarica prelievo da rete... - Page 18 LEONARDO PRO X 3000/48 Li Manuale utente Corrente rete IN/OUT Corrente da PV MENU 3.1 Tensione di rete Potenza da PV Variabili fotovoltaico Potenza PV Variabili rete AC Potenza rete IN/OUT Variabili Home AC Potenza Home Variabili Battey DC Potenza di Batteria n.Menu / Warning...
- Page 19 LEONARDO PRO X 3000/48 Li Manuale utente Menu di impostazioni Il Leonardo PRO X è appositamente progettato per funzionare in presenza della connessione a internet, per il monitoraggio, l’assistenza da remoto e gli aggiornamenti. Per questo motivo è indispensabile configurare le impostazioni di connessione del sistema, attraverso il display, per avere un corretto funzionamento.
- Page 20 LEONARDO PRO X 3000/48 Li Manuale utente Visualizzazione dei parametri del sistema MENU 7.4 Elenco visualizzato: Valore: Valori impostabili e descrizioni: Network param.: status: OFF-LINE OFF-LINE; ON-LINE : stato della connessione al cloud IP : 192.168.100.067 indirizzo IP corrente. sNM: 255.255.255.000 sottomaschera di rete corrente.
- Page 21 LEONARDO PRO X 3000/48 Li Manuale utente Led di segnalazione sul pannello inferiore dell’inverter: Tabella segnalazione LED CHARGER Charger ON INVERTER Inverter ON UPS MODE Inverter in modalità OFF-GRID (STAND-ALONE) ON-GRID Inverter in modalità ON-GRID (connesso alla rete elettrica) STATUS Led VERDE: normale stato di funzionamento attivo ON.
- Page 22 LEONARDO PRO X 3000/48 Li Manuale utente MONITORAGGIO Registrazione impianto tramite APP LEONARDO MONITOR e KEY di attivazione Se il display indica che la connessione a internet è attiva, è possibile registrare il proprio impianto attraverso le applicazioni APP per dispositivi mobili, denominate LEONARDO MONITOR, disponibili per i di sistemi operativi, come Android, iOS.
- Page 23 LEONARDO PRO X 3000/48 Li Manuale utente Visualizzazione su APP LEONARDO MONITOR Leonardo Monitor è l'applicazione dedicata al monitoraggio remoto dei prodotti della serie Leonardo, nella schermata Home, gli installatori o i proprietari di più impianti possono facilmente selezionare i diversi siti e confrontare a colpo d'occhio i principali dati di funzionamento per un rapido controllo e visualizzazione di tutte le installazioni effettuate.
- Page 24 LEONARDO PRO X 3000/48 Li Manuale utente Fig.21 Schermata Dati Storici - Energy Per maggiori informazioni sull'APP Leonardo Monitor si rimanda alla presentazione della stessa sugli STORE dedicati al download per lo specifico dispositivo, oppure al sito www.leonardosystem.com. Visualizzazione su portale WEB Per la visualizzazione via WEB, dedicata al monitoraggio remoto più...
-
Page 25: Caratteristiche Elettriche
LEONARDO PRO X 3000/48 Li Manuale utente CARATTERISTICHE ELETTRICHE Leonardo PRO X 3000/48 Li Nominal power 3kVA Pnom Continuous power at 25 ° C 2.4kW Pcon1 Continuous power at 40 ° C 2.2kW Pcon2 Battery voltage Vbat Battery voltage range... -
Page 26: Smaltimento Dei Rifiuti
Il prodotto difettoso dovrà essere rispedito alla Western CO. srl o a società delegata dalla Western CO. srl a fare assistenza sul prodotto, a spese del cliente, assieme ad una copia della fattura di vendita, sia per la riparazione che la sostituzione garantita. -
Page 27: General Description
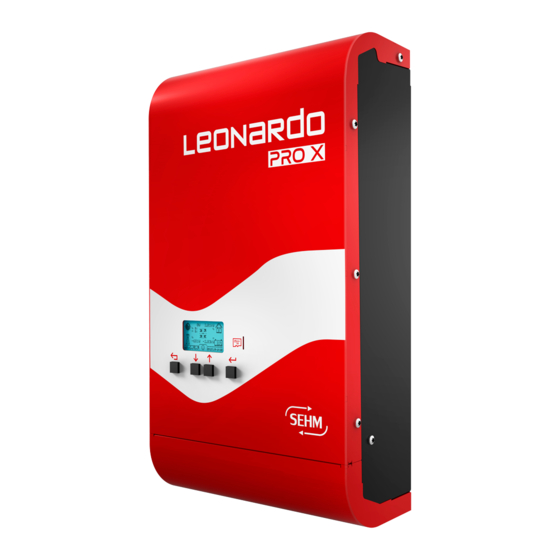
Leonardo PRO X is the ideal solution for adding a storage system on • AC overload and short circuit protection photovoltaic systems already equipped with AC On-Grid string inverters or to have a storage system on a new photovoltaic system by adding Western CO.’s • IP21 case external charge controllers. - Page 28 LEONARDO PRO X 3000/48 Li User Manual Safety instructions Explosion hazard due to sparks Electrocution hazard WARNING: do not lift heavy objects without assistance General • We recommend you to read this manual carefully before installing and using the product.
- Page 29 User Manual OPERATION OF LEONARDO PRO X 3000/48 Li Leonardo PRO X 3000/48 Li is designed for the storage of energy from existing photovoltaic systems connected to the ON-GRID network; 2- Normally the device is in the ON-GRID state, for direct self-consumption +...
- Page 30 (voltage and frequency); 3. Battery: it is the 48V electrochemical storage system with its management profile. Leonardo PRO X 3000/48 Li has a communication cable with CAN BUS, with a direct RJ10 type connection, to the internal LG CHEM battery management system;...
-
Page 31: Connection Diagrams
LEONARDO PRO X 3000/48 Li User Manual CONNECTION DIAGRAMS 1. Connection diagram with M3 meter and privileged loads powered even in the event of a blackout. Use this scheme in case of an all-inclusive tariff, using the M3 meter and the output switch, with topology parallel to the grid. In this case it will be possible to manage privileged loads, which will remain active even in the event of a blackout. - Page 32 LEONARDO PRO X 3000/48 Li User Manual 3. Connection diagram with power supply for standard and privileged loads. In this case the loads (standard) will be powered, with topology parallel to the grid and the privileged loads, even in the event of a blackout.
- Page 33 LEONARDO PRO X 3000/48 Li User Manual 5. Connection diagram that provides for the connection of all loads on the inverter's AC-OUT output. In this case, even in the event of a blackout, all the loads in the home will be powered, up to the system output power (3kVA).
- Page 34 EXTERNAL PROTECTIONS AC side protections Leonardo PRO X 3000/48 Li is equipped with an EPS alternating current output and an AC-IN alternating current input / output line. Since the device is equipped with a ground connection for NEUTRAL conductor - TT system, the AC-OUT alternating current output line can be protected with an AC-type magnetothermic-differential switch OUTPUT, with rated current In = 32A and differential current Id = 0.03A (this circuit-breaker is usually already present in the home's...
- Page 35 LEONARDO PRO X 3000/48 Li User Manual P1 CONTROL COUNTER INSTALLATION The P1 control meter provides a direct connection of the AC power cables of the existing PV system, in order to measure the PV power produced. The input and output terminal blocks can accommodate cables with a section up to 6 mm2 and a maximum current of 45A.
-
Page 36: Mechanical Installation
1. Install the Leonardo PRO X 3000/48 Li in a dry and adequately ventilated place, fixed on a non-flammable surface and positioned so as to leave an obstacle-free space of at least 10cm around the device which allows it to cool by forced air convection. -
Page 37: Inverter Wiring
VE-Bus: Control Bus connection for the connection of a Leonardo PRO X Slave, RJ45 Meter: Bus connection of the production counter P1, 2x2.5mm VE-Bus: Internal control bus connection, RJ45 WBUS: Connection of the WESTERN CO, RJ11 Bus (not used). CAN: CAN-BUS battery connection, RJ10 Ethernet: Internet connection, RJ45... - Page 38 LEONARDO PRO X 3000/48 Li User Manual EXPANSION SYSTEM WITH LEONARDO PRO X 3000/48 Li SLAVE You can expand your system by installing a LEONARO PRO X 3000/48 Li SLAVE, referring to the diagrams in Pic.13 and Pic.14. AC Connections Pic.13 AC connection diagrams of Leonardo PRO X SLAVE...
-
Page 39: System Start
LEONARDO PRO X 3000/48 Li User Manual SYSTEM START Activate the system, strictly following the following boot order: 1. give AC-IN power to the inverter input; 2. turn on the inverter through its switch - position (I); checking that the display on the front panel of Leonardo PRO X comes on;... -
Page 40: Integrated Display
LEONARDO PRO X 3000/48 Li User Manual INTEGRATED DISPLAY Through the display it is possible to view a series of information regarding the operation of Leonardo PRO X. Menu navigation: Navigation between the various screens is very simple and intuitive. The display has two viewing environments (Pic. 15): the MAIN environment, consisting of 6 screens where the system is monitored;... - Page 41 LEONARDO PRO X 3000/48 Li User Manual Main menu screens MENU 1.0 Home Production consumption Energy flow PV (AC) (AC) direction AC input network 2 State of charge Status bar Entering or Charge or withdrawal from discharge the grid (AC)
- Page 42 LEONARDO PRO X 3000/48 Li User Manual Grid Current IN / OUT Current from PV MENU 3.1 Grid Voltage Power from PV AC photovoltaic variables PV power AC Grid Variables Grid power IN/OUT AC Home Variables Home Power DC Battery variables Battery Power IN/OUT n.Menu / Warning...
- Page 43 LEONARDO PRO X 3000/48 Li User Manual Settings menu Leonardo PRO X is specially designed to work in the presence of internet connection, for monitoring, remote assistance and updates. For this reason it is essential to configure the connection settings of the system, through the display, for correct operation.
- Page 44 LEONARDO PRO X 3000/48 Li User Manual Display of system parameters MENU 7.4 List displayed: Value: Settable values and descriptions: Network param.: status: OFF-LINE OFF-LINE; ON-LINE : cloud connection status IP : 192.168.100.067 current IP address. sNM: 255.255.255.000 current network subform.
-
Page 45: Possible Problems And Solutions
LEONARDO PRO X 3000/48 Li User Manual Signaling LED on the lower panel of the inverter: LED signaling table CHARGER Charger ON INVERTER Inverter ON UPS MODE Inverter in OFF-GRID mode (STAND-ALONE) ON-GRID Inverter in ON-GRID mode (connected to the electricity grid) STATUS GREEN LED: normal operating state ON. - Page 46 LEONARDO PRO X 3000/48 Li User Manual MONITORING System registration via APP LEONARDO MONITOR and activation KEY If the display indicates that the internet connection is active, you can register your system through the APP applications for mobile devices, called LEONARDO MONITOR, available for operating systems, such as Android, iOS.
- Page 47 LEONARDO PRO X 3000/48 Li User Manual Display on APP LEONARDO MONITOR Leonardo Monitor is the application dedicated to remote monitoring of the Leonardo series products. On the Home screen, installers or owners of multiple systems can easily select the various sites and compare the main operating data at a glance for quick control and display of all the installations carried out.
- Page 48 LEONARDO PRO X 3000/48 Li User Manual Pic.21 Historical Data - Energy screen For more information on the Leonardo Monitor APP, please refer to the presentation of the same on the STORE dedicated to the download for the specific device, or to the website www.leonardosystem.com...
-
Page 49: Electrical Characteristics
LEONARDO PRO X 3000/48 Li User Manual ELECTRICAL CHARACTERISTICS Leonardo PRO X 3000/48 Li Nominal power Pnom 3kVA Continuous power at 25 ° C Pcon1 2.4kW Pcon2 Continuous power at 40 ° C 2.2kW Battery voltage Vbat Battery voltage range... -
Page 50: Mechanical Dimensions And Weights
The defective product must be sent back to Western CO. srl or to a company delegated by Western CO. srl to provide assistance on the product, at the customer's expense, together with a copy of the sales invoice, both for repair and replacement guaranteed. - Page 51 Questo documento è di proprietà di WESTERN CO. Srl - Tutti i diritti sono riservati - La riproduzione e l'uso delle informazioni contenute nel presente documento sono vietati senza il consenso scritto di WESTERN CO. Srl. This document is the property of WESTERN CO. Srl - All rights are reserved - Reproduction and use of information contained within this document is forbidden without the written consent of WESTERN CO.
Need help?
Do you have a question about the LEONARDO PRO X 3000/48 Li and is the answer not in the manual?
Questions and answers