Table of Contents
Advertisement
Advertisement
Table of Contents

Related Manuals for Cardioline ar1200view


Summary of Contents for Cardioline ar1200view
- Page 1 User’s Manual English...
- Page 2 This User Manual has been prepared with the objective of giving the user all the ® necessary information to make the best use of the CARDIOLINE ar1200view. General information et medical devices SpA, continuously in search of technological improvement and customer satisfaction, reserves the right to modify this publication without prior notice at any time.
-
Page 3: Table Of Contents
Contents 1 Introduction 1.1 How to read the manual 1.2 Information and recommendations relating to safe use 1.3 The electrocardiograph Front view Side view and bottom Parts, symbols and controls 2 Installation and initial preparation 2.1 Selecting the installation site 2.2 Loading the thermal paper 2.3 Power supply;... - Page 4 5 Recording of a rest ECG 5.1 Patient data entry 5.2 Recording in manual mode 5.3 Recording in automatic mode Automatic calculation of ECG parameters Automatic ECG interpretation Copy of an automatic ECG recording ECG memory: saving a recording ECG memory: archive management Saving to Personal Computer archive 5.4 Recording in Emergency mode 5.5 Recording in ECG Autotimer mode...
- Page 5 7.4 Battery replacement 7.5 Display maintenance 7.6 Periodic checks Technical information 8 Technical specifications Basic accessories supplied*...
-
Page 6: Introduction
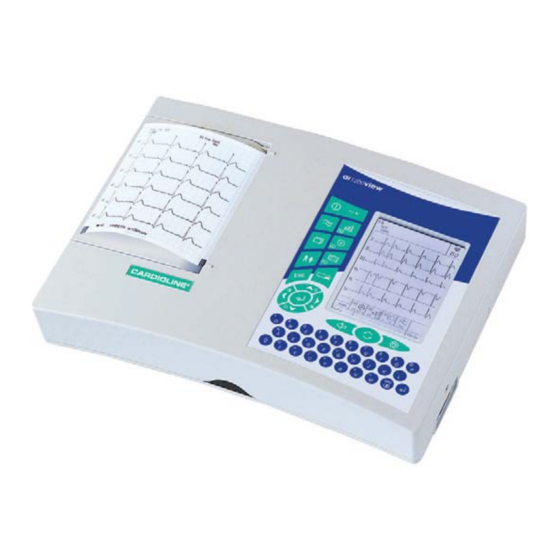
1 Introduction ar1200view is an electrocardiograph with dual power supply (mains and rechargeable internal batteries), whose basic configuration allows for the following functions: ECG recording in automatic, manual, and timed mode; real-time display of the ECG signal on the built-in graphic display in 3, 6 channel format;... -
Page 7: How To Read The Manual
The manual gives detailed information on the use of the model ar1200view in traditional ECG procedures, and an introduction to the use of particular functionalities involving interaction with software and a Personal Computer. -
Page 8: Information And Recommendations Relating To Safe Use
Further information and clarifications can be requested directly from: CARDIOLINE® - Supporto Prodotto Strada Rivoltana Nuova, 53, I - 20060 Vignate (MI) ITALIA e-mail: et.service@etmed.biz tel. - Page 9 only original electrodes or electrodes responding to IEC and AAMI standards. If an electrosurgical scalpel is in use, the patient cable should be disconnected from the device. At all events, when defibrillators or high-frequency surgical devices are being used at the same time, it is essential to take the greatest care. If there is any doubt when such devices are in use, disconnect the patient from the electrocardiograph temporarily.
-
Page 10: The Electrocardiograph
1.3 The electrocardiograph Front view Side view and bottom... -
Page 11: Parts, Symbols And Controls
Parts, symbols and controls 2. Keyboard: Function Messages & Symbols displayed / Associated LED LED on: device connected to mains power; internal battery charging “full” symbol: battery charged “part empty” symbol battery power less than 30% on/ off “empty” symbol: internal battery flat;... - Page 12 On display: On / Off Filter on On paper: AC mains and muscle interference filter Available speeds: 12.5 – 25 – 50 mm/s Select ECG scroll speed on display Available speeds: 5, 25, 50 mm/s Select paper scroll speed Available wavelengths: 5, 10, 20, Select ECG recording sensitivity on screen...
- Page 13 2. Display: to display the ECG signal, control operations, patient data, report data and settings. In normal operating mode: a. Patient data area: displays Last Name (first line) and First Name (second line). b. ECG signal display area Each lead is preceded by its name Selected operating mode.
- Page 14 h. Filter in place/not in place indicator. Number of tests stored and space available , in Autotimer, HRV and Arrhythmia mode , it displays test timing. Time display. m. Battery status indicator n. Operating information and error message area. In Menu mode, it indicates enabled keys and any additional options.
- Page 15 5. Patient cable connector. 6. Paper compartment door. 7. Reset button : used to re-establish normal operating conditions in the event of an error that cannot be managed using the keyboard. 8. “Mains line” connector. 9. Identification plate. Please, refer to the information shown on this plate during any communication with the Authorised Support Centres.
-
Page 16: Installation And Initial Preparation
This avoids presence of mains power disturbance of the recorded ECG signal. 2.2 Loading the thermal paper CARDIOLINE® ar1200view is able to reproduce the ECG signal both on thermal paper in rolls and on thermal paper in packs. No particular configuration procedure is required. -
Page 17: Power Supply; Control And Management Of The Rechargeable Battery
If using paper in rolls: a. Open the paper compartment using a coin or a similar object, remove the “roll guide” hub and the “pack guide”. To avoid losing the “guide”, place it in a safe place. If replacing an empty roll, retrieve the core before throwing away the empty roll. -
Page 18: Recharging The Battery
Warning: the internal feeder of the device is classified under Class I. Warning: when the device is connected to the mains, the battery is automatically recharged during use. To gain maximum benefit from the characteristics of the dual power supply system, follow the indications given below. -
Page 19: How To Switch Off The Electrocardiograph
2.5 How to switch off the electrocardiograph The display turns off. The settings for the last recording remain stored in the memory. To see the effect of switching off on the last automatic recording see "Copy an automatic ECG recording". Warning: switching off is not enabled as specified in §... -
Page 20: Preparation For Use: The Menu
3 Preparation for use: the menu 3.1 How to access the menu to access the menu from the main screen. to scroll through the menu items. executes the action associated with the symbol displayed: access the lower level menu, select and confirm. to scroll multiple selections. - Page 21 “Settings” and “Tools”. The following tree layout of the menu illustrates the different levels of exploration possible, and the features that can be selected. Details on the single items are given in subsequent headings. Personalize mode Emergency Paper Saving PC ECG Arrhythmia Monitor HRV analysis ECG autotimer...
- Page 22 ST amplitudes Templates • ECG interpretation Summary Rhythm Interpretation Measurements Templates • None Configure Copy • Complete • ECG Only • Analysis Only Archive Management • Save Automatic Request None • Deleting Manual Automatic • Autotrx last ECG Emergency only •...
-
Page 23: Menu-Activated Operation And Personalization Of The Electrocardiograph
Print delay • • General ♦ Date \ Time ♦ Measurement Units Cm / Kg Inch / Pound ♦ Mains filter 50 Hz 60 Hz ♦ Display Brightness Contrast ♦ Recorder ID Password (only numerical) Tools About Configuration Print Default Configuration Self-test ♦... -
Page 24: The "Ecg Archive
PC archive. Feature associated with “memory” option. The twelve ECG leads are displayed in real time on your Computer screen where, thanks to the CARDIOLINE software (Real Time ECG), PC-ECG it is possible to perform all the ECG recording operations. - Page 25 “Operation profiles” Up to four different Operation Profiles can be saved. This facility enabled the recorder to be modified for different use requirements in just a few seconds. Accessing the “Operation Profiles” menu the user can: recall an existing profile: ”Select Profile”. The list of saved Profiles is displayed.
- Page 26 Leads sequence. The sequence of leads printed can be selected. As well as modifying the order in which the leads are printed out, the selection also influences the rhythm lead selection menu. Lead Three options are available: Sequence Standard; Cabrera. Personalize: a special sequence can be set.
- Page 27 “Delete” “Manual” files can be deleted using the delete function on the Look in ECG archive menu. “Automatic” archive files are deleted automatically after successful transmission to a PC with the ArchPC function. “Auto-transmission last ECG” “Yes”: last stored ECG will be automatically sent “No”: no auto-transmission “Emergency only”: only last stored ECG acquired in Emergency mode will be automatically sent .
-
Page 28: Tools
”General" Options / Actions available Description Accessing the date/time programming masks. Use number keys for Date \ Time settings. Set units to be used for management of numerical patient data Units (Weight and Height). Two options are available: cm, Kg; inch, pound. To ensure the device operates correctly select the mains frequency in Mains filter the area of use. -
Page 29: Preparing For An Ecg Recording
CARDIOLINE ar1200view electrocardiograph. In particular, indications are given for “connecting the patient cable”, “preparing the patient”, “applying the electrodes”. Also illustrated are the necessary procedures for choosing the correct recording parameters, such as “speed, sensitivity and introduction of the filter”. -
Page 30: Select Recording Characteristics Operating Mode, Display And Print Format, Speed, Sensitivity, Filter
carefully and evenly (this is not necessary when using disposable electrodes with built-in gel). The following figure shows the standard positioning of the electrodes. Standard positioning electrodes V1: on the 4th intercostal space, right parasternal; V2: on the 4th intercostal space, left parasternal;... -
Page 31: Display And Print Format
Options / Actions available Description All 12 ECG leads are recorded simultaneously (10 seconds). The Automatic ECG signal printed out refers to the same time period, and is saved. The selected leads are recorded and printed out. The recorded signal Manual ECG is in real time, i.e. -
Page 32: Speed Of Recording On The Display And On Paper
In “Automatic” mode: the twelve ECG leads are printed by groups 2.5 sec per each lead (3x4) plus 10 sec for rhythm leads. Additional pages are available if diagnosis aids (e.g. Interpretation) are used. The selected format will be applied to all manual, automatic and autotimed twelve lead recordings. - Page 33 the signal without modifying its morphology. Filter introduction affects both the displayed and the printed signal. To ensure correct and accurate tests, automatic interpretation of the trace is always performed only on the non- filtered ECG signal. to install the filter; “on” is associated with the corresponding symbol on the display.
-
Page 34: Recording Of A Rest Ecg
5 Recording of a rest ECG 5.1 Patient data entry to display the patient file at any time. Inside the patient file: to display the “New” option. On confirmation the displayed data are cancelled. to move around inside the file and display the options associated with the “Type”. -
Page 35: Recording In Manual Mode
to clear the text before the cursor; to clear the text after the cursor. to confirm data. to interrupt the data entry phase with no changes. The data entered in the patient file are, in sequence, “Patient ID”, “Last Name”, “First Name”, “Date of birth”, “Sex”, “Last Name 2”, “Blood Pressure”, "Height", “Weight”, “Type”, “Medications”, “Notes”, “Ward/Dept Name.”... -
Page 36: Automatic Calculation Of Ecg Parameters
options), to obtain a copy of the recording, to save the recording ("Memory" option), and to transfer the ECG to a Computer (PC archive" option). Having selected “Automatic” mode (see “Operating mode”): to start the recording. If the signal has not yet been initialised, the message “Wait …”... -
Page 37: Copy Of An Automatic Ecg Recording
Stop: automatic at the end of printing the report. The message “Analysis OK” is displayed. Warning: The ECG Interpretation option assume that an ECG is taken on a rested person without pace-maker. Warning The correctness of the results furnished by the ECG Interpretation option also depends on the exact formulation of the physical data of the patient (sex, age), that the user is kept to effect before the execution of the analysis, according to the illustrated formalities in the User Manual. -
Page 38: Ecg Memory: Saving A Recording
to start printing a copy. The message “Copying …” is displayed. to interrupt printing (stop). If the memory does not contain valid data, the message "No data" is displayed. Note: the trace is saved without filtering the signal, irrespective of whether the filters are activated during the recording. -
Page 39: Saving To Personal Computer Archive
50cm. Avoid placing objects between the two interfaces. Your electrocardiograph is capable of transferring stored ECG traces to a Personal Computer equipped with CARDIOLINE management software. For details on the use of the application software, consult the specific manual. -
Page 40: Recording In Emergency Mode
Select the “ECG archive” menu and proceed as appropriate. For details of the options available, see § “ECG archive”. Warning: in order to provide a correct transmission of data, position the IR adapter from PC at a distance not greater than 50 cm. Do not place any object between the two interfaces. -
Page 41: Recording In "Paper Saving" Mode
PC, using the “Copy” function or the “ECG Archive” menu. 5.7 Recording in ”PC ECG” mode Associated with the CARDIOLINE software, your ar1200view becomes a PC-based acquisition system. For details on the use of the application software, consult the specific manual. -
Page 42: Recording In "Hrv Analysis" Mode
(connected previously to the PC) as illustrated in the following figure: 50 cm start transmission. message “PC transmission” is displayed. During transmission, the ECG leads are also displayed on the recorder display. to end transmission. Warning: to favour a correct transmission of data, position the IR adapter for PC to a distance not greater than 50 cm. -
Page 43: Recording In "Arrhythmia Mode
The display shows the time from the test start. The test is automatically terminated at the end of the scheduled time and the final report is printed out. to scroll the leads displayed during the test (based on the electrodes connected). to interrupt (stop). -
Page 44: Defibrillation
to interrupt (stop). 5.10 Defibrillation! If defibrillation occurs the symbol is displayed. Within 10 seconds from the discharge, the signal is automatically restored. -
Page 45: Management And Control Of Electrocardiograph Functions
6 Management and control of electrocardiograph functions 6.1 Disconnected electrodes, potential defibrillation Saturation events are controlled and monitored by your electrocardiograph. The response of the electrocardiograph depends on the current phase of operation. Stop phase Symbol displayed: critical electrode contact. The user can proceed with the recording;... -
Page 46: Status Messages And Error Indication: Description And Related Event
inhibited automatically and the messages “Out of paper” or “Printer!” are displayed for 3 seconds approx. 6.4 Status messages and error indication: description and related event Listed below are the various error messages displayed and/or printed on paper when abnormal events occur. Each message is correlated to a specific condition or phase of operation. -
Page 47: Troubleshooting
6.5 Troubleshooting The following table summarises certain problems that may occur and the relative causes. Problem Cause Use of electrodes other than originals Use Isoelectric line drift of electrodes in saturation Insufficient electrode/skin contact Electrode surface dirty Patient moving Voltage generator too close; presence of Interference from AC mains supply other clinical instruments (e.g. -
Page 48: Maintenance
The user can also print out identifying information relative to the individual device. ® In the event of error messages being displayed, contact the CARDIOLINE Authorised Assistance Centre, and a technician will investigate and eliminate the causes of the trouble. -
Page 49: Replacing The Thermal Paper
7.2 Replacing the thermal paper When the thermal paper is depleted, the device stops and any attempt to start recording is inhibited (see "Print system control. "Out of paper”.) 7.3 How to clean the device and the electrodes To clean the device, use a cloth moistened with water or denatured ethyl alcohol. -
Page 50: Display Maintenance
5. Before using the recorder again, read carefully the recharge instructions given in § “Battery recharge”. 6. Reset date and time in the appropriate menu. Warning: If the battery pack connection polarities are not matched correctly, severe damage can be caused to the recorder and the guarantee will be invalidated. Warning: Do not abandon the exhausted batteries in the environment. -
Page 51: Technical Specifications
8 Technical specifications Mains power supply Internal supply, class I 230 V ± 10% 50/60Hz 115 V ± 10% 50/60 Hz Maximum current 160 mA at 115 V ~ ±10% absorbed 80 mA at 230 V ~ ±10% Mains protection Fuse: T 0.5 A Internal power supply 12V –... - Page 52 Backlit with cold cathode fluorescent light Interpretation program Parameter calculation (optional) ECG interpretation (optional): Arrhythmia Program (optional) HRV: RR variability (optional) Type of use Continuous Operating modes Manual: acquisition and printing in real time Automatic : simultaneous acquisition Timed: acquisition at user-defined intervals Arrhythmia: analyse real...
-
Page 53: Basic Accessories Supplied
Basic accessories supplied* IEC Patient cable, ref. 63050025 6 suction cup electrodes ref. 66030163 4 peripheral electrodes ref. 660301105 1 260 gr. gel bottle, ref. 66020002 1 paper roll, 120 mm x 20m, ref. 66010033 1 Z-fold paper pack, 120 x 100 mm x 30 metres ref. 66010039 ECG ruler User’s Manual *Note: may vary according to sale configuration selected upon purchase... - Page 54 - Page intentionally left blank -...
- Page 55 - Page intentionally left blank -...
- Page 56 Marketing & Sales Head Office Strada Nuova Rivoltana, 53 20060 Vignate (MI) ITALY tel. +39 02 95 05 181 fax +39 02 95 66 013 e-mail: etmed@etmed.biz www.cardioline.biz...
Need help?
Do you have a question about the ar1200view and is the answer not in the manual?
Questions and answers