Table of Contents
Advertisement
Advertisement
Table of Contents

Related Manuals for Houghton BELAIRE


Summary of Contents for Houghton BELAIRE
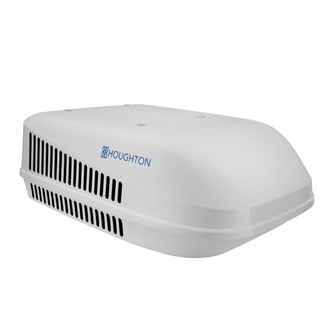
- Page 1 Ducted Air-Conditioning System...
- Page 2 Safety Notices Dear user, thank you for choosing a HOUGHTON caravan air-conditioner. For your ease of use and safe maintenance, we have included the following symbols in this manual: All the contents with this “Warning” logo are about the safety of the user and the air-conditioner, the user shall operate in strict compliance with the instructions.
-
Page 3: Table Of Contents
Table of Contents Safety Notes..............................1 Product Introduction............................2 Packing List..............................3 Installation Guidance...........................4 Instructions for Use........................... 10 Operation Instruction ..........................11 Product Maintenance..........................20 Specifications............................21 Exploded Diagram and Parts List......................22 Trouble Shooting Guide..........................24 Circuit Diagram............................25... -
Page 4: Safety Notes
Safety Notes Make sure the external electric supply socket of the caravan air-conditioner is effectively grounded in accordance with your local regulations. Failure to ground the unit correctly may cause electric shock or fire. If you are not to use the air-conditioner for a long time, please isolate the power supply. Clean the filter of the air-conditioner regularly, A dirty filter will decrease air flow and lead to poor heating and cooling performance. -
Page 5: Product Introduction
D. Choice & Use of a generator HOUGHTON BELAIRE requires a mains quality AC power source for correct operation. If you decide to supply power using a generator then you are strongly recommended to consult with the generator suppler to confirm suitability and sizing of the generator for your application. -
Page 6: Packing List
Packing List Installation parts list Main parts: 1.BELAIRE air-conditioner outdoor unit ×1 2.Outlet gasket ×1 3.Air flow partition×1 4.Plenum mounting bracket ×1 5.Return air filters ×2 6.Plenum assembly ×1 7.M8 x 180 mm hex head bolts ×4 8.Metal clamping bar ×4 9.Large M8 washer ×4... -
Page 7: Installation Guidance
The installers shall have refrigeration technician qualification certificates and/or suitable electrical trade qualifications. Consult with HOUGHTON or the local distributor in the case of unusual applications or installation conditions that are not specifically covered by this manual. Installation requirements ... - Page 8 Installation position Traveling direction of caravan Before the installation, consider the installation position: At least 150mm/6" is needed on the left and right side. At least 200mm/8" is need at the front and back area. At least 50mm/2" is needed for the height. ...
- Page 9 Install outlet gasket Mare sure the roof is clean, dry and free from oil or grease. Take off the paper from the back of the outlet gasket and stick the outlet gasket onto the roof over the square hole. ...
- Page 10 Install air flow separation baffle A. Measure the height from ceiling to the steel base of the Insert the trimmed air flow separation baffle into the air conditioner and trim the baffle to this height. slot of the plenum mounting bracket. Baffle height Ceiling to base height Slot...
- Page 11 Install plenum mounting bracket A. Assemble M8 bolts, washer and metal fixing plates in D. Tighten the M8 bolts to make sure the plenum mounting order shown. bracket is connected with outdoor unit tightly. It’s suggested that when screwing the bolt, torque should be 7N.m/ 5ft-lbs which could make the connection between outdoor unit and outlet gasket perfect.
- Page 12 Install plenum assembly Fix the plenum assembly on the plenum mounting A. Connect the socket and plug of the display panel wires bracket with four ST4.2x16 pan head screws(#10). and the controller wires. please note that colors of the wires should be match (yellow to yellow, red to red, etc.) Attach the plenum assembly to the plenum mounting D.
-
Page 13: Instructions For Use
Instructions for Use Switch on the power to the air-conditioner at the isolation breaker. Start the air-conditioner by using the remote control and pressing the “ON” button. Then select fan function by pressing the “MODE” button. Operate in low FAN,medium FAN and high FAN in turn to check normal operation. ... -
Page 14: Operation Instruction
Operation Instruction Remote controller 1. Operation of the remote controller Turn on Press the on/off “ ” key, the unit turns on. The panel buzzer beeps once time and the running mode and temperature will be displayed. - Page 15 FAN mode Press the “MODE” key, select the “ ” mode. Press the“FAN”key to select Low/Medium/High FAN speeds. The panel will display “ ” and the indoor environment temperature. Medium High COOL mode Press the“MODE”key, select the mode. Press the down “▼” key to decrease the room temperature. Press the ...
- Page 16 HEAT mode Press the “MODE” key, select the mode. Press the up “▲” key to increase the room temperature.Press the “FAN” key to select different speed. The panel will display and the indoor environment temperature(Initial 3 seconds flashing the set point temperature). AUTO mode Press the “MODE”...
- Page 17 Celsius and Fahrenheit degree change In any mode,press the“℃/℉”key to select temperature unit of Celsius and Fahrenheit. Turn off Press the on/off “ ”key again,the unit turns off and the panel will be blank. Timing function Set clock and timer. ...
- Page 18 Wall pad controller 2. Wall pad controller operation Turn on Press the ON/OFF “ ” key, the unit turns on. The buzzer of the panel beeps once time and the running mode and temperature will be displayed.
- Page 19 COOL mode Press the“MODE”key, select the mode. Press the down“▼”key to set the temperature lower than the room temperature.Press the“FAN”key to select different speed. The panel will display and the indoor environment temperature(Initial 3 seconds flashing the set point temperature). DRY mode Press the “MODE”...
- Page 20 HEAT mode Press the “MODE” key, select the mode. Press the up “ ▲ ” key to set the temperature higher than the room temperature .Press the“FAN”key to select different speed. The panel will display and the indoor environment temperature(Initial 3 seconds flashing the set point temperature).
- Page 21 Celsius and Fahrenheit degree change In any mode,press up“▲” and down“▼”key at same time for 3 seconds.Switch temperature between Celsius and Fahrenheit units. SLEEP Only available in COOL and HEAT modes.Press the “SLEEP” key to enter or exit sleep mode.Sleep mode is selected ...
- Page 22 LIGHT This function only applies to air conditioners with LED lights. Control of the LED lights is independent of the ON/OFF“ ”key. Short press the “LIGHT” key to control the LED lights ON/OFF. When the LED light is ON long press the“LIGHT” key for 3 seconds to set the LED lights brightness and can be adjusted by up“▲”...
-
Page 23: Product Maintenance
Product Maintenance Filter The return air filters (#5) are the only components that need periodic maintenance. Check and clean the filter each week when in use to prevent the filters from being blocked by dirt and lint. The filter should be washed frequently to ensure effective cooling and heating. ... -
Page 24: Specifications
Specification Model A3501 A3800 T3500 Power supply 115V~/60Hz 115V~/60Hz 220-240V~/50Hz Refrigerant charged R410A/470g R410A/650g R410A/590g Rated cooling capacity 13500BTU/H 15000BTU/H 3500W Rated heating capacity ------- 15000BTU/H 3500W Input power for cooling (W) 1300 1500 1300 Input power for heating (W) ------- 1300 1200... -
Page 25: Exploded Diagram And Parts List
Exploded Diagram and Parts List... -
Page 27: Trouble Shooting Guide
Trouble Shooting Guide No display on the wall pad controller when unit turn ON Check whether power is supplied to the RV. E0: Wall pad and unit are not communicating Check circuit breaker for AC supply power is ON. correctly. -
Page 28: Circuit Diagram
Circuit Diagram A3501 No FURNACE FURNACE... - Page 29 A3800 No FURNACE FURNACE...
- Page 30 T3500...
- Page 31 Ho u g h t o n Le i s u r e Pr o d u c t s Pt y Lt d . 37 A H u m p h r i e s Te r r a c e , Ki l k e n n y , S . A . 5 0 0 9 A u s t r a l i a S e r v i c e c a l l : +6 1 8 7 2 3 1 1 8 9 1 W e b s i t e : w w w .
Need help?
Do you have a question about the BELAIRE and is the answer not in the manual?
Questions and answers