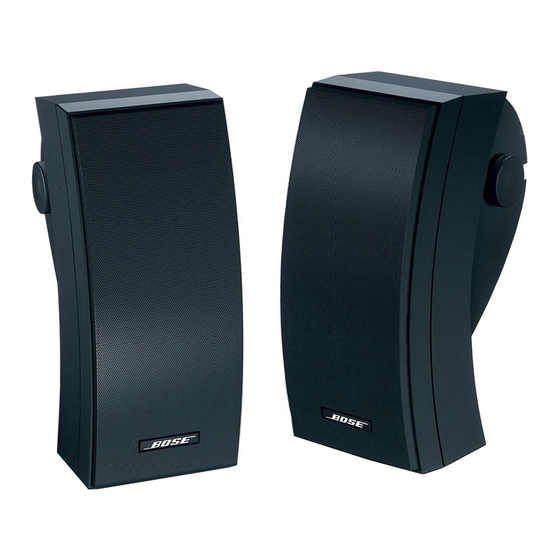
Summary of Contents for Bose 251
- Page 1 The Bose Environmental Speakers ® OwOOwner Owner’s Guide October 30, 2001 AM250811_04_V.pdf ltkje...
-
Page 2: For Your Records
For your records… Serial numbers are located on the label on the back of each 251 Serial numbers: Dealer name: Dealer phone: We suggest you keep your sales slip and warranty card together with this owner’s guide. Nijverheidstraat 8, 1135 GE Edam... -
Page 3: Table Of Contents
Unpacking the carton ... 4 Tools required ... 4 Selecting the location for your speakers ... 5 Installing Your 251 Choosing the speaker wire ... 6 Installing the mounting brackets ... 6 Attaching the speakers to the brackets ... 8 Making the connections ... -
Page 4: Setting Up
Carefully unpack your speakers and save all packing materials for possible future use. Check that your system contains the parts identified in Figure 1. Do not attempt to use your speak- ers if any part of them appears damaged. Instead, notify Bose Corporation or your autho- rized Bose dealer immediately. -
Page 5: Selecting The Location For Your Speakers
Speaker placement guidelines AM250811_04_V.pdf speakers should be placed at least 7 feet (2 m) apart. ® 251 speakers are not magnetically shielded. Keep them at least 9 inches (23 cm) 7 ft (2 m) minimum space between speakers October 30, 2001... -
Page 6: Installing Your 251
11. Installing the brackets onto the exterior of a house The 251 speakers should be mounted in a vertical position to achieve the best musical performance. Figure 3 illustrates how the mounted speaker will look once the installation is complete. - Page 7 The 251 performance. Figure 7 illustrates how the mounted speaker will look once the installation is complete. To begin, mark four holes to indicate where you want to install the speaker bracket (Figure 8). Then, drill four starter holes using a...
-
Page 8: Attaching The Speakers To The Brackets
Installing the bracket onto a deck railing or table Note: If you are mounting your 251 rotate the Bose logo. Refer to “Rotating the Bose logo” on page 11 for instructions on how to do this. Attaching the speakers to the brackets Once the brackets are installed, carefully follow these steps to attach the speakers to the brackets. -
Page 9: Making The Connections
This marked wire is positive (+). The plain wire is negative (–). These correspond to the red (+) and black (–) terminals on the back of the speaker, receiver, or amplifier. Be sure to connect each wire to the proper terminal (positive to positive, negative to negative). -
Page 10: Checking The Connections
Attach the marked wire to the red (+) terminal. b. Attach the plain wire to the black (–) terminal. 2. Connect the speaker on the right side of the listening area to the right channel of your receiver or amplifier, following the same procedure above (Figure 17). -
Page 11: Attaching The Rubber Feet
B. Deck railing or table Attaching the rubber feet If you do not plan to use the supplied brackets to mount your 251 environmental speakers, you can place them on a sturdy, level surface. They should be standing in the vertical posi- tion. -
Page 12: Maintaining Your 251
Use a cloth dampened in mild detergent and water to remove dust or dirt from the outside of your 251 speakers. Or use a hose to rinse them thoroughly with fresh water. Do not use enough pressure to force water behind the grille and into the drivers or the acoustic ports. -
Page 13: Product Information
Driver complement • Two (2) 2 ⁄ " environmental Twiddler • One (1) 5 ⁄ " environmental woofer per speaker Enclosure • Dual-port molded polypropylene composite • Black or white Dimensions • 13 ⁄ " H x 5 ⁄... - Page 14 October 30, 2001 AM250811_04_V.pdf...
-
Page 15: Bose Corporation
Richmond Hill, Ontario L4B 1B3 1-800-465-2673 Phone hours - ET (eastern time): Weekdays 9 a.m. to 5 p.m. European Office Bose Pr oducts B.V ., Nijver heidstraat 8 1135 GE Edam, Nederland TEL 0299-390111 FAX 0299-390114 Australia Bose Pty Limited, 1 Sorrell Street... - Page 16 © 2000 Bose Corporation, The Mountain Framingham, MA 01701-9168 USA 250811 AM Rev.04 JN10679 October 30, 2001 AM250811_04_V.pdf...


Need help?
Do you have a question about the 251 and is the answer not in the manual?
Questions and answers