Table of Contents
Advertisement
Quick Links
OPERATION AND INSTALLATION MANUAL
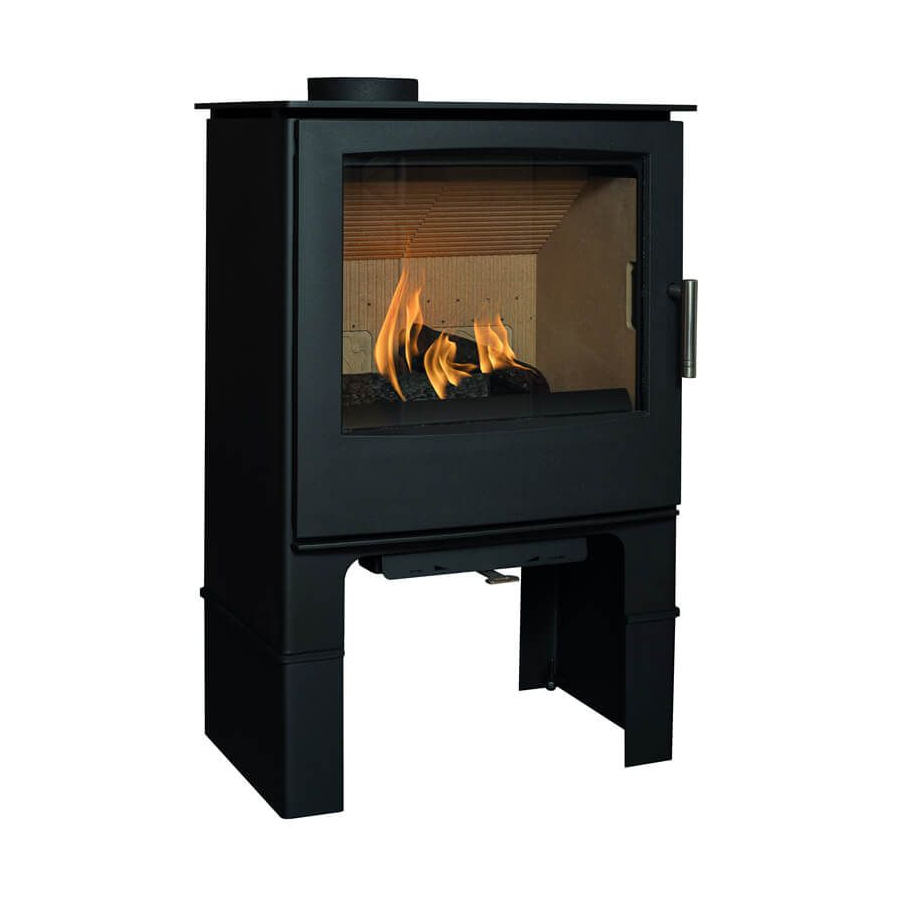
Woodland Electric
THE HEATER OUTLET GRILLE BECOMES VERY HOT WHILST IN OPERATION.
DO NOT COVER THE OUTLET GRILLE OR ANY PART OF THE APPLIANCE.
FOR USE WITH 230V - 240V 50HZ ELECTRICITY SUPPLY ONLY.
PLEASE READ THESE INSTRUCTIONS CAREFULLY BEFORE INSTALLATION.
KEEP THE INSTRUCTIONS IN A SAFE PLACE.
THEY WILL BE NEEDED WHEN MAINTENANCE OR SERVICING IS REQUIRED.
THIS APPLIANCE MUST BE EARTHED.
1 of 24
Advertisement
Table of Contents

Related Manuals for Mendip Stoves Woodland Electric


Summary of Contents for Mendip Stoves Woodland Electric
- Page 1 OPERATION AND INSTALLATION MANUAL Woodland Electric THE HEATER OUTLET GRILLE BECOMES VERY HOT WHILST IN OPERATION. DO NOT COVER THE OUTLET GRILLE OR ANY PART OF THE APPLIANCE. FOR USE WITH 230V - 240V 50HZ ELECTRICITY SUPPLY ONLY. PLEASE READ THESE INSTRUCTIONS CAREFULLY BEFORE INSTALLATION.
- Page 2 2 of 24...
- Page 3 2 years. If your stove is purchased through a registered Mendip Stoves retailer and the 5 year and 2 year extended warranty will only apply if we have received the completed registration card within 1 calendar month of the purchase of your appliance.
- Page 4 HOW TO USE YOUR APPLIANCE 1. IMPORTANT SAFETY INFORMATION READ ALL OF THE INSTRUCTIONS CAREFULLY BEFORE USING THE APPLIANCE. Instruc�ons are available online at: www.eurostove.co.uk REMOVE ALL PACKAGING AND DISPOSE OF AT AN APPROPRIATE RECYCLING FACILITY. DO NOT LOCATE THIS APPLIANCE IMMEDIATELY BELOW A FIXED SOCKET DO NOT USE THIS APPLIANCE IN THE IMMEDIATE SURROUNDINGS OF A BATH, SHOWER, SWIMMING POOL OR ANY OTHER AREA WHERE THE APPLIANCE COULD COME INTO CONTACT WITH WATER OR HUMIDITY, FOR EXAMPLE A BATHROOM.
- Page 5 CAUTION: SOME PARTS OF THIS PRODUCT CAN BECOME VERY HOT AND CAUSE BURNS. PARTICULAR ATTENTION MUST BE GIVEN WHERE CHILDREN AND VULNERABLE PEOPLE ARE PRESENT. CHILDREN AGED 8 YEARS OR OLDER SHALL ONLY SWITCH ON/ OFF THE APPLIANCE PROVIDED THAT IT HAS BEEN PLACED OR INSTALLED IN ITS INTENDED NORMAL OPERATING POSITION AND THEY HAVE BEEN GIVEN SUPERVISION OR INSTRUCTION CONCERNING USE OF THE APPLIANCE IN A SAFE WAY AND UNDERSTAND THE HAZARDS INVOLVED.
-
Page 6: Turning On The Appliance
2. OPERATING INSTRUCTIONS WARNING: Parts of the stove may get hot during opera�on To turn the appliance on I/O operate the standby switch located on the rear of the stove just under the top plate on the right hand side. The flame effect can be turned on/off using the remote. -
Page 7: Heat Settings
TO ADJUST THE LIGHT EFFECT Select ‘effect’ se�ng while in light mode. The LH menu bu�on will switch the effect on. Rota�ng the dial or pressing the menu bu�ons will exit the effect mode. the CURRENT SETTING effect mode is indicated by a dashed bar, the light level is indicated by a solid LEVEL bar. -
Page 8: Manual Mode
MANUAL MODE The heat se�ng is indicated by a red bar. adjust heat by rota�ng finger on the touch dial. clockwise increases the temperature and an� clockwise decreases the temperature un�l heat is turned off. THERMOSTATIC MODE When set in thermosta�c mode just a temperature is displayed on screen. Rotate touch dial clockwise to increase temperature se�ng and an�-clockwise to decrease temperature se�ng. -
Page 9: Other Advanced Functions
ADVANCED Used to turn on or off the dimmer,7 day �mer, and adap�ve heat func�ons. 7 DAY TIMER Used to set the 7 day �mer. TO SET THE 7 DAY TIMER: Rotate the touch dial and press the LH menu bu�on to select the desired day (highlighted in red). Use the touch dial to alter the selected hea�ng period (available in 10 minute increments). - Page 10 ADJUST THE FLAME SPEED To access the flame speed controls navigate to the flame colour op�ons. Then press and hold the LH menu bu�on for 5 seconds. CURRENT SETTING Then press and hold the LH menu bu�on for 5 seconds. LEVEL The LH menu bu�on will change to purple.
-
Page 11: Thermal Safety Cut Out
THERMAL SAFETY CUT OUT If the safety cut out for the heater trips the appliance has overheated. If this happens: • Unplug the device and allow it to cool down for a minimumof 2 hours. • Check the heater outlet vents for and obstruc�on and clear if necessary. See maintenancesec�on for guidance. -
Page 12: Battery Replacement
CLEANING THE OUTLETS The area around the fire should be kept free of any materials such as lint or house dust (i.e. animal hair/carpet fibres) that could be drawn into the internal workings of the appliance and hence affect the performance. We recommend that you clean around the fan grille housing at regular intervals. •... -
Page 13: This Appliance Must Be Earthed
4. TECHNICAL SPECIFICATION Model Woodland Weight Kg 40 approx Voltage 230V 50Hz Battery handset 12 V MN 21/23 transmitter Flame picture Electrical only power consumption Heating 2000W Supply cord BS1363 UK13A THIS APPLIANCE MUST BE EARTHED This appliance has been certified for use in countries other than those stated. To install this appliance in these countries, it is essential to obtain the translated instructions and in some cases the appliance will require modification. -
Page 14: Positioning Your Appliance
6. POSITIONING YOUR APPLIANCE • Your new appliance may be installed virtually anywhere in your home, however, when choosing a loca�on ensure that the general instruc�ons are followed. • The positioning of the appliance should ideally be fitted in front of a flat wall of block/brick construction or an internal wooden frame plaster board wall. - Page 15 7. SETTING THE FUEL BED • Unpack the box of logs provided. the logs are made from ceramic and are fragile. PLEASE HANDLE THE LOGS WITH CARE. • Supplied with the logs will be a bag of loose fuel bed material. Spread this over the fuel bed in an even layer.
-
Page 16: Servicing Instructions
8. ELECTRICAL CONNECTION CONNECTING TO MAINS SUPPLY • Check whether the mains supply can accommodate the addi�onal load of 2000 WATT • Connect the provided IEC power cord to the appliance. • Connect the power cable to an earthed socket. •... -
Page 17: Servicing Requirements
SERVICING INSTRUCTIONS 10. FAULT FINDING OPERATE APPLIANCE BEFORE COMMISSIONING 1. Click on the remote handset power bu�on. if the appliance does not func�on, then, follow points 1, 2, 3, 4 and 5 respec�vely. 2. Check the power connec�on to the mains switch on the wall is in the on posi�on. 3. - Page 18 1. Spray anti static on the back of the fire behind the screen and on the silk. 2. Attach the silk and clip back into its original position. 3. Clean the effects screen and outer screen with screen cleaner and cloth. 4.
- Page 19 SERVICING INSTRUCTIONS 12. REPLACING FUEL BED LEDS • To access the fuel bed LEDS, open the door on the stove • Remove any fuel effect material carefully, and set aside. • NOTE: The complete assembly must be removed from the body, see previous sec�on page 17. •...
- Page 20 SERVICING INSTRUCTIONS FUEL BED LED WIRING BLOCK DIAGRAM 13. REPLACING FUEL BED LEDS BLACK BLACK WHITE GREEN GREEN GREEN BLUE BLUE BLACK SERVICING INSTRUCTIONS TO FUEL BED LED 14. REPLACING THE POWER PLATE ASSEMBLY The power plate assembly within the appliance, holds key electrical components. If any element of this assembly has failed please swap the assembly out following the instruc�ons below.
- Page 21 SERVICING INSTRUCTIONS 16. REMOVING THE INNER SCREEN ASSEMBLY • To remove the inner screen assembly locate the 4 fixing points. • Remove the 4 retaining screws. • Li� the screen assembly and pivot out of the appliance with the top edge exi�ng first. •...
- Page 22 22 of 24...
- Page 23 23 of 24...
- Page 24 MENDIP STOVES Unit H1 Mendip Industrial Estate Mendip Road Rooksbridge Somerset BS26 2UG Tel. : +44 (0) 1934 750500 Web : www.mendipstoves.co.uk Email : info@eurostove.co.uk Mendip stoves: Woodland Electric manual May 2021. V1 M10515-49-00-99-00 24 of 24...
Need help?
Do you have a question about the Woodland Electric and is the answer not in the manual?
Questions and answers
I have just had my electric mendip woodland stove delivered, how do I open the door to get the instructions out