
Related Manuals for Kodak 6900


Summary of Contents for Kodak 6900
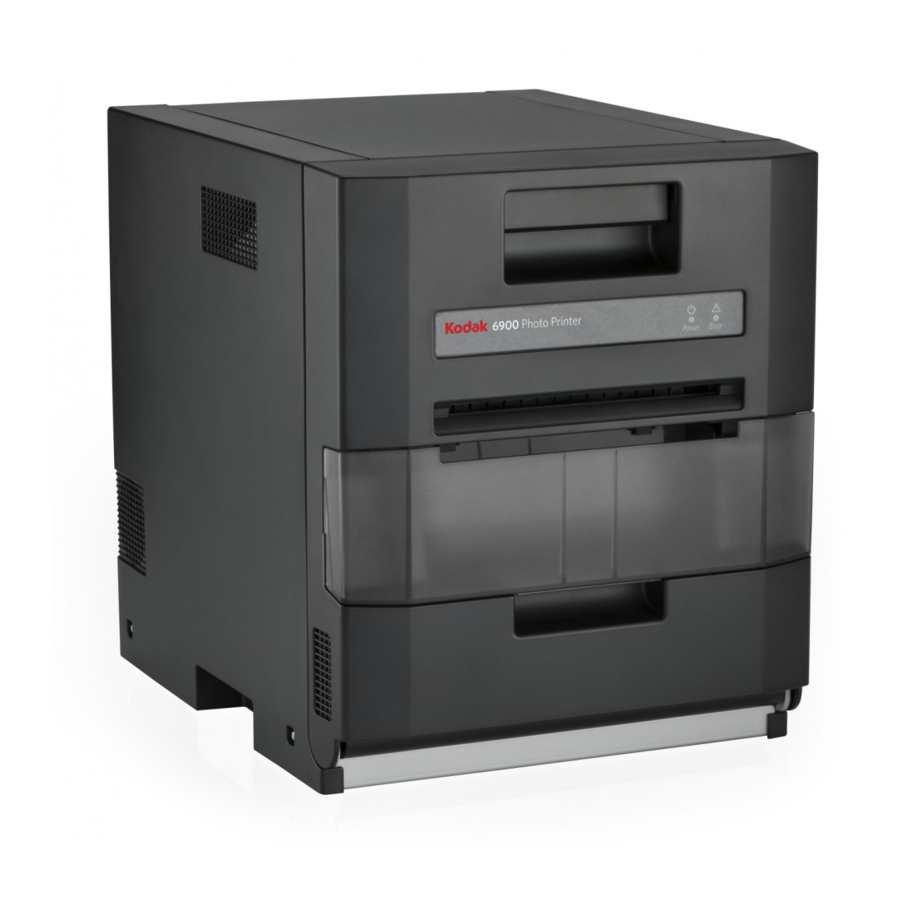
- Page 1 User’s Guide for the KODAK 6900 Photo Printer and the KODAK MOMENTS 6950 Photo Printer A190_0010GA October 2020...
-
Page 3: Table Of Contents
Installing the 6950 Printer ........................2-3 Installing the Trim Tray...........................2-5 Removing the Trim Tray .........................2-6 Installing the Exit Tray on the 6900 Printer ..................2-6 Connecting the Power Cord and the USB Cable ................2-7 Turning On the Printer ..........................2-8 Handling and Storing the Paper and Ribbon....................2-8 Loading the Paper............................2-9... - Page 4 Table of Contents Repairing a Damaged Ribbon ........................5-11 Recovering from a Power Interruption ....................5-14 Appendix A: Safety and Regulatory Information Important Safety Information ........................A-1 Safety Labels ..............................A-2 Acoustic Level..............................A-4 Disposal................................A-4 EU Reach ................................A-5 EU Simplified Declaration of Conformance ....................A-5 Appendix B: Regulatory Compliance United States..............................A-1 Canada................................A-1 Korea ..................................A-1...
-
Page 5: Overview
Overview The KODAK 6900 Photo Printer / KODAK MOMENTS 6950 Photo Printer is a roll-fed printer that: • Uses thermal dye-sublimation technology • Provides a printing resolution of 300 dpi, continuous tone • Produces single-sided prints in landscape, portrait, and square layouts •... - Page 6 Overview Power voltage/frequency 100-240 V / 50-60 Hz (auto detection in the prescribed range) Power consumption Less than 5.0 Amps at 100V AC or 2.3 Amps at 240V AC Print sizes—6R, borderless 2 x 6 in. (5.1 x 15.2 cm) 3 x 6 in.
-
Page 7: Printer Supplies
For best results, replace the paper and ribbon at the IMPORTANT: same time. Used ribbon is safe for land-fill disposal. Do not recycle used ribbon. KODAK Photo Print Kit 6900 / 6800 / 6R Specifications Storage 40-85° F (5-30° C) specifications... -
Page 8: Thermal Printer Cleaning Kit
Overview KODAK Photo Print Kit 6900 / 6800 / 5R Specifications Storage 40-85° F (5-30° C) specifications 60% relative humidity or lower Capacity* 750 - 3.5 x 5 in. (8.9 x 12.7 cm) prints, paper, and ribbon** or 375 - 5 x 7 in.(12.7 x 17.8 cm) prints, paper,... -
Page 9: Packing And Transporting The Printer
Overview Packing and Transporting the Printer CAUTION: The 6900 Printer weighs approximately 17.46 kg (38.5 lbs). The 6950 Printer weight 18.7 kg (41.22 lbs). Use caution when moving the printer. Shipping the printer with paper and ribbon installed can cause damage to the printer. -
Page 11: Setting Up The Printer Identifying Printer Parts - 6900 Printer
Setting Up the Printer Identifying Printer Parts - 6900 Printer 1. Door latch 2. Paper flange with gear (light green) 3. Paper flange without gear (black) 4. Exit tray 5. Trim Tray October 2020... -
Page 12: Identifying Printer Parts - 6950 Printer
Setting Up the Printer Identifying Printer Parts - 6950 Printer 1. Door latch 2. Paper flange with gear (dark green) 3. Paper flange without gear (dark gray) 4. Trim tray 5. Diverter October 2020... -
Page 13: Preparing The Printer For Use
Complete these steps only if you have a 6950 Printer. To prevent tipping, make sure that you install the rear bracket on the printer. If you are installing the printer in a KODAK MOMENTS Cabinet, follow the instructions packed with the cabinet. - Page 14 Setting Up the Printer 2. Install: • Rear bracket • 1 screw • 1 washer and screw Rear bracket October 2020...
-
Page 15: Installing The Trim Tray
• Push in the bottom of the trim tray. Note: If the trim tray is not inserted properly, a paper jam can occur. 6900 Printer Trim Tray A190_0004AA 6950 Printer... -
Page 16: Removing The Trim Tray
Removing the Trim Tray 1. Lift up on the bottom of the trim tray. 2. Pull the trim tray out from the front of the printer. Installing the Exit Tray on the 6900 Printer 1. Install the exit tray. Exit Tray October 2020... -
Page 17: Connecting The Power Cord And The Usb Cable
Setting Up the Printer Connecting the Power Cord If you received more than one power cord with your printer, make and the USB Cable sure to use the correct power cord for your region. 1. Move the power switch to the Off ( ) position. CAUTION: The power outlet must be grounded. -
Page 18: Turning On The Printer
Setting Up the Printer Turning On the Printer Move the power switch to the On ( | ) position. On the operator panel, the Power light illuminates. To turn off the printer, move the power switch to the Off ( ) position. -
Page 19: Loading The Paper
Setting Up the Printer Loading the Paper Make sure that you have the appropriate media kit available (see “Printer Supplies” on page 1-3). 1. Make sure that the power switch is in the On ( | ) position. 2. Remove the exit tray (if installed). Exit Tray A190_0042AA 3. - Page 20 Setting Up the Printer 4. Pull the latch on the front door. 5. Carefully lower the door until it is fully open. Door 2-10 October 2020...
- Page 21 Setting Up the Printer 6. Remove the used ribbon. Note: Images remain on the ribbon after printing. If you need to maintain confidentiality, dispose of the used ribbon appropriately. 7. Remove the used paper roll. 8. Remove the flanges from the used paper roll. Save the flanges. Flange October 2020 2-11...
- Page 22 9. Remove the plastic wrapper from the new paper roll. Do not remove the tape from the new paper roll. Important: If you have a 6900 Printer and a 6950 Printer, the flanges are not interchangeable! 6950 Flanges 6900 Flanges...
- Page 23 Setting Up the Printer 11. Match the colored flanges with the slots of the same color on the printer, then carefully lower the paper roll into the slots. A200 0009HA 12. Remove the tape from the paper roll. Note: Verify that the paper unrolls from the top of the roll. Tape A200_0010HA October 2020...
- Page 24 Setting Up the Printer Important: Ribbon must be loaded in the printer (see “Loading the Ribbon” on page 2-16) before the paper automatically loads and advances. 13. Insert the edge of the paper between the metal roller and black roller at Paper Paper Important: Make sure that the paper is straight.
- Page 25 Setting Up the Printer 15. Load the ribbon. See “Loading the Ribbon” on page 2-16. 16. Close the front of the printer. Once the ribbon is loaded, the light on the front of the printer blinks green and the printer automatically loads the paper. If the light blinks red, there is an error with media loading.
-
Page 26: Loading The Ribbon
Setting Up the Printer Loading the Ribbon Make sure that you have the appropriate media kit available (see “Printer Supplies” on page 1-3). 1. Make sure that the power switch is in the On ( | ) position. 2. Remove the exit tray (if installed). Exit Tray 3. - Page 27 Setting Up the Printer 5. Carefully lower the door until it is fully open. Door 6. Remove the used ribbon. Note: Images remain on the ribbon after printing. If you need to maintain confidentiality, dispose of the used ribbon appropriately. 7.
- Page 28 Setting Up the Printer 8. Load the new ribbon: a. Insert right side of the supply spool into the spool holder on the lower right. b. Insert left side of the supply spool into the spool holder on the lower left. c.
- Page 29 Setting Up the Printer 10. Insert the right side of the take-up spool into the spool holder on the right. 11. Insert the left side of the take-up spool into the spool holder on the left. Take-up Spool A200_0015HA 12. Adjust the take-up spool until the spool locks into place. 13.
- Page 30 Setting Up the Printer 14. Close the front of the printer. The light on the front of the printer blinks green. If red light turns on, there is an error with media loading. The green light stops blinking and the printer is ready to print. Door 15.
-
Page 31: Starting The Software Operator Control Panel
Setting Up the Printer Starting the Software Operator Control Panel Launch the software operator control panel to view the printer status and change the printer settings. Do not use the Software Operator Control Panel (SOCP) when printing with the driver. Close the SOCP before you print. -
Page 32: Making A Status Print
Setting Up the Printer Making a Status Print Print a sheet with the printer serial number, counts, errors, and firmware information. 1. Before you begin, make sure that you connect the printer to a PC with a USB cable. 2. From the PC, double-click “SOCPstartup.exe”. 3. -
Page 33: Maintaining The Printer
3-1) of the printer regularly to eliminate dust buildup and prevent debris from entering the printer. Make sure you have the KODAK Thermal Printer Cleaning Kit available. This kit contains 10 individually packaged alcohol pads. CAUTION: Alcohol is a flammable liquid. It can cause eye irritation and dry skin. -
Page 34: Cleaning The Thermal Print Head And The Peel Roller
Maintaining the Printer Cleaning the Thermal Print Only do this procedure if directed by a service IMPORTANT: representative. Head and the Peel Roller 1. Move the power switch to the Off ( ) position. 2. Remove the exit tray (if installed). 3. - Page 35 Maintaining the Printer 7. Remove a new alcohol pad from its packaging. Move the pad along the entire length of the thermal print head, in one direction only. When you clean the thermal head: • Apply firm, even pressure. • Make three passes along the thermal print head. •...
-
Page 36: Cleaning The Platen And Pinch Rollers
Maintaining the Printer 11. Install the paper and ribbon. See pages and 2-16. 12. Close the front of the printer. 13. Install the exit tray (if present). See page 2-6. Door Cleaning the Platen and Pinch Rollers 1. Move the power switch to the Off ( ) position. 2. - Page 37 Maintaining the Printer 4. Pull the latch on the front door. CAUTION: The thermal print head becomes extremely hot during normal operation. Wait approximately five minutes after you open the front of the printer before cleaning it. Fingerprints can damage the thermal head. Never touch it with your bare hands or fingers.
- Page 38 Maintaining the Printer 7. Remove an alcohol pad from its packaging. Wipe the rubber section of the platen roller with the pad. 8. Rotate the roller to clean the entire surface. 9. Allow the alcohol to dry completely (about five minutes) before you resume printing.
-
Page 39: Cleaning The Cleaning Roller
Maintaining the Printer 14. Install the paper and ribbon. See pages and 2-16. 15. Close the front of the printer. 16. Install the exit tray (if present). See page 2-6. Door Cleaning the Cleaning Roller 1. Move the power switch to the Off ( ) position. 2. - Page 40 Maintaining the Printer CAUTION: The thermal print head becomes extremely hot during normal operation. Wait approximately five minutes after you open the front of the printer before cleaning it. Fingerprints can damage the thermal head. Never touch it with your bare hands or fingers.
- Page 41 Maintaining the Printer 11. Install the paper and ribbon. See pages and 2-16. 12. Close the front of the printer. 13. Install the exit tray (if present). See page 2-6. Door October 2020...
-
Page 43: Operating The Printer Making Prints
Operating the Printer Making Prints You make prints using photo printing software applications. For application-specific printing information, see the user’s guide or on-line Help for the software application. Handling and Storing Prints For best results: • Make sure hands are clean and free of food, oil, and grease. •... -
Page 44: Operator Panel Lights
Operating the Printer Operator Panel Lights LED Display Printer Status POWER ERROR Paper Set The printer power is off. The printer is initializing after powering on. • The thermal print head is cooling/heating during the printing process. •... -
Page 45: Printer Settings
Operating the Printer Printer Settings Use the operator panel buttons to review and change printer settings. 1. Click MENU to enter User Mode and to scroll through the Main Menu options. 2. Click UP or DOWN to adjust settings up or down (where applicable). - Page 46 Operating the Printer Display - Level 1 Display - Level 2 Description STATUS PRINT ---- Prints a sheet with the printer serial number, counts, errors, and firmware information. Clear Slitter ---- This feature turns on the slitter drive mechanism for a few seconds.
-
Page 47: Troubleshooting
Troubleshooting Problem Description or Cause Possible Solution Sections of the image are not printed. • Platen roller is dirty. 1. Clean the platen roller (see page 3-4). • Pinch roller is dirty. 2. Clean the pinch roller (see page 3-4). 1. -
Page 48: Resolving Operator Panel Status/Error Messages
Troubleshooting Problem Description or Cause Possible Solution • Make sure that the paper is Print borders are not even. • Paper is not loaded loading correctly and correctly, or it is loose on wound tightly onto the roll, the roll. see page 2-9. - Page 49 Troubleshooting Message Description or Cause Possible Solution • The trim tray is full or not • Empty the trim tray and make sure that it Paper Jam (6950 inserted properly. is inserted properly. Printer Only - Jam during slitting) • The diverter is not inside of •...
-
Page 50: Clearing A Paper Jam
Troubleshooting Clearing a Paper Jam If a Paper Jam message appears on the software operator control panel, follow this procedure. If a paper jam occurs in the slitter, or Paper Jam 70 -79 appears on the software operator control panel, see “Clearing a Slitter Jam from the 6950 Printer”... - Page 51 Troubleshooting 5. Pull the latch on the front door. 6. Carefully lower the door until it is fully open. Door 7. Remove the used ribbon. Note: Images remain on the ribbon after printing. If you need to maintain confidentiality, dispose of the used ribbon appropriately.
- Page 52 Troubleshooting CAUTION: To prevent damage to the printer, do not pull abruptly on the paper. 8. Use both hands to manually rewind the paper onto the roll. CAUTION: Be careful not to damage or mark any rollers. 9. Cut off damaged or printed areas of the paper. 10.
- Page 53 Troubleshooting 13. Close the front of the printer. 14. Install the trim tray. See page 2-5. 15. Install the exit tray (if present). See page 2-6. Door October 2020...
-
Page 54: Clearing A Slitter Jam From The 6950 Printer
Troubleshooting Clearing a Slitter Jam from the 6950 Printer If a paper jam occurs in the slitter, or Paper Jam 70 - 79 appears on the software operator control panel, follow this procedure. 1. Remove and empty the trim tray. See “Removing the Trim Tray”... - Page 55 Troubleshooting 5. Carefully lower the door until it is fully open. Door 6. Remove the used ribbon. Note: Images remain on the ribbon after printing. If you need to maintain confidentiality, dispose of the used ribbon appropriately. October 2020...
- Page 56 Troubleshooting CAUTION: To prevent damage to the printer, do not pull abruptly on the paper. 7. Use both hands to manually rewind the paper onto the roll. CAUTION: Be careful not to damage or mark any rollers. 8. Cut off damaged or printed areas of the paper. 9.
-
Page 57: Repairing A Damaged Ribbon
Troubleshooting 18. Install the paper and ribbon. See pages and 2-16. 19. Close the front of the printer. Door 20. Install the trim tray. See page 2-5. 21. Install the exit tray (if present). See page 2-6. Repairing a Damaged Ribbon 1. - Page 58 Troubleshooting 4. Pull the latch on the front door. 5. Carefully lower the door until it is fully open. Door 5-12 October 2020...
- Page 59 Troubleshooting 6. Remove the used ribbon. Note: Images remain on the ribbon after printing. If you need to maintain confidentiality, dispose of the used ribbon appropriately. 7. Cut off any damaged areas of the ribbon. Ribbon 8. Overlap the ends of the ribbon. 9.
-
Page 60: Recovering From A Power Interruption
Troubleshooting 13. Close the front of the printer. Door 14. Install the trim tray. See page 2-5. 15. Install the exit tray (if present). See page 2-6. Recovering from a Power Interruption CAUTION: If the printer loses power while printing, the printer stops with the thermal print head is positioned against the platen roller. -
Page 61: Appendix A: Safety And Regulatory Information Important Safety Information
Appendix A: Safety and Regulatory Information Important Safety Information CAUTION: Use of controls or adjustments or performance of procedures other than those specified in this manual may result in injury and/or damage to the printer. • The power outlet should be easily accessible and installed near the printer. -
Page 62: Safety Labels
Safety and Regulatory Information Safety Labels Please observe the important safety warnings that are posted on the printer. CAUTION: HOT SURFACE—To prevent burns, use caution in these areas. October 2020... - Page 63 Safety and Regulatory Information CAUTION: SHARP CUTTER BLADE / PINCH—Do not insert hands or objects. There are sharp cutter blades inside the printer. There are moving parts inside and outside the printer. Papercutter can cut fingers. Do not put fingers into the gap. CAUTION: TIPPING RISK—To prevent the 6950 Printer from tipping, make sure the front bracket does not overhang the edge of...
-
Page 64: Acoustic Level
In the European Union, this symbol indicates that when the last user wishes to discard this product, it must be sent to appropriate facilities for recovery and recycling. Contact your local Kodak Alaris representative or refer to www.kodakalaris.com/go/EHS for additional information on the collection and recovery programs available for this product. -
Page 65: Eu Reach
59(1) of Regulation (EC) No. 1907/2006 (REACH). EU Simplified Declaration of Conformance Hereby, Kodak Alaris Inc. declares that this product is in compliance with Directive 2014/53/EU, Directive 2014/30/EU and 2014/35/EU to the degree to which they apply. The full text of the EU declaration of conformity is available at the internet address http://www.kodakalaris.com/go/EHS. -
Page 67: Appendix B: Regulatory Compliance United States
Appendix B: Regulatory Compliance United States FCC Statement: This equipment has been tested and found to comply with the limits for a Class A digital device, pursuant to part 15 of the FCC rules. These limits are designed to provide reasonable protection against harmful interference when the equipment is operated in a commercial environment. -
Page 68: China
This value is assigned based on normal use of the product as described in the operating instructions. Table of hazardous substance’s name and concentration Model Name: KODAK 6900 Photo Printer Model Name: KODAK MOMENTS 6950 Photo Printer October 2020... -
Page 69: Brazil
Regulatory Compliance Brazil Este equipamento não tem direito à proteção contra interferência prejudicial e não pode causar interferência em sistemas devidamente autorizados. October 2020... - Page 72 © 2020 Kodak Alaris Inc. Kodak Alaris Inc. 336 Initiative Dr., Rochester, NY 14624 The Kodak trademark and Kodak trade dress are used under license from Eastman Kodak Company. P/N 4J9780_US...
Need help?
Do you have a question about the 6900 and is the answer not in the manual?
Questions and answers