Control 4 T4 Series Installation Manual
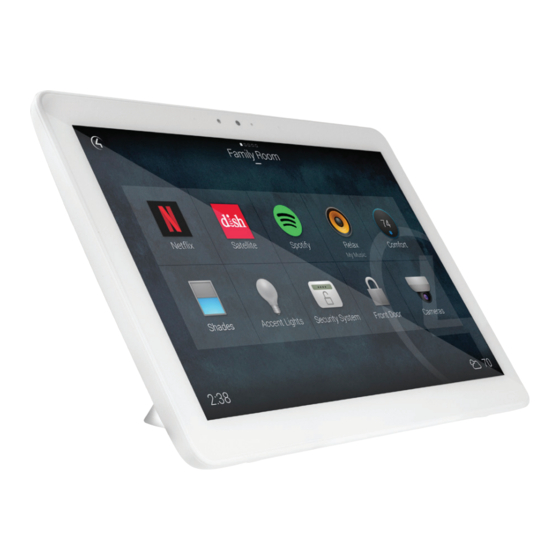
Tabletop touchscreens
Hide thumbs
Also See for T4 Series:
- Installation manual (8 pages) ,
- Installation manual (6 pages) ,
- Installation manual (4 pages)
Advertisement
Quick Links
T4 Series Tabletop Touchscreens
Installation Guide
Supported models
• C4-T4T8-xx 8" Tabletop Touchscreen (black or white)
• C4-T4T10-xx 10" Tabletop Touchscreen (black or white)
Introduction
The Control4® T4 Series Tabletop Touchscreens offer complete
system control in an elegant, compact, and portable design. The
touchscreens are equipped with a full capacitive screen, audio
and video Intercom (with the built-in camera) using SIP, and
more.
This touchscreen can be located anywhere, and the convenient
recharging station enables it to be used as either a tabletop or
portable interface. The touchscreen uses an AC power adapter
for power and Wi-Fi for network connectivity.
Note: 802.11b is not recommended for video intercom.
We recommend using Wireless-N. See "Specifications"
for more information.
Box contents
• Tabletop Touchscreen
• Recharging station
• Recharging station power cord
Accessories available for purchase
• Tabletop Permanent Mount Kit (C4-T4PMNT)
• T4 Touchscreen Tabletop 8" Base (C4-T4TBS8)
• T4 Touchscreen Tabletop 10" Base (C4-T4TBS10)
1 1
Warnings
Warning! This product must be grounded in accordance
with the National Electrical Code (NEC) requirements.
Avertissement ! Ce produit doit être fondu selon les
conditions électriques nationales de code (NEC).
Caution! Do not place the touchscreen near sources of
heat or expose to direct sunlight for an extended time.
Avertissement ! Ne placez pas l'unité près des sources
de chaleur ou exposition pour diriger la lumière du soleil
pendant une période prolongée.
Caution! This product generates heat. The room must
have adequate ventilation or the ability to dissipate heat
effectively.
Avertissement ! Ce produit produit de la chaleur. La salle
doit avoir à ventilation proportionnée ou la capacité
d'absorber la chaleur efficacement.
Caution! Use this product only in dry locations.
Avertissement ! Employez ce produit seulement dans
des endroits secs.
Caution! Do not use pens or sharp objects to navigate
or make selections on the touchscreen. To select an item
or scroll through a list, use your fingertip.
Avertissement ! N'employez pas les stylos ou les objets
pointus pour diriger ou pour faire des choix sur l'écran.
Pour choisir un article ou un rouleau par une liste,
employez votre bout du doigt.
Caution! Improper use or installation can cause
DAMAGE OF PROPERTY.
Avertissement ! L'utilisation ou l'installation inexacte
peut causer DAMAGE DE PROPRIÉTÉ.
Important! Using this product in a manner other than
outlined in this document voids your warranty. Further,
Control4 is NOT liable for any damage incurred with the
misuse of this product. See "Warranty."
Advertisement

Related Manuals for Control 4 T4 Series


Summary of Contents for Control 4 T4 Series
- Page 1 Caution! Do not place the touchscreen near sources of heat or expose to direct sunlight for an extended time. The Control4® T4 Series Tabletop Touchscreens offer complete Avertissement ! Ne placez pas l’unité près des sources system control in an elegant, compact, and portable design. The de chaleur ou exposition pour diriger la lumière du soleil...
- Page 2 Specifications and requirements Views Specifications Front C4-T4T10-BL, C4-T4T10-WH Model Numbers C4-T4T8-BL, C4-T4T8-WH Resolution: 1920 × 1200 Screen Capacitive touch Camera: 720p 802.11b/g/n 2.4 GHz 802.11a/n/ac 5 GHz Security: WEP, WPA/WPA2 PSK, 802.1x EAP, PEAP Notes: (1) While technically the touchscreen can use 802.11b, Wireless network 802.11b is not supported.
- Page 3 Touchscreen placement If you don’t see the network you want: 1 Tap +, then tap the Network SSID field and type the SSID Place the touchscreen’s charging station on any level surface (name) of the network by using the on-screen keyboard. near a power outlet.
- Page 4 • Sip Information—Information for integrating the 3 Remove the charging station’s bottom cover by removing touchscreen into your SIP/VoIP system. the two screws shown. • Custom Buttons—Select to enable and label the two available custom buttons. • Alternate Camera—Select to use an external camera for the video associated with the touchscreen, for example, a security camera mounted to the side of the entrance and pointing at the door.
- Page 5 Troubleshooting 8 To install the charging station permanently into a table or countertop, remove the small rubber discs covering the threaded holes in the base. To power cycle the touchscreen: 1 Press and hold the (power) button for several seconds until the touchscreen turns off.
- Page 6 Additional resources The following resources are available for more support. • Knowledgebase and forums on Tech Community • Technical Support • Control4 website: www.control4.com ctrl4.co/docs • Composer documentation available at Warranty and legal notices Find details of this product’s 2-Year Limited Warranty at snapav.com/warranty , or request a paper copy from Customer Service at (866) 424-4489.
- Page 7 Introduction • Plastic (C4-NWB57C-P) • Metal (C4-NWB57C-M) The Control4® T4 Series 8- and 10-inch In-Wall Touchscreens offer • In-Wall Touchscreen Wall Box Kits - Retrofit complete system control in an elegant and compact design. The touchscreens are equipped with a full capacitive screen, audio •...
- Page 8 Warnings Specifications and requirements Warning! The touchscreen must be protected by an Specifications external circuit breaker or a fuse rated at 6A maximum when used in Europe. C4-T4IW10-BL, C4-T4IW10-WH, Model Numbers AVERTISSEMENT ! Pour réduire le risque du feu ou de C4-T4IW8-BL, C4-T4IW8-WH choc électrique, n’exposez pas cet appareil à...
- Page 9 Front view Top view A Power button. Press to turn the display on and off, press and hold to select Power off or Restart, or press and hold for 10 seconds to reset the device. B Center pinhole. Not used. C Reset pinhole.
- Page 10 Power and network installation options Option 3: Wi-Fi connection with AC This device uses an Ethernet or Wi-Fi network connection and Place the touchscreen above a power source, for example, an can be powered using PoE or AC power. outlet. Ensure that you have Wi-Fi in the home (Figure 6). Choose one of the following options to install the power and Important: The touchscreen cannot connect to a Wi-Fi network communication.
- Page 11 Connecting to a wired network 4 If using a plastic wall box with an exposed bare copper ground, wrap the ground in electrical tape or heat shrink To connect to a wired network: tape/tubing. If using a metal wall box, attach the ground wire to the wall box.
- Page 12 Configuration Add and configure in Composer Pro After the touchscreen is installed and appears on the home Configure the touchscreen for wireless (optional) network, use Composer Pro to add it to the Control4 system and configure it. To configure the touchscreen for wireless: Use the Composer Pro System Design and Connections views to add and configure this device.
- Page 13 Troubleshooting Removing the touchscreen from the wall To remove the touchscreen: Boot up time 1 Remove the 3/32" set screw. When the device is booting up, it may take 30 seconds or longer 2 Pull the bottom of the touchscreen away from the locking before the Green LED turns on.
- Page 14 Additional resources The following resources are available for additional support. • Knowledgebase and forums in Technician Community • Technical Support • Control4 website: www.control4.com • Composer documentation in its online help. Warranty and legal notices Find details of this product’s 2-Year Limited Warranty at snapav.com/warranty , or request a paper copy from Customer Service at (866) 424-4489.
- Page 15 In-Wall Touchscreen Specifications Installing the wall box 9 After you install the drywall, carefully tighten the screws to pull in the securing tabs so that the wall box is flush with the surface of the wall. Dimensions: 68 x 104 x 81 mm (2.7 x 4.1 x 3.19") Note: This kit is intended for installation of a wall box before drywall Wall Box - New Construction Important: In the metal wall box kit, the two longer screws are for use...
- Page 16 Regulatory Compliance & Safety Information for Model C4-T4IW8-WH, C4-T4IW8-BL, C4- T4IW10-WH, C4-T4IW10-BL Electrical Safety Advisory Sécurité électrique consultatif Important Safety Instructions Consignes de sécurité importantes Read the safety instructions before using this product. Lisez les consignes de sécurité avant d'utiliser ce produit. 1.
- Page 17 fournie pour votre sécurité. Si la fiche fournie ne s'adapte pas à votre prise, consultez un électricien pour le remplacement de la prise obsolète. 10. Only use attachments/accessories specified by the manufacturer. Utilisez uniquement des fixations / accessoires spécifiés par le fabricant. 11.
- Page 18 appareil ne couvre pas les dommages causés par les surtensions électriques ou transitoires de foudre. Pour réduire le risque de cet équipement devient endommagé, il est suggéré que le client envisager l'installation d'un limiteur de surtension. 16. To completely disconnect unit power from the AC mains, turn off the circuit breaker. To reconnect power, turn on the circuit breaker following all safety instructions and guidelines.
- Page 19 Conservez ces instructions Compliance of this equipment is confirmed by the following label that is placed on the equipment: Conformité de cet appareil est confirmé par le symbole suivant qui est placé sur l'équipement: USA & Canada Compliance FCC Part 15, Subpart B & IC Unintentional Emissions Interference Statement This equipment has been tested and found to comply with the limits for a Class B digital device, pursuant to Part 15 of the FCC rules.
- Page 20 FCC Part 15, Subpart C / RSS-247 Intentional Emissions Interference Statement Compliance of this equipment is confirmed by the following certification numbers that are placed on the equipment: Notice: The term “FCC ID:” and “IC:” before the certification number signifies that FCC and Industry Canada technical specifications were met.
- Page 21 Cet équipement doit être installé par des professionnels qualifiés ou entrepreneurs conformément aux normes FCC partie 15.203 & IC RSS-247, Exigences d'antenne. Ne pas utiliser une antenne autre que celui fourni avec l'appareil. Cet émetteur ne doit pas être localisé ou fonctionner avec d'autres antennes ou transmetteurs. Les opérations dans la bande 5.15-5.25GHz sont limitées à...
- Page 22 WLAN 5GHz: Operations in the 5.15-5.35GHz band are restricted to indoor usage only. Recycling Wirepath Home Systems, LLC understands that a commitment to the environment is essential for a health life and sustainable growth for future generations. We are committed to supporting the environmental standards, laws, and directives that have been put in place by various communities and countries that deal with concerns for the environment.
Need help?
Do you have a question about the T4 Series and is the answer not in the manual?
Questions and answers