Table of Contents

Related Manuals for Flow HIVE 2

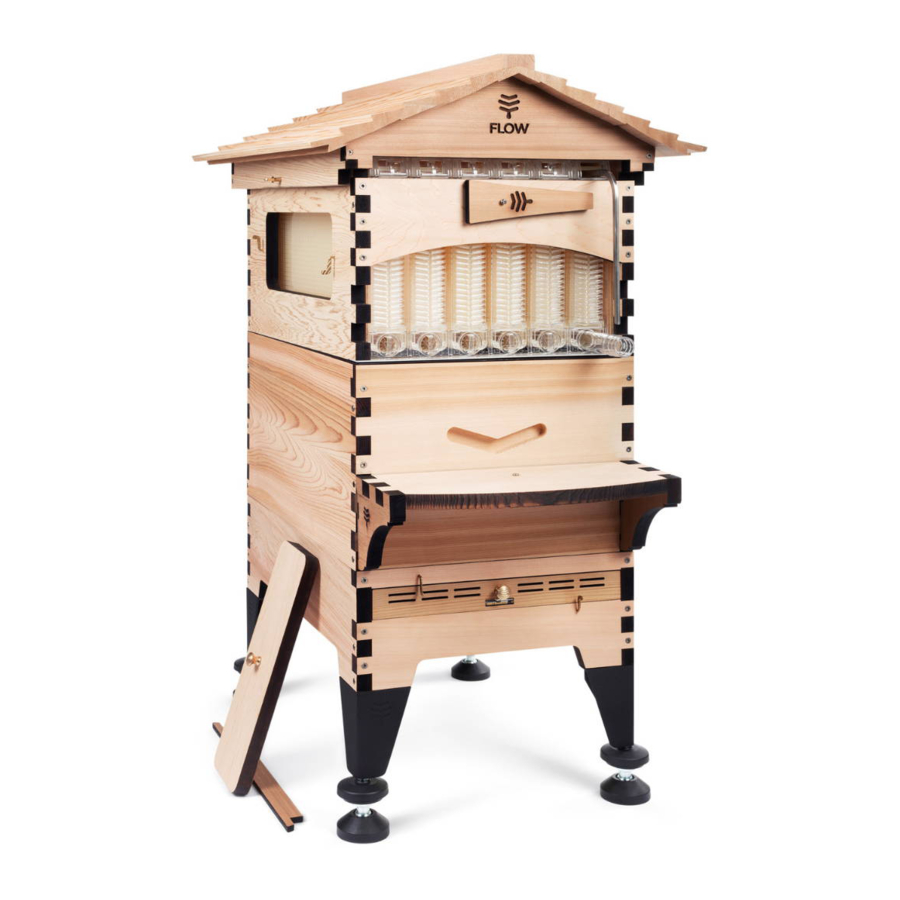
Summary of Contents for Flow HIVE 2
- Page 1 If we look after the bees they will look after us, and the honey really AUSTRALIAN MADE is an amazing bonus. FLOW HIVE 2: CEDAR 6 & 7 FRAME, PAULOWNIA 6 FRAME, ARAUCARIA 6 & 7 FRAME FLOW HIVE 2 BROOD BOX...
- Page 2 : Flow Hive 2 – 6 frame illustrations PLEASE NOTE shown throughout. Flow Hive 2 – 7 frame model will vary slightly in appearance .
-
Page 3: Table Of Contents
It’s important to note that your Flow Super and Brood box panels may appear to be the same, however, these have a few minor differences which need be identified, to avoid confusion. The brood box end panels can be distinguished from the Flow Super front panel, by PAGES FLOW the inclusion of an extra set of pilot holes on the finger joints (see images below). - Page 4 ROOF INNER • If short on time, the Flow Super can be constructed at a later date, as this will not be added to your hive until your colony is well COVER established in the brood box.
-
Page 5: Roof
Line up the holes in the shingle panels with the roof to measure this overhang • The Flow logos face toward the outside. square drive bit and square drive screws) as shown. gables. The roof overhangs the front and rear gables Check once again that the roof assembly is square and •... -
Page 6: Araucaria 7 Frame
The roof overhangs the front and rear gables to measure this overhang by 27mm (1.06 inches). Use the roof alignment block • The Flow logos face toward the outside. • The Flow logos face toward the outside. to measure this overhang Check once again that the roof assembly is square and •... - Page 7 3 x brass knob screws To attach the acrylic frame spacers to the left and this piece will be used to gain access to the Flow Remove protective plastic film from both sides of Place a spring onto the rear window latch screw and right side panels, remove the plastic film and line up Frames.
- Page 8 BROOD BOX ASSEMBLY PARTS ASSEMBLY 2 x brood box side panels 2 x brood box end panels Dry fit the 2 brood box side panels and 2 brood box end panels together as shown. BROOD BOX SCREW KIT – ACTUAL SIZE •...
- Page 9 BASE ASSEMBLY The rails form a shelf PARTS on their top edges ASSEMBLY For extra tips, check out our assembly video at: www.honeyflow.com/assembly The bottom rail will slope toward the front 1 x side panel left (with spirit level) 1 x side panel right 1 x front panel 1 x rear support beam 1 x metal screen...
- Page 10 When you are ready to harvest you can fit the Flow Turn the base on its side to access the bottom four You can attach your shelf in multiple locations at rear to create the 3°...
-
Page 11: Super
Add your Flow Super with Flow Frames once your colony expansion in wet weather. add your Flow Super. First set up your base, brood box is strong and established. Place the queen excluder Araucaria & Paulownia: We recommend painting the... -
Page 12: Harvesting Checklist
The little tongue on the end of the tube goes into the frame and blocks the honey leak back point. If the tube is the wrong way around honey may flow back into the hive. Make sure the tube is inserted all the way in to create a seal, you may need to wiggle the tube to make sure it fits in correctly. - Page 13 For beekeeping info and assembly instructions go to: www.honeyflow.com/assembly To keep connected join us on forum.honeyflow.com or contact info@honeyflow.com facebook.com/flowhive instagram.com/flowhive twitter.com/flowhive Australian Made Flow Hive 2 Assembly Guide Revision: 01.20 Printed on 100% recycled paper using environmentally friendly inks. All content copyright © 2020 Flow®...
Need help?
Do you have a question about the HIVE 2 and is the answer not in the manual?
Questions and answers