Table of Contents
Advertisement
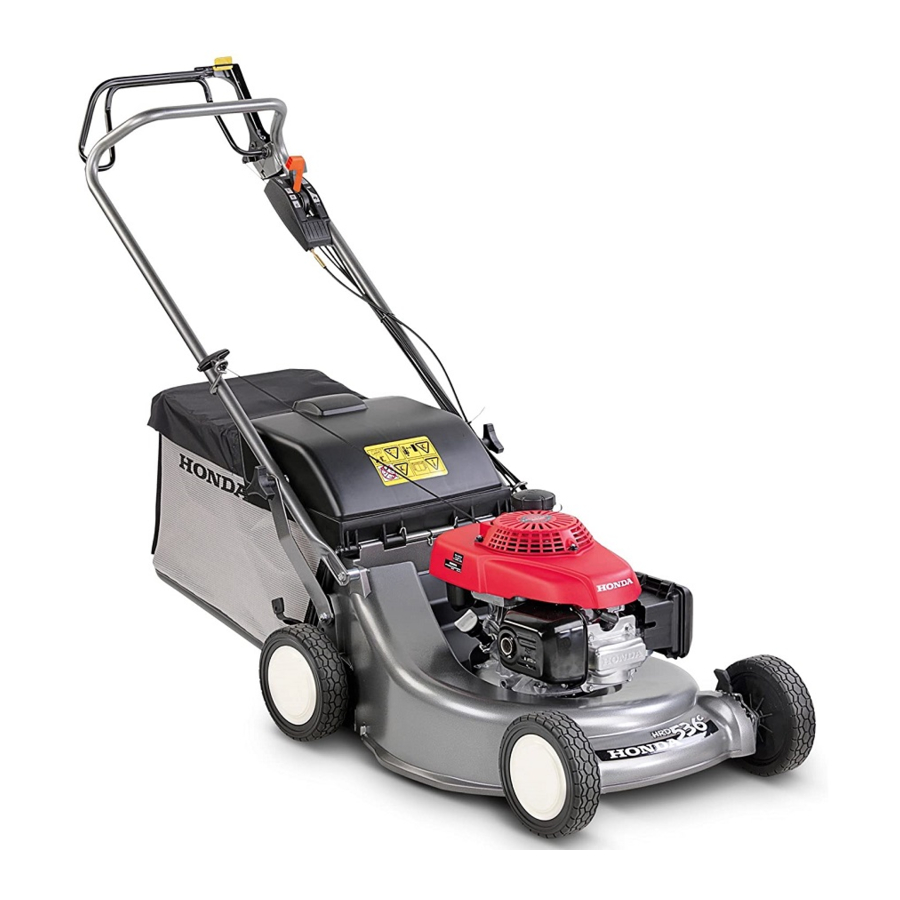
HRA536 - HRD535 - HRD536
INDEX
1.
SPECIFICATIONS . . . . . . . . . . . . . . . . . . . . . . . . . . . . . . . . . . . . . . . . . . 3
1.1 General specifications . . . . . . . . . . . . . . . . . . . . . . . . . . . . . . . . . . . . 3
1.2 Dimensional drawings . . . . . . . . . . . . . . . . . . . . . . . . . . . . . . . . . . . . 9
1.3 Wiring diagrams . . . . . . . . . . . . . . . . . . . . . . . . . . . . . . . . . . . . . . . . 10
2.
SERVICE INFORMATION. . . . . . . . . . . . . . . . . . . . . . . . . . . . . . . . . . . . 11
2.1 General safety . . . . . . . . . . . . . . . . . . . . . . . . . . . . . . . . . . . . . . . . . 11
2.2 Service rules . . . . . . . . . . . . . . . . . . . . . . . . . . . . . . . . . . . . . . . . . . 11
2.3 Serial number location . . . . . . . . . . . . . . . . . . . . . . . . . . . . . . . . . . . 11
2.4 Maintenance standards . . . . . . . . . . . . . . . . . . . . . . . . . . . . . . . . . . 12
2.5 Torque values . . . . . . . . . . . . . . . . . . . . . . . . . . . . . . . . . . . . . . . . . 13
2.6 Special tools. . . . . . . . . . . . . . . . . . . . . . . . . . . . . . . . . . . . . . . . . . . 14
2.7 Troubleshooting . . . . . . . . . . . . . . . . . . . . . . . . . . . . . . . . . . . . . . . . 15
2.8 Maintenance schedule . . . . . . . . . . . . . . . . . . . . . . . . . . . . . . . . . . . 19
3.
MAINTENANCE . . . . . . . . . . . . . . . . . . . . . . . . . . . . . . . . . . . . . . . . . . . 20
3.1 Oil. . . . . . . . . . . . . . . . . . . . . . . . . . . . . . . . . . . . . . . . . . . . . . . . . . . 20
3.2 Spark plug . . . . . . . . . . . . . . . . . . . . . . . . . . . . . . . . . . . . . . . . . . . . 22
3.3 Air cleaner . . . . . . . . . . . . . . . . . . . . . . . . . . . . . . . . . . . . . . . . . . . . 23
3.4 Throttle cable . . . . . . . . . . . . . . . . . . . . . . . . . . . . . . . . . . . . . . . . . . 24
3.5 Drive clutch cable (except H type) . . . . . . . . . . . . . . . . . . . . . . . . . . 25
3.6 Rotostop cable . . . . . . . . . . . . . . . . . . . . . . . . . . . . . . . . . . . . . . . . . 25
3.7 Shift cable (except Q type). . . . . . . . . . . . . . . . . . . . . . . . . . . . . . . . 27
3.8 Valve clearance . . . . . . . . . . . . . . . . . . . . . . . . . . . . . . . . . . . . . . . . 28
3.9 carburetor. . . . . . . . . . . . . . . . . . . . . . . . . . . . . . . . . . . . . . . . . . . . . 29
3.10 Governor . . . . . . . . . . . . . . . . . . . . . . . . . . . . . . . . . . . . . . . . . . . . . 29
3.11 Fuel filter . . . . . . . . . . . . . . . . . . . . . . . . . . . . . . . . . . . . . . . . . . . . . 30
3.12 Blade . . . . . . . . . . . . . . . . . . . . . . . . . . . . . . . . . . . . . . . . . . . . . . . . 30
3.13 Spark arrester (optional part) . . . . . . . . . . . . . . . . . . . . . . . . . . . . . . 31
4.
BLADE / ROTOSTOP . . . . . . . . . . . . . . . . . . . . . . . . . . . . . . . . . . . . . . . 32
4.1 Principe de fonctionnement du rotostop . . . . . . . . . . . . . . . . . . . . . 32
4.2 Blade brake clutch . . . . . . . . . . . . . . . . . . . . . . . . . . . . . . . . . . . . . . 33
4.3 Inspection du rotostop . . . . . . . . . . . . . . . . . . . . . . . . . . . . . . . . . . . 36
4.4 Driven disc, drive disc . . . . . . . . . . . . . . . . . . . . . . . . . . . . . . . . . . . 37
4.5 Ball control assembly . . . . . . . . . . . . . . . . . . . . . . . . . . . . . . . . . . . . 39
4.6 Blade sharpening . . . . . . . . . . . . . . . . . . . . . . . . . . . . . . . . . . . . . . . 40
5.
ENGINE REMOVAL / INSTALLATION. . . . . . . . . . . . . . . . . . . . . . . . . . 41
5.1 Engine removal . . . . . . . . . . . . . . . . . . . . . . . . . . . . . . . . . . . . . . . . 41
5.2 Engine installation . . . . . . . . . . . . . . . . . . . . . . . . . . . . . . . . . . . . . . 43
6.
AIR CLEANER / MUFFLER . . . . . . . . . . . . . . . . . . . . . . . . . . . . . . . . . . 45
6.1 Air cleaner . . . . . . . . . . . . . . . . . . . . . . . . . . . . . . . . . . . . . . . . . . . . 45
6.2 Muffler . . . . . . . . . . . . . . . . . . . . . . . . . . . . . . . . . . . . . . . . . . . . . . . 46
7.
RECOIL STARTER / FUEL TANK . . . . . . . . . . . . . . . . . . . . . . . . . . . . . 47
7.1 Fuel tank . . . . . . . . . . . . . . . . . . . . . . . . . . . . . . . . . . . . . . . . . . . . . 47
7.2 Recoil starter . . . . . . . . . . . . . . . . . . . . . . . . . . . . . . . . . . . . . . . . . . 49
8.
IGNITION COIL / CONTROL ARM / carburetor . . . . . . . . . . . . . . . . . . 52
8.1 Ignition coil / Engine stop switch . . . . . . . . . . . . . . . . . . . . . . . . . . . 52
8.2 Control assembly . . . . . . . . . . . . . . . . . . . . . . . . . . . . . . . . . . . . . . . 55
8.3 carburetor. . . . . . . . . . . . . . . . . . . . . . . . . . . . . . . . . . . . . . . . . . . . . 59
9.
FLYWHEEL / STARTER MOTOR. . . . . . . . . . . . . . . . . . . . . . . . . . . . . . 61
9.1 Flywheel. . . . . . . . . . . . . . . . . . . . . . . . . . . . . . . . . . . . . . . . . . . . . . 61
9.2 Starter motor / Charging coil . . . . . . . . . . . . . . . . . . . . . . . . . . . . . . 62
10.
CYLINDER HEAD / VALVES . . . . . . . . . . . . . . . . . . . . . . . . . . . . . . . . . 66
10.1 Removal / Installation. . . . . . . . . . . . . . . . . . . . . . . . . . . . . . . . . . . . 66
10.2 Disassembly / Reassembly . . . . . . . . . . . . . . . . . . . . . . . . . . . . . . . 67
10.3 Inspection. . . . . . . . . . . . . . . . . . . . . . . . . . . . . . . . . . . . . . . . . . . . . 68
10.4 Valve guide replacement . . . . . . . . . . . . . . . . . . . . . . . . . . . . . . . . . 69
10.5 Valve seat reconditioning. . . . . . . . . . . . . . . . . . . . . . . . . . . . . . . . . 70
11.
OIL PAN / DRIVE SHAFT / GOVERNOR . . . . . . . . . . . . . . . . . . . . . . . . 72
11.1 Oil pan . . . . . . . . . . . . . . . . . . . . . . . . . . . . . . . . . . . . . . . . . . . . . . . 72
11.2 Drive shaft / Governor . . . . . . . . . . . . . . . . . . . . . . . . . . . . . . . . . . . 74
12.
CRANKSHAFT / PISTON / CYLINDER . . . . . . . . . . . . . . . . . . . . . . . . . 75
12.1 Disassembly / Reassembly . . . . . . . . . . . . . . . . . . . . . . . . . . . . . . . 75
12.2 Inspection. . . . . . . . . . . . . . . . . . . . . . . . . . . . . . . . . . . . . . . . . . . . . 78
13.
FRONT WHEEL / REAR WHEEL . . . . . . . . . . . . . . . . . . . . . . . . . . . . . . 82
13.1 Front wheel . . . . . . . . . . . . . . . . . . . . . . . . . . . . . . . . . . . . . . . . . . . 82
13.2 Rear wheel. . . . . . . . . . . . . . . . . . . . . . . . . . . . . . . . . . . . . . . . . . . . 84
14.
REAR DRIVE SYSTEM. . . . . . . . . . . . . . . . . . . . . . . . . . . . . . . . . . . . . . 86
14.1 Transmission/Hydrostatic transmission (HRD535/K1/K2
HRD536/K1/K2) . . . . . . . . . . . . . . . . . . . . . . . . . . . . . . . . . . . . . . . . 86
14.2 Transmission/Hydrostatic transmission (HRD535K1 TME) . . . . . . . 91
14.3 Transmission/Hydrostatic transmission (HRA536) . . . . . . . . . . . . . 93
14.4 Rear roller . . . . . . . . . . . . . . . . . . . . . . . . . . . . . . . . . . . . . . . . . . . 101
15.
HANDLE / CONTROL LEVERS . . . . . . . . . . . . . . . . . . . . . . . . . . . . . . 105
15.1 Upper handle . . . . . . . . . . . . . . . . . . . . . . . . . . . . . . . . . . . . . . . . . 105
15.2 Lower handle . . . . . . . . . . . . . . . . . . . . . . . . . . . . . . . . . . . . . . . . . 108
15.3 Control lever. . . . . . . . . . . . . . . . . . . . . . . . . . . . . . . . . . . . . . . . . . 109
15.4 Wire / Harness routing . . . . . . . . . . . . . . . . . . . . . . . . . . . . . . . . . . 111
16.
CONTROL BOX . . . . . . . . . . . . . . . . . . . . . . . . . . . . . . . . . . . . . . . . . . 114
16.1 Control box. . . . . . . . . . . . . . . . . . . . . . . . . . . . . . . . . . . . . . . . . . . 114
16.2 Combination switch . . . . . . . . . . . . . . . . . . . . . . . . . . . . . . . . . . . . 115
16.3 Battery . . . . . . . . . . . . . . . . . . . . . . . . . . . . . . . . . . . . . . . . . . . . . . 115
16.4 Regulator / Rectifier . . . . . . . . . . . . . . . . . . . . . . . . . . . . . . . . . . . . 117
17.
DISCHARGE GUARD / GRASS BAG . . . . . . . . . . . . . . . . . . . . . . . . . 118
17.1 Discharge guard. . . . . . . . . . . . . . . . . . . . . . . . . . . . . . . . . . . . . . . 118
17.2 Grass bag . . . . . . . . . . . . . . . . . . . . . . . . . . . . . . . . . . . . . . . . . . . 119
SAFETY INSTRUCTIONS
Pay attention to these symbols and their meaning:
Indicates a high risk of severe personal injury or death if instructions are not
followed.
CAUTION:
Indicates a possibility of personal injury or equipment damage if instructions are not
•
followed.
- 2 -
Advertisement
Table of Contents

Related Manuals for Honda HRA536


Summary of Contents for Honda HRA536
-
Page 1: Table Of Contents
14.2 Transmission/Hydrostatic transmission (HRD535K1 TME) ..91 14.3 Transmission/Hydrostatic transmission (HRA536) ... . . 93 3.10 Governor ..........29 14.4 Rear roller . -
Page 2: Specifications
HRA536 - HRD535 - HRD536 - SPECIFICATION SPECIFICATIONS 1.1 General specifications HRD535/K1/K2 MODEL HRD535 HRD535K1 HRD535K2 Type DIMENSIONS AND WEIGHT Grass bag capacity Dry weight 46.4 50.2 47.0 49.5 53.3 50.2 49.8 53.8 49.8 53,8 49,8 Curb weight 47.9 51.7 48.5... - Page 3 HRA536 - HRD535 - HRD536 - SPECIFICATION - 4 - General specifications HRD535/K1/K2 MODEL HRD535 HRD535K1 HRD535K2 Type ENGINE Model GXV140 Type 4-stroke, overhead valves, vertical one cylinder Displacement Bore x stroke 62 x 42 Maximum power KW/rpm 3.7 / 3800 Maximum torque N.m/rpm...
- Page 4 HRA536 - HRD535 - HRD536 - SPECIFICATION General specifications HRD536/K1/K2 MODELS HRD536 HRD536K1 HRD536K2 Types DIMENSIONS AND WEIGHT Grass bag capacity Dry weight 48.6 49.6 54.6 49.6 54.6 49.6 54.6 Curb weight 50.6 51.6 56.6 51.6 56.6 51.6 56.6 FRAME...
- Page 5 HRA536 - HRD535 - HRD536 - SPECIFICATION - 6 - General specifications HRD536/K1/K2 MODELS HRD536 HRD536K1 HRD536K2 Types ENGINE Model GXV160K1 Type 4-stroke, overhead valves, vertical one cylinder Displacement Bore x stroke 68 x 45 Maximum power KW/rpm 4.0 /3600 Maximum torque N.m/rpm...
- Page 6 HRA536 - HRD535 - HRD536 - SPECIFICATION General specifications HRA536 MODEL HRA536 Type DIMENSIONS AND WEIGHT Grass bag capacity Dry weight 57.0 Curb weight 59.0 FRAME Cutting width Step Cutting height adjusting Height 22 - 77 Front Tyre size Rear...
- Page 7 HRA536 - HRD535 - HRD536 - SPECIFICATION - 8 - General specifications HRA536 MODEL HRA536 Type ENGINE Model GXV160K1 Type 4-stroke, overhead valves, vertical one cylinder Displacement Bore x stroke 68 x 45 Maximum power KW/rpm 4.0 /3600 Maximum torque N.m/rpm...
-
Page 8: Dimensional Drawings
HRA536 - HRD535 - HRD536 - SPECIFICATION 1.2 Dimensionnal drawing Models HRD535 HRD535K1 HRD535K2 Types A (mm) 1694 1655 1694 1655 B (mm) C (mm) 1018 1031 1018 1031 D (mm) E (mm) F (mm) Models HRD536 HRD536K1 HRD536K1 Types... -
Page 9: Wiring Diagrams
HRA536 - HRD535 - HRD536 - SPECIFICATION - 10 - 1.3 Wiring diagrams HRD535 SME, QME HRD535K1 SME, TME, QME HRD535K2 QME Engine stop switch Spark plug Ignition coil Engine block (without starter motor model) Earth terminal Starter motor Charging coil... -
Page 10: Service Information
Keep away from rotating or hot parts and high voltage wires when the engine is run. • 2.2 Service rules 1. Use genuine Honda or Honda - recommended parts and lubricants. Parts that do not meet Honda’s design specifications may damage the mower. 2. Use the special tools designed for the product. -
Page 11: Maintenance Standards
3.0 - 4.0 Ù Charging coil Resistance HRD535/K1/K2 - HRD536 3.0 mm 2.0 mm Lining thickness HRD535 Q /K1 Q /K2 Q - HRA536 4.6 mm Blade brake Clutch spring HRD535 Q /K1 Q /K2 Q - HRA536 35.5 mm HRD535/K1/K2 - HRD536/K1/K2... -
Page 12: Torque Values
HRA536 - HRD535 - HRD536 - SERVICE INFORMATION Torque values • Specifique torque values • Standard torque values TIGHTENING TIGHTENING TORQUE THREAD ITEM TORQUE ITEM DIA. X PITCH 5 mm screw Cylinder head screw M8 X 1.25 5 mm screw/nut Cylinder head cover screw M6 X 1.0... -
Page 13: Special Tools
HRA536 - HRD535 - HRD536 - SERVICE INFORMATION - 14 - 2.6 Special tools TOOL NAME TOOL NUMBER APPLICATION Float level gauge 07401-0010000 Float level inspection Crankshaft oil seal installation Attachment, 37 x 40 mm 07746-0010200 (HRD535/K1/K2) Crankshaft oil seal installation... -
Page 14: Troubleshooting
HRA536 - HRD535 - HRD536 - SERVICE INFORMATION Troubleshooting ENGINE General symptom and possible causes FUEL FILTER clogged Check: ch. 3.11, 7.1 CARBURETOR malfunction Readjust: ch. 3.9 Engine will not rev sufficiently Disassemble and inspect: ch. 8.3 STATER MOTOR faulty Check: ch. - Page 15 HRA536 - HRD535 - HRD536 - SERVICE INFORMATION - 16 - Hard starting d. Ignition system Ÿ Faulty spark plug. Install a new spark No spark 1 Ÿ Perform spark plug test. 1 Ÿ Check fuel level in the tank.
- Page 16 HRA536 - HRD535 - HRD536 FRAME d. Transmission (S types) Gears are not changed SCHIFT CABLE out of adjustment Drive clutch (except H type) Adjust: ch. 3.7 Mower does not drive when the drive TRANSMISSION malfunction DRIVE CLUTCH CABLE out of adjustment clutch lever is grasped.
- Page 17 HRA536 - HRD535 - HRD536 - SERVICE INFORMATION - 18 - CYLINDER COMPRESSION CHECK 1. Remove the spark plug cap and spark plug. 2. Install a compression gauge [2] in the spark plug hole. 3. Crank the engine using the recoil starter until stable compression is obtained.
-
Page 18: Maintenance Schedule
(1) Increase cleaning frequency when mower is used in dusty areas. (2) Maintenance of these points must be carried out by a Honda dealer unless the user has the necessary tools and mechanical experience. See Honda Shop Manual. (3) If applicable (4) During storage (5) For professional commercial use, log hours of operation to determine proper maintenance intervals. -
Page 19: Maintenance
NOTE: Draining can be performed rapidly and completely when the engine is still warm. 10W40 1. Stop the engine and disconnect the spark plug cap. 10W30 2. Move the throttle lever to “STOP” position and turn the fuel shut-off valve (HRA536 - 40°C HRD535K1/K2 - HRD536/K1/K2), drain the carburetor. 100°F 3. - Page 20 Clean the surrounding area before checking the transmission oil level. • Use only Honda hydrostatic transmission oil, when topping up or changing the hydrostatic transmission oil. NOTE: When checking hydrostatic transmission oil level, screw in the oil level gauge.
-
Page 21: Spark Plug
HRA536 - HRD535 - HRD536 - 22 - - MAINTENANCE 3.2 Spark plug If the engine has been running, the engine will be very hot, allow it to cool before proceeding. 1. Remove the spark plug cap. 2. Clean any dirt from around spark plug. -
Page 22: Air Cleaner
• cause damage to the element. NOTE: HRA536 - HRD536/K1/K2 only: dip the element in clean engine oil and squeeze out all the excess oil. Excess oil will restrict air flow through the foam element and may transfer to paper element, soaking and clogging it. -
Page 23: Throttle Cable
HRA536 - HRD535 - HRD536 - 24 - - MAINTENANCE 3.4 Throttle cable a. Throttle cable/linkage adjustment 1. Stop the engine and remove the spark plug cap. 2. Verify that the governor spring is connected to the lower hole on the control arm. If necessary, reposition the spring. -
Page 24: Drive Clutch Cable (Except H Type)
HRA536 - HRD535 - HRD536 - MAINTENANCE 3.5 Drive clutch cable (except H type) NOTE: Before making any cable tension adjustements, always check that the cables are corrected routed. 1. Stop the engine and disconnect the spark plug cap. 2. Measure clearance at the tip of the lever. - Page 25 HRA536 - HRD535 - HRD536 - 26 - - MAINTENANCE b. HRD535K1/K2: 8106640 ~ HRD536K1/K2: 8107480 ~ Do not turn the lawnmower over. 1. Switch the engine off and remove the spark plug cap. 2. Put the throttle to stop, close the fuel cock and drain the carburetor.
-
Page 26: Shift Cable (Except Q Type)
HRA536 - HRD535 - HRD536 - MAINTENANCE 3.7 Shift cable (except Q type) a. S type 1. Stop the engine and remove the spark plug cap. 2. Loosen the shift cable lock nut [2] completely. 3. Tilt the mower and set the transmission in 2nd (move the shift arm [3] toward the cable stay). -
Page 27: Valve Clearance
HRA536 - HRD535 - HRD536 - 28 - - MAINTENANCE d. HRA536 model 1. Open the discharge guard, and remove the rear cover clip and rear cover. 2. Position the shift lever to minimum speed, and engage the drive clutch lever as it is. -
Page 28: Carburetor
2. Turn the throttle stop screw to obtain the standard idle speed. 2 100 ± 150 rpm (HRD535/K1/K2) Standard idle speed 1 700 ± 150 rpm (HRA536 - HRD536/K1/K2) b. Pilot screw adjustment CAUTION: Damage the pilot screw seat will occur if the pilot screw is tightened against the seat. -
Page 29: Fuel Filter
Wear heavy gloves to protect your hands when handling the blade. 1. Move the throttle lever to “STOP” position and turn the fuel shut-off valve (HRA536 - HRD535K1/K2 - HRD536/K1/K2), drain the carburetor. -
Page 30: Spark Arrester (Optional Part)
HRA536 - HRD535 - HRD536 - MAINTENANCE 3.13 Spark arrester (optional part) The engine and exhaust system become hot for a while after stopping. A hot engine and exhaust system can burn you and can ignite some materials. Avoid touching a hot engine or exhaust system. Allow the engine to cool before servicing the spark arrester. -
Page 31: Blade / Rotostop
HRA536 - HRD535 - HRD536 - 32 - - BLADE / ROTOSTOP BLADE / ROTOSTOP 4.1 How the Rotostop works HRD535K1: 8106640 ~ , HRD536K1: 8107480 ~ HRD535K2 - HRD536K2 Rotostop lever engaged (left-hand section of the drawing) 1. The clutch control plate [1] pivots anti-clockwise. -
Page 32: Blade Brake Clutch
HRA536 - HRD535 - HRD536 - BLADE / ROTOSTOP 4.2 Blade brake clutch (HRD535/K1 except Q type ~ 8106639 - HRD536/K1 ~ 8107479) a. Disassembly / Reassembly CAUTION: Ÿ Do not turn the mower upside down. 1. Stop the engine and disconnect the spark plug cap. - Page 33 HRA536 - HRD535 - HRD536 - 34 - - BLADE / ROTOSTOP b. Inspection BBC BOTTOM PLATE Measure the lining thickness. Brake lining thickness 2.0 mm Service limit Clutch lining thickness 2.0 mm Replace the bottom plate if the lining thickness is under than the service limit.
- Page 34 HRA536 - HRD535 - HRD536 - BLADE / ROTOSTOP c. Models HRD535K1: 8106640 ~, HRD536K1: 8107479 ~ HRD535K2 - HRD536K2 Do not turn the lawnmower over. 1. Switch the engine off and remove the spark plug cap. [21] [18] 2. Put the throttle to stop, close the fuel cock and drain the carburetor.
-
Page 35: Inspection Du Rotostop
HRA536 - HRD535 - HRD536 - 36 - - BLADE / ROTOSTOP 4.3 Inspecting the Rotostop If the steps described below show that the clutch or brake is worn, the clutch lining and spring must be replaced. 1. Set the clutch cable to the engaged position. -
Page 36: Driven Disc, Drive Disc
HRA536 - HRD535 - HRD536 - BLADE / ROTOSTOP 4.4 Driven disc, drive disc (HRD535 Q /K1 Q ~ 8106639 - HRA536) a. Disassembly / Reassembly CAUTION: Do not turn the mower upside down. • 1. Stop the engine and disconnect the spark plug cap. - Page 37 HRA536 - HRD535 - HRD536 - 38 - - BLADE / ROTOSTOP b. Inspection DRIVEN DISC Measure the lining thickness. Brake lining thickness 4.6 mm Service limit Clutch lining thickness 4.6 mm Replace the driven disc if the lining thickness is under than the service limit.
-
Page 38: Ball Control Assembly
HRA536 - HRD535 - HRD536 - BLADE / ROTOSTOP 4.5 Ball control assembly (HRD535 Q /K1 Q /K2 Q - HRA536) a. Disassembly / Reassembly 1. Remove the drive disc (ch. 4.4). NOTE: Before carrying out any operation on the ball control assembly, loosen the Rotostop cable by loosening the lock nuts of the handle and removing the ball control assembly return spring. -
Page 39: Blade Sharpening
HRA536 - HRD535 - HRD536 - 40 - - BLADE / ROTOSTOP 4.6 Blade sharpening 1. Stop the engine and remove the spark plug cap to prevent accidental stating. Blade will start spinning if the Rotostop lever is pulled back while the engine is running. -
Page 40: Engine Removal / Installation
HRA536 - HRD535 - HRD536 - ENGINE REMOVAL / INSTALLATION ENGINE REMOVAL / INSTALLATION 5.1 Engine removal 1. Drain the petrol from the carburetor and fuel tank into an approved container. Petrol is highly flammable and explosive. If ignited, petrol can burn you severely. - Page 41 Slide off the pin clip and remove the joint pin, then disconnect the drive shaft from the engine. 8. Undo the knot on the recoil starter rope at handle level to release it (except HRA536). 9. With starter motor model only Remove screws: HRD535/K1/K2: 5 x 8 mm screw and 4 x 6 mm screw;...
-
Page 42: Engine Installation
HRD535K1 ~ 8106639 , HRD536K1 ~ 8107479 Install the engine in the reverse order of removal. NOTE: Connect the drive shaft with the pin hole aligned as shown (Q type and HRA536 only). Install the drive pulley by aligning the key groove with the woodruff key on the crankshaft (except Q type and HRA536). - Page 43 HRA536 - HRD535 - HRD536 - 44 - - ENGINE REMOVAL / INSTALLATION b. HRD535K1: 8106640 ~ , HRD536K1: 8107479 ~ - HRD535K2 - HRD536K2 When you refit the engine, make sure you don’t lose or forget the studs [7].
-
Page 44: Air Cleaner / Muffler
HRA536 - HRD535 - HRD536 - AIR CLEANER / MUFFLER AIR CLEANER / MUFFLER 6.1. Air cleaner a. Disassembly / Reassembly NOTE: Air cleaner service can be accomplished with the engine installed. HRD535/K1/K2 [1] AIR CLEANER CASE REASSEMBLY: When reassembly, clean inside of the air cleaner case. -
Page 45: Muffler
HRA536 - HRD535 - HRD536 - 46 - - AIR CLEANER / MUFFLER 6.2 Muffler a. Disassembly / Reassembly The engine and exhaust system become hot during operation and remain hot for a while after stopping. A hot engine and exhaust system can burn you and can ignite some materials. -
Page 46: Recoil Starter / Fuel Tank
HRA536 - HRD535 - HRD536 - RECOIL STARTER / FUEL TANK RECOIL STARTER / FUEL TANK 7.1 Fuel tank a. Removal / Installation NOTE: It is not necessary to remove the engine. Petrol is highly flammable and explosive. If ignited, petrol can burn you severely. - Page 47 HRA536 - HRD535 - HRD536 - 48 - - RECOIL STARTER / FUEL TANK Petrol is highly flammable and explosive. If ignited, petrol can burn you severely. When draining petrol: - Drain petrol into an approved container. - Keep sparks and flames away, and do not smoke.
-
Page 48: Recoil Starter
HRA536 - HRD535 - HRD536 - RECOIL STARTER / FUEL TANK 7.2 Recoil starter [13] a. Disassembly [1] RECOIL STARTER ROPE REASSEMBLY: Check the rope for fraying or wearing before installation. HRD535/K1/K2 HRD536/K1/K2 [2] STARTER REEL HRA536 [3] RATCHET (2) - Page 49 HRA536 - HRD535 - HRD536 - 50 - - RECOIL STARTER / FUEL TANK b. Reassembly NOTE: Clean all disassembled part thoroughly before reassembly. Wear heavy gloves to protect your hands. 1. Insert the hook [3] on the outer side of the return spring [2] into the groove inside the reel.
- Page 50 HRA536 - HRD535 - HRD536 - RECOIL STARTER / FUEL TANK 7. Install the ratchet and ratchet [4] spring onto the starter reel as shown. 8. Install the reel cover by aligning the cut-out with ratchet end. 9. Apply grease to the friction spring and resin washer.
-
Page 51: Ignition Coil / Control Arm / Carburetor
HRA536 - HRD535 - HRD536 - 52 - - IGNITION COIL / CONTROL ARM / CARBURETOR IGNITION COIL / CONTROL ARM / CARBURETOR HRD535/K1/K2 8.1 Ignition coil / Engine stop switch a. Removal / Installation NOTE: It is not necessary to remove the engine. - Page 52 HRA536 - HRD535 - HRD536 - IGNITION COIL / CONTROL ARM / CARBURETOR b. Inspection ENGINE STOP SWITCH Check for continuity between the switch terminal and switch body earth. HRD535 There should be no continuity when the arm is moved fully counter-clockwise.
- Page 53 HRA536 - HRD535 - HRD536 - 54 - - IGNITION COIL / CONTROL ARM / CARBURETOR SPARK PLUG CAP Measure the resistance of the spark plug cap. Standard resistance value HRA536 - HRD536/K1/K2 4 - 5 kΩ 0.2 Ω HRD535/K1/K2 c.
-
Page 54: Control Assembly
HRA536 - HRD535 - HRD536 - IGNITION COIL / CONTROL ARM / CARBURETOR 8.2 Control assembly HRD535K1/K2 a. Removal / Installation [5]-3 Petrol is highly flammable and explosive. If ignited, petrol can burn you severely. When draining petrol: - Drain petrol into a approved container. - Page 55 HRA536 - HRD535 - HRD536 - 56 - - IGNITION COIL / CONTROL ARM / CARBURETOR HRD535K1/K2 [9]-2 ANTI-SURGE SPRING [9]-3 THROTTLE LEVER [10] NUT, 6 mm [5]-3 TIGHTNING TORQUE: 10 N.m [11] GOVERNOR SPRING INSTALLATION: Hook to the lower hole on the control arm.
- Page 56 HRA536 - HRD535 - HRD536 - IGNITION COIL / CONTROL ARM / CARBURETOR HRA536 - HRD536/K1/K2 [1] CARBURETOR DISASSEMBLY / REASSEMBLY: ch. 8.3 HRD535K1 HRD535K2 [2] HEAT SHIELD [3] INSULATOR [4] INSULATOR GASKET [5] FUEL TUBE INSTALLATION: Before installing, check for deterioration or damage. Replace if necessary.
- Page 57 HRA536 - HRD535 - HRD536 - 58 - - IGNITION COIL / CONTROL ARM / CARBURETOR HRD535K1 [17] ADJUSTING SCREW A HRD535K2 INSTALLATION: Install the stopper collar as shown. ADJUSTMENT: ch. 3.4 [17]-1 STOPPER COLLAR [17]-2 ADJUSTING SCREW A [18] CHOKE ROD...
-
Page 58: Carburetor
HRA536 - HRD535 - HRD536 - IGNITION COIL / CONTROL ARM / CARBURETOR 8.3 Carburetor a. Disassembly / Reassembly Petrol is highly flammable and explosive. If ignited, petrol can burn you severely. When draining petrol: - Drain petrol into a approved container. - Page 59 HRA536 - HRD535 - HRD536 - 60 - - IGNITION COIL / CONTROL ARM / CARBURETOR b. Inspection FLOAT LEVEL HEIGHT With the carburetor in an upright, measure the distance between the float top and S.TOOL carburetor body when the float just contacts the float valve.
-
Page 60: Flywheel / Starter Motor
REMOVAL: Do not hit the flywheel with a hammer. Remove with the rotor puller (HME, QME, SME type) or a commercially available puller (HXE, QXE, SXE type). Avoid the magnet section when attaching the puller. [3]-1 PULLER ROTOR (HRD535 HXE, QXE, SXE /K1/K2 QXE - HRA536 - HRD536 HXE, SXE /K1/K2 HXE) [14] . -
Page 61: Starter Motor / Charging Coil
HRA536 - HRD535 - HRD536 - 62 - - FLYWHEEL / STARTER MOTOR 9.2 Starter motor / Charging coil Removal / Installation NOTE: It is not necessary to remove the engine. 1. Remove the flywheel (ch. 9.1). [13] HRD535/K1/K2 HRD535/K1/K2... - Page 62 HRA536 - HRD535 - HRD536 - FLYWHEEL / STARTER MOTOR b. Disassembly / Reassembly HRD535/K1/K2 [1] SNAP RING REASSEMBLY: Replace with new one whenever disassembled. [2] SPRING COVER A [3] SPRING COVER B [4]-1 [4] PINION GEAR DISASSEMBLY: Hold the armature upright, place an offset wrench over the pinion [4]-2 stopper, and drive the stopper down exposing the snap ring.
- Page 63 HRA536 - HRD535 - HRD536 - 64 - - FLYWHEEL / STARTER MOTOR HRD536/K1/K2 [1] SNAP RING REASSEMBLY: Replace with new one whenever disassembled. [2] STOPPER [3] PINION GEAR DISASSEMBLY: Hold the armature upright, place an offset wrench over the pinion stopper, and drive the stopper down exposing the snap ring.
- Page 64 HRA536 - HRD535 - HRD536 - FLYWHEEL / STARTER MOTOR c. Inspection BRUSH LENGTH Measure the brush length. Service limit 6 mm If the brush length is less than service limit, replace the starter motor as an assembly (HRD535/K1/K2) or replace the brush (HRD536/K1/K2).
-
Page 65: Cylinder Head / Valves
HRA536 - HRD535 - HRD536 - 66 - - CYLINDER HEAD / VALVES 10. CYLINDER HEAD / VALVES 10.1 Removal / Installation NOTE: It is not necessary to remove the engine. 1. Remove the following: Air cleaner and muffler (ch. 6). -
Page 66: Disassembly / Reassembly
HRA536 - HRD535 - HRD536 - CYLINDER HEAD / VALVES 10.2 Disassembly / Reassembly [1] INTAKE VALVE REASSEMBLY: Do not interchange with the exhaust valve. Check to see that there is no damage or carbon deposits in the valve heads. -
Page 67: Inspection
HRA536 - HRD535 - HRD536 - 68 - - CYLINDER HEAD / VALVES 10.3 Inspection VALVE SPRING FREE LENGTH Measure the free length of the valve springs. HRA536 - HRD536/K1/K2 HRD535/K1/K2 Service limit IN / EX: 32.5 mm IN / EX: 29 mm If the spring free length is shorter than service limit, replace the valve spring. -
Page 68: Valve Guide Replacement
HRA536 - HRD535 - HRD536 - CYLINDER HEAD / VALVES VALVE GUIDE I.D. NOTE: Ream the valve guides to remove any carbon deposits before measuring. S.TOOL S.TOOL [1] VALVE GUIDE REAMER ..........07984-2000001 Measure and record each valve guide I.D. -
Page 69: Valve Seat Reconditioning
HRA536 - HRD535 - HRD536 - 70 - - CYLINDER HEAD / VALVES CAUTION: When driving the valve guides out, be careful not to damage the cylinder head. • S.TOOL 4. Remove the new valve guides from refrigerator one at a time as need. - Page 70 HRA536 - HRD535 - HRD536 - CYLINDER HEAD / VALVES S.TOOL 3. Using a 45° cutter, remove enough material produce a smooth and concentric seat. Turn the cutter clockwise, never counter-clockwise. Continue to turn the cutter as you lift it from the valve seat.
-
Page 71: Oil Pan / Drive Shaft / Governor
[2] SCREW, 6 x 14 mm (2) GREASE OIL SEAL HRD535/K1/K2 HRD535/K1/K2: 25 x 38 x 7 mm HRA536 - HRD536/K1/K2 HRA536 - HRD536/6K1/K2: 25.4 x 40 x 7 mm REASSEMBLY: ch. 11.1b [4] OIL PAN [5] SEALING WASHER [13] [6] OIL DRAIN SCREW TIGHTNING TORQUE: 18 N.m... - Page 72 HRA536 - HRD535 - HRD536 - OIL PAN / DRIVE SHAFT / GOVERNOR b. Oil seal installation Apply grease to the oil seal lip and drive it in squarely with the driver and attachment. S.TOOL S.TOOL [1] DRIVER HANDLE ...........07749 - 0010000 [2] HRD535/K1/K2: ATTACHMENT, 37 x 40 mm .
-
Page 73: Drive Shaft / Governor
[9] LOCK PIN [16] [10] LUG [15] [11]-1 OIL RETURN PIPE (HRD535/K1/K2) [14] [11]-2 OIL RETURN RUBBER (HRA536 - HRD536/K1/K2 only) [12] [13] GREASE OIL SEAL, 12 x 20 x 6 mm [10] Apply to the lip of the oil seal. -
Page 74: Crankshaft / Piston / Cylinder
Be careful not to damage the oil seal lip. [4] CONNECTING ROD SCREW TIGHTNING TORQUE: 12 N.m [5] LOWER CAP [6] BALL BEARING (HRD535/K1/K2: 62/22, HRA536 - HRD536/K1/K2: 6205) [13] REPLACEMENT: ch. 12.1 [7] OIL SEAL (HRD535/K1/K2: 22 x 35 x 6 mm, HRA536 - HRD536/K1/K2: 25 x 38 x 7 mm REASSEMBLY: ch. - Page 75 HRA536 - HRD535 - HRD536 - 76 - - OIL PAN / DRIVE SHAFT / GOVERNOR PISTON RINGS REASSEMBLY NOTE: install all rings the marking facing up. After installation, make sure that the rings rotate freely in the grooves. Separate the piston ring end gaps 120° apart.
- Page 76 HRA536 - HRD535 - HRD536 - OIL PAN / DRIVE SHAFT / GOVERNOR BALL BEARING REPLACEMENT Oil a new bearing to ease installation and drive in evenly. Drive the bearing in squarely with the driver and attachment. S.TOOL S.TOOL [1] DRIVER HANDLE ........... 07749-0010000 [2] ATTACHMENT, 52 x 55 mm .
-
Page 77: Inspection
HRA536 - HRD535 - HRD536 - 78 - - OIL PAN / DRIVE SHAFT / GOVERNOR 12.2 Inspection BALL BEARING Clean the bearing in solvent and dry it. Spin the bearing by hand and check for clearance. Replace the bearing if is noisy of has excessive clearance. - Page 78 HRA536 - HRD535 - HRD536 - OIL PAN / DRIVE SHAFT / GOVERNOR PISTON SKIRT O.D. Measure and record the piston skirt O.D. at 10 mm (0.4 in) from the bottom, and 90° to the piston pin hole. HRD535/K1/K2 HRA536 - HRD536/K1/K2 Service limit 63.815 mm...
- Page 79 HRA536 - HRD535 - HRD536 - 80 - - OIL PAN / DRIVE SHAFT / GOVERNOR CONNECTING ROD SMALL END I.D. HRD535/K1/K2 HRA536 - HRD536/K1/K2 Service limit 13.07 mm 18.052 mm CONNECTING ROD BIG END SIDE CLEARANCE Service limit 1.1 mm CRANK PIN O.D.
- Page 80 HRA536 - HRD535 - HRD536 - OIL PAN / DRIVE SHAFT / GOVERNOR 3. Remove the connecting rod and measure the plastigauge. Service limit 0.12 mm 4. If the clearance is outside of the service limit replace the connecting rod and perform the measurement again.
-
Page 81: Front Wheel / Rear Wheel
HRA536 - HRD535 - HRD536 - 82 - - FRONT WHEEL / REAR WHEEL 13. FRONT WHEEL / REAR WHEEL 13.1 Front wheel a. Disassembly / Reassembly Wear heavy gloves to protect your hand when servicing near the blade. NOTE: The front wheels servicing can be done with the engine on the cutter housing. - Page 82 HRA536 - HRD535 - HRD536 - FRONT WHEEL / REAR WHEEL Q type [1] ADJUSTER ARM SPRING WASHER Q type REASSEMBLY: Install the washer as shown. [1]-1 NUT SIDE GREASE [2] COLLAR (2) [3] PLAIN WASHER (2) [4] ADJUSTER CENTER SCREW (2)
-
Page 83: Rear Wheel
HRA536 - HRD535 - HRD536 - 84 - - FRONT WHEEL / REAR WHEEL 13.2 Rear wheel a. Disassembly / Reassembly [24] Wear heavy gloves to protect your hand when servicing near the blade. NOTE: The rear wheel servicing can be done with the engine on the cutter housing. - Page 84 HRA536 - HRD535 - HRD536 - FRONT WHEEL / REAR WHEEL HRA536 [1] REAR AXLE [2] SCREW, 6 x 12 mm (4) [3] REAR ADJUSTER LEVER (2) [4] ADJUSTER LEVER COLLAR (2) [5] FINAL SHAFT COLLAR (2) [6] WASHER (2)
-
Page 85: Rear Drive System
HRA536 - HRD535 - HRD536 - 86 - - REAR DRIVE SYSTEM 14. REAR DRIVE SYSTEM 14.1 Transmission / Hydrostatic transmission (HRD535/K1/K2 except TME - HRD536/K1/K2) a. Removal Wear heavy gloves to protect your hand servicing near the blade. NOTE: The drive system servicing can be done with the engine on the cutter housing. - Page 86 HRA536 - HRD535 - HRD536 - REAR DRIVE SYSTEM 9. Apply transparent tape over axle grooves to protect seal during disassembly. 10. Remove the 22 mm snap ring and washer from the inside of the rear adjuster arm. 11. Remove the 6 x 12 screws and rear axle holder and remove the transmission assembly.
- Page 87 HRA536 - HRD535 - HRD536 - 88 - - REAR DRIVE SYSTEM b. Disassembly / Reassembly [2]-2 S type [1] SELF-LOCKING NUT, 10 mm TIGHTNING TORQUE: 30 N.m maximum [2] DRIVEN PULLEY [2]-1 REASSEMBLY: Install the pulley with the longer boss toward transmission side.
- Page 88 HRA536 - HRD535 - HRD536 - REAR DRIVE SYSTEM c. Transmission installation 1. Connect the drive clutch cable and shift cable to the transmission. Do not set the drive clutch cable to the cable stay. 2. Install the spring tensioner plate in the cutter housing and connect the spring to the plate.
- Page 89 HRA536 - HRD535 - HRD536 - 90 - - REAR DRIVE SYSTEM d. Drive belt replacement NOTE: It is advisable to disassemble the blade for safety reasons. 1. Drain the fuel from the fuel tank and carburetor, and drain the engine oil.
-
Page 90: Transmission/Hydrostatic Transmission (Hrd535K1 Tme)
HRA536 - HRD535 - HRD536 - REAR DRIVE SYSTEM 14.2 Transmission / Hydrostatic transmission (HRD535K1/K2 TME) a. Removal Wear heavy gloves to protect your hands when servicing near the blade. 1. Remove the spark plug cap. 2. Drain the gasoline from the carburetor tank, as well as the engine oil (ch. 3.1). - Page 91 HRA536 - HRD535 - HRD536 - 92 - - REAR DRIVE SYSTEM 10. Remove the gear shift cable [1]: Release the cable at the adjustment nuts (side handle) Unhook the cable from the handle shift lever (cotter pin [2]) Cut the cable clamps, Remove the transmission with the cable, Remove the driving pulley (ø...
-
Page 92: Transmission/Hydrostatic Transmission (Hra536)
HRA536 - HRD535 - HRD536 - REAR DRIVE SYSTEM 14.3 Transmission / Hydrostatic transmission (HRA536) a. Removal / Installation NOTE: The transmission servicing can be done with the engine on the cutter housing. 1. Remove the two clips and remove the drive cover. - Page 93 If any parts of pump cylinder, piston, piston spring or cylinder plate and needle bearing plate, thrust needle bearing or bearing plate are worn, replace and install them as a set. Use the HST Honda hydrostatic transmission oil on each sliding surface, O-ring and inside lip of the oil seal.
- Page 94 HRA536 - HRD535 - HRD536 - REAR DRIVE SYSTEM Pump case [1] CONTROL YOKE BUSH B DISASSEMBLY: Drive out the control yoke bush B from the pump case. REASSEMBLY: Install the control yoke bush B with its long part facing inside as shown.
- Page 95 HRA536 - HRD535 - HRD536 - 96 - - REAR DRIVE SYSTEM RELIEF VALVE NEEDLE SELECTION 1. Install the pump control yoke to the pump case with control yoke bush A. Install the control yoke bush B to the pump case.
- Page 96 HRA536 - HRD535 - HRD536 - REAR DRIVE SYSTEM MINIMUM SPEED ADJUSTMENT CAUTION: • The minimum speed adjustment is performed by moving the mower. Be sure that the area around the mower is clear of people, pets and obstacles. Test the mower on an asphalt or concrete paved surface.
- Page 97 HRA536 - HRD535 - HRD536 - 98 - - REAR DRIVE SYSTEM c. Hydraulic motor disassembly / Reassembly NOTE: It is not necessary to remove the oil pump. If any parts of motor cylinder, piston, piston spring or motor cylinder plate and thrust ball bearing outer ring, thrust ball bearing or thrust ball bearing inner ring are worn, replace and install them as a set.
- Page 98 HRA536 - HRD535 - HRD536 - REAR DRIVE SYSTEM TRANSMISSION CASE [1] TRANSMISSION CASE COVER REASSEMBLY: Tighten the transmission case cover screws as follows. [2] OIL SEAL, 15 x 24 x 5 mm [3] SCREW, 6 x 20 mm (7) TIGHTNING TORQUE: 13 N.m...
- Page 99 HRA536 - HRD535 - HRD536 - 100 - - REAR DRIVE SYSTEM HYDROSTATIC TRANSMISSION AIR BLEEDING CAUTION: • Be careful not to allow dust, or other foreign materials to enter the hydrostatic transmission. • Once the hydrostatic transmission has been disassembled without oil the hydrostatic transmission must be bled.
-
Page 100: Rear Roller
HRA536 - HRD535 - HRD536 - REAR DRIVE SYSTEM 14.3 Rear roller a. Removal / Installation Wear heavy gloves to protect your hand when servicing near the blade. NOTE: The rear roller servicing can be done with the engine on the cutter housing. - Page 101 HRA536 - HRD535 - HRD536 - 102 - - REAR DRIVE SYSTEM b. Rear roller disassembly / Reassembly [1] AXLE SHAFT WASHER [2] RIGHT ROLLER [3] AXLE SHAFT REASSEMBLY: Check for runout, replace if necessary. [4] THRUST WASHER RADIAL BALL BEARING, 6004 (2)
- Page 102 HRA536 - HRD535 - HRD536 - REAR DRIVE SYSTEM c. Transmission disassembly / Reassembly NOTE: After reassembly, check for smooth operation without binding. Before reassembly, clean all parts and check for damage or wear. Replace if necessary. 0.16 l Oil capacity...
- Page 103 HRA536 - HRD535 - HRD536 - 104 - - REAR DRIVE SYSTEM [17] EXTERNAL SNAP RING, 28 mm (2) [18] OIL SEAL, 28 x 38 x 6 mm (2) [19] SCREW, 6 x 32 mm (2) [20] CASE PROTECTOR [21] FLANGE NUT, 6 mm (2)
-
Page 104: Handle / Control Levers
HRA536 - HRD535 - HRD536 - HANDLE / CONTROL LEVERS 15. HANDLE / CONTROL LEVERS 15.1 Upper handle a. Disassembly / Reassembly [27] S type [1] WASHER [2] BUSH (2) [3] DRIVE CLUTCH LEVER ADJUSTMENT: ch. 3.5 GREASE [4] ROTOSTOP LEVER... - Page 105 HRA536 - HRD535 - HRD536 - 106 - - HANDLE / CONTROL LEVERS Q type [1] WASHER [2] BUSH (2) [23] [3] DRIVE CLUTCH LEVER ADJUSTMENT: ch. 3.5 [4] ROTOSTOP LEVER [5] RATCHET PUSH ROD [6] LOCK PIN, 6 mm...
- Page 106 HRA536 - HRD535 - HRD536 - HANDLE / CONTROL LEVERS H type [1] WASHER [2] BUSH (2) [3] DRIVE CLUTCH LEVER ADJUSTMENT: ch. 3.5 [4] ROTOSTOP LEVER [5] RATCHET PUSH ROD [26] [6] LOCK PIN, 6 mm [7] WASHER (2)
-
Page 107: Lower Handle
HRA536 - HRD535 - HRD536 - 108 - - HANDLE / CONTROL LEVERS 15.2 Lower handle a. Disassembly / Reassembly HRD535/K1/K2 - HRD536/K1/K2 [1] RIGHT HANDLE SUPPORT [2] LOWER HANDLE [3] WIRE BAND (2) REASSEMBLY: ch. 15.4 [4] HANDLE HOLDER SCREW (2) (HRD535 F/N 8021986 ~ HRD536 F/N 8010818 ~) - HRD535K1/K2... -
Page 108: Control Lever
HRA536 - HRD535 - HRD536 - HANDLE / CONTROL LEVERS 15.3 Control lever a. Disassembly / Reassembly S type [1] CONTROL COVER [15] GREASE [2] SHIFT LEVER [3] COLLAR [14] [4] STOPPER PLATE [5] THROTTLE LEVER [6] SPRING SEAT [13]... - Page 109 HRA536 - HRD535 - HRD536 - 110 - - HANDLE / CONTROL LEVERS H type [1] CONTROL COVER [2] SHIFT LEVER [3] SHIFT LEVER SPRING [4] SHIFT LEVER ARM [19] [5] STOPPER PLATE GREASE [6] SPRING SEAT [7] SPRING [8] STOPPER PLATE...
-
Page 110: Wire / Harness Routing
HRA536 - HRD535 - HRD536 - HANDLE / CONTROL LEVERS 15.4 Wire / Harness routing [1] CONTROL BOX (electrical starter type only) HRD535/K1/K2 See ch. 16.1 for wire harness connection. [12] [2] MAIN WIRE HARNESS (electrical starter type only) HRD535/K1/K2 [3] OIL FILLER TUBE Route the all wire harnesses between the oil filler tube and crankcase. - Page 111 HRA536 - HRD535 - HRD536 - 112 - - HANDLE / CONTROL LEVERS HME type (shift cable route) [1] CABLE CLAMP Clamp shift cable (S type only) and wire harness. [2] WIRE BAND Clamp shift and throttle cables. 20 - 30 mm...
- Page 112 HRA536 - HRD535 - HRD536 - HANDLE / CONTROL LEVERS S type H type CONTROL CABLE CONNECTIONS S type [14] SHIFT CABLE [15] THROTTLE CABLE [16] ROTOSTOP CABLE [17] DRIVE CLUTCH CABLE H type [14] SHIFT CABLE [15] THROTTLE CABLE...
-
Page 113: Control Box
HRA536 - HRD535 - HRD536 - 114 - - CONTROL BOX 16. CONTROL BOX 16.1 Control box a. Disassembly / Reassembly NOTE: HRD536 shown. HRD535 is similar. [1] CONTROL PANEL [2] COMBINATION SWITCH REMOVAL / INSTALLATION: ch. 16.2a INSPECTION: ch. 16.2b... -
Page 114: Combination Switch
HRA536 - HRD535 - HRD536 - CONTROL BOX 16.2 Combination switch a. Removal / Installation Align the projection of the switch with the groove of the control panel. [1] SWITCH COVER [2] LOCK NUT [3] COLLAR [4] GROOVE [5] COMBINATION SWITCH... - Page 115 HRA536 - HRD535 - HRD536 - 116 - - CONTROL BOX CHARGING Without removal of battery 1. Disconnect the battery lead coupler (black) under the control box. 2. Connect the male coupler to the charger connector. 3. Plug the charger into the standard AC power outlet.
-
Page 116: Regulator / Rectifier
HRA536 - HRD535 - HRD536 - CONTROL BOX 16.4 Regulator / Rectifier CHARGING VOLTAGE INSPECTION 1. Start the engine and adjust the engine speed to 2 900 rpm. 2. Measure the regulated voltage at the 2P coupler by connecting the positive probe of a voltmeter to the white terminal and negative to black terminal. -
Page 117: Discharge Guard / Grass Bag
HRA536 - HRD535 - HRD536 - 118 - - DISCHARGE GUARD / GRASS BAG 17. DISCHARGE GUARD / GRASS BAG 17.1 Discharge guard a. Disassembly / Reassembly [1] STOPPER WASHER (2) [2] DISCHARGE GUARD SHAFT [3] GUARD RETURN SPRING [4] DISCHARGE GUARD... -
Page 118: Grass Bag
HRA536 - HRD535 - HRD536 - DISCHARGE GUARD / GRASS BAG 17.2 Grass bag a. Assembly NOTE: Before assembly, check the grass bag for frying, tears or clogged mesh. 1. Insert the grass bag frame into the grass bag as shown. - Page 119 62 VF0 F10 0210 PREFACE This manual covers the construction, function and servicing procedures of the Honda HRD535/K1/K2 - HRA536 - HRD536/K1/K2 rotary mowers. Careful observance of these instructions will result in better, safer service work. Illustrations in this manual are based primarily on the HRD536 SXE.
Need help?
Do you have a question about the HRA536 and is the answer not in the manual?
Questions and answers