Advertisement
Advertisement

Related Manuals for DT SWISS TRICON RR1450


Summary of Contents for DT SWISS TRICON RR1450
- Page 1 WHEELS ® TRICON Technical Manual_english V2013.03...
- Page 2 User Information Validity Safety Target Group Layout DT Swiss Manual Concept How to Use this Manual Cross References Environmental Protection Disclaimer Warranty (Europe) Limited Equipment Warranty USA Safety Description TRICON® Rim ............7...
-
Page 3: Table Of Contents
Sticker Sets ............29 Spare Parts MTB front wheel . - Page 4 For experienced users, it offers the possibility to carry out small maintenance works on their own. If there are any doubts concerning the own skills, there should be contacted a DT Swiss service center. Warranty will expire if works are not done properly.
- Page 5 Biel/Switzerland. Swiss law shall apply. Submit any warranty claims to your retailer or a DT Swiss Service Centre. Any defects recognised by DT Swiss AG as a warranty claim will be repaired or replaced by a DT Swiss Service Centre.
- Page 6 To take advantage of this warranty, the product or part must be returned for examination, postage prepaid, to the dealer where you bought the product or to a DT Swiss Service Centre. Proof of pur- chase date and an explanation of the complaint must accompany the product. If our inspection dis- closes a defect, DT Swiss will either repair or replace the product or refund the purchase price, if we cannot readily and quickly provide a repair or replacement.
- Page 7 • Assembly and maintenance of the component requires a basic knowledge of handling bicycle compo- nents. If in any doubt, consult your dealer or a DT Swiss Service Center. • Components should only be used in accordance with their intended use, otherwise the user shall as- sume full responsibility.
- Page 8 3 Description ® TRICON ® TRICON Figure 3-1: Rim Profile and Rim Insert Torx nipples Thanks to the Torx design the truing tool has a better grip on the nipple. Rim insert The rim inserts are supported on two sides in the rim creating a big contact surface. The rim can be designed lighter and is airtight for tubeless compatibility.
- Page 9 This spoke connection is considerably stronger as it is playfree on both ends and therefore subject to smaller peak loads. ® Ratchet System ® Thanks to the proven DT Swiss Ratchet System the hubs can easily be converted to different axle standards and rotors. ® TRICON...
- Page 10 Incorrect maintenance or assembly can lead to unpredictable errors! • Maintenance and assembly may only be done by a skilled professional. • In case of any doubt, contact a DT Swiss Service Center. CAUTION Risk of injury due to wrong spare parts! Incorrect spare parts can lead to unpredictable errors! •...
- Page 11 Special Tools Pos. Description nipple wrench Torx spoke holder DT NEW AERO spoke holder DT NEW AEROLITE spoke holder DT Universal nipple guide plastic tool for hub nipple tensiometer DT Tensio analog screw clamp * These tools are available as new and old versions. Both version can be used for works on the wheels. In the figures of the following work instructions are only used the old versions.
- Page 12 Before truing you have to analyze which nipple has to be turned. A normal truing procedure can be very time consuming due to the glued nipples. In case of any doubt, the service works should be done by a DT Swiss Service Center. ®...
- Page 13 2. Fix the wheel in the truing stand. 3. Check the radial and axial run out. NOTE Risk of damage to the spokes and the nipples! • Whenever possible there should be used the universal spoke holder (see chap. 4.1, p.10, pos.
- Page 14 5. Slide the spoke holder (see chap. 4.1, p.10, pos. 2 or pos. 3) onto the spoke. To avoid damages of the spoke, slide the spoke holder as far as possible into the nipple wrench. 6. True the wheel. 7. Distress the wheel (see chap.
- Page 15 Loctite 241 (blue) as required grease for star ratchet® DT Swiss special grease NOTE Risk of damage to the spokes and the nipples! • Whenever possible there should be used the universal spoke holder (see chap. 4.1, p.10, pos.
- Page 16 2. If necessary, cut the spoke: a) Release the spoke using a screw clamp (see chap. 4.1, p.10, pos. 9). b) Cut the spoke. c) Take off the screw clamp. 3. Put on the nipple holder (see chap. 4.1, p.10, pos.
- Page 17 The nipple will be replaced preventively. 1. Grease the contact surface of the nipple and the rim insert with DT Swiss special grease. 2. Put the new nipple into the rim insert. 3. Check, if the nipple can be turned smoothly.
- Page 18 4. Put the nipple holder (see chap. 4.1, p.10, pos. 5) onto the nipple. 5. Insert the pre-assembled rim insert with the nipple into the rim. Attach the new spoke 1. Put Loctite into the thread of the hub nipple. 2.
- Page 19 5. Screw the nipple as far as possible onto the spoke using the nipple holder (see chap. 4.1, p.10, pos. 5). 6. Remove the nipple holder. 7. Slide the nipple wrench (see chap. 4.1, p.10, pos. 4) onto the nipple. To avoid damages to the nipples, slide the nipple wrench as far as possible onto the nipple.
- Page 20 Loctite 241 (blue) as required grease for star rachet® DT Swiss special grease NOTE Watch for the thread lengths of the spokes! The ends of the spokes have two different thread lengths. The short thread has to be screwed into the hub nipple and has to be secured with Loctite 241.
- Page 21 1. Screw in the four radial spoke on the first side. 2. Screw in the four crossed spokes to the left of the radial ones. 3. Screw in the remaining spokes on the first side (on top of the crossed spokes). 4.
- Page 22 (on top of the crossed spokes). Prepare the rim 1. Grease the contact surface of the nipple and the rim insert with DT Swiss special grease. 2. Put the new nipple into the rim insert. 3. Check, if the nipple can be turned smoothly.
- Page 23 4. Put the nipple holder (see chap. 4.1, p.10, pos. 5) onto the nipple. 5. Insert the pre-assembled rim insert with the nipple into the rim. 6. Repeat the previous step on every spoke hole or at least on the maximum number of nipple holders you have.
- Page 24 2. Insert the spoke into the nipple. 3. Using the nipple holder, screw the nipple as far as possible onto the spoke. 4. Take off the nipple holder. 5. Repeat step 2 to step 4 with all spokes. NOTE Risk of damage to the spokes and the nipples! •...
- Page 25 Distressing the wheel ® Basically, TRICON wheels should be distressed minimum four times during the building process. First time at approximately 50% of the maximum spoke tension. After finishing truing, the wheel should be distressed once again. There should be no more changes in the set- tings (spoke tension, radial and axial run out).
- Page 26 5 Technical Data Spoke Lengths ROAD Side Spoke Type Lacing Length Amount pos. RR1450 left Aerolite radial 100 mm crossed front wheel right Aerolite radial crossed RR1450 left Aerolite radial 130 mm crossed rear wheel right New Aero radial crossed R1700 left New Aero...
- Page 27 Side Spoke Type Lacing Length Amount pos. XM1550 29“ left Aerolite radial 100 mm crossed front wheel right New Aero radial crossed XM1550 left Aerolite radial 100 mm crossed front wheel right Aerolite radial #2075* crossed XM1550 left Aerolite radial 135/142 mm crossed rear wheel...
- Page 28 Spoke Tension NOTE: All values in the following table are only valid in combination with DT Swiss Tensio 2. If you are using the DT Swiss Tensio old, the N-values must be converted into the according Tensio value. Therefore you have to use the table which is attached to the Tensio.
- Page 29 6 Spare Parts Spare Part Kits Spokes are available in three different kits: • pack of 20 of each length • small spare part kit wheel: set contains 2 spokes of each required length, 8 rim nipples, 2 rim inserts and 8 hub nipples (one set per wheel set FW + RW) •...
-
Page 30: Sticker Sets
Sticker Sets Wheel Article XM1550 front wheel 26“ sticker set rim and hub black rear wheel 26“ sticker set rim and hub black front wheel and rear wheel sticker set rim and hub white 26“ front wheel and rear wheel sticker set rim and hub black 29“... -
Page 31: Spare Parts Mtb Front Wheel
Spare Parts MTB front wheel Figure 6-1: MTB front wheel Pos. Article rim insert aluminium nipple spoke left radial spoke left crossed spoke right radial spoke right crossed tubeless valve replacement rim ® TRICON Technical Manual_EN V2013.03... -
Page 32: Spare Parts Mtb Rear Wheel
Spare Parts MTB rear wheel Figure 6-2: MTB rear wheel Pos. Article rim insert aluminium nipple spoke left radial spoke left crossed spoke right radial spoke right crossed tubeless valve replacement rim ® TRICON Technical Manual_EN V2013.03... -
Page 33: Spare Parts Road Front Wheel
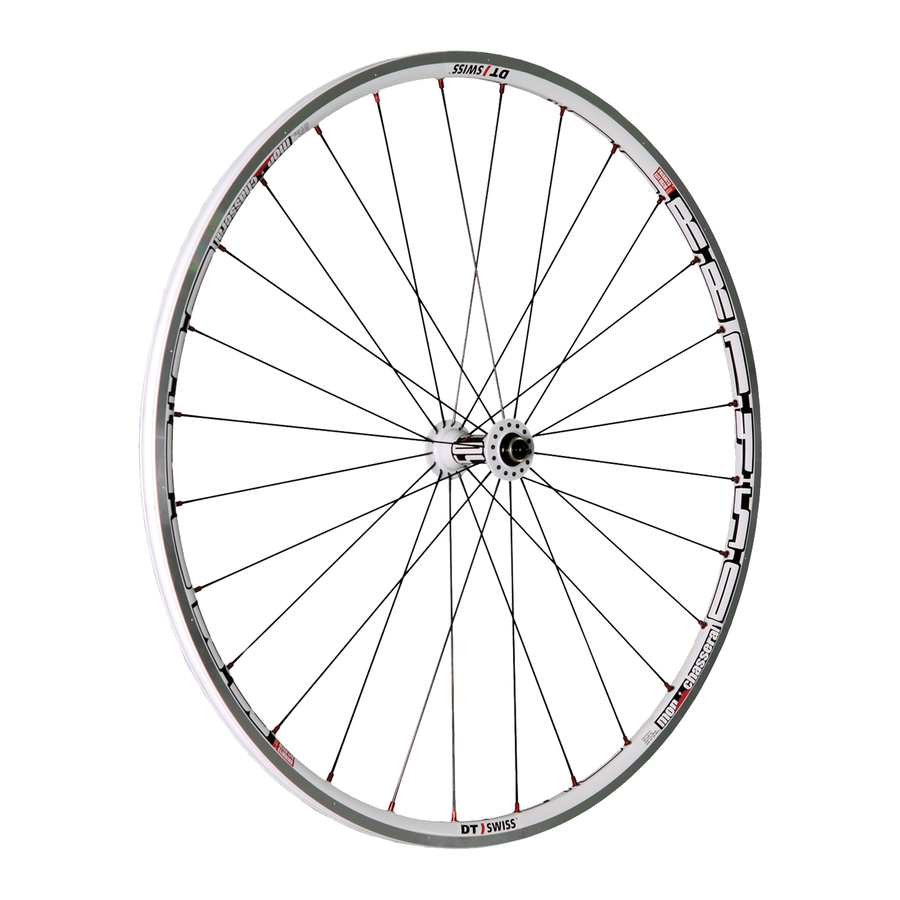
Spare Parts ROAD front wheel Figure 6-3: ROAD front wheel Pos. Article rim insert aluminium nipple spoke crossed spoke radial tubeless valve replacement rim ® TRICON Technical Manual_EN V2013.03... -
Page 34: Spare Parts Road Rear Wheel
Spare Parts ROAD rear wheel Figure 6-4: ROAD rear wheel Pos. Article rim insert aluminium nipple spoke left radial spoke left crossed spoke right radial spoke right crossed tubeless valve replacement rim ® TRICON Technical Manual_EN V2013.03... - Page 35 F - 06620 Le Bar sur Loup info.fr@dtswiss.com DT Swiss (Asia) Ltd. No. 26, 21st Road Industrial Park Taichung City Taiwan R.O.C. info.tw@dtswiss.com www.dtswiss.com Subject to technical alterations, errors and misprints excepted. All rights reserved. © by DT Swiss AG...
Need help?
Do you have a question about the TRICON RR1450 and is the answer not in the manual?
Questions and answers