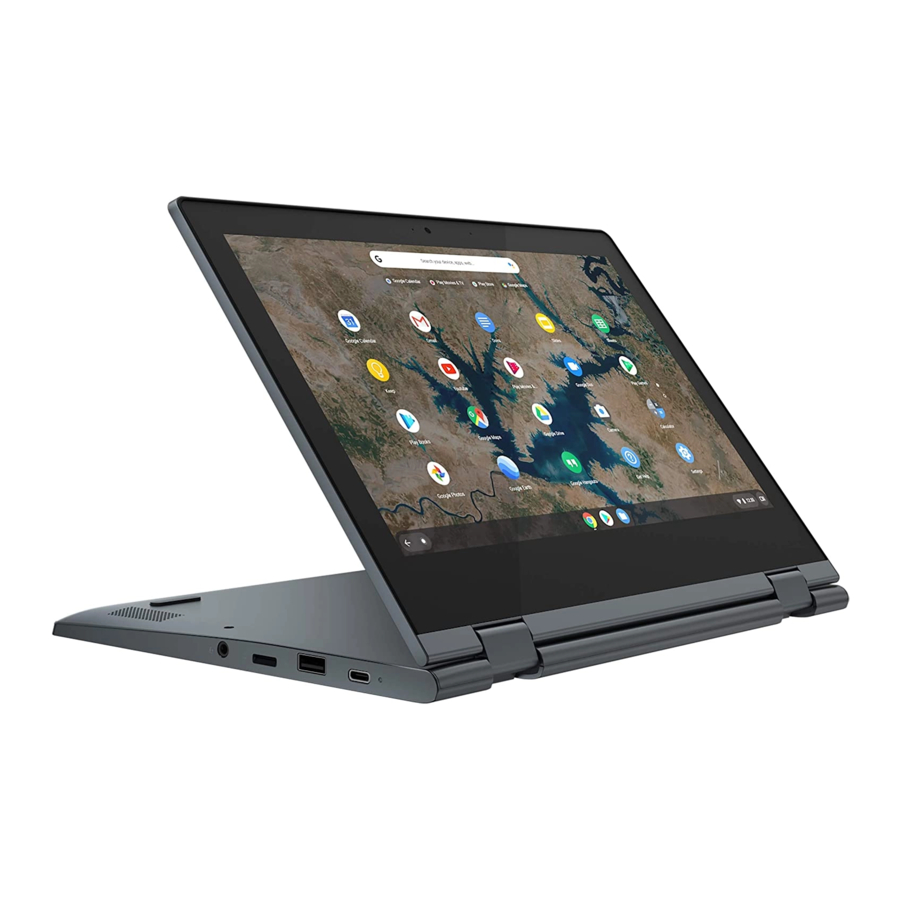
Lenovo IdeaPad Flex 3 Chromebook Series User Manual
Hide thumbs
Also See for IdeaPad Flex 3 Chromebook Series:
- Hardware maintenance manual (56 pages) ,
- User manual (50 pages) ,
- Setup manual (10 pages)

Related Manuals for Lenovo IdeaPad Flex 3 Chromebook Series


Summary of Contents for Lenovo IdeaPad Flex 3 Chromebook Series
- Page 1 User Guide IdeaPad Flex 3 Chromebook (11″, 05) and IdeaPad Flex 3 Chromebook (11″, 5)
- Page 2 • Setup Guide First edition (February 2020) © Copyright Lenovo 2020. LIMITED AND RESTRICTED RIGHTS NOTICE: If data or software is delivered pursuant to a General Services Administration “GSA” contract, use, reproduction, or disclosure is subject to restrictions set forth in Contract No. GS-...
-
Page 3: Table Of Contents
Use audio ....Call Lenovo ....Before you contact Lenovo .. -
Page 4: About This Documentation
About this documentation • This guide applies to Lenovo product model(s) listed below. Illustrations in this guide may look slightly different from your product model. Model name Machine type (MT) IdeaPad Flex 3 CB 11IGL05 82BB IdeaPad Flex 3 CB 11M735 82HG •... -
Page 5: Chapter 1. Meet Your Chromebook
If the light is on, the camera is in use. 2. Camera Capture still and moving images for taking photos, recording videos, and video chatting. 3. Microphone Capture or record sound and voice. Display text, graphics, and videos. 4. Screen © Copyright Lenovo 2020... -
Page 6: Base
Base Figure 3. Base view — IdeaPad Flex 3 CB 11IGL05 Figure 4. Base view — IdeaPad Flex 3 CB 11M735 1. Keyboard Enter characters and interact with programs. Note: The keyboard also includes special keys for changing settings and performing tasks quickly. 2. -
Page 7: Left
Left Figure 5. Left view — IdeaPad Flex 3 CB 11IGL05 1. Charging light Indicate whether the computer is connected to ac power. • Solid red: Connected to ac power; battery capacity 1%-5% • Solid orange: Connected to ac power; battery capacity 5%-97% •... - Page 8 Figure 6. Left view — IdeaPad Flex 3 CB 11M735 1. Power connector/USB-C connector • Connect to power with the included power cord and ac power adapter. • Connect external display, storage, or data devices. Note: An appropriate adapter may be needed for connecting external devices.
-
Page 9: Right
You are responsible for evaluating, selecting, and implementing the locking device and security feature. Lenovo makes no comments, judgments, or warranties about the function, quality, or performance of the locking device and security feature. Cable locks for your product are available from Lenovo at https://smartfind.lenovo.com/... - Page 10 You are responsible for evaluating, selecting, and implementing the locking device and security feature. Lenovo makes no comments, judgments, or warranties about the function, quality, or performance of the locking device and security feature. Cable locks for your product are available from Lenovo at https://smartfind.lenovo.com/...
-
Page 11: Bottom
Bottom Figure 9. Bottom view— IdeaPad Flex 3 CB 11IGL05 Figure 10. Bottom view— IdeaPad Flex 3 CB 11M735 1. Speakers Produce sound. Chapter 1 Meet your Chromebook... -
Page 12: Features And Specifications
Features and specifications IdeaPad Flex 3 CB 11IGL05 Dimensions • Width: 290 mm (11.41 inches) • Depth: 207.8 mm (8.18 inches) • Thickness: 17.8 mm (0.7 inches) ac power adapter • Input: 100 V ac–240 V ac, 50 Hz–60 Hz •... -
Page 13: Statement On Usb Transfer Rate
Battery pack • Capacity: 45 Wh • Number of cells: 3 Memory • Type: Low Power Double data rate 3 (LPDDR3) • Number of slots: 0 Storage device • Type: Embedded multi media card (eMMC) • Bus: eMMC Screen • Size: 294.64 mm (11.6 inches) •... - Page 14 – Storage: 5°C to 43°C (41°F to 109°F) • At altitudes above 2438 m (8000 ft) – Maximum temperature when operating under the unpressurized condition: 31.3°C (88°F) Note: When you charge the battery, its temperature must be no lower than 10°C (50°F). Relative humidity •...
-
Page 15: Chapter 2. Get Started With Your Chromebook
All plugs must be firmly and securely inserted into receptacles. 1. Connect the power cord to the ac power adapter. 2. Plug the power adapter into the power connector of the Chromebook. 3. Plug the power cord into an electrical outlet. © Copyright Lenovo 2020... -
Page 16: User Interface
User interface 1. Wallpaper Your wallpaper might look different. To change the wallpaper, right- click a blank area of your desktop and select Set Wallpaper. 2. Search box and App Launcher • Type the name of your device, app, or Web page in the search box. •... - Page 17 Attention: • Do not rotate the computer display with too much force, or apply too much force to the upper-right or upper-left corner of the computer display. Otherwise, the computer display or hinges might get damaged. • The keyboard and the pointing devices are automatically disabled in stand mode, tent mode, and tablet mode.
-
Page 18: Connect To Bluetooth Devices
Connect to Bluetooth devices Your Chromebook supports Bluetooth feature. You can connect your Chromebook to a Bluetooth keyboard, mouse, speakers, or other Bluetooth devices. Note: The Bluetooth devices must be within a short distance, usually 10 meters (33 feet), from the Chromebook. -
Page 19: Chapter 3. Navigate The Screen
Open a shortcut menu. Slide Scroll through items, such as lists, pages, and photos. Drag an item to the location you want Move an object. Move two fingers closer together Zoom out. Move two fingers farther apart Zoom in. © Copyright Lenovo 2020... -
Page 20: Use The Special Keys
Swipe up from the bottom Show or hide the app shelf. Tap with two fingers Open a shortcut menu. Tips • Turn off the computer before cleaning the multi-touch screen. • Use a dry, soft, and lint-free cloth or a piece of absorbent cotton to remove fingerprints or dust from the multi-touch screen. -
Page 21: Use The Touchpad
Take a screenshot ctrl + Switch the Caps Lock function alt + Lock your computer screen View all keyboard shortcuts ctrl + alt + ? To change the keyboard settings: 1. Click your account picture, and then click the settings icon. 2. - Page 22 To change the settings: 1. Click your account picture, and then click the settings icon. 2. Click Settings ➙ Device ➙ Touchpad. 3. Follow the on-screen instructions to change the settings as you desire. User Guide...
-
Page 23: Chapter 4. Use Multimedia
1. Use a USB-C to USB-C cable (not supplied) to connect your Chromebook to an external display. Note: If the external display does not support input through USB-C connector, you may need to purchase and use adapters. Lenovo provides various USB-C accessories at https://www.lenovo.com/ accessories , to help you expand your computer functionality. - Page 24 User Guide...
-
Page 25: Chapter 5. Account, Login, And Logout
You’re now your Chromebook’s owner. To verify this, refer to “Check a Chromebook’s owner” on page 23. Sign in with a Google Account other than the owner’s As the device owner, you may share your Chromebook with other people. They can use their Google Accounts to sign in and use your Chromebook. © Copyright Lenovo 2020... -
Page 26: Browse As A Guest
1. Start the Chromebook. 2. On the login screen, click Add person. 3. Type the Google Account user name and password to sign in. Note: An Internet connection is required when signing in for the first time. If you cannot sign in with your Google Account, your account may be restricted by the Chromebook owner. For details, refer to “Control who can use your Chromebook”... -
Page 27: Check A Chromebook's Owner
4. Under People, click Manage other people. 5. Check Restrict sign-in to the following users and add the Google Accounts that you want to give permission. Check a Chromebook’s owner Typically, the user of the first Google Account signed in is set as a Chromebook’s owner. However, if you’re not sure whether you’re the owner, you can follow the steps below to check a Chromebook’s owner. -
Page 28: Get Help From Google
Get help from Google After signing in to your Chromebook, click Get Help from the App Launcher. The Get Help app provides comprehensive instructions on using a Chromebook. In addition, Google provides an online community for Chromebook users. If you are interested, go to http:// chromebook.com/community User Guide... -
Page 29: Chapter 6. Manage Files And Folders
If you have failed saving a large-size file, you may need to check the amount of available storage and then decide if you need to delete unused files to free more storage. 1. Start the Files app from the App Launcher. © Copyright Lenovo 2020... -
Page 30: Expand The Local Storage
2. On the left pane, select a storage space. 3. Click the settings icon in the upper right corner. The amount of available storage is displayed. Expand the local storage You can insert a microSD card into the microSD card slot to expand the Chromebook’s local storage capacity. -
Page 31: Chapter 7. Language Settings
2. Click the name of your desired input method. Notes: As a shortcut, use key combinations to switch among input methods. • Alt + Shift to switch among available input methods. • Ctrl + Space to switch to your previous input method. © Copyright Lenovo 2020... - Page 32 User Guide...
-
Page 33: Chapter 8. Add And Manage Apps
You can download and install Android apps on your Chromebook using the Google Play™ Store. 1. Start Play Store from the App Launcher. 2. Select the app that you want to install and then select Install. © Copyright Lenovo 2020... -
Page 34: Pin Apps To Shelf
Note: Not all apps in the Google Play Store are free of charge. Some apps require purchase for downloading or full-function using. The installed Android apps are accessible from the App Launcher. Pin apps to shelf Apps pinned to shelf are accessible from the lower-left corner of the Chrome desktop. 1. -
Page 35: Chapter 9. Lenovo Help And Support
If you intend to install a CRU, Lenovo will ship the CRU to you. You might be required to return the defective part that is replaced by the CRU. When return is required: (1) return instructions, a prepaid shipping label, and a container will be included with the replacement CRU;... -
Page 36: Lenovo Customer Support Center
• Lenovo hardware repair - If the problem is determined to be caused by Lenovo hardware under warranty, trained service personnel are available to provide the applicable level of service. -
Page 37: Appendix A. Important Safety Information
• Avoid keeping your hands, your lap, or any other part of your body in contact with a hot section of the computer for any extended time. • Periodically take hands from the keyboard by lifting your hands from the palm rest. © Copyright Lenovo 2020... - Page 38 Protect yourself from the heat generated by the ac power adapter. When the ac power adapter is connected to an electrical outlet and your computer, it generates heat. Extended contact with your body, even through clothing, may cause a skin burn. •...
- Page 39 Customer Support Center for further guidance. For a list of Service and Support phone numbers, see the following Web site: https://pcsupport.lenovo.com/supportphonelist Frequently inspect your computer and its components for damage or wear or signs of danger. If you have any question about the condition of a component, do not use the product. Contact the Customer Support Center or the product manufacturer for instructions on how to inspect the product and have it repaired, if necessary.
- Page 40 Note: If you notice these conditions with a product (such as an extension cord) that is not manufactured for or by Lenovo, stop using that product until you can contact the product manufacturer for further instructions, or until you get a suitable replacement.
- Page 41 When replacing CRUs, be cautious of sharp edges or corners that might cause injury. If you suffer an injury, seek medical care immediately. Power cords and power adapters DANGER Use only the power cords and power adapters supplied by the product manufacturer. The power cords shall be safety approved.
- Page 42 Plugs and outlets DANGER If a receptacle (power outlet) that you intend to use with your computer equipment appears to be damaged or corroded, do not use the outlet until it is replaced by a qualified electrician. Do not bend or modify the plug. If the plug is damaged, contact the manufacturer to obtain a replacement.
- Page 43 Batteries supplied by Lenovo for use with your product have been tested for compatibility and should only be replaced with approved parts. A battery other than the one specified by Lenovo, or a disassembled or modified battery is not covered by the warranty.
- Page 44 The Lenovo-authorized repair facilities or technicians recycle Lenovo batteries according to local laws and regulations. When replacing the lithium coin-cell battery, use only the same type or equivalent type that is recommended by the manufacturer. The battery contains lithium and can explode if not properly used, handled, or disposed of.
- Page 45 Heat and product ventilation DANGER Computers, ac power adapters, and many accessories can generate heat when turned on and when batteries are charging. Notebook computers can generate a significant amount of heat due to their compact size. Always follow these basic precautions: •...
- Page 46 Electrical current safety information DANGER Electric current from power, telephone, and communication cables is hazardous. To avoid a shock hazard: • Do not use your computer during a lightning storm. • Do not connect or disconnect any cables or perform installation, maintenance, or reconfiguration of this product during an electrical storm.
- Page 47 2 can be dangerous due to excessive sound pressure levels. If your Lenovo computer came with headphones or earphones in the package, as a set, the combination of the headphones or earphones and the computer already complies with the specifications of EN 50332-1. If different headphones or earphones are used, ensure that they comply with EN 50332-1 (Clause 6.5...
- Page 48 Glass parts notice CAUTION: Some parts of your product may be made of glass. This glass could break if the product is dropped on a hard surface or receives a substantial impact. If glass breaks, do not touch or attempt to remove it. Stop using your product until the glass is replaced by trained service personnel.
- Page 49 Similarly, if a child notices damaged/broken parts, this should be reported to the teacher/parents/adult supervisors immediately. Damaged parts may be replaced through service provided by Lenovo. DANGER ELECTRICALLY OPERATED PRODUCT. Not recommended for children under 3 years of age (or other intended age range).
- Page 50 User Guide...
-
Page 51: Appendix B. Accessibility, Ergonomic, And Maintenance Information
Accessibility information Lenovo is committed to providing users who have hearing, vision, and mobility limitations with greater access to information and technology. This section provides information about the ways these users can get the most out of their computer experience. You also can get the most up-to-date accessibility information from the following Web site: https://www.lenovo.com/accessibility... - Page 52 Many product solutions are available to help you modify and expand your computer to best suit your needs. You can find some of these options at https://www.lenovo.com/accessories Explore your options for docking solutions and external products that provide the adjustability and features that you want.
- Page 53 onto the keyboard. To remove any crumbs or dust from beneath the keys, you can use a camera blower with a brush or use cool air from a hair dryer. Cleaning the computer screen Scratches, oil, dust, chemicals, and ultraviolet light can affect the performance of your computer screen. Use a dry, soft, lint-free cloth to wipe the screen gently.
- Page 54 User Guide...
-
Page 55: Appendix C. Compliance Information
Lenovo cannot accept responsibility for any failure to satisfy the protection requirements resulting from a non-recommended modification of the product, including the installation of option cards from other manufacturers. This product has been tested and found to comply with the limits for Class B equipment according to European Standards harmonized in the Directives in compliance. - Page 56 Lenovo encourages owners of information technology (IT) equipment to responsibly recycle their equipment when it is no longer needed. Lenovo offers a variety of programs and services to assist equipment owners in recycling their IT products. For information about recycling Lenovo products, go to: https://www.lenovo.com/recycling...
- Page 57 Collecting and recycling a disused Lenovo computer or monitor If you are a company employee and need to dispose of a Lenovo computer or monitor that is the property of the company, you must do so in accordance with the Law for Promotion of Effective Utilization of Resources.
- Page 58 If you use a Lenovo notebook computer at home and need to dispose of a battery, you must comply with local ordinances and regulations. You also can refer to the instructions at: https://www.lenovo.com/jp/ja/environment/recycle/battery/ Battery recycling information for the European Union Notice: This mark applies only to countries within the European Union (EU).
- Page 59 Battery recycling information for the United States and Canada RoHS compliance statements Lenovo is committed to protecting the environment. An important priority for Lenovo is the implementation of RoHS (Restriction of Hazardous Substances) requirements globally. Lenovo meets all the RoHS requirements currently in effect.
- Page 60 Table 2. 产品中有害物质的名称及含量 (continued) 六价铬(CR 多溴联苯 多溴二苯醚 汞(Hg) 镉(Cd) 部件名称 铅(Pb) (VI)) (PBB) (PBDE) 键盘 ○ ○ ○ ○ ○ 内存 ○ ○ ○ ○ ○ 电池 ○ ○ ○ ○ ○ 电源适配器 ○ ○ ○ ○ ○ 底壳、顶壳和扬声 ○ ○...
- Page 61 India RoHS compliant as per E-waste (Management) Rules. Electromagnetic emission notices Federal Communications Commission (FCC) Supplier’s Declaration of Conformity The following information refers to Lenovo product model(s) listed below. Model name Machine type (MT) IdeaPad Flex 3 CB 11IGL05 82BB...
- Page 62 • Connect the equipment into an outlet on a circuit different from that to which the receiver is connected. • Consult an authorized dealer or service representative for help. Lenovo is not responsible for any radio or television interference caused by using other than recommended cables and connectors or by unauthorized changes or modifications to this equipment. Unauthorized changes or modifications could void the user’s authority to operate the equipment.
- Page 63 Klasse B. Dieses Gerät ist berechtigt, in Übereinstimmung mit dem Deutschen EMVG das EG-Konformitätszeichen - CE - zu führen. Verantwortlich für die Konformitätserklärung nach Paragraf 5 des EMVG ist die Lenovo (Deutschland) GmbH, Meitnerstr. 9, D-70563 Stuttgart. Japan VCCI Class B compliance statement...
- Page 64 Energy aimed at saving money and protecting the environment through energy efficient products and practices. Lenovo is proud to offer products with the ENERGY STAR certified designation. Lenovo computers, if carry an ENERGY STAR mark, have been designed and tested to conform to the ENERGY STAR program requirements for computers as prescribed by the U.S.
- Page 65 ENERGY STAR, go to https://www.energystar.gov Lenovo encourages you to make efficient use of energy an integral part of your day-to-day operations. To help in this endeavor, Lenovo has preset the following power-management features to take effect when your computer has been inactive for a specified length of time.
- Page 66 User Guide...
-
Page 67: Appendix D. Notices And Trademarks
Lenovo representative for information on the products and services currently available in your area. Any reference to a Lenovo product, program, or service is not intended to state or imply that only that Lenovo product, program, or service may be used. Any functionally equivalent product, program, or service that does not infringe any Lenovo intellectual property right may be used instead. - Page 68 Actual results may vary. Users of this document should verify the applicable data for their specific environment. This document is copyrighted by Lenovo and is not covered by any open source license, including any Linux agreement(s) which may accompany software included with this product. Lenovo may update this document at any time without notice.