Table of Contents
Advertisement
Quick Links
Advertisement
Table of Contents

Related Manuals for Novation Circuit Tracks

Summary of Contents for Novation Circuit Tracks
- Page 2 Novation has taken all possible steps to ensure that the information given here is both correct and complete. In no event can Novation accept any liability or responsibility for any loss or damage to the owner of the equipment, any third party, or any equipment which may result from use of this manual or the equipment which it describes.
-
Page 3: Table Of Contents
What’s In The Box ...........................8 Getting Up and Running ........................9 If you’re on a Mac: ..................................9 If you’re on Windows: ..................................9 Novation Components Overview ....................9 Getting Started with Circuit Tracks ....................10 Having Trouble? ...........................10 Power Requirements ........................10 Hardware Overview........................12 Glossary ............................12 Top View ............................16... - Page 4 Play order ....................................56 Pattern Sync rate ..................................56 Mutate ............................57 The MIDI Tracks ........................58 Introduction ..........................58 Selecting Templates ........................58 Default Templates ..................................59 Setting Up Templates in Components .............................59 Connecting to external hardware via MIDI Out ................60 The Drums ..........................61 Playing Drums ..........................61 Expanded Drum View ................................62 Selecting Samples ........................63 Using the Macros for drum design ....................64...
- Page 5 Changing Project Colours .................................97 Packs ............................98 Loading a Pack ..........................99 Duplicating Packs .........................99 Using microSD Cards .........................100 Components .........................102 About Components & Navigating to Circuit Tracks ..............102 Appendix ..........................103 Firmware Updates ........................103 Setup View ..........................103 Brightness ....................................104 MIDI Channels ..................................104 MIDI I/O ....................................105...
-
Page 6: Introduction
With a built-in, rechargeable battery you can unplug and create music anywhere. Let your creativity thrive! Circuit Tracks is both a compositional tool and a live performance instrument. It’s an eight track instrument - two for the polyphonic synths, four for samples and two for interfacing with external MIDI devices like analogue synths. -
Page 7: Key Features
– save thousands of synth patches, samples and projects across 32 packs. • Built-in rechargeable battery with 4 hours of battery life • Novation Components integration – full synth engine editing, sample upload and project backup • Full size 5-pin MIDI In, Out and Thru •... -
Page 8: About This Manual
(See pages 16 and 19 ). We’ve used Bold text to name physical things – the top panel controls and rear panel connectors, and have made a point of using the same names used on Circuit Tracks itself. We’ve used to name the various Views that the grid can display. -
Page 9: Getting Up And Running
We’ve made getting up and running with Circuit Tracks as easy as possible, whether you’re a brand new beatmaker or a seasoned producer. To access the Easy Start Tool, first connect your Circuit Tracks to your computer with the USB-A to USB-C cable supplied. -
Page 10: Getting Started With Circuit Tracks
Powering from a computer Circuit Tracks can be powered from a computer or laptop via the USB connection. Use the supplied cable to connect the unit to a Type ‘A’ USB port on the computer or laptop. The internal battery will be charged while the unit is connected (provided that the computer or laptop itself is powered on). - Page 11 15%, a Low Battery symbol will be displayed: The battery will be charged while Circuit Tracks is connected to the AC mains via the AC adaptor, or to a computer’s USB 3.0 port: charging time is up to 4 hours, again depending on initial battery state.
-
Page 12: Hardware Overview
Hardware Overview Glossary Some of the terms used in this manual have a specific meaning as applied to Circuit Tracks. Here is a list: Term Button Definition Doubles the area of performance pads for the Synths, Shift + Note Expanded View and allows you create patterns on all drum tracks simultaneously, using the currently selected samples. - Page 13 In playback, the white pad which moves through the Playback Cursor pattern display, indicating which step is currently being played. Changes to red in Record Mode. Circuit Tracks’ operating mode with the sequencer Playback Mode running; the Play button will be lit bright green.
- Page 14 Project including Patterns, Sequences, automation data, etc. Up to 64 Projects can be saved as a Pack in flash memory. Circuit Tracks’ operating mode when synth notes can be added to the Pattern, or when adjustments using the Record Mode Macro controls can be saved.
- Page 15 Pattern Settings View Collective name for the button group comprising the Step buttons Note, Velocity, Gate and Probability buttons. Circuit Tracks’ operating mode when the sequencer is Stop Mode not running. Preset (with MIDI One of the eight templates which can be selected for...
-
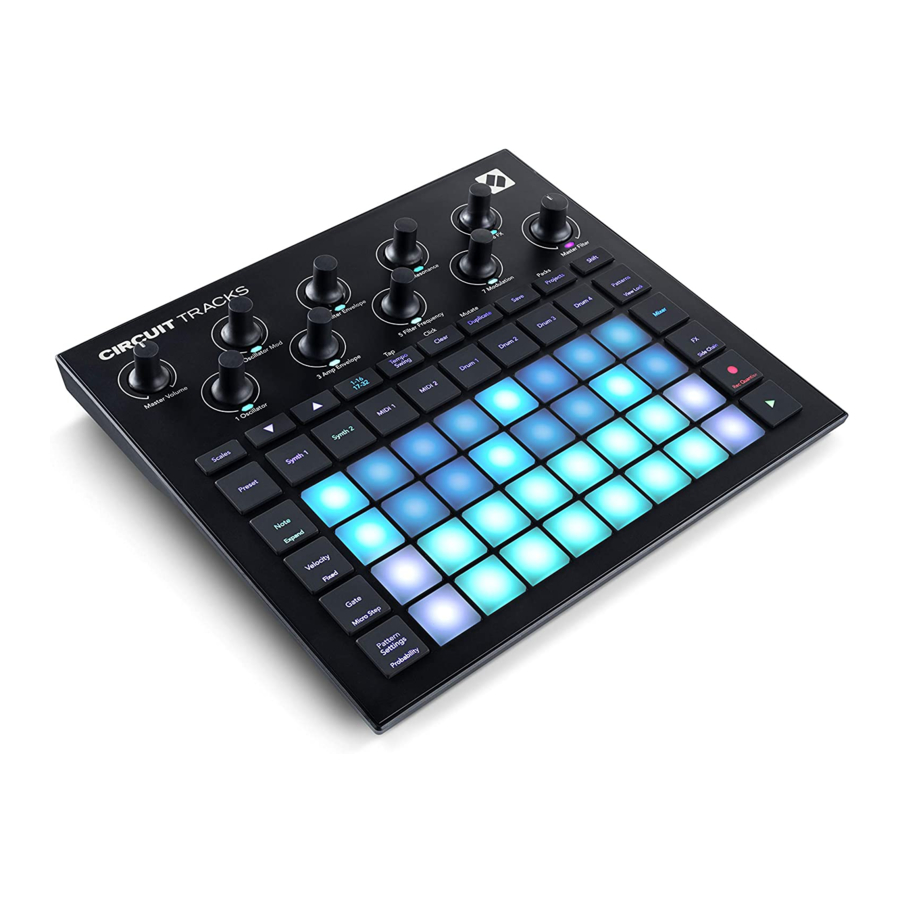
Page 16: Top View
Patches. The movement of Macro controls in performance may be recorded and replayed. Master Volume – controls the overall level of Circuit Tracks’ audio outputs. - Page 17 Most of the remaining buttons select the 32-pad grid to display a specific . Each View View provides information and control of a particular aspect of a particular track, pattern or sound selection, timing adjustments, etc. Note also that several buttons have an additional ‘Shift’ function, indicated on (or above) the button by a legend in a smaller font.
- Page 18 J and K - these two buttons have different actions (and colours) depending on the currently selected . In they let you shift the pitch of the synth pads or the View Note View MIDI tracks up by one to five octaves, or down by one to six octaves when entering notes: the pitch range of each track is adjustable independently.
-
Page 19: Rear View
Rear view Outputs - L/Mono and R – Circuit Tracks’ main audio outputs on two ¼” TS jack sockets. Max. output level is +5.3 dBu (+/-1.5 dBu). With no plug in the R socket, the L/Mono socket carries a mono mix of L and R channels. -
Page 20: Basics
Basics Powering the unit on Connect the supplied AC adaptor to the USB port using the cable supplied and plug the adaptor into the AC mains. This will ensure that the internal lithium battery becomes fully charged. Connect the main outputs to a monitoring system (powered speakers or a separate amplifier and passive monitors);... - Page 21 Step where sequencer is stopped pulses blue/white...
-
Page 22: Getting Started
Getting started We’ve pre-loaded 16 demo Projects into the memories to give you an idea of how Circuit Tracks works. Press the Play button ; you should hear the first demo Session. If it’s not already lit, press the Synth 1 button ;... -
Page 23: Loading And Saving
Loading and Saving Play for the first time after powering on, the Project which Circuit Tracks When you press plays will be the last one used when it was powered off. The factory demo described in the previous section was loaded in to Memory Slot 1. - Page 24 There’s nothing special about the slots containing factory demo Projects: you can overwrite these if you wish: you can always re-load them by using Novation Components. to save a Project you’ve been working on. If you press Save You don’t need to be in...
-
Page 25: Starting From Scratch
You won’t hear anything just yet. NOTE: On Circuit Tracks, Patterns are 16 steps long by default. This can be changed to 32 steps for any or all of the eight tracks. This topic is explained in “Step Page” at page 76. - Page 26 PLAY Pads 1-16: Pattern Steps Pads 17-32: Drum samples New drum sample You can select a different drum sample while the Pattern is playing by simply pressing a different pad on the lower two rows: you can use any of the four sample pages. Now add a snare drum to other steps in the sequence in the same way by selecting Drum 2 in and choosing a different drum sample;...
- Page 27 With all scales (see “Scales” on page 31) except Chromatic, the grid display looks like this: PLAY Pads 1-16: Pattern Steps Pads 17-32: Synth keyboard The “keyboard” is two octaves, with the “paler” pads representing the root notes. While the Record button is lit, anything you play in either of the Synth Views ( ) will be Synth 1...
-
Page 28: The Synths
The Synths Each synth track employs a powerful and versatile synth engine. Circuit Tracks gives you a simple user interface that allows you to conjure great sounds very rapidly. The synth section comes loaded with 128 great factory patches to give you a wide range of sounds to start from. -
Page 29: Expanded Note View
Pads 25 to 32, then 18 to 24. When Circuit Tracks is powered up and an empty Project selected, it is possible to alter the keyboard ‘layout’ so that the bottom note in an octave is something other than C – see page 33. - Page 30 Synth 1 selected Synth 1 MIDI 1 Drum 1 Drum 2 Drum 3 Drum 4 Synth 2 MIDI 2 Synth 1 keyboard Synth 2 selected Synth 1 Synth 2 MIDI 1 Drum 1 Drum 2 Drum 3 Drum 4 MIDI 2 Synth 2 keyboard This View is very useful when recording synth notes in real time.
-
Page 31: Scales
Scales Circuit Tracks is extremely flexible in how it lets you configure the note pads in the playing grid to suit different musical ideas in both key and scale. There are two aspects to specifying how the note pads are laid out: the scale and the root note. -
Page 32: Scale Selection
Scale selection , the lower two rows allow selection of one of the 16 available musical scales. These Scales View are given in the table below, which also lists the notes that each scale includes when the lowest note in the scale is C: Scale Natural Minor ... -
Page 33: Root Note
same layout as the keynote selection pads in . In with Chromatic Scales View Expanded Note View scale selected, a two-octave keyboard is presented: Upper octave (C to C Lower octave (C to C Chromatic Scale in Extended Note View (Synth 1) Root note The default root note for all scales is C. -
Page 34: Selecting Patches
Pattern when the pad is pressed. Changing the Patch does not alter the Patch originally saved with the Pattern, unless the Project is re-saved. You can use Components to load Patches onto Circuit Tracks; in this way, you have control over the starting Patch for new Projects. -
Page 35: External Patch Select
Patch Preview is disabled when Circuit Tracks is in Record Mode and playback is active. External Patch Select Synth Patches may also be recalled from an external MIDI controller by sending Circuit Tracks MIDI Program Change (PGM) messages: the default MIDI channels are Channel 1 (Synth 1) and Channel 2 (Synth 2), though MIDI channels may be reassigned in . -
Page 36: Recording A Synth Pattern In Real Time
Project. See page 37 for more details. The Macros can also be varied by an external MIDI controller of any kind. Circuit Tracks’ MIDI I/O configuration will need to be set to receive MIDI Control Change (CC) data – this is the default setting, but see page 104 for full information. -
Page 37: Recording Knob Movements
Record button has the dual momentary/latching action available on several other buttons. If you hold the button down for more than half a second, Circuit Tracks will drop out of Record Mode as soon as you release it. This means that you can punch-in and punch-out of record very easily with a single action. -
Page 38: Non-Quantised Record
Non-quantised record When you record synth notes in real time as described above, Circuit Tracks will “quantise” your timing and assign the notes you play to the nearest step. Six “finer” intervals – or “micro steps” – in between adjacent pattern steps can be made available in live record mode by disabling quantised recording. -
Page 39: Recording From An External Controller
Recording from an external controller You can also create a synth pattern in Circuit Tracks by sending it MIDI note data from an external controller. This gives you the ability to play Circuit Tracks’ synth patches from a standard music keyboard. - Page 40 These two steps have synth notes associated with them One step pad blinks blue/white to show where pattern is stopped Hold pad down to see which note(s) play at this step (HOLD) Keyboard pad(s) illuminate red to indicate note at the selected step If a bright blue step pad (i.e., one corresponding to a synth note) is pressed and held, it illuminates red, the note(s) at that step will sound, and the keyboard note(s) will also illuminate red (it will be two...
-
Page 41: Deleting Notes
Deleting notes To delete a note from a step, press the step pad (lights red) and then press the unwanted keyboard pad (also lights red). The keyboard pad will resume the native colour of the other (unplayed) notes. Inserting notes You can add a synth note to a step by holding down the step pad and pressing the desired note. -
Page 42: Velocity, Gate And Probability
(i.e., in Stop Mode). You can subsequently alter the Velocity parameter of each step. Circuit Tracks lets you assign one of 16 Velocity values to a step after you’ve created a pattern. This is done in... - Page 43 One step pad pulses These three steps have blue/white; this is the step synth notes associated whose Velocity value is with them displayed Pattern step display Velocity value display This indicates a Velocity value of 11 , the two upper rows of the grid represent the pattern steps. In the example shown Velocity View above, Steps 4, 14 and 16 are brightly lit, indicating that these steps have notes associated with them.
- Page 44 “mechanical” feel to them regardless of how you hard you actually strike the pads. Circuit Tracks has a Fixed Velocity function, which sets Velocity at a value of 96. You can toggle Fixed Velocity mode on and off by pressing Velocity while holding down Shift. Fixed Velocity is confirmed by the Velocity button illuminating green while Shift is pressed;...
- Page 45 Per-note velocity It is also possible for synth notes on the same step to have different Velocity values, provided Circuit Tracks is not in Fixed Velocity Mode. When notes are inserted manually, the velocity value that each note is struck with will be saved to the step. For example, if you hit a synth note with a high velocity, the velocity value for the note will be saved;...
-
Page 46: Gate
Gate value will be higher. A Gate value of 16 means that notes at that step will sound continuously for an entire 16-step pattern. Circuit Tracks lets you change the Gate value of a step after you’ve created a pattern. This is done in , which is selected by pressing Gate... - Page 47 You can change the Gate value by pressing the pad in the Gate value display that corresponds to the Gate value; that is, the number of pattern steps that the note at the step should sound for. If you wanted the note at Step 1 in the example above to sound for four steps instead of two, you would press pad 4;...
-
Page 48: Probability
Probability You can introduce a degree of random variation into a pattern with Circuit Tracks’ Probability function. Probability is essentially a further step parameter, which decides whether or not the notes on the step will be played during each pass of the Pattern. -
Page 49: Micro Step Edit
To assign a Probability to a step in Stop Mode, press and release the pad for the step you wish to edit and press the pad in Row 3 corresponding to the Probability value. To assign Probability to a step while in Play Mode, you must keep the step pad held while you set a probability. - Page 50 Selected step pulses blue/white PLAY Pattern step display Synth micro-nudge steps Play note at selected step. Pads 26+ will also illuminate if multiple notes are present at the step. The fourth grid row will show one or more pads in the track colour. These let you choose which note at the step is to have a delay altered: if only one note is assigned, only one pad will be lit.
- Page 51 Select required step (shows red while pressed, then blinks white) (PRESS) PLAY Pattern step display Synth micro steps Selected note at One of three notes at the step is now selected step. Pads 26+ delayed by 3 ticks also illuminate if multiple notes are present at the step.
-
Page 52: Tied / Drone Notes
PLAY Pattern step display Synth micro-nudge steps There are four notes at the selected step; some of them are at micro step 0 (no delay), others at micro step 3 (3 ticks delay) When auditioning a step that contains notes with different micro steps, playback of the notes will be staggered according to their micro step delays. - Page 53 You can now turn the tie-forward setting on/off for this step by pressing pad 24 as shown above. To make the tied note work you need to set the gate length so that the note ends just before the next note is played or overlaps with it. In this example, the note to tie is on the first step so setting the gate length to 16 steps means that it will end just before the next pattern is triggered as follows: Selected step...
-
Page 54: Pattern Settings
Pattern Settings Although default Pattern lengths are either 16 or 32 steps (see also “Step Page and 16/32-step Patterns” at page 76), it is possible for the Pattern in any track to be any other number of steps in length, up to the maximum of 32 steps. Furthermore, the start and end points of a Pattern may be independently defined, so that sub-sections of a Pattern, of any length, may be played against other tracks with different Pattern lengths, creating some very interesting effects. - Page 55 Repositioned end Dim red pad indicates that point – Pattern length note/hit data still exists for is now 12 steps this step Pattern step display point Sync rate display Play order selection Altering the start point is exactly the same process, except that Shift needs to be held down while selecting the new start point: Dim red pad indicates that Repositioned start point –...
-
Page 56: Play Order
Play order Pads 29 to 32 in let you choose the play order the currently selected Pattern will Pattern Settings View use. The pad for the selected play order illuminates brightly: the default play order is forwards (i.e., normal), indicated by Pad 29. Play order selection Forwards Reverse... -
Page 57: Mutate
The selected sync rate is indicated by the brightly-lit pad: the default rate is “x1” (pad 5 in row 3), which means the track will play at the set BPM. Selection of a higher-numbered pad increases the rate at which the play cursor progresses through the Pattern relative to the previous one. Similarly the lower-numbered pads will decrease the play rate. -
Page 58: The Midi Tracks
Inputs on the rear panel. The recommended workflow is to send MIDI data from Circuit Tracks to your external synth or drum machine, while routing the audio outputs of that device back into Circuit Tracks’ audio inputs: this gives you full control of the external device’s contribution to the overall mix from the MIDI tracks. -
Page 59: Default Templates
CC71 Resonance CC74 Filter frequency You can download various pre-made templates from Novation Components; these cover a range of Novation products as well as those from other manufacturers. Setting Up Templates in Components MIDI Template Control Range Using Components Editor, you can define the start and end values of each control in the template. -
Page 60: Connecting To External Hardware Via Midi Out
Connecting to external hardware via MIDI Out To sequence and control external equipment from Circuit Tracks, connect a 5-pin MIDI cable from Circuit Tracks’ MIDI Out port (or MIDI Thru if set to duplicate the MIDI Out port, see Setup View page 103). -
Page 61: The Drums
The Drums Circuit Tracks has four separate drum tracks, Drum 1 to Drum 4. The grid displays for the drum tracks are similar to those for the synth tracks in that the upper two rows show the same Pattern display. -
Page 62: Expanded Drum View
You can audition the samples by pressing the sample pads. To change the active sample, give a different sample pad a quick tap: a longer press will play the sample but leave the previous sample assigned as the active one. To assign the active sample to Pattern steps in Stop Mode or Play Mode, tap the Pattern step pads that correspond to where you want drum hits to be triggered. -
Page 63: Selecting Samples
Expanded Note View Selecting Samples Each of the four drum tracks in Circuit Tracks can use any one of 64 pre-loaded samples. You can either audition and select the samples in , four pages of 16 at a time, or use... -
Page 64: Using The Macros For Drum Design
pad for the required sample (it turns red) and then press the step pads in the Pattern display where you want to place that sample in the pattern – they also turn red. When you run the pattern, the new sample will play at the steps it was assigned to instead of the one that was assigned previously. -
Page 65: Recording A Drum Pattern
Manual hit entry and step editing Although you can’t hear the drum hits by pressing lit step pads in when the Pattern isn’t Note View running (i.e., Stop Mode), Circuit Tracks lets you add or delete individual drum hits to/from a pattern, effectively “off-line”. - Page 66 , one sample pad will always be lit, though it may not be on the currently visible page of Note View four. This is the current default sample: if you tap (short-press) a step pad, the default sample will be assigned to that step, and the step pad will show bright blue.
-
Page 67: Micro Step Edit
Micro step edit When quantised recording is not enabled, the timing of drum hits recorded in real time is assigned to one of six “micro steps” in between adjacent Pattern steps. Any drum hits added “off-line” (i.e., in Stop Mode, see preceding section) will always be assigned to the step’s first micro step, which is on the exact beat of the step. - Page 68 Press a lit step pad to display the micro step value at the step PLAY (PRESS) Pattern step display Drum micro steps When only micro step 1 is bright, the drum hit at the selected step will be exactly on the beat PLAY Pattern step display (PRESS)
-
Page 69: Velocity
Using micro steps can add a whole new range of rhythmic possibilities to any pattern, and can create subtle rhythmic effects, or dramatically wonky grooves. As with many other aspects of Circuit Tracks, we urge you to experiment! - Page 70 have Velocity values determined by how hard the sample pads are struck. This applies both to normal Note View Expanded Note View To select Fixed Velocity, hold Shift and press Velocity: the Velocity button changes colour to green. Now all drum hits entered using the sample pads will always have a fixed velocity of 96 (12 pads lit in –...
-
Page 71: Probability
This is great for adding a series of “ghost” hits at low volume. Probability Circuit Tracks’ Probability function can be applied to individual steps on any of the Drum tracks in exactly the same manner as it is to individual steps on either Synth track. Note that as regards the drum tracks, probability is applied per step, not per micro step, so if there are multiple hits on different micro step, either all they will all trigger, or none of them will. -
Page 72: Recording Knob Movements
Recording Knob Movements As with synth sounds, you can tweak the drum sounds in real time using the Macro controls . Circuit Tracks features automation, which means you can add the effect of these tweaks to the Record recorded pattern by entering Record Mode (by pressing ) while moving the knobs. -
Page 73: Clear And Duplicate
Clear and Duplicate The Clear and Duplicate buttons perform the same functions with drum tracks as they do with synth notes (see page 41), although as altering a drum pattern is such a simple process to perform in , you probably won’t ever use them to simply add or remove drum hits. Note View Note that clearing a step will delete all parameters (Velocity, Micro steps and Probability) that were assigned to the step. -
Page 74: Patterns
Patter ns Each Project in Circuit Tracks has memory space for eight separate Patterns per track, so you can create eight Patterns for each synth, eight Patterns for each drum and eight Patterns for each of two external MIDI instruments within a project. -
Page 75: Clearing Patterns
Pattern step, thereby ensuring that the overall timing maintains continuity. For example, if the current Pattern had reached Step 11 when you press a second Pattern’s pad while holding down Shift, Circuit Tracks will remember where the cursor is, and the second Pattern will start playing from Step 12. -
Page 76: Duplicating Patterns
Synth or MIDI track to a Drum track, or vice-versa. Step Page and 16/32-step Patterns The default length of a Pattern in Circuit Tracks is 16 steps, but you can double the length to 32 (legended 1-16/17-32). A Pattern length of 16 steps or fewer is steps with the Step Page button indicated by the Step Page button showing dim blue. -
Page 77: Chaining Patterns
You can chain Patterns 1, 2, 3 and 4 together, or 5, 6 and 7 together, or 4 and 5 together, but you can’t chain 1,2 and 6 together. (However, Circuit Tracks’ Scenes feature allows you to overcome this restriction: see page 82 for details of how to use Scenes.) - Page 78 The following example will illustrate chaining: Synth 1 Synth 2 MIDI 1 MIDI 2 Drum 1 Drum 2 Drum 3 Drum 4 (Pulsing (Pulsing (Pulsing (Pulsing bright/dim) bright/dim) bright/dim) bright/dim) (Pulsing bright/dim) (Pulsing bright/dim) Patterns View – Page 1 Synth 1 Synth 2 MIDI 1 MIDI 2...
- Page 79 • Synth 1 - Patterns 1 to 4 • Synth 2 - Pattern 1 only • MIDI 1 – Patterns 1 and 2 • MIDI 2 – Patterns 6 and 7 • Drum 1 - Patterns 2 and 3 • Drum 2 –...
-
Page 80: Pattern Octave
Circuit Tracks allows Pattern chains of up to 256 (8 x 32) steps, where any of the eight tracks can change their pattern every 16 steps (or fewer if start/end points are also altered from the default). -
Page 81: View Lock
View Lock By default, the Pattern Step display on the upper two rows changes with the selected Pattern (and current Page), so that the play cursor is always visible. If you want to edit one pattern while continuing to play another Pattern or complete Pattern Chain, you can make use of View Lock. One use of View Lock is to “freeze”... -
Page 82: Scenes
Scene pads The two lower rows of pads in represent the 16 Scenes that are available in Circuit Tracks. Mixer View In a new Project, all the pads will trigger Pattern 1 of all eight tracks as no Pattern Chains have been defined or assigned yet. - Page 83 Mixer View with Shift pressed: Synth 1 Synth 2 MIDI 1 MIDI 2 Drum 1 Drum 2 Drum 3 Drum 4 Scene pads Pad where Scene is being stored lights brightly while Shift is held All the selected pattern chains are now stored as that Scene. On releasing Shift, the pad with the stored Scene now shows bright white: Mixer View when Shift is released: Synth 1...
-
Page 84: Chaining Scenes To Create An Arrangement
When you select , you will immediately be able to see where Scenes are already stored, as Mixer View their pads will be lit bright white, or bright gold when you press Shift. Assigning Pattern Chains to a Scene does not affect current playback and will not select the Scene nor change your Scene Chain (see below) if you are already in Play Mode: the selected Scene will start when the current Pattern or Pattern Chain is completed –... -
Page 85: Queuing Scenes
Synth 1 Synth 2 MIDI 1 MIDI 2 Drum 1 Drum 2 Drum 3 Drum 4 (Pulsing bright/dim) Scene pads A Scene Chain is defined here by pressing pads 4 and 6. Scenes 4, 5 and 6 will now play in sequence;... -
Page 86: Tempo And Swing
Tempo Circuit Tracks will operate at any tempo in the range 40 to 240 BPM; the default tempo for a new Project is 120 BPM. The tempo can be set by the internal tempo clock, or by an external MIDI clock source. -
Page 87: Tap Tempo
Tap Tempo If you want to match Circuit Tracks’ tempo to an existing piece of music and you don’t know its BPM, you can use Tap Tempo. Hold down Shift and tap the Tempo/Swing button in time with the track you’re listening to. -
Page 88: Click Track
Analogue Sync Out It is very easy to synchronise external equipment – e.g., analogue synths – to Circuit Tracks with the rear panel Sync Out connector . This provides a sync pulse at a rate proportional to the tempo –... -
Page 89: Mixer
Mixer Circuit Tracks includes an eight-channel mixer to let you adjust the volume of each track relative to the others. By default, all the tracks play at a volume level of 100 (arbitrary units, range 0-127), leaving you with the Master Volume control to adjust the output level as required. - Page 90 Circuit Tracks’ mix. Track level adjustment with the Macros may be automated. If Circuit Tracks is in Record Mode, changes to the individual track levels will be recorded to the Pattern. To delete Volume Level automation, hold Clear and turn the Macro control.
-
Page 91: Fx Section
FX Section Circuit Tracks includes a digital effects processor (FX) which lets you add delay and/or reverb effects to any or all of the tracks making up your Project. There is also a master compressor which is applied to your mix by default. -
Page 92: Reverb
Reverb To add reverb to one or more of your tracks, select a reverb preset. The pad corresponding to the active preset illuminates brightly. The Macros are now the reverb send level controls for the eight tracks: this is exactly the same arrangement as used in . -
Page 93: Master Compressor
Details of the 16 delay presets are given the table below: PRESET DELAY TYPE MUSICAL DESCRIPTION Slapback Fast Very rapid repeats Slapback Slow Rapid repeats 32nd Triplets 48 cycles per bar 32nd 32 cycles per bar 16th Triplets 24 cycles per bar 16th 16 cycles per bar 16th Ping Pong... -
Page 94: Side Chains
Side Chains Each of the synth tracks and external audio inputs (represented by the MIDI tracks) can be Side Chained. Side Chains work in the same manner as in common dynamics processors such as compressors, and can be used to alter the “envelope” of synth notes in time with any of the drum tracks. Side Chain allows the hits of the selected drum track to duck the audio level of the synths. -
Page 95: The Filter Knob
The Filter Knob The entire audio output of Circuit Tracks – the sum of the sounds from all six internal tracks plus the two external audio inputs – is fed through a traditional DJ-style filter section. The control for this is the large Master Filter knob . -
Page 96: Projects
Projects. Switching Projects There are some rules governing how Circuit Tracks responds when you change from one Project to another. If you’re in Stop Mode (i.e., with the sequencer not running) and change Project in... -
Page 97: Saving Projects To New Slots
Saving Projects to new slots Use Save to store the tracks you’ve been working on to a Project memory slot. Save needs to be pressed twice to complete the store process: the first press will flash the Save button; a second press will save your work to the last Project memory that was in use. -
Page 98: Packs
Packs A Pack is defined as everything currently saved on your Circuit Tracks: you can export the current Pack to a removable microSD card. The card slot is on the rear panel A Pack contains the totality of Circuit Tracks’ current operation, including the contents of all 64 Project memories, all 128 synth Patches and all 64 drum Samples. -
Page 99: Loading A Pack
Loading a Pack First select a Pack by pressing any lit pad other than that for the currently loaded Pack. It will start pulsing between dim and bright (in its assigned colour) to confirm that it is “primed” and can now be loaded. -
Page 100: Using Microsd Cards
(The “no SD” icon is also displayed in other situations, see `Removing An SD Card` below for more details.) Circuit Tracks is fully operational without a Micro SD card, but the user will only have access to the internal Pack. If a microSD card is present, Packs View will display the available Packs and allow the user to load a new Pack as described in `Loading a Pack` above. - Page 101 If a microSD card is removed while the internal Pack is loaded, Circuit Tracks will behave as described above for operating from power-up without a card present. Doing so does not hinder the user’s ability to load synth patches and samples, or to save and load Projects.
-
Page 102: Components
Components About Components & Navigating to Circuit Tracks Novation Components is the online companion for Circuit Tracks. With Components, you can: • Download new content • Create and edit synth patches • Load your own samples • Edit MIDI track templates •... -
Page 103: Appendix
Appendix Firmware Updates In order to access all features, you may need to update Circuit Tracks to the latest firmware version. Components will let you know whether the connected unit is up to date and, if it’s not, Components can update the unit’s firmware to the latest version. -
Page 104: Brightness
Pad 24 dims them by approximately 50%. This can be of benefit if you are running Circuit Tracks on its internal battery. You may also wish to run with reduced brightness if performing in conditions of low ambient lighting. -
Page 105: Midi I/O
Setup View for four categories of MIDI data independently: Note, CC (Control Change), Program Change (PGM) and MIDI Clock. This ensures you have a high degree of flexibility in how Circuit Tracks integrates with the rest of your system. MIDI Rx (receive) and Tx (transmit) can be enabled independently for each of the data categories. -
Page 106: Clock Settings
AUTO mode and the BPM will be set by an externally applied MIDI clock at either the MIDI In or the USB ports if a valid one is applied; if this is not the case, Circuit Tracks will automatically switch to its internal clock. -
Page 107: Advanced Setup View
MIDI Out. When it is lit dim red, a hardware thru switch is activated and the port acts as a regular MIDI Thru. Master Compressor Circuit Tracks includes a master compressor, which is applied to all audio outputs from the device. It can be enabled or disabled by pressing FX while in in . -
Page 108: Save Lock
Project loading problems Circuit Tracks loads the last Project in use when it is powered-up. It is possible that if the power was interrupted while a Project was being saved it may have become corrupted in some way. This might mean that Circuit Tracks ends up in some anomalous state at power-on. -
Page 109: Bootloader Mode
Note buttons 3. Power Circuit Tracks on again Circuit Tracks will now be in Bootloader Mode, and the grid display will display a selection of green lit pads (which may differ from that shown below): Synth 1 Synth 2...
Need help?
Do you have a question about the Circuit Tracks and is the answer not in the manual?
Questions and answers