Table of Contents
Advertisement
Quick Links
Advertisement
Table of Contents

Related Manuals for Whirlpool FSCR12441


Summary of Contents for Whirlpool FSCR12441
- Page 1 Health & Safety, Use & Care and Installation guide www.whirlpool.eu/register...
- Page 2 ENGLISH . . . . . . . . . . . . . . . . . . . . . . . . . . . . . . . . . . . . . . . 3...
-
Page 3: Table Of Contents
ENGLISH HEALTH & SAFETY, USE & CARE and INSTALLATION GUIDES THANK YOU FOR BUYING A WHIRLPOOL PRODUCT. In order to receive a more complete assistance, please register your appliance on www.whirlpool.eu/register Index Health and Safety Guide SAFETY INSTRUCTIONS . . . . . . . . . . . . . . . . . . . . . . . . . . . . . . . . . . . . . . . . . . . . . . . . . . . . . . . . . . . . . . . . . . . . . . . . . . . . . . 5 SAFEGUARDING THE ENVIRONMENT . - Page 4 SAVING TIPS . . . . . . . . . . . . . . . . . . . . . . . . . . . . . . . . . . . . . . . . . . . . . . . . . . . . . . . . . . . . . . . . . . . . . . . . . . . . . . . . . . . . . . . . . 34 SENSE LIVE FEATURE / SETUP PROCEDURE .
-
Page 5: Health And Safety Guide
Health and Safety Guide SAFETY INSTRUCTIONS IMPORTANT TO BE READ hazards involved . Children Children should not perform AND OBSERVED must not play with the installation operations . Before using the appliance appliance . Cleaning and Keep children away during carefully read these safety user maintenance must not installation . - Page 6 on a sheet of plywood at least be replaced by a qualified Wear protective gloves for 60 x 60 cm wide/ deep and technician in compliance with cleaning and maintenance . at least 3 cm thick which is the manufacturer instruction The appliance must be secured to the floor .
-
Page 7: Safeguarding The Environment
. DECLARATION OF CONFORMITY This appliance has been designed, Whirlpool Europe S .r .l . - Socio equipment and the mutual constructed and distributed in Unico, hereby declares that this recognition of their conformity (the... - Page 8 ARISING IN ANY WAY OUT OF THE USE OF for the software by name to opensource@ All rights reserved . THIS SOFTWARE, EVEN IF ADVISED OF THE whirlpool .com, along with the address for Redistribution and use in source and binary POSSIBILITY OF SUCH DAMAGE . delivery .
-
Page 9: Use And Care Guide
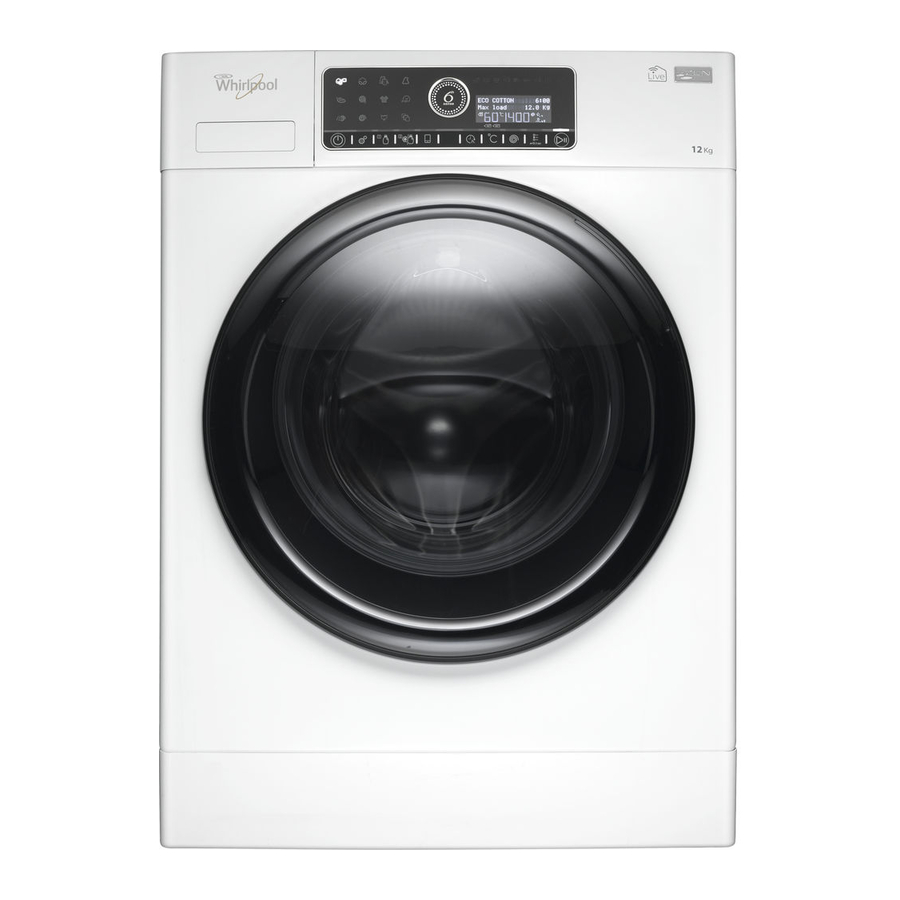
Use and Care guide PRODUCT DESCRIPTION APPLIANCE 1. Worktop 2. Detergent dispenser 3. Control panel 4. Door handle 5. Door 6. Water filter / Emergency drain hose (if available) - behind plinth - 7. Plinth (removable) 8. Adjustable feet (4) -
Page 10: Detergent Dispenser
Detergents containing whitener and/or optical Light/pastel- shaded colours (cold-60°C) brighteners Colour detergents without whitener / optical Intensive colours (cold-60°C) brighteners Black/dark colours (cold-60°C) Special detergents for black/dark laundry * Find water softener appropriate for your washing machine under www .whirlpool .eu . -
Page 11: Control Panel
CONTROL PANEL 1. On/Off button (Reset/Drain if pressed and held down) 2. Settings button 3. Auto dosing / Tank 1 4. Auto dosing / Tank 2 5. Remote control button 6. Sensing indicator 7. Finish in button 8. Temperature button 9. -
Page 12: Door
DOOR To open the door, pull the handle To close the door, hold the handle and push so that you can hear it click shut . DRUM LIGHT (IF AVAILABLE) • During programme selection: the light goes on • After programme end, when you open the door, for laundry loading . -
Page 13: How To Use The Appliance
HOW TO USE THE APPLIANCE FIRST TIME USE AUTO DOSING FUNCTION If you plug in the washing machine, it will switch on automatically . You will be asked to set the desired The detergent dispenser of the washing machine is language for the display . -
Page 14: Daily Use
DAILY USE SORTING YOUR LAUNDRY REMOVE ALL OBJECTS FROM SORT ACCORDING TO TYPE O TYPE OF POCKETS FABRIC / CARE LABEL SYMBOL • Coins, pins etc . can damage your Cottons, mixed fibres, easy care / synthetics, wool, laundry as well as parts of the handwash items . - Page 15 HOW TO USE THE WASHING MACHINE Change spin speed, if needed LOAD LAUNDRY Press the Spin button; the display indicates • Open the door and load the laundry . that the spin speed can be set . Load the articles one at a time loosely •...
- Page 16 ADD DETERGENT Refer to section Troubleshooting for more • If you want to add the detergent information on unbalance in the laundry load . manually, pull out the detergent dispenser and add detergent (and additives) now, CHANGE THE SETTINGS OF A RUNNING as indicated in section DETERGENT DISPENSER .
- Page 17 • Change your settings RESET A RUNNING PROGRAMME, IF • Press “Start/Pause” again to continue the NEEDED programme . • Press and hold the “On/Off” button until the display indicates that the programme If you have changed the programme, do not add is cancelled .
-
Page 18: Programmes And Options
PROGRAMMES AND OPTIONS For choosing the appropriate programme for your kind of laundry, always respect the instructions on the care labels of the laundry. PROGRAMME Type of Wash Care Settings and Recommendations Labels ECO COTTON Normally soiled cotton laundry . load At 40 °C and 60 °C standard cotton temperature range... - Page 19 PROGRAMME Type of Wash Care Settings and Recommendations Labels WOOL 2.0 kg Woolens, labeled with the Woolmark load and identified as machine washable, as temperature range Cold to 40°C well as textiles made of silk, linen, wool 1000 and viscose marked as handwashable . max spin speed Rapid, Respect the manufacturers...
- Page 20 PROGRAMME Type of Wash Care Settings and Recommendations Labels SPECIAL To set one of the following programmes, select the special PROGRAMMES programmes position . Press the DOWN and UP keys to select one of the programmes mentioned below . The selected programme is marked with “...
- Page 21 PROGRAMME Type of Wash Care Settings and Recommendations Labels SPORT 4.0 kg Normally soiled and sweaty sportswear load made of cotton jersey or microfibers . temperature range Cold to 40°C This programme includes a prewash cycle . If you want, you can add the max spin speed Prewash, detergent quantity for the prewash...
- Page 22 OPTIONS SELECTABLE BY THE OPTIONS BUTTON The programme chart gives an and options are selectable. option blinks and switches off overview of possible combinations Also certain options are not again, and a signal sounds. of programmes and options. Not combinable. In this case, the all combinations of programmes indicator of the non-combinable PREWASH...
- Page 23 FRESH CARE Helps to keep your laundry fresh approximately 6 hours after end if you cannot unload it soon after of your wash programme . You can programme end . stop it at any time by pressing any button; the door unlocks and you can The washing machine starts to take out your laundry .
- Page 24 OPTIONS WHICH ARE DIRECTLY SELECTABLE BY PRESSING THE RESPECTIVE BUTTON TEMPERATURE If you want to change the If you switch on the washing temperature, press the temperature machine, the last used programme button, and press the UP or and temperature setting will appear DOWN key to select the desired on the control panel .
-
Page 25: Functions
FUNCTIONS ON/OFF To switch on the washing machine: To switch off the washing machine press the button until the Start/Pause after programme end: button lights up . press the key until the lights go off . To cancel a running programme: press and hold the button until the display indicates that the programme is cancelled;... - Page 26 FINISH IN Moves the end of your programme • The programme starts to a later time . Helps to profit from automatically to complete at more favourable energy rates (for the end of the delay period . example during the night), or to have After programme start, the the laundry ready at a certain time .
-
Page 27: Indicators
DESCALING A display message will remind you regularly to descale the washing machine . Find descaler appropriate for the washing machine (WPRO) on www .whirlpool .eu . To cancel the display reminder, press the OK key . FAILURE Refer to the Troubleshooting section for more information . -
Page 28: Auto Dosing Function: Automatic Dosing Of Detergent / Fabric Softener
AUTO DOSING FUNCTION: AUTOMATIC DOSING OF DETERGENT / FABRIC SOFTENER Automatically dispenses liquid detergents and utomAtic dosing fabric softener (if needed) from the tanks of the 1. Tank 1 detergent dispenser . To enable a correct dosage, • Liquid generic detergent this function needs to be set up as mentioned in section AUTO DOSING / FIRST USE . -
Page 29: Auto Dosing / First Use
AUTO DOSING / FIRST USE Before you can use the Auto Dosing function, some p reparatory steps are required . • Press and hold the Settings button until the settings menu appears on the display . Set the correct water hardness level. •... - Page 30 Arrange the labels according to one of the following combinations which are technically possible: Tank 1 content Tank 2 content Main liquid detergent Fabric softener Main liquid detergent Special liquid detergent Special liquid detergent Fabric softener Main liquid detergent Main liquid detergent Special liquid detergent Main liquid detergent Example: if you do not use fabric softener, you can...
- Page 31 Set the dosing quantities for the tanks. • Press the UP or DOWN key to change the The concentration of detergents available on the indicated dosing value . Afterwards confirm the market differs considerably; for that reason, the new dosing value; a checkmark will appear next dosing values of the auto dosing function need to be to it .
- Page 32 Close the tank flap and push the detergent • Press the UP or DOWN key to select if you want dispenser back into the dispenser compartment . the function to be switched on or off, and confirm The Auto dosing system is ready for use now by pressing the OK key .
-
Page 33: Auto Dosing / Daily Use
AUTO DOSING / DAILY USE Make sure that the detergent dispenser is In addition, the corresponding tank button light correctly inserted blinks a few times . When this message appears for the first time, the supply in the indicated tank If the detergent dispenser is not correctly inserted, is usually sufficient for about two or three more a programme cannot be started, and the display... -
Page 34: Saving Tips
SAVING TIPS • Achieve the best use of energy, water, detergent • Save energy by using a 60°C instead of a 95°C and time by using the recommended maximum wash programme or a 40°C instead of a 60°C load size for the programmes, as indicated in the wash programme . -
Page 35: Th Sense Live Feature / Setup Procedure
SENSE LIVE FEATURE / SETUP PROCEDURE To enable the appliance to be remotely monitored The setup procedure has to be carried out only once. and controlled, you first have to complete successfully You have to carry it out again only if you change the setup procedure. - Page 36 AUTOMATIC SETUP PROCEDURE This procedure is applicable only if your router supports WPS 2.0 (or greater) Turn on your router and activate the WPS (Wi- The Connection Status indicator starts Fi Protected Setup) feature . The WPS indicator light blinking slow as the connection with the turns on and the feature remains active for about router is established .
- Page 37 MANUAL SET UP PROCEDURE This procedure uses the Micro Access Point technology and is applicable if your router does not support WPS Before starting the setup procedure take Open your favourite browser with your device and type 192.168.10.1 in the address bar . note of your home wireless network name (SSID), its PASSWORD and the SAID code of the washing machine .
- Page 38 RESET PROCEDURE The reset procedure has to be carried out if you change the router setup properties (network name and password) or if the washing machine is not able to connect to the cloud. Select the Live menu from the Setting When the provisioning process is complete a menu using the UP and DOWN key and press message appears on the display.
-
Page 39: Th Sense Live Remote Control / Daily Use
SENSE LIVE REMOTE CONTROL / DAILY USE The Remote Control mode allows to control the The Remote Control function needs some specific washing machine remotely using a smartphone or technical devices and some preparatory setup . Find a tablet . detailed information in the "6 Sense Live Feature / Setup procedure"... -
Page 40: Th Sense Live Feature / Faq
SENSE LIVE FEATURE / FAQ QUESTION ANSWER Are there any differences You can use the operating system you prefer, there are no differences . between using a smart phone (or a tablet) with Android or iOS? Which WiFi protocols are The radio installed in the washing machine supports WiFi b/g/n for European countries . - Page 41 QUESTION ANSWER I changed the router, what do I You can either maintain the same setup properties (network name have to do? and password) or erase the previous setup from the appliance (reset process) and carry out the setup process again (see "Live-Remote Control/Setup procedure") .
-
Page 42: Cleaning & Maintenance
INSIDE If you do not regularly use the Cotton programme at 95°C, run this programme occasionally, without adding any laundry, to keep the interior clean . To descale the washing machine, use appropriate descaler available on www .whirlpool .eu . -
Page 43: Checking The Water Supply Hose
CHECKING THE WATER SUPPLY HOSE Check the inlet hose regularly for brittleness and cracks . If damaged, replace it by a new hose available through our After-Sales Service or your specialist dealer . Depending on the hose type: For water stop hoses: check the small safety valve inspection window (see arrow) . -
Page 44: Cleaning The Mesh Filters In The Water Supply Hose
CLEANING THE MESH FILTERS IN THE WATER SUPPLY HOSE Close water tap and screw off the inlet hose . Insert the mesh filter again . Connect the inlet hose to water tap and washing machine again . Do not use a tool to connect the inlet hose . Open the water tap and check that all connections are tight . -
Page 45: Cleaning The Detergent Dispenser
CLEANING THE DETERGENT DISPENSER Remove the detergent dispenser by pressing Carefully clean the parts under running water, down the release button and pulling out the removing detergent or fabric softener residues . detergent dispenser . Particularly take care not to damage the functional parts on the reverse of the tank cover . - Page 46 Reassemble the detergent dispenser and push it back into the dispenser compartment . Make sure that it is pushed in completely; otherwise the washing machine will not work .
-
Page 47: Cleaning The Water Filter / Draining Residual Water
CLEANING THE WATER FILTER / DRAINING RESIDUAL WATER Clean the water filter regularly, to avoid that WARNING the water cannot drain after the wash due to obstruction of the filter . Switch off and unplug the washing machine If the water cannot drain, the display indicates that before cleaning the water filter or draining residual the water filter may be clogged . - Page 48 Clean the water filter: remove residues in the If your washing machine model has no emergency filter and clean it under running water . drain hose: Slowly turn the filter counterclockwise until water flows out . Let the water flow out, without removing the filter .
-
Page 49: Transport And Handling
TRANSPORT AND HANDLING WARNING Never lift the washing machine by holding it at the worktop . Pull out the mains plug, and close the water Refit the transport bolts . Follow the tap . instructions for removing the transport bolts in the Installation Guide in reverse order . -
Page 50: Troubleshooting
TROUBLESHOOTING Your washing machine is equipped with various These failures are frequently so minor that they can automatic safety and feedback functions . They be removed within a few minutes . When a failure occurs, the sensing indicator in the enable failures and needed maintenance to be detected and indicated accordingly . - Page 51 PROBLEM POSSIBLE CAUSE SOLUTION Spin speed “0” blinks on control Unbalance of laundry load If you want to spin the wet panel and/or laundry still very wet prevented spin cycle, to protect laundry, add more laundry the washing machine items of different sizes and start “Rinse&Spin”...
- Page 52 PROBLEM POSSIBLE CAUSE SOLUTION Door is locked, with or without Door is locked in case of power Programme will continue failure indication, and the breakdown . automatically as soon as the mains programme does not run . is available again . Washing machine is in a standstill Programme will continue (as described in previous section...
- Page 53 FAILURE INDICATORS AND MESSAGES Below is a summary of possible failure causes and persists, close the water tap, switch off and unplug solutions . the washing machine and contact our After-Sales If the problem persists after having removed the Service . origin of the failure, press On/Off for at least three seconds .
- Page 54 Failure indicator Display Possible Cause Possible Solution lights up message The door cannot unlock . Firmly press the door on the area of the (or F29) door lock, then press On/Off for at least 3 seconds . If hot cycle is selected, wait until cool down and press again On/Off for at least 3 seconds .
-
Page 55: Door - How To Open It In Case Of A Failure, To Take Out Your Laundry
DOOR – HOW TO OPEN IT IN CASE OF A FAILURE, TO TAKE OUT YOUR LAUNDRY Switch off the washing machine and unplug it . down when washing with high temperatures . Close the water tap . Always drain the water before opening the Wait until the drum has stopped rotating . -
Page 56: After-Sales Service
• Your full address and telephone number . For any repairs, use our authorized After Sales Service, to ensure proper repairing and use of original spare parts . Manufacturer: Whirlpool Europe s.r.l. - Socio Unico Viale Guido Borghi 27 21025 Comerio (VA) Italy... - Page 57 17 mm - 0,67 inch 12 mm - 0,47 inch...
- Page 58 2 cm - 0,7 inch...
- Page 60 max 2,5 cm max 0,9 inch...
- Page 62 max 125 cm 49 inch min 60 cm 24 inch max 125 cm 49 inch min 60 cm 24 inch max 125 cm 49 inch min 60 cm 24 inch...
- Page 63 IPX4 ....xxx V ~ xx Hz xx A xxxx xxxx xxxx Whirlpool Europe s.r.l. Viale G.Borghi 27 21025 Comerio - Italy Type D xxx...
- Page 64 400010848664...