Table of Contents
Advertisement
Quick Links
Advertisement
Table of Contents

Related Manuals for Thales ProtectServer 3 HSM

Summary of Contents for Thales ProtectServer 3 HSM
- Page 1 ProtectServer 3 HSM and ProtectToolkit 7 INSTALLATION AND CONFIGURATION GUIDE...
- Page 2 Thales Group does not and shall not warrant that this product will be resistant to all possible attacks and shall not incur, and disclaims, any liability in this respect. Even if each product is compliant with current security standards in force on the date of their design, security mechanisms' resistance necessarily evolves according to the state of the art in security and notably under the emergence of new attacks.
- Page 3 Thales Group. Thales ProtectServer 3 HSM and ProtectToolkit 7 Installation and Configuration Guide 2021-06-30 10:29:48-04:00 Copyright 2009-2021 Thales Group...
-
Page 4: Table Of Contents
CONTENTS Preface: About the ProtectServer 3 HSM and ProtectToolkit 7 Installation Guide Document Conventions Support Contacts Chapter 1: ProtectServer 3 PCIe Hardware Installation ProtectServer 3 PCIe Required Items Contents Received Optional Items ProtectServer 3 PCIe Installation Installing the ProtectServer 3 PCIe Card Into the Host Computer... - Page 5 Installing ProtectToolkit 7 on Linux Utility Startup Available Packages Installing a Package Setting Up Your Environment Changing the Cryptoki Provider Uninstalling a package Thales ProtectServer 3 HSM and ProtectToolkit 7 Installation and Configuration Guide 2021-06-30 10:29:48-04:00 Copyright 2009-2021 Thales Group...
- Page 6 Fixing Command Line Utility Low Performance Enabling Smart Card Access under Linux Specifying the Network Server(s) Linux Example Windows Example Using IPv6 addressing Thales ProtectServer 3 HSM and ProtectToolkit 7 Installation and Configuration Guide 2021-06-30 10:29:48-04:00 Copyright 2009-2021 Thales Group...
-
Page 7: Preface: About The Protectserver 3 Hsm And Protecttoolkit 7 Installation Guide
This guide provides hardware installation and configuration procedures for your ProtectServer cryptographic services hardware security module (HSM) and installation procedures for the ProtectToolkit client software. Refer to the section(s) relevant for your ProtectServer 3 HSM model: > "ProtectServer 3 PCIe Hardware Installation" on page 10 >... - Page 8 Preface: About the ProtectServer 3 HSM and ProtectToolkit 7 Installation Guide Warnings Warnings are used to alert you to the potential for catastrophic data loss or personal injury. They use the following format: **WARNING** Be extremely careful and obey all safety and security measures. In this situation you might do something that could result in catastrophic data loss or personal injury.
-
Page 9: Support Contacts
Customer Support. Thales Customer Support operates 24 hours a day, 7 days a week. Your level of access to this service is governed by the support plan arrangements made between Thales and your organization. Please consult this support plan for further information about your entitlements, including the hours when telephone support is available to you. -
Page 10: Chapter 1: Protectserver 3 Pcie Hardware Installation
The ProtectServer 3 PCIe has been tested with a variety of representative systems/servers with compliant PCI express slots. When a compatibility problem with a current brand and model computer arises, that information is made available via the Thales Support Portal. To troubleshoot a ProtectServer 3 PCIe installation issue that ProtectServer 3 PCIe Installation Issues... -
Page 11: Protectserver 3 Pcie Required Items
ProtectServer 3 PCIe Adapter Card Smart card reader Smart cards (in a single media case) Each smart card contains a total of 64 kilobytes of storage space. Thales ProtectServer 3 HSM and ProtectToolkit 7 Installation and Configuration Guide 2021-06-30 10:29:48-04:00 Copyright 2009-2021 Thales Group... -
Page 12: Optional Items
> SafeNet 110 Time-Based OTP Token (enables multifactor authentication on ProtectServer 3 HSM tokens) Thales recommends ordering at least two (2) OTP tokens for each slot on the HSM (one each for the Security Officer and Token User). PN: 955-000237-001 >... - Page 13 The card is properly seated when no portion of the gold-colored contacts of the card protrudes above the connector socket. Thales ProtectServer 3 HSM and ProtectToolkit 7 Installation and Configuration Guide 2021-06-30 10:29:48-04:00 Copyright 2009-2021 Thales Group...
-
Page 14: Connecting A Chassis Intrusion Connector To The Tamper Header
HSM. If you are constructing or ordering a cable for this purpose, the header has 2 mm pin pitch and mates with a Molex connector (https://www.molex.com/molex/products/datasheet.jsp?part=active/0355070200_CRIMP_ HOUSINGS.xml or equivalent. Thales ProtectServer 3 HSM and ProtectToolkit 7 Installation and Configuration Guide 2021-06-30 10:29:48-04:00 Copyright 2009-2021 Thales Group... -
Page 15: Smart Card Reader Installation
Chapter 1: ProtectServer 3 PCIe Hardware Installation Smart Card Reader Installation The ProtectServer 3 PCIe supports the use of smart cards with a Thales-supplied smart card reader. Readers not supplied by Thales are unsupported. To install the USB card reader, simply plug the card reader into the HSM's USB port. -
Page 16: Chapter 2: Protectserver 3 External Installation And Configuration
ProtectServer 3+ External. This section also contains the following additional information/procedures: > "Powering off the ProtectServer 3 External" on page 32 Thales ProtectServer 3 HSM and ProtectToolkit 7 Installation and Configuration Guide 2021-06-30 10:29:48-04:00 Copyright 2009-2021 Thales Group... -
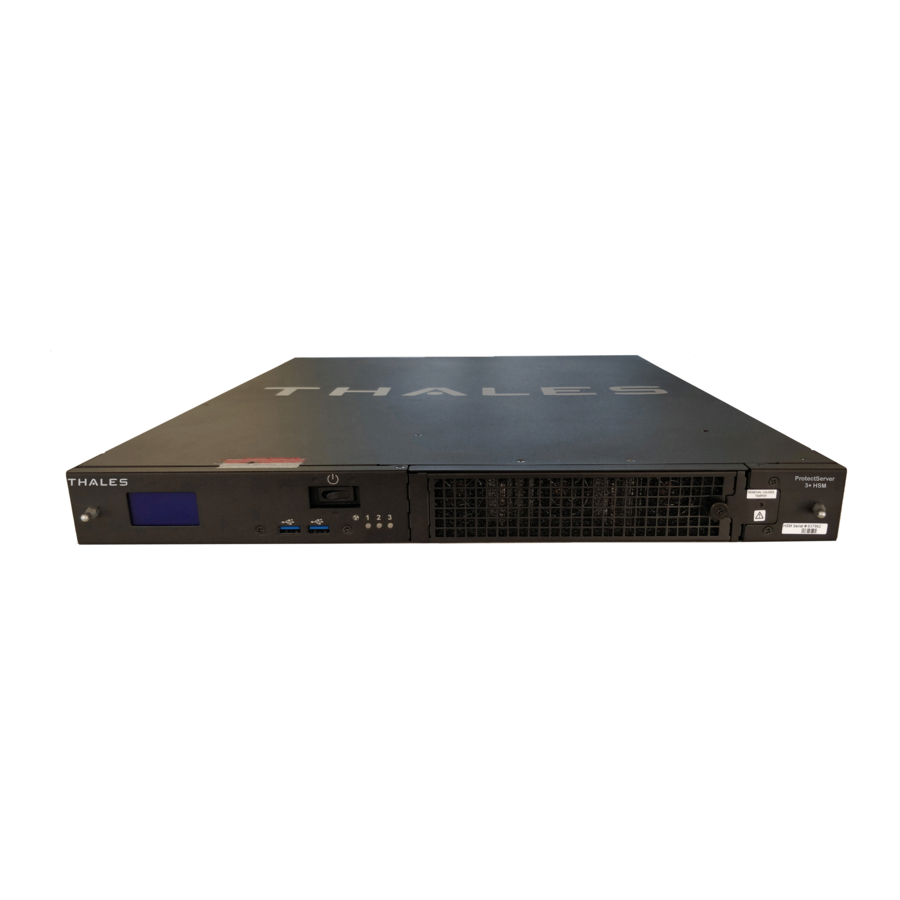
Page 17: Product Overview
The front panel is equipped with the following ports: Not active. Console Provides console access to the appliance. See "First Login and System Test" on page 25. Thales ProtectServer 3 HSM and ProtectToolkit 7 Installation and Configuration Guide 2021-06-30 10:29:48-04:00 Copyright 2009-2021 Thales Group... -
Page 18: Rear Panel View
ProtectServer 3 External, remove the tamper key after commission and store it in a safe place. Cryptographic Architecture A hardware-based cryptographic system consists of three general components: Thales ProtectServer 3 HSM and ProtectToolkit 7 Installation and Configuration Guide 2021-06-30 10:29:48-04:00 Copyright 2009-2021 Thales Group... -
Page 19: Technical Specifications
ProtectServer HSM Net Server software Power Supply > Nominal power consumption: 43 W > Input AC voltage range: 100-240 V > Input frequency range: 50-60 Hz Thales ProtectServer 3 HSM and ProtectToolkit 7 Installation and Configuration Guide 2021-06-30 10:29:48-04:00 Copyright 2009-2021 Thales Group... - Page 20 Weight 5 kg (11 lb) Operating Environment Temperature: 0 to 40 ° C (32 to 104 ° F) > > Relative Humidity: 5 to 85% Thales ProtectServer 3 HSM and ProtectToolkit 7 Installation and Configuration Guide 2021-06-30 10:29:48-04:00 Copyright 2009-2021 Thales Group...
-
Page 21: Protectserver 3 External Required Items
Item ProtectServer 3 External standalone appliance Adapter Cable: RJ45 to USB with a standard eight-pin, eight connector (8P8C) modular connector Smart card reader Thales ProtectServer 3 HSM and ProtectToolkit 7 Installation and Configuration Guide 2021-06-30 10:29:48-04:00 Copyright 2009-2021 Thales Group... -
Page 22: Optional Items
> SafeNet 110 Time-Based OTP Token (enables multifactor authentication on ProtectServer 3 HSM tokens) Thales recommends ordering at least two (2) OTP tokens for each slot on the HSM (one each for the Security Officer and Token User). PN: 955-000237-001 >... -
Page 23: Installing The Protectserver 3 External Hardware
100-240V at 50-60Hz. Smart Card Reader Installation The unit supports the use of smart cards with a Thales-supplied smart card reader. Other smart card readers are not supported. To install the USB card reader Simply plug the card reader into the HSM USB port, as illustrated below. -
Page 24: Deployment Guidelines
FIPS mode. Networking and Firewall Configuration The PTK client authenticates the ProtectServer 3 HSM using its ProtectServer Identity Certificate (PIC). There is no means to authenticate the client to the HSM. It is therefore recommended that the HSM and client are... -
Page 25: Separation Of Roles
When starting up your ProtectServer 3+ External for the first time, follow these steps: > "Access the Console, Power On, and Log In" on the next page > "Run System Test" on page 27 Thales ProtectServer 3 HSM and ProtectToolkit 7 Installation and Configuration Guide 2021-06-30 10:29:48-04:00 Copyright 2009-2021 Thales Group... -
Page 26: Access The Console, Power On, And Log In
Prolific USB-to-Serial adapter. Set the serial connection parameters as follows: • Baud rate : 115200 • Data bits : 8 • Parity : None • Stop bits : 1 Thales ProtectServer 3 HSM and ProtectToolkit 7 Installation and Configuration Guide 2021-06-30 10:29:48-04:00 Copyright 2009-2021 Thales Group... -
Page 27: Run System Test
RJ-45 console port, used to provide serial access to the appliance for initial network configuration. The network device interfaces (eth0 and eth1) and console port are located on the front of the appliance, as illustrated below: Thales ProtectServer 3 HSM and ProtectToolkit 7 Installation and Configuration Guide 2021-06-30 10:29:48-04:00 Copyright 2009-2021 Thales Group... -
Page 28: Console Port
IP address and subnet mask for each LAN port you want to use (if you are using static IP addressing) > Hostname for the HSM appliance (registered with network DNS) Thales ProtectServer 3 HSM and ProtectToolkit 7 Installation and Configuration Guide 2021-06-30 10:29:48-04:00 Copyright 2009-2021 Thales Group... -
Page 29: Configuring The Network Parameters
[Optional] Configure network interface bonding. This allows the two network devices to function as a single interface, with a single MAC address, improving bandwidth and providing redundancy. Thales ProtectServer 3 HSM and ProtectToolkit 7 Installation and Configuration Guide 2021-06-30 10:29:48-04:00 Copyright 2009-2021 Thales Group... - Page 30 DNS table. There is one DNS table that applies to all network devices (ports) on the appliance. psesh:> network dns add nameserver <IP_address> -device <net_device> Thales ProtectServer 3 HSM and ProtectToolkit 7 Installation and Configuration Guide 2021-06-30 10:29:48-04:00 Copyright 2009-2021 Thales Group...
- Page 31 -ip <IP_address> psesh:> network iptables addrule drop network -net <IP_address> -mask <netmask> To see the current list of rules: psesh:> network iptables show Thales ProtectServer 3 HSM and ProtectToolkit 7 Installation and Configuration Guide 2021-06-30 10:29:48-04:00 Copyright 2009-2021 Thales Group...
-
Page 32: Ssh Network Access
Toggle the power switch, located on the rear of the ProtectServer 3 External, to the off position. The fan and LEDs will turn off. Thales ProtectServer 3 HSM and ProtectToolkit 7 Installation and Configuration Guide 2021-06-30 10:29:48-04:00 Copyright 2009-2021 Thales Group... -
Page 33: Chapter 3: Protectserver 3+ External Installation And Configuration
ProtectServer 3+ External. This section also contains the following additional information/procedures: > "Powering off the ProtectServer 3+ External" on page 67 Thales ProtectServer 3 HSM and ProtectToolkit 7 Installation and Configuration Guide 2021-06-30 10:29:48-04:00 Copyright 2009-2021 Thales Group... -
Page 34: Product Overview
The HSM can therefore be located remotely, improving the security of cryptographic key data The figure below depicts a cryptographic service provider using the ProtectServer 3+ External in network mode. Thales ProtectServer 3 HSM and ProtectToolkit 7 Installation and Configuration Guide 2021-06-30 10:29:48-04:00 Copyright 2009-2021 Thales Group... - Page 35 Figure 4: ProtectServer 3+ External implementation Thales ProtectServer 3 HSM and ProtectToolkit 7 Installation and Configuration Guide 2021-06-30 10:29:48-04:00 Copyright 2009-2021 Thales Group...
-
Page 36: Protectserver 3+ External Required Items
Follow this checklist to verify that you have all of the items required for the installation. Item ProtectServer 3+ External Appliance Adapter Cable: RJ45 to USB with a standard eight-pin, eight connector (8P8C) modular connector Smart card reader Thales ProtectServer 3 HSM and ProtectToolkit 7 Installation and Configuration Guide 2021-06-30 10:29:48-04:00 Copyright 2009-2021 Thales Group... - Page 37 Each smart card contains a total of 64 kilobytes of storage space. Front Ear Bracket Set Set includes: > (2) front ear brackets > (4) bracket screws Thales ProtectServer 3 HSM and ProtectToolkit 7 Installation and Configuration Guide 2021-06-30 10:29:48-04:00 Copyright 2009-2021 Thales Group...
- Page 38 (8) M5 cage nuts > (8) M5x14 rack screws If you did not receive this set, you can request one from Thales (part number: 216-000035-001) or obtain your own suitable screws/nuts. Thales ProtectServer 3 HSM and ProtectToolkit 7 Installation and Configuration Guide...
-
Page 39: Optional Items
> SafeNet 110 Time-Based OTP Token (enables multifactor authentication on ProtectServer 3 HSM tokens) Thales recommends ordering at least two (2) OTP tokens for each slot on the HSM (one each for the Security Officer and Token User). PN: 955-000237-001 >... - Page 40 (2) sliding rail mounts with removable side rails • (2) transformer brackets • (6) rail screws > Sliding Rail Rack Mounting Screws Set includes (8) M5x8 flat-headed screws. Thales ProtectServer 3 HSM and ProtectToolkit 7 Installation and Configuration Guide 2021-06-30 10:29:48-04:00 Copyright 2009-2021 Thales Group...
-
Page 41: Installing The Protectserver 3+ External In A Server Rack
If you did not receive this set, you can request one from Thales (part number: 216-000034-001) or obtain your own suitable screws. If you do not use the screws included in this kit, ensure that the screw heads are flat enough so as not to interfere with the locking bezel. - Page 42 While any standard equipment rack screws should fit the brackets, certain large- headed screws may interfere with the operation of the secure locking bezel. Thales ProtectServer 3 HSM and ProtectToolkit 7 Installation and Configuration Guide 2021-06-30 10:29:48-04:00 Copyright 2009-2021 Thales Group...
- Page 43 Support the weight of the appliance with the hydraulic lift until all four brackets are secured. Secure the front ear brackets using rack mounting screws. Thales ProtectServer 3 HSM and ProtectToolkit 7 Installation and Configuration Guide 2021-06-30 10:29:48-04:00 Copyright 2009-2021 Thales Group...
-
Page 44: Using The Optional Sliding Rail System
Fit the front end of each mount into either side of the rack and pull the spring-loaded latch at the rear to snap it in place. Thales ProtectServer 3 HSM and ProtectToolkit 7 Installation and Configuration Guide 2021-06-30 10:29:48-04:00 Copyright 2009-2021 Thales Group... - Page 45 Secure the rear end of each mount to the rack with two wide flat-headed screws. Fasten the transformer bracket to each sliding mount with two wide flat-headed screws. Thales ProtectServer 3 HSM and ProtectToolkit 7 Installation and Configuration Guide 2021-06-30 10:29:48-04:00 Copyright 2009-2021 Thales Group...
- Page 46 Screws with heads that are too large can prevent the locking bezel from fitting to the faceplate. Use the screws included with the ProtectServer 3+ External, or other screws with suitable heads. Thales ProtectServer 3 HSM and ProtectToolkit 7 Installation and Configuration Guide 2021-06-30 10:29:48-04:00 Copyright 2009-2021 Thales Group...
-
Page 47: Physical Features
19-inch equipment rack. The extending tabs act as posts for the locking bezel. Mounts for optional The secure locking bezel connects to the appliance faceplate here. locking bezel Thales ProtectServer 3 HSM and ProtectToolkit 7 Installation and Configuration Guide 2021-06-30 10:29:48-04:00 Copyright 2009-2021 Thales Group... -
Page 48: Protectserver 3+ External Rear Panel
Opening to swap fan modules triggers a tamper event on the appliance. See also "Power Supply and Fan Maintenance" on page 51. ProtectServer 3+ External Rear Panel The rear panel is illustrated below: Thales ProtectServer 3 HSM and ProtectToolkit 7 Installation and Configuration Guide 2021-06-30 10:29:48-04:00 Copyright 2009-2021 Thales Group... -
Page 49: Front Locking Bezel
The purpose of the bezel is to: > cover the appliance's ports and the power button, > lock the appliance to the rack to prevent removal. Thales ProtectServer 3 HSM and ProtectToolkit 7 Installation and Configuration Guide 2021-06-30 10:29:48-04:00 Copyright 2009-2021 Thales Group... - Page 50 The locks fit over the posts highlighted below. Fit the bezel over the posts with both keys in the horizontal position. Turn the keys to the vertical position to lock the bezel. Thales ProtectServer 3 HSM and ProtectToolkit 7 Installation and Configuration Guide 2021-06-30 10:29:48-04:00 Copyright 2009-2021 Thales Group...
-
Page 51: Replacement Keys
Steady green Power supply failure Steady RED Power supply warning Flashing Blue/Red (1Hz) alternating Input power failure (only in n+1 configuration) Flashing Red (1Hz) Thales ProtectServer 3 HSM and ProtectToolkit 7 Installation and Configuration Guide 2021-06-30 10:29:48-04:00 Copyright 2009-2021 Thales Group... -
Page 52: Replacing A Power Supply
Withdraw the power supply completely, using your other hand to support the body of the power supply as it emerges. Thales ProtectServer 3 HSM and ProtectToolkit 7 Installation and Configuration Guide 2021-06-30 10:29:48-04:00 Copyright 2009-2021 Thales Group... -
Page 53: The Fans
In less-than-perfect non- clean-room conditions, the mesh might accumulate a buildup of dust, and should be cleaned occasionally for best cooling airflow into the equipment. Thales ProtectServer 3 HSM and ProtectToolkit 7 Installation and Configuration Guide 2021-06-30 10:29:48-04:00 Copyright 2009-2021 Thales Group... - Page 54 To reinstall the mesh, place it in its cavity in front of the fans, and use fingers or a blunt tool to tuck-in the corners. Thales ProtectServer 3 HSM and ProtectToolkit 7 Installation and Configuration Guide 2021-06-30 10:29:48-04:00 Copyright 2009-2021 Thales Group...
- Page 55 The fan modules are now exposed and are held in place only by the friction of their electrical connectors. Grasp the handle of the selected fan module and pull straight out toward you. Thales ProtectServer 3 HSM and ProtectToolkit 7 Installation and Configuration Guide 2021-06-30 10:29:48-04:00 Copyright 2009-2021 Thales Group...
-
Page 56: Summary
Removing, cleaning, and replacing the fan filter (the black mesh behind the grille) does not cause a tamper, and can be done at any time without disrupting your Clients. Thales ProtectServer 3 HSM and ProtectToolkit 7 Installation and Configuration Guide 2021-06-30 10:29:48-04:00 Copyright 2009-2021 Thales Group... - Page 57 Clients. If only one fan module is showing a defect, you can probably leave replacing it until scheduled down-time, during which there would be no unexpected disruption to your Clients. Thales ProtectServer 3 HSM and ProtectToolkit 7 Installation and Configuration Guide 2021-06-30 10:29:48-04:00 Copyright 2009-2021 Thales Group...
-
Page 58: Power Consumption
84W (typical) 100W (max) The appliance has two power supplies, each rated at 350W, either of which is capable of running the system alone. Thales ProtectServer 3 HSM and ProtectToolkit 7 Installation and Configuration Guide 2021-06-30 10:29:48-04:00 Copyright 2009-2021 Thales Group... -
Page 59: Deployment Guidelines
FIPS mode. Networking and Firewall Configuration The PTK client authenticates the ProtectServer 3 HSM using its ProtectServer Identity Certificate (PIC). There is no means to authenticate the client to the HSM. It is therefore recommended that the HSM and client are... -
Page 60: Separation Of Roles
When starting up your ProtectServer 3+ External for the first time, follow these steps: > "Access the Console, Power On, and Log In" on the next page > "Run System Test" on page 62 Thales ProtectServer 3 HSM and ProtectToolkit 7 Installation and Configuration Guide 2021-06-30 10:29:48-04:00 Copyright 2009-2021 Thales Group... -
Page 61: Access The Console, Power On, And Log In
Prolific USB-to-Serial adapter. Set the serial connection parameters as follows: • Baud rate : 115200 • Data bits : 8 • Parity : None • Stop bits : 1 Thales ProtectServer 3 HSM and ProtectToolkit 7 Installation and Configuration Guide 2021-06-30 10:29:48-04:00 Copyright 2009-2021 Thales Group... -
Page 62: Run System Test
Network access is provided by four Ethernet LAN ports. The network device interfaces ( eth0 , eth1 , eth2 , eth3 ) are located on the back of the appliance, as illustrated below: Thales ProtectServer 3 HSM and ProtectToolkit 7 Installation and Configuration Guide 2021-06-30 10:29:48-04:00 Copyright 2009-2021 Thales Group... -
Page 63: Appliance Configuration
> If you are using DHCP, then all references to the Client and the HSM appliance (as in Certificates) should use hostnames. Thales ProtectServer 3 HSM and ProtectToolkit 7 Installation and Configuration Guide 2021-06-30 10:29:48-04:00 Copyright 2009-2021 Thales Group... -
Page 64: Configuring The Network Parameters
1 : Active-Backup. One bonded device is active and the other serves as a backup. The backup only becomes active if the active device loses connectivity. Thales ProtectServer 3 HSM and ProtectToolkit 7 Installation and Configuration Guide 2021-06-30 10:29:48-04:00 Copyright 2009-2021 Thales Group... - Page 65 <domain> -device <net_device> The search domain is added to the appliance DNS table. Thales ProtectServer 3 HSM and ProtectToolkit 7 Installation and Configuration Guide 2021-06-30 10:29:48-04:00 Copyright 2009-2021 Thales Group...
- Page 66 After making any change to the network configuration, reboot the appliance: psesh:> sysconf appliance reboot View the new network settings: psesh:> network show Thales ProtectServer 3 HSM and ProtectToolkit 7 Installation and Configuration Guide 2021-06-30 10:29:48-04:00 Copyright 2009-2021 Thales Group...
-
Page 67: Ssh Network Access
Wait for the appliance to perform shutdown procedures. The fan and LEDs will remain operational until shutdown is complete. Thales ProtectServer 3 HSM and ProtectToolkit 7 Installation and Configuration Guide 2021-06-30 10:29:48-04:00 Copyright 2009-2021 Thales Group... -
Page 68: Chapter 4: Protecttoolkit 7 Software Installation
The supported platforms are listed in the following table. C=ProtectToolkit-C, PKCS #11 v2.10/2.20 M=ProtectToolkit-M, MS CSP 2.0 with CNG J=ProtectToolkit-J, Java runtime 7.x/8.x/9.x/10.x/11.x Thales ProtectServer 3 HSM and ProtectToolkit 7 Installation and Configuration Guide 2021-06-30 10:29:48-04:00 Copyright 2009-2021 Thales Group... -
Page 69: Operating Modes
The software emulator version is typically used as a development and testing environment for applications that will eventually use the hardware variant of ProtectToolkit-C. Thales ProtectServer 3 HSM and ProtectToolkit 7 Installation and Configuration Guide 2021-06-30 10:29:48-04:00 Copyright 2009-2021 Thales Group... -
Page 70: Installing Protecttoolkit 7 On Windows
Review the "Operating Modes" on the previous page as they apply to your HSM deployment. > Ensure that your ProtectServer 3 HSM is installed and configured for access over a network (if applicable): • "ProtectServer 3 PCIe Installation" on page 12 • "ProtectServer 3 External Installation and Configuration" on page 16 •... - Page 71 PTK client in Software Emulation mode only, you can deselect this option. – Network : Select this option if you are connecting to a ProtectServer 3 HSM over a network. – PCI : installs the drivers for a locally-installed ProtectServer 3 PCIe.
-
Page 72: Modifying The Protecttoolkit Client Windows Installation
Modifying the ProtectToolkit Client Windows Installation You can modify an existing ProtectToolkit client installation/configuration on Windows by using the client installer. This includes adding new client components, modifying the list of accessible ProtectServer 3 HSM IPs, or switching between HSM and Software Emulation mode. -
Page 73: Utility Startup
ProtectToolkit 7 on Linux Manually" on page 77 To start up the utility The Thales Linux Installation Utility is located in the installation image's root directory. Unzip the image by following standard procedure for your platform and installation. Change to the unzipped directory and start the utility. The utility scans the system and the directory and displays the Main Menu. -
Page 74: Available Packages
Java Cryptographic Architecture (JCA) / Java Cryptographic Extension (JCE) interface. NOTE PTK-J requires the PTK-C Runtime component as a prerequisite. Thales ProtectServer 3 HSM and ProtectToolkit 7 Installation and Configuration Guide 2021-06-30 10:29:48-04:00 Copyright 2009-2021 Thales Group... -
Page 75: Installing A Package
If you add it to your startup file, your environment will be set each time you log in. To set up your environment Go to the ProtectToolkit software installation directory: Thales ProtectServer 3 HSM and ProtectToolkit 7 Installation and Configuration Guide 2021-06-30 10:29:48-04:00 Copyright 2009-2021 Thales Group... -
Page 76: Changing The Cryptoki Provider
On Linux systems, the software-only Cryptoki provider is made active by default. If you plan to use this instance of ProtectToolkit-C with a ProtectServer 3 HSM, you will need to change the Cryptoki provider. Software-only mode is not secure, as cryptographic material is stored on the host system. You can use the Unix Installation Utility to change modes. -
Page 77: Boot Service Operation On Linux Platforms
Use the following commands to install or uninstall the Network Access Provider package. It includes the components required to access a ProtectServer 3 HSM over the network, whether a ProtectServer 3 External, ProtectServer 3+ External, or ProtectServer 3 PCIe configured for network access. -
Page 78: Manual Linux Installation For Pcie Mode
Generating RSA signing keys and certificates > > Signing the ProtectServer PCIe driver > Enrolling the signing public key into the system keyring > Loading the signed driver Thales ProtectServer 3 HSM and ProtectToolkit 7 Installation and Configuration Guide 2021-06-30 10:29:48-04:00 Copyright 2009-2021 Thales Group... - Page 79 = myexts [ req_distinguished_name ] O = Organization CN = Organization signing key emailAddress = E-mail address [ myexts ] basicConstraints=critical,CA:FALSE keyUsage=digitalSignature subjectKeyIdentifier=hash authorityKeyIdentifier=keyid Thales ProtectServer 3 HSM and ProtectToolkit 7 Installation and Configuration Guide 2021-06-30 10:29:48-04:00 Copyright 2009-2021 Thales Group...
-
Page 80: Manual Linux Installation For Net Server Mode
Execute the following as root (where x.x.x-yy is the PTK version number). Specify the location you chose for the installation files: # cd /output-unix/Linux64/hsm_net_server rpm -i PTKnetsrv-x.x.x-yy.x86_64.rpm Thales ProtectServer 3 HSM and ProtectToolkit 7 Installation and Configuration Guide 2021-06-30 10:29:48-04:00 Copyright 2009-2021 Thales Group... -
Page 81: Installing Protecttoolkit-C Manually On Linux
To uninstall the ProtectToolkit-C packages manually Use the rpm(8) command with the appropriate package name as a parameter. # rpm -e PTKcprt # rpm -e PTKcpsdk Thales ProtectServer 3 HSM and ProtectToolkit 7 Installation and Configuration Guide 2021-06-30 10:29:48-04:00 Copyright 2009-2021 Thales Group... -
Page 82: Changing The Cryptoki Provider Manually
-i PTKjpsdk-x.x.x-yy.x86_64.rpm To uninstall the ProtectToolkit-J packages manually Use the rpm(8) command with the appropriate package name as a parameter. # rpm -e PTKjpsdk Thales ProtectServer 3 HSM and ProtectToolkit 7 Installation and Configuration Guide 2021-06-30 10:29:48-04:00 Copyright 2009-2021 Thales Group... -
Page 83: Installing The Protecttoolkit Fmsdk Manually On Linux
The SafeNet hardware maintenance utilities are installed during the ProtectServer 3 PCIe and ProtectServer 3 External Access Provider installations. The utilities are named hsmstate and hsmreset . "hsmstate" on page 85 "hsmreset" on page 86 The utilities are described in Thales ProtectServer 3 HSM and ProtectToolkit 7 Installation and Configuration Guide 2021-06-30 10:29:48-04:00 Copyright 2009-2021 Thales Group... -
Page 84: Safenet-Install.sh
Plain mode. In this mode the ‘tput’ is not used for video enhancements. -s<size> Override the screen size (default = ‘tput lines/cols’ or 24x80). Print the version of this script. Thales ProtectServer 3 HSM and ProtectToolkit 7 Installation and Configuration Guide 2021-06-30 10:29:48-04:00 Copyright 2009-2021 Thales Group... -
Page 85: Hsmstate
Number of message frames in one direction Host Interface version = V0.3 NOTE The information presented with the -v option may only be required when contacting technical support. Thales ProtectServer 3 HSM and ProtectToolkit 7 Installation and Configuration Guide 2021-06-30 10:29:48-04:00 Copyright 2009-2021 Thales Group... -
Page 86: Hsmreset
The command hsmreset will reset the first HSM. Upon execution, the following message displays: HSM is in normal mode. Resetting it might disturb other applications. Continue [N/Y]: Type Y to complete the operation. Thales ProtectServer 3 HSM and ProtectToolkit 7 Installation and Configuration Guide 2021-06-30 10:29:48-04:00 Copyright 2009-2021 Thales Group... -
Page 87: Chapter 5: Configuration Items
Regardless of the platform, a common naming convention for configuration items has been followed. Understanding this naming convention will help you locate and change the appropriate configuration items when required. Thales ProtectServer 3 HSM and ProtectToolkit 7 Installation and Configuration Guide 2021-06-30 10:29:48-04:00 Copyright 2009-2021 Thales Group... -
Page 88: Client/Pcie Hsm Server Configuration
Add a new key entitled NETCLIENT and open it. Add a new string named ET_HSM_NETCLIENT_CONNECT_TIMEOUT_SECS . Set the value data to the desired time in seconds. Thales ProtectServer 3 HSM and ProtectToolkit 7 Installation and Configuration Guide 2021-06-30 10:29:48-04:00 Copyright 2009-2021 Thales Group... -
Page 89: Protectserver 3 External Server Configuration
"Network Mode Server Configuration Items" on page 93 For example: ET_HSM_NETSERVER_OLD_WORKER_COUNT=5 ET_HSM_NETSERVER_V2_WORKER_COUNT=12 ET_HSM_NETSERVER_READ_TIMEOUT_SECS=40 ET_HSM_NETSERVER_WRITE_TIMEOUT_SECS=40 ET_HSM_NETSERVER_CONN_TIMEOUT_COUNT=5 ET_HSM_NETSERVER_FRAG_SIZE=5000 ET_HSM_NETSERVER_ALLOW_RESET=OnHalt ET_HSM_NETSERVER_PORT=12396 Thales ProtectServer 3 HSM and ProtectToolkit 7 Installation and Configuration Guide 2021-06-30 10:29:48-04:00 Copyright 2009-2021 Thales Group... - Page 90 Command Result : 0 (Success) Restart the etnetserver service. psesh:> service restart etnetserver View the new configuration to confirm the changes. psesh:> sysconf etnetcfg show Thales ProtectServer 3 HSM and ProtectToolkit 7 Installation and Configuration Guide 2021-06-30 10:29:48-04:00 Copyright 2009-2021 Thales Group...
-
Page 91: Pci Mode Client Configuration Items
Currently, there is only one modifiable configuration item for PCI mode. NOTE Thales recommends leaving configuration items at the their default value or setting them to a valid value specified in the following table. If the value of a configuration item must... - Page 92 Chapter 5: Configuration Items NOTE Thales recommends leaving configuration items at the their default value or setting them to a valid value specified in the following table. If the value of a configuration item must be changed and no valid values are given, contact Thales Customer Support for assistance.
-
Page 93: Network Mode Server Configuration Items
NOTE Thales recommends leaving configuration items at the their default value or setting them to a valid value specified in the following table. If the value of a configuration item must be changed and no valid values are given, contact Thales Customer Support for assistance. - Page 94 Default=etnetserver ET_HSM_NETSERVER_LOG_LEVEL Amount of tracing to generate. Valid values are: > 0(default): Startup and Errors > 1: Startup + errors + client connections Thales ProtectServer 3 HSM and ProtectToolkit 7 Installation and Configuration Guide 2021-06-30 10:29:48-04:00 Copyright 2009-2021 Thales Group...
-
Page 95: Software Emulator Mode Configuration
You can use hostnames, IPv4 addresses, or IPv6 addresses to specify your network servers. The full syntax for the ET_HSM_NETCLIENT_SERVERLIST configuration item is: ET_HSM_NETCLIENT_SERVERLIST=server1[:port1] [server2[:port2]] Thales ProtectServer 3 HSM and ProtectToolkit 7 Installation and Configuration Guide 2021-06-30 10:29:48-04:00 Copyright 2009-2021 Thales Group... -
Page 96: Linux Example
Since the interface ports listen for both IPv6 and IPv4, you can specify both IPv4 and IPv6 addresses in the ET_ HSM_NETCLIENT_SERVERLIST configuration item, as follows: export ET_HSM_NETCLIENT_SERVERLIST=[<IPv6_address>] <IPv4_address>… Thales ProtectServer 3 HSM and ProtectToolkit 7 Installation and Configuration Guide 2021-06-30 10:29:48-04:00 Copyright 2009-2021 Thales Group...
Need help?
Do you have a question about the ProtectServer 3 HSM and is the answer not in the manual?
Questions and answers