Table of Contents
Troubleshooting

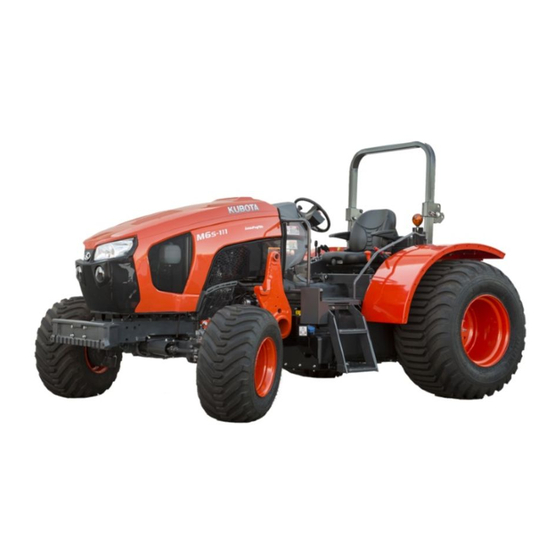
Related Manuals for Kubota M6S-111


Summary of Contents for Kubota M6S-111
- Page 1 OPERATOR'S MANUAL MODELS M6S-111 M6L-111 M6H-101 1NHDS00001A01 · · 1NHDS00050A01 1NHDS00051A01 English (U.S.A.) Code No. 3N840-9971-5 READ AND SAVE THIS MANUAL © PRINTED IN JAPAN KUBOTA Corporation 2017...
- Page 2 American Society of Agricultural and Biological Engineers, USA ASTM American Society for Testing and Materials, USA Since its inception in 1890, KUBOTA Corporation has grown to Deutsches Institut für Normung, GERMANY rank as one of the major firms in Japan.
- Page 3 UNIVERSAL SYMBOLS As a guide to the operation of your tractor, various universal symbols have been utilized on the instruments and controls. The symbols are shown below with an indication of their meaning. B General Engine-stop Safety alert symbol Electrical power-accessories Master system warning Diesel preheat/glow plugs (low temperature start aid)
- Page 4 PTO-off (disengaged) PTO-on (engaged) PTO-540 rpm PTO-1000 rpm B Hydraulic-related Draft control-shallow position Draft control-deep position Position control-raised position Position control-lowered position 3-Point lowering speed control Remote cylinder-retract Remote cylinder-extend B Electric-related Battery charging condition Headlight-low beam Headlight-high beam Turn signal Hazard warning lights Audible warning device...
- Page 5 FOREWORD You are now the proud owner of a KUBOTA tractor. This tractor is a product of KUBOTA quality engineering and manufacturing. It is made of fine materials and under a rigid quality control system. It will give you long, satisfactory service. To obtain the best use of your tractor, please read this manual carefully.
-
Page 7: Table Of Contents
INSTRUMENT PANEL AND CONTROLS .................43 SWITCHES AND HAND CONTROLS (ALL MODELS) ..................43 INSTRUMENT PANEL (ALL MODELS) ......................44 FOOT AND HAND CONTROLS (M6S-111)......................45 FOOT AND HAND CONTROLS (M6L-111) ......................46 FOOT AND HAND CONTROLS (M6H-101) ....................... 47 PRE-OPERATION CHECK ......................48 DAILY CHECK .............................. - Page 8 3. Adjusting the foldable ROPS ........................71 STARTING THE TRACTOR..........................72 1. Muffler (M6L-111) ............................72 2. Operator's seat ............................73 2.1 For M6S-111 and M6H-101 ........................ 73 2.1.1 Mechanical suspension type...................... 73 2.2 For M6L-111 ............................73 2.2.1 Mechanical suspension type...................... 73 3.
- Page 9 4.1 Adjusting the flow rate ........................113 4.2 Positions and advantages of the flow control valve ................. 113 5. Hydraulic control unit use-reference chart ....................115 TIRES, WHEELS, AND BALLAST (M6S-111) ................116 TIRES................................116 1. Inflation pressure ............................. 116 2. Dual tires ..............................116 WHEEL ADJUSTMENT ............................
- Page 10 LUBRICANTS, FUEL AND COOLANT ......................140 1. Biodiesel fuel (BDF) B0-B5........................144 PERIODIC SERVICE .......................145 WASTE DISPOSAL ............................145 HOW TO OPEN THE HOOD ..........................145 1. Hood ................................ 145 2. Side cover..............................145 DAILY CHECK ..............................146 1. Walk around inspection ........................... 146 M6S-111,M6L-111,M6H-101...
- Page 11 2. Draining fuel tank water ........................... 163 EVERY 400 HOURS ............................164 1. Cleaning water separator ........................164 2. Lubricating grease fitting (M6S-111 2WD only) ..................165 EVERY 500 HOURS ............................165 1. Changing engine oil ..........................165 2. Replacing engine oil filter ........................166 3.
- Page 12 4. Replacing oil cooler line........................... 181 5. Replacing power steering line ......................... 181 6. Replacing master cylinder kit........................181 7. Replacing equalizer kit ..........................181 8. Replacing brake seal 1 and 2 ........................181 SERVICE AS REQUIRED..........................181 1. Bleeding fuel system ..........................181 M6S-111,M6L-111,M6H-101...
- Page 13 6. Replacing light bulb ..........................184 7. Replacing head lamp ..........................184 STORAGE..........................186 TRACTOR STORAGE ............................186 REMOVING THE TRACTOR FROM STORAGE....................186 TROUBLESHOOTING ......................187 ENGINE TROUBLESHOOTING ........................187 POWER TRAIN TROUBLE SHOOTING......................189 OPTIONS ..........................190 LIST OF OPTIONS ............................190 INDEX............................191 M6S-111,M6L-111,M6H-101...
- Page 14 M6S-111,M6L-111,M6H-101...
-
Page 15: Safe Operation
2. CAB and ROPS Use additional safety items, such as a hard hat, • KUBOTA recommends the use of a CAB or roll over safety boots or shoes, eye and hearing protection, protective structures (ROPS) and seat belt in gloves and so on, as appropriate or required. - Page 16 M6S-111 and M6L-111 (1) Seat belt OPERATING THE TRACTOR Operator safety is a priority. Safe operation, specifically...
- Page 17 • Never try to get on or off a moving tractor. possible wheel tread. • Always sit in the operator's seat when operating (See TIRES, WHEELS, AND BALLAST (M6S-111) levers or controls. on page 116, TIRES, WHEELS, AND BALLAST • Do not stand between tractor and implement or (M6L-111) on page 124 and TIRES, WHEELS, AND trailed vehicle unless the parking brake is applied.
- Page 18 SAFE OPERATION M6S-111 and M6H-101 (1) SMV emblem (2) Bracket (1) Brake pedal (LH) (A) Whenever traveling on the (2) Brake pedal (RH) road • On public roads use the SMV emblem and hazard (3) Brake pedal lock lights, if required by local traffic and safety regulations.
- Page 19 • Keep the PTO shaft cover in place at all times. Replace the PTO shaft cap when the shaft is not in use. (1) Safety chain • Set the implement lowering speed lever in the “LOCK” position to hold the implement in the raised position. M6S-111,M6L-111,M6H-101...
- Page 20 SAFE OPERATION M6S-111 and M6L-111 (1) Groove (1) PTO shaft cover (A) “NORMAL position” (2) PTO shaft cap (B) “RAISED position” SERVICING THE TRACTOR M6H-101 Before servicing the tractor, park it on a firm, flat and level surface, set the parking brake, lower all implements to the ground, place the gear shift lever in neutral, stop the engine and remove the key.
- Page 21 • To prevent fires, keep the DPF/SCR muffler and its surroundings clear of anything flammable and keep M6S-111,M6L-111,M6H-101...
- Page 22 • During regeneration, do not leave the tractor. Please dispose properly. • The improper disposal or burning of waste causes See your local recycling center or KUBOTA environmental pollution and can be punishable by Dealer to learn how to recycle or get rid of your local laws and regulations.
- Page 23 SAFE OPERATION SAFETY LABELS M6S-111,M6L-111,M6H-101...
- Page 24 SAFE OPERATION M6S-111,M6L-111,M6H-101...
- Page 25 SAFE OPERATION M6S-111,M6L-111,M6H-101...
- Page 26 SAFE OPERATION M6S-111,M6L-111,M6H-101...
- Page 27 SAFE OPERATION M6S-111,M6L-111,M6H-101...
- Page 28 SAFE OPERATION M6S-111,M6L-111,M6H-101...
- Page 29 • If a component with safety label(s) affixed is replaced with new part, make sure new label(s) is (are) attached in the same location(s) as the replaced component. • Mount new safety labels by applying on a clean dry surface and pressing any bubbles to outside edge. M6S-111,M6L-111,M6H-101...
- Page 30 M6S-111,M6L-111,M6H-101...
-
Page 31: Servicing Of Tractor
However, when in need of parts or major service, be sure to see your KUBOTA Dealer. For service, contact the KUBOTA Dealership from which you purchased your tractor or your local KUBOTA Dealer. -
Page 32: Warranty
(1) Diesel particulate filter (DPF) serial number (2) Selective catalytic reduction (SCR) muffler serial number WARRANTY This tractor is warranted under the KUBOTA Limited Express Warranty, a copy of which may be obtained from your selling dealer. No warranty shall, however, apply if the tractor has not... -
Page 33: Specifications
SPECIFICATION TABLE (M6S-111) SPECIFICATIONS SPECIFICATIONS SPECIFICATION TABLE (M6S-111) M6S-111 Model Model V3800-TIEF4 Direct injection, water-cooled 4 cycle diesel, common rail system, turbo- Type charger, intercooler Number of cylinders Total displacement 3769 (230) Bore and stroke mm (in.) 100 × 120 (3.9 × 4.7) - Page 34 SPECIFICATIONS M6S-111 Model Max. lifting 24 in. behind lift- 1750 (3858), kg (lbs.) force ing point 2600 (5732) with 2 assist cylinders (option) Remote hydraulic control 2 standard (3rd and flow control valve optional) Hydraulic unit System pressure MPa (kgf/cm 19.6 (200)
-
Page 35: Specification Table (M6L-111)
24 in. behind lift- 1750 (3858), kg (lbs.) ing point 2175 (4795) with 1 assist cylinder (option) Remote hydraulic control 2 standard (3rd and flow control valve optional) System pressure MPa (kgf/cm 19.6 (200) Traction system Swinging drawbar, adjustable in direction (Continued) M6S-111,M6L-111,M6H-101... - Page 36 Clockwise, viewed from tractor rear Live PTO PTO/engine 6 spline: 540 / 2405 (independent) speed 21 spline: 1000 / 2389 (if equipped) The company reserves the right to change the specifications without notice. Manufacturer's estimate Max lifting force by full stroke, ISO730 M6S-111,M6L-111,M6H-101...
-
Page 37: Specification Table (M6H-101)
Hydraulic unit Max. lifting force 24 in. behind lift- 1750 (3858), kg (lbs.) ing point 2600 (5732) with 2 assist cylinders (option) Remote hydraulic control 2 standard (3rd and flow control valve optional) System pressure MPa (kgf/cm 19.6 (200) (Continued) M6S-111,M6L-111,M6H-101... - Page 38 Clockwise, viewed from tractor rear Live PTO PTO/engine 6 spline: 540 / 2405 (independent) speed 21 spline: 1000 / 2389 (if equipped) The company reserves the right to change the specifications without notice. Manufacturer's estimate Max lifting force by full stroke, ISO730 M6S-111,M6L-111,M6H-101...
-
Page 39: Traveling Speeds (M6S-111)
TRAVELING SPEEDS (M6S-111) SPECIFICATIONS TRAVELING SPEEDS (M6S-111) Model M6S-111 Rear tire size 18.4-34 Transmission type without Dual speed with Dual speed Shuttle shift lev- Range gear Main gear shift lever km/h (mph) shift lever km/h (mph) km/h (mph) 0.38 (0.23) 0.38 (0.23) - Page 40 SPECIFICATIONS Model M6S-111 Rear tire size 18.4-34 Transmission type without Dual speed with Dual speed Shuttle shift lev- Range gear Main gear shift lever km/h (mph) shift lever km/h (mph) km/h (mph) 0.38 (0.24) 0.38 (0.24) 0.32 (0.19) 0.49 (0.30) 0.49 (0.30)
-
Page 41: Traveling Speeds (M6L-111)
19.8 (12.3) 16.4 (10.2) 22.5 (14.0) 18.6 (11.5) 24.4 (15.2) 20.2 (12.6) 29.6 (18.4) 22.8 (14.1) 32.3 (20.1) 24.8 (15.4) At rated engine rpm The company reserves the right to change the specifications without notice. At maximum engine rpm M6S-111,M6L-111,M6H-101... - Page 42 20.0 (12.4) 16.6 (10.3) 22.7 (14.1) 18.7 (11.6) 24.7 (15.3) 20.4 (12.7) 29.9 (18.6) 23.0 (14.3) 32.5 (20.2) 25.0 (15.5) At rated engine rpm The company reserves the right to change the specifications without notice. At maximum engine rpm M6S-111,M6L-111,M6H-101...
-
Page 43: Traveling Speeds (M6H-101)
3.97 (2.5) 4.86 (3.0) 5.2 (3.2) 6.6 (4.1) 8.1 (5.0) 9.9 (6.2) 12.7 (7.9) 16.2 (10.1) 20.0 (12.4) 26.3 (16.4) At rated engine rpm The company reserves the right to change the specifications without notice. At maximum engine rpm M6S-111,M6L-111,M6H-101... - Page 44 4.00 (2.5) 4.91 (3.1) 5.2 (3.2) 6.6 (4.1) 8.2 (5.1) 10.0 (6.2) 12.8 (8.0) 16.3 (10.2) 20.1 (12.5) 26.6 (16.5) At rated engine rpm The company reserves the right to change the specifications without notice. At maximum engine rpm M6S-111,M6L-111,M6H-101...
-
Page 45: Implement Limitations
The tractor has been thoroughly tested for proper performance with implements sold or approved by Kubota. Use with implements which are not sold or approved by Kubota and which exceed the maximum specifications listed in the following table, or which are otherwise unfit for use with the tractor, may result in malfunctions or failures of the tractor, damage to other property and injury to the operator or others. - Page 46 Optional equipment such as operator protective structure (OPS), falling object protective structure (FOPS), etc. to deal with these hazards and other related hazards is not available for this tractor. Without such optional equipment, use is limited to tractor specific applications like transport and stationary work. M6S-111,M6L-111,M6H-101...
-
Page 47: Implement Specification Table
IMPLEMENT SPECIFICATION TABLE IMPLEMENT LIMITATIONS IMPLEMENT SPECIFICATION TABLE Implement Remarks M6S-111 2WD M6S-111 4WD M6L-111 M6H-101 Max. tank capacity L (gals.) 5000 (1320) Slurry tank Max. load capacity kg (lbs.) 6000 (13200) Max. load capacity kg (lbs.) 6000 (13200) 7000 (15400) Trailer Max. - Page 48 2600 (102) Snow blade Max. weight kg (lbs.) 800 (1760) NOTE : • Implement size may vary depending on soil operating conditions. Must remove front weight with this implement. Need subframe The value contains the weight of Kubota standard bucket. M6S-111,M6L-111,M6H-101...
-
Page 49: Instrument Panel And Controls
(3) Hydraulic-shuttle shift lever............81 (9) Parked regeneration switch ............55 (4) Clutch pedal................... 77 (10) Key switch..................62 (5) Tilt pedal ..................74 (11) Turn signal and headlight switch............ 75 (6) Front work light switch ..............76 (12) Brake pedals.................. 76 M6S-111,M6L-111,M6H-101... -
Page 50: Instrument Panel (All Models)
(28) Mode selector switch ..............93 (14) Emission indicator................85 (29) Select switch.................. 93 ® (15) DEF/AdBlue system warning indicator ........85 NOTE : The (23) dual speed shift indicator is only available for M6S-111 (as option) and M6L-111 (as standard). M6S-111,M6L-111,M6H-101... -
Page 51: Foot And Hand Controls (M6S-111)
FOOT AND HAND CONTROLS (M6S-111) INSTRUMENT PANEL AND CONTROLS FOOT AND HAND CONTROLS (M6S-111) Illustrated contents (1) Differential lock pedal ..............96 (11) Main gear shift lever ..............81 (2) 3-Point hitch lowering speed knob..........111 (12) Clutch-off switch ................81 (3) Range gear shift lever.............. -
Page 52: Foot And Hand Controls (M6L-111)
(8) Tool box (18) PTO clutch control lever............... 100 (9) Hand throttle lever ................. 84 (19) Cup holder (10) Foot throttle..................84 (20) Operator's seat ................73 Illustrated contents (21) Remote control valve coupler ..........112 (22) Trailer electrical outlet ............... 98 M6S-111,M6L-111,M6H-101... -
Page 53: Foot And Hand Controls (M6H-101)
(17) PTO clutch control lever............... 100 (8) Tool box (18) Cup holder (9) Hand throttle lever ................. 84 (19) Operator's seat ................73 (10) Foot throttle..................84 Illustrated contents (20) Remote control valve coupler ..........112 (21) Trailer electrical outlet ............... 98 M6S-111,M6L-111,M6H-101... -
Page 54: Pre-Operation Check
• Check seat belt and ROPS • Check movable parts • Check antifrost heater for oil separator (if equipped) ® • Supply DEF/AdBlue • Refuel (See DAILY CHECK on page 146.) • Care of the safety labels (See SAFETY LABELS on page 17.) M6S-111,M6L-111,M6H-101... -
Page 55: Operating The Engine
Particulate matter (PM) and black smoke contained in performance. exhaust gases are trapped and removed by the diesel Use of fuels other than ultra low sulfur fuel particulate filter (DPF) muffler. (S15) may not meet regulations for your region. M6S-111,M6L-111,M6H-101... -
Page 56: Dpf Regeneration Process
DPF will not be burnt, unless the operator performs the regeneration work manually. The “Regeneration inhibit” mode is effective for work in poorly ventilated work spaces. For more details, read the regeneration prohibition section of this manual. M6S-111,M6L-111,M6H-101... -
Page 57: Operating Procedure For Auto Regeneration Mode
• The engine rpm increase indicator is used as a guide to satisfy the regeneration conditions. If the engine load is too heavy, the engine rpm increase indicator may continue to flash, even though regeneration system conditions are satisfied and regeneration may begin automatically. (See Tips on diesel particulate filter (DPF) regeneration on page 56.) M6S-111,M6L-111,M6H-101... -
Page 58: Pm Warning Level And Required Procedures
Immediately move the tractor to a safe place, Engine output: 50% stantly “ON”. park it there and turn the engine “OFF”. Contact your local KUBOTA Dealer. • At this level, do not continue to operate the tractor; otherwise, damage will result to the DPF and engine. -
Page 59: Operating Procedure For Regeneration Inhibit Mode
3. When the parked regeneration indicator starts flashing: A specific amount of PM has accumulated in the DPF muffler. Move the tractor to a safe place and activate the DPF muffler. (See Operating procedure for parked regeneration on page 55.) M6S-111,M6L-111,M6H-101... -
Page 60: Pm Warning Level And Required Procedures
The engine warning indicator remains con- Immediately move the tractor to a safe place, stantly “ON”. park it there and turn the engine “OFF”. Contact your local KUBOTA Dealer. • At this level, do not continue to operate the tractor; otherwise, damage may re- sult to the DPF and engine. -
Page 61: Operating Procedure For Parked Regeneration
LCD. • Diagnostic trouble code (DTC) DTC can be used to diagnose the problem in the engine and SCR muffler. For example, : The code beginning with the letter “P” or “U” is the DTC. “ENG P-208B” M6S-111,M6L-111,M6H-101... -
Page 62: Tips On Diesel Particulate Filter (Dpf) Regeneration
• While the DPF is being regenerated, the engine air may have trouble and be damaged. flow rate is automatically limited to keep up the M6S-111 exhaust temperature. Because of this, the engine may sound differently, but this is normal for this engine. -
Page 63: Warning Indication And Countermeasures
: the code beginning with “ENG P-208B” These limitations are stipulated in conformity with the the letter “P” or “U” is the DTC. emission controls of each country and territory. If a DTC appears, immediately contact your local KUBOTA Dealer. M6S-111,M6L-111,M6H-101... - Page 64 After restarting the engine, the DTC ( “ENG ) will disappear and the thawing of the P-208B” ® DEF/AdBlue will resume. In case the DTC ( ) remains on the “ENG P-208B” screen even after restarting the engine several times, contact your local KUBOTA Dealer. M6S-111,M6L-111,M6H-101...
-
Page 65: Scr System Inducement Display And Measures
The engine output is limited to idle status (limited engine output: “Lv.2” ® When DEF/AdBlue has been added or a poor-quality solution replaced by a genuine product, the warning indicator and icons turn off. The engine output limitation will also be cleared. M6S-111,M6L-111,M6H-101... - Page 66 The SCR system has experienced an abnormality. Verify the DTC displayed on the performance monitor and contact your local KUBOTA Dealer. inhibit The engine output is unrestricted. After 195 minutes, the engine output will be limited to 50% (limited en- gine output: “Lv.1”...
- Page 67 3. The 40 hours warning record will be reset if any fault has not been detected over 40 hours from the repair. If a fault is detected after the 40 hours warning record reset, then the new countdown will be stated. M6S-111,M6L-111,M6H-101...
-
Page 68: Storing And Handling Def/Adblue
Pull the parking brake lever up to park. The parking brake warning indicator on the Easy ™ Checker will come on while the parking brake is set. M6S-111 (1) Parking brake lever (A) “PULL” (2) Release button All models (1) Parking brake lever (A) “PULL”... - Page 69 STARTING THE ENGINE OPERATING THE ENGINE 2. Make sure the fuel shutoff-valve is in the “OPEN” position. M6S-111 (1) Hydraulic-shuttle shift lever (F) “FORWARD” (2) Main gear shift lever (N) “NEUTRAL POSITION” (R) “REVERSE” 4. Place the PTO clutch control lever in “OFF” position (1) Fuel shutoff-valve (A) “CLOSE”...
-
Page 70: Checking Easy Checker ™ Indicators
• If the engine fails to start after 10 seconds, turn off the key for 30 seconds. Then repeat steps 6 through 9. To protect the battery and the starter, make sure that the starter is not continuously turned for more than 10 seconds. M6S-111,M6L-111,M6H-101... -
Page 71: Operating The Engine In Freezing Conditions
OPERATING THE ENGINE IN FREEZING CONDITIONS OPERATING THE ENGINE 7. If the parking brake warning indicator (5) does not M6S-111 and M6H-101 illuminate, set the parking brake. (1) Heater (oil separator, OUT) (2) Heater (oil separator, IN) (1) Electrical charge warning indicator... -
Page 72: Engine Low Temperature Regulation
In case the error/warning code remains “ENG P-208B” “OFF”. on the screen even after restarting the engine several times, contact your local KUBOTA Dealer. 2. Remove the key. WARMING UP THE ENGINE WARNING To avoid personal injury or death: • Be sure to set the parking brake during warm- •... -
Page 73: Warm-Up And Transmission Fluid At Low Temperature Range
1. Bring the helper vehicle with a battery of the same dead. Charge battery fully before voltage as the disabled tractor within easy cable operating the tractor. reach. Otherwise, the tractor might malfunction. IMPORTANT : • The vehicles must not touch. M6S-111,M6L-111,M6H-101... -
Page 74: Operating The Tractor
If interference The lubricating oil is especially important in the case of occurs, contact your KUBOTA Dealer. a new tractor. The various parts are not “broken-in” and are not accustomed to each other; small metal grit may develop during the operation of the tractor;... -
Page 75: Folding The Rops
OPERATING FOLDABLE ROPS OPERATING THE TRACTOR 1. Folding the ROPS M6S-111 and M6H-101 1. Remove both set bolts. M6S-111 and M6H-101 (1) ROPS M6L-111 (1) Set bolt M6L-111 (1) ROPS (1) Set bolt 2. Fold the ROPS. CAUTION To avoid personal injury: •... -
Page 76: Raising The Rops To Upright Position
OPERATING THE TRACTOR OPERATING FOLDABLE ROPS 3. Align the set bolt holes and insert both set bolts. M6S-111 and M6H-101 Slightly tighten the set bolts and secure them with the hair pin cotters. CAUTION To avoid personal injury: • Make sure that both set bolts are properly installed and secured with the hair-pin- cotters. -
Page 77: Adjusting The Foldable Rops
OPERATING FOLDABLE ROPS OPERATING THE TRACTOR 2. Raise the ROPS to the upright position. M6S-111 and M6H-101 CAUTION To avoid personal injury: • Raise the ROPS slowly and carefully. M6S-111 and M6H-101 (1) Set bolt (2) Hair pin cotter M6L-111... -
Page 78: Starting The Tractor
Then reposition the hair pin cotter. 4. Checking the brake pedal. • Brake pedals (right and left) on page 76 M6S-111 and M6H-101 5. Pull the position control lever to raise the implement. • Position control on page 110 6. -
Page 79: Operator's Seat
IMPORTANT : • After adjusting the operator's seat, be sure to check to see that the seat is properly locked. 2.1 For M6S-111 and M6H-101 2.1.1 Mechanical suspension type (1) Travel adjust lever (2) Suspension adjust knob... -
Page 80: Seat Belt
• Do not use the seat belt if the foldable ROPS is down or if there is no ROPS. Adjust the seat belt for proper fit and connect the buckle. This seat belt is auto-locking retractable type. M6S-111,M6L-111,M6H-101... -
Page 81: Turn Signal Switch And Hazard Light Switch
(2) Turn signal light switch (B) “LEFT TURN” Headlights ON, high beam. (3) Hazard and turn signal indi- cator M6S-111 6. Turn signal switch and hazard light switch Hazard light 1. When the hazard light switch is pushed, the hazard lights flash, along with the LH and RH indicators on the instrument panel. -
Page 82: Front Work Light Switch
(2) Front work light switch with indicator turns speeds (field operation only). Disengage the brake pedal lock and depress only one brake pedal. 8. Horn button The horn will sound when the key switch is in “ON” position and horn button is pushed. M6S-111,M6L-111,M6H-101... -
Page 83: Clutch Pedal
STARTING THE TRACTOR OPERATING THE TRACTOR 3. Be sure brake pedals have equal adjustment when using locked together. M6S-111 and M6H-101 (1) Clutch pedal IMPORTANT : To help prevent premature clutch wear: • The clutch pedal must be quickly disengaged (1) Brake pedal lock (A) “LOCK”... -
Page 84: Travel Speed Control
OPERATING THE TRACTOR STARTING THE TRACTOR 11. Travel speed control M6S-111 (1) Main gear shift lever (F) “FORWARD” (2) Clutch-off switch (N) “NEUTRAL POSITION” (3) Dual speed shift switch (dual speed model only) (R) “REVERSE” (4) Creep lever (if equipped) (Ls) “LOW”... - Page 85 By using the shift lever-shift switch combination, the forward speeds and reverse speeds shown in the following table are obtained. 32 forward speeds Without creep 32 reverse speeds Dual speed model 48 forward speeds With creep 48 reverse speeds M6S-111,M6L-111,M6H-101...
- Page 86 (Hs) “HIGH” (6) Pilot lamp (low) (7) Hydraulic-shuttle shift lever By using the shift lever-shift switch combination, the forward speeds and reverse speeds shown in the following table are obtained. 24 forward speeds Standard model With creep 24 reverse speeds M6S-111,M6L-111,M6H-101...
-
Page 87: Main Gear Shift Lever
• While shuttle shift lever engaged and the tractor will begin to move. “NEUTRAL” position, the [N] character appears • Always use the clutch pedal to start the tractor. on the LCD monitor. M6S-111,M6L-111,M6H-101... -
Page 88: Creep Lever
• Planting not operate in the high-speed range.) • Turf application This shifting requires clutch operation. Creep speed cannot be used for any of the M6S-111 following jobs: • Pulling a trailer • Front-loader operation • Front-blade operation • Earth-moving •... -
Page 89: Front-Wheel Drive Lever
– When starting to operate the tractor, be sure to release the parking brake. Misuse of the brakes may cause damage to the transmission and is therefore not acceptable to KUBOTA for coverage under the warranty. IMPORTANT : • Press the clutch pedal completely down and stop the tractor's motion before shifting the creep lever. -
Page 90: Front-Wheel Drive Usage
• When working on a hard soil where a rotary tiller brake lever down. might push the tractor forward. M6S-111 IMPORTANT : • Tires will wear quickly if the front-wheel drive is engaged on paved roads. -
Page 91: Stopping The Tractor
Never operate the tractor while an Easy Checker CHECK DURING DRIVING indicator is on. IMPORTANT : Immediately stop the engine if: • The engine suddenly slows down accelerates. • Unusual noises are suddenly heard. • Exhaust fumes suddenly become very dark. M6S-111,M6L-111,M6H-101... - Page 92 If the error ™ the indicator on the Easy Checker will light up. happens again, consult your local KUBOTA If this should happen during operation, drain the Dealer. water from the water separator as soon as possible.
-
Page 93: Fuel Gauge
If trouble should occur at the engine, transmission or other control parts, the warning indicator flashes as a warning. If the trouble is not corrected by restarting the tractor, consult your local KUBOTA Dealer. NOTE : • For checking and servicing of your tractor, consult... -
Page 94: Tachometer
Use the displayed data only as an approximate guide. In particular, do not use the total fuel consumption display mode in place of the fuel gauge. • The travel speed displayed when the wheels slip under traction is different from the actual one. M6S-111,M6L-111,M6H-101... -
Page 95: Various Setting Mode
(4) Unit setting switch. (5) PTO speed display setting The various setting mode screen appears again. 1.1 Clock setting 1. Press the mode selector switch to choose “Clock setting”. Then press the select switch, and the clock setting screen appears. M6S-111,M6L-111,M6H-101... -
Page 96: Setting The Clock Display On/Off
Entry (cm) switch. 18.4-34 The various setting mode screen appears again. 18.4R34 1.3 Setting the tire circumference M6S-111 16.9-34 18.4-30 When optional different-diameter tires are fitted on the machine, the travel speed display mode must be 18.4R30 changed. Otherwise, the travel speed will not be 16.9-24, 6PR... -
Page 97: Setting The Unit
Otherwise, the PTO speed will not be correctly displayed in the LCD monitor. When the PTO speed is changed from 540 rpm to 1000 rpm or from 1000 rpm to 540 rpm, it is necessary to switch the PTO speed display mode. M6S-111,M6L-111,M6H-101... -
Page 98: Performance Monitor
Memory B rpm • Engine RPM dual memory B rpm is displayed. NOTE : • Hold down the mode selector switch for 2 seconds or longer to reset the “Trip meter”, “Average fuel consumption” and “Total fuel consumption” displays to “0.0” M6S-111,M6L-111,M6H-101... -
Page 99: Electronic Engine Control
(A) Light up 2. Set the hand throttle lever slightly toward the Engine revolution is operating in the rpm memory setting value. higher-speed side. Flashing Engine revolution is less than the rpm memory setting value. M6S-111,M6L-111,M6H-101... -
Page 100: Constant Rpm Management Control
Set the desired engine speed while Constant RPM Management can be turned “ON” or watching the speed display. “OFF” by operating the switch. Pressing the switch turns the control “ON” and pressing the switch again turns it “OFF”. M6S-111,M6L-111,M6H-101... -
Page 101: Parking The Tractor
• There is a limit to the range within which a constant speed can be maintained. If a load exceeding the engine performance is applied, the engine speed will drop. • The purpose of Constant RPM Management is not to increase the engine power. M6S-111,M6L-111,M6H-101... -
Page 102: Operating Techniques
• Do not leave your tractor in the rain. If it cannot machine. be avoided, cover the muffler pipe to prevent water from entering. M6S-111 OPERATING TECHNIQUES 1. Differential lock WARNING To avoid personal injury or death due to loss of steering control: •... -
Page 103: Operating The Tractor On A Road
SMV emblem together for easy turning. and warning lamps on the equipment. Consult your local KUBOTA Dealer for further details. (1) 4-wheel differential lock ped- (A) Press to “ENGAGE” al (rear and front wheel) (B) Release to “DISENGAGE”... -
Page 104: Directions For Use Of Power Steering
The tractor is equipped with electrical outlets which serve the following functions. 6. Trailer electrical outlet For use with work light A trailer electrical outlet is supplied for use with trailer or implement. (1) Accessory electrical outlet for work light (11 A) (1) Trailer electrical outlet M6S-111,M6L-111,M6H-101... - Page 105 OPERATING TECHNIQUES OPERATING THE TRACTOR For use with accessory (1) Power supply connector (15 A) M6S-111,M6L-111,M6H-101...
-
Page 106: Pto
• To avoid damage to the PTO clutch and implement, shift the PTO clutch control lever slowly when engaging the PTO clutch. Do not keep the PTO clutch control lever at the halfway point. Proper warm up is strongly recommended in cold weather. M6S-111,M6L-111,M6H-101... -
Page 107: Pto Rpm Display
Use only when this higher rpm is specifically recommended by the implement manufacturer. By interchanging the PTO shafts, 2 different PTO shaft speeds can be obtained. M6S-111,M6L-111,M6H-101... -
Page 108: Pto Shaft Cover And Shaft Cap
PTO PTO OPERATION 5. Set the distance from drawbar pin hole to the rear M6S-111 and M6L-111: adjustable shaft cover end of PTO shaft according to the following instructions. IMPORTANT : • For maximum PTO shaft speeds of various implements, see the implement operator's manual. -
Page 109: 3-Point Hitch And Drawbar
3-POINT HITCH AND DRAWBAR 3-POINT HITCH AND DRAWBAR M6S-111 (1) Top link (2) Lifting rod (left) (3) Telescopic stabilizers (4) Lower link (5) Lifting rod (right) (6) Drawbar M6S-111,M6L-111,M6H-101... - Page 110 3-POINT HITCH AND DRAWBAR M6L-111 (1) Top link (2) Lifting rod (left) (3) Telescopic stabilizers (4) Lower link (5) Lifting rod (right) (6) Drawbar M6S-111,M6L-111,M6H-101...
- Page 111 3-POINT HITCH AND DRAWBAR M6H-101 (1) Top link (2) Lifting rod (left) (3) Telescopic stabilizers (4) Lower link (5) Lifting rod (right) (6) Drawbar M6S-111,M6L-111,M6H-101...
-
Page 112: 3-Point Hitch Setup
If draft control is not required, it is recommended to use the top set (1). (1) Lower link (A) Hole (2) Lifting rod (B) Hole M6S-111,M6L-111,M6H-101... -
Page 113: Draft Stopper
To avoid personal injury or death: • Do not extend lifting rod beyond the groove on the thread rod. By turning the rod itself, the lifting rod changes its length. When extending the rod, do not exceed the groove on the rod thread. M6S-111,M6L-111,M6H-101... -
Page 114: Top Link
2. The proper length of the top link varies according to the type of implement being used. To attach an implement, follow the instructions below: 1. Push the levers, pull out the lower link ends, and attach to the implement. (1) Top link (A) “Length of the screw” M6S-111,M6L-111,M6H-101... -
Page 115: Drawbar
1. When towing an implement, it is recommended that hole (A) in drawbar be utilized. 2. For information about the drawbar load, read the implement limitations section of this manual. (See IMPLEMENT LIMITATIONS on page 39.) (1) Drawbar (2) Locating pin (3) Locking bolt (1) Drawbar M6S-111,M6L-111,M6H-101... -
Page 116: Hydraulic Unit
Unless corrected, the unit will be damaged. Contact your KUBOTA Dealer for adjustments. A standard tractor has the following hydraulic control systems. Choose the most appropriate system for the implement you are using. -
Page 117: Mixed Control
Place both the draft control lever and the position as a loader bucket follow the ground. control lever in the float position to make the lower links move freely along with the ground conditions. M6S-111,M6L-111,M6H-101... -
Page 118: Remote Control Valve Lever
3. Relieve pressure by moving hydraulic control levers with engine shut off. Pull the hose straight from the hydraulic coupler to release it. Lever 2 Push Pull 4. Clean oil and dust from the coupler, then replace the dust plugs. Port M6S-111,M6L-111,M6H-101... -
Page 119: Flow Control Valve (Option)
2. Turn the flow control knob (5) counterclockwise (A), NOTE : and the flow rate for the remote control valves (2) or • Your local KUBOTA Dealer can supply parts for (3) increases. A clockwise turn (B) of the knob adapting couplers to hydraulic hoses. - Page 120 (2). 5. The 3-point hitch lift speed and the flow available for valve (1) are influenced by the flow adjustment of valve (2). (1) Remote control valve (1) (2) Remote control valve (2) (3) Flow control valve M6S-111,M6L-111,M6H-101...
-
Page 121: Hydraulic Control Unit Use-Reference Chart
(hold the draft control lev- when implement is Tighten rear carrier, etc. er at the frontmost position in raised position. during operation). For implements Mower (mid-and with gauge rear-mount type) wheels, lower the Hay rake, ted- position control der, etc. lever fully. M6S-111,M6L-111,M6H-101... -
Page 122: Tires, Wheels, And Ballast (M6S-111)
TIRES, WHEELS, AND BALLAST (M6S-111) TIRES TIRES, WHEELS, AND BALLAST (M6S-111) TIRES Tire sizes Inflation pressure 9.5L-15 250 kPa (2.5 kgf/cm , 36 psi.) WARNING 10.00-16, 6PR 220 kPa (2.2 kgf/cm , 32 psi.) To avoid personal injury or death: Front 12.4-24, 6PR... - Page 123 WHEEL ADJUSTMENT TIRES, WHEELS, AND BALLAST (M6S-111) 3. Adjust the toe-in as 1 to 5 mm (0.04 to 0.2 in.). (See Adjusting toe-in on page 162.) 1540 mm (60.6 in.) 1640 mm (64.6 in.) (1) Front axle mounting bolt (both sides, LH not shown in illustra-...
-
Page 124: Front Wheels-4Wd
TIRES, WHEELS, AND BALLAST (M6S-111) WHEEL ADJUSTMENT should not be longer than 1840 mm (72.4 in.). • When using the maximum front tread (2040 mm / 80.3 in.) on 2WD models, there should not be more than 10 front end weight pieces. - Page 125 WHEEL ADJUSTMENT TIRES, WHEELS, AND BALLAST (M6S-111) (1) Stopper bolts (A) “FRONT” Stopper bolts (ex. LH stopper bolt) Angle 50° 48° 45° Stopper (Factory set- ting) Angle 42° 37° 33° Stopper Angle 30° Stopper (A) 5 mm (0.2 in.) collar (B) 6 mm collar (C) 2.3 mm collar...
-
Page 126: Rear Wheels
TIRES, WHEELS, AND BALLAST (M6S-111) WHEEL ADJUSTMENT 4. Rear wheels Rear tread width can be adjusted, as shown, with the standard equipped tires. To change the tread width: 1. Remove the wheel rim and/or disc mounting bolts. 2. Change the position of the rim and/or disc (right and left) to the desired position, and tighten the bolts. - Page 127 WHEEL ADJUSTMENT TIRES, WHEELS, AND BALLAST (M6S-111) Cast iron disc 18.4R34 1730 mm 1835 mm 1930 mm 2035 mm 18.4-34 (68.1 in) (72.2 in) (76.0 in) (80.1 in) 16.9-34 18.4-30 1705 mm 1860 mm 1905 mm 2060 mm 18.4R30 (67.2 in) (73.2 in)
-
Page 128: Rear Jack Point
Rear wheel weights can be attached to the rear wheel. maintain steering control. See your implement operator's manual for required number of weights or consult your local KUBOTA 1. Front ballast Dealer about their usage. Add weights if needed for stability (2WD, 4WD models) and improved traction (4WD model). -
Page 129: Liquid Ballast In Rear Tires
BALLAST TIRES, WHEELS, AND BALLAST (M6S-111) OVERALL BALLAST Steel disc, 30 in. cast 34 in. cast iron disc iron disc Overall, the tractor, depending on the job, terrain, Maximum implement and purpose should be ballasted. 72.5 kg x 2 pieces 72.5 kg x 3 pieces... -
Page 130: Tires, Wheels, And Ballast (M6L-111)
120 kPa (1.2 kgf/cm , 18 psi.) Rear 18.4-26, 6PR 110 kPa (1.1 kgf/cm , 16 psi.) 600/50-22.5 120 kPa (1.2 kgf/cm , 18 psi.) Cannot be used in combination with front loader. 2. Dual tires Dual tires are not approved. M6S-111,M6L-111,M6H-101... -
Page 131: Front Jack Point
⋅ m / 26.5 to 31 kgf ⋅ m / 192 to 224 ft ⋅ lbs NOTE : • Wheels with beveled or tapered holes: Use the tapered side of lug nut. (1) Jack point 1530 mm 9.5-20 (60.2 in.) 1420 mm 1520 mm 9.5-24 (55.9 in.) (59.8 in.) (1) Tread M6S-111,M6L-111,M6H-101... -
Page 132: Rear Wheels
(74.4 in.) (78.7 in.) 680 mm 1790 mm 1890 mm 1990 mm 18.4-26 (66.1 in.) (70.5 in.) (74.4 in.) (78.3 in.) (1) Tread (2) Rear wheel rim (3) Rear wheel disc 1840 mm 600/50-22.5 (72.4 in.) (1) Tread (Continued) M6S-111,M6L-111,M6H-101... -
Page 133: Rear Jack Point
(both M8 and M10), adjusting plates (1) Fender (2) Axle mounting bolt (M16), lock washer, plain washer (if reinstalling to upper position), and axle mounting (3) Fender mounting bolt (M10), plain washer bolts (M16). (4) Fender mounting bolt (M8), plain washer (5) Adjusting plates M6S-111,M6L-111,M6H-101... -
Page 134: Ballast
Slush free at -47 ℃ (-53 ℉) See your implement operator's manual for required Solid at -52 ℃ (-62 ℉) 297 kg 387 kg number of weights or consult your local KUBOTA Approx. 2.25 kg (5 lbs.) (654 lbs.) (854 lbs.) Dealer about their usage. -
Page 135: Tires, Wheels, And Ballast (M6H-101)
240 kPa (2.4 kgf/cm , 35 psi.) 13.6-38 150 kPa (1.5 kgf/cm , 22 psi.) Rear 9.5R48 240 kPa (2.4 kgf/cm , 35 psi.) 12.4R46 240 kPa (2.4 kgf/cm , 35 psi.) 2. Dual tires Dual tires are not approved. M6S-111,M6L-111,M6H-101... -
Page 136: Front Wheels
• Wheels with beveled or tapered holes: Use the the bolts to the following torques then tapered side of lug nut. recheck after driving the tractor 200 m (200 yards) and thereafter according to service interval. (See MAINTENANCE on page 137.) M6S-111,M6L-111,M6H-101... - Page 137 9.5R48 12.4R46 Optional tire Standard 1565 mm (61.6 in.) 1665 mm (65.6 in.) With 2030 mm (80 in.) 1830 mm (72 in.) 1925 mm (75.8 in.) 2025 mm (79.7 in.) wide axle 13.6-38 (Steel disc) (1) Tread M6S-111,M6L-111,M6H-101...
-
Page 138: Front Jack Point
Adjust the stopper bolt with these factors in mind. • Make sure that the stopper bolts are always tightened to the correct torque. M6S-111,M6L-111,M6H-101... -
Page 139: Rear Wheels
• When re-fitting or adjusting a wheel, tighten the bolts to the following torques then recheck after driving the tractor 200 m (200 yards) and 10 times of shuttle movement by 5 m (5 yards), and thereafter according to service interval. (See MAINTENANCE on page 137.) M6S-111,M6L-111,M6H-101... - Page 140 9.5R48 12.4R46 Option tire Standard 1525 mm (60.0 in.) 1630 mm (64.2 in.) With 2030 mm (80 in.) 1845 mm (72.6 in.) 1940 mm (76.3 in.) 2045 mm (80.6 in.) wide axle 13.6-38 (Steel disc) (1) Tread M6S-111,M6L-111,M6H-101...
-
Page 141: Rear Jack Point
Add weights if needed for stability and improved traction. Heavy pulling and heavy rear mounted implements tend to lift up the front wheels. Add enough ballast to maintain steering control and to prevent tipping over. Remove the weight when it is no longer needed. M6S-111,M6L-111,M6H-101... -
Page 142: Front End Weights (Option)
Front end weights can be attached to the bumper. See your implement operator's manual for required Slush free at -10 ℃ (14 ℉) number of weights or consult your local KUBOTA Solid at -30 ℃ (-22 ℉) 231.3 kg 120 kg 195 kg Approx. -
Page 143: Maintenance
200 Hr 163 12 Water separator Clean ○ every 400 Hr 164 Greasing (2WD front wheel hub) for ○ every 400 Hr 165 M6S-111 2WD only 14 Engine oil Change ○ every 500 Hr 165 ◎ 15 Engine oil filter Replace ○... - Page 144 Check every 1 year 180 every 2 49 Master cylinder filter Clean years Oil separator related every 2 Replace rubber pipe years every 2 51 PCV valve hose Replace years DPF related rubber every 2 Replace pipe years (Continued) M6S-111,M6L-111,M6H-101...
- Page 145 50 hours of operation. • The items marked with @ are registered as emission related critical parts by Kubota in the U.S.EPA nonroad emission regulation. As the engine owner, you are responsible for the performance of the required maintenance on the engine according to the above instructions.
-
Page 146: Lubricants, Fuel And Coolant
Steering joint shaft Battery terminal A small amount NOTE : • The product name of Kubota genuine UDT fluid may be different from that in the operator's manual depending on countries or territories. Consult your local KUBOTA Dealer for further details. M6S-111,M6L-111,M6H-101... - Page 147 Steering joint shaft Battery terminal A small amount NOTE : • The product name of Kubota genuine UDT fluid may be different from that in the operator's manual depending on countries or territories. Consult your local KUBOTA Dealer for further details. M6S-111,M6L-111,M6H-101...
- Page 148 Battery terminal A small amount NOTE : • The product name of Kubota genuine UDT fluid may be different from that in the operator's manual depending on countries or territories. Consult your local KUBOTA Dealer for further details. Engine oil •...
- Page 149 ISO 22241-1. Transmission oil *KUBOTA Super UDT2: For an enhanced ownership experience, we highly recommend Super UDT2 to be used instead of standard hydraulic and transmission fluid. Super UDT2 is a proprietary Kubota formulation that delivers superior performance and protection in all operating conditions.
-
Page 150: Biodiesel Fuel (Bdf) B0-B5
Consequently, fuel filter performance may be reduced, particularly during cold weather conditions. 8. The KUBOTA warranty, as specified in the owner's warranty information guide, only covers defects in product materials and workmanship. Accordingly, any problems that may arise due to the use of poor quality fuels that fail to meet the above requirements, whether biodiesel or mineral oil based, are not covered by the KUBOTA warranty. -
Page 151: Periodic Service
Please dispose properly. See your local recycling center or KUBOTA Dealer to learn how to recycle or get rid of waste products. HOW TO OPEN THE HOOD... -
Page 152: Daily Check
DAILY CHECK 1. Walk around inspection 2. Loosen the bolts (5), and remove the side cover 2. M6S-111 and M6H-101 Look around and under the tractor for items such as loose bolts, trash build-up, oil or coolant leaks, broken or worn parts. -
Page 153: Checking Antifrost Heater For Oil Separator (If Equipped)
• Be careful not to let the fuel tank become to add fuel. empty. Otherwise, air will enter the fuel system, necessitating bleeding before the next engine M6S-111 start. • If the engine runs out of fuel and stalls, engine components may become damaged. -
Page 154: Checking Def/Adblue ® Level And Adding Fluid
PERIODIC SERVICE DAILY CHECK 2. If the heater is not warm, it is not working. In this case, contact your local KUBOTA Dealer without starting the engine. M6S-111 and M6H-101 ® 4. Checking DEF/AdBlue level and adding fluid (1) Heater... - Page 155 If any other substance (gasoline/diesel/oil) is ® mistakenly introduced into the DEF/AdBlue tank, do not attempt to start the engine and contact your local KUBOTA Dealer as soon as possible. ® • Check the DEF/AdBlue gauge regularly to avoid emptying its tank.
-
Page 156: Checking Water Separator
3. Allow the water to drain. When no more water comes out and fuel starts to flow out, retighten the air plug and drain plug. 4. Bleed the fuel system. (See SERVICE AS REQUIRED on page 181.) M6S-111 (1) Red float (A) [ON] (2) Fuel shutoff-valve (B) [OFF] (3) Air plug (C) “FUEL”... -
Page 157: Checking Transmission Fluid Level
Check to see that the oil level lies between the 2 notches. If the level is too low, add new oil to the prescribed level at the oil inlet. (See LUBRICANTS, FUEL AND COOLANT on page 140.) M6S-111,M6L-111,M6H-101... -
Page 158: Cleaning Evacuator Valve
• Use clean, fresh soft water and antifreeze to fill the radiator. • If coolant should leak, consult your local KUBOTA Dealer. (1) Radiator screen (2) Fuel cooler (3) Intercooler 9. Cleaning evacuator valve... -
Page 159: Checking Brake Pedal
To release the brakes, push in the button at the tip of the parking brake lever and tilt down the lever. After releasing the brakes, the parking brake indicator on the instrument panel will turn off. M6S-111 (1) Parking brake indicator 14. Checking gauges, meter and ™... -
Page 160: Checking Headlight, Turn Signal Light, Hazard Light, And So On
6. Turn the key to “START” position. 7. The engine must not crank. EVERY 50 HOURS 8. If it cranks, consult your local KUBOTA Dealer for 1. Checking engine start system this service. 1.3 Testing switch for PTO clutch control... -
Page 161: Checking Operator Presence Control (Opc) System
168 to 196 N⋅m / 17.1 to 20.0 kgf⋅m / 124 to 145 ft⋅lbs lever. c. If the buzzer does not sound, shut off the engine and consult your local KUBOTA Dealer Steel disc for immediate servicing of the PTO OPC. -
Page 162: Checking Tie-Rod Dust Cover
368 to 402 N⋅m / 37.6 to 40.9 kgf⋅m / 272 to 296 ft⋅lbs M6H-101 (1) Dust cover (both sides, LH not shown in illustration) M6S-111 4WD, M6L-111 and M6H-101 (1) Dust cover (both sides, LH not shown in illustration) IMPORTANT : •... -
Page 163: Every 100 Hours
(3) Grease fitting (lifting rod) (1) Grease fitting (front axle support) (1) Battery terminals (1) Grease fitting (front axle support) (1) Grease fitting (steering joint shaft) (1) Grease fitting (front axle gear case support) - both sides, LH not shown in illustration M6S-111,M6L-111,M6H-101... -
Page 164: Cleaning Air Cleaner Primary Element
PERIODIC SERVICE EVERY 100 HOURS M6S-111 2WD only IMPORTANT : • The air cleaner uses a dry element; never apply oil. • Do not run the engine with the filter element removed. • Be sure to refit the cover with the arrow (on the rear of the cover) upright. -
Page 165: Adjusting Brake Pedal
1. Disengage the brake pedal lock. to be beyond the specification range, contact 2. Depress the brake pedal several times. your local KUBOTA Dealer for adjusting the 3. Step on the right-hand pedal and measure the level brakes. difference (pedal stroke) between this pedal and the left-hand pedal. -
Page 166: Checking Equalizer Working Level (Anti-Imbalance Device)
Proper parking brake lever free 3 to 5 notches travel (ratchet sound 3 to 5) M6S-111 and M6H-101 1. Raise the parking brake lever to the parking position while counting the ratchet sound made by the parking brake lever. 2. If adjustment is needed, loosen the lock nut and... -
Page 167: Checking Battery Condition
M6S-111 • Do not use or charge the refillable type battery if the fluid level is below the [LOWER] (lower limit level) mark. Otherwise, battery component parts may prematurely deteriorate, which may shorten the battery's service life or cause an explosion. -
Page 168: Charging The Battery
When using a boost-charged battery, it is necessary to recharge the battery as early as possible. Failure to do this will shorten the battery's service life. M6S-111,M6L-111,M6H-101... -
Page 169: Adjusting Toe-In Procedure
EVERY 200 HOURS PERIODIC SERVICE M6S-111 4WD, M6L-111 and M6H-101 Proper toe-in = (A) - (B) M6S-111 2WD 1 to 5 mm (0.04 to 0.2 in.) M6S-111 4WD M6L-111 2 to 8 mm (0.08 to 0.31 in.) M6H-101 1. Park the tractor on a flat surface. -
Page 170: Every 400 Hours
PERIODIC SERVICE EVERY 400 HOURS M6H-101 M6S-111 (1) Fuel tank (both sides, RH not shown in illustration) (1) Water sensor connector (A) “CLOSE” (2) Drain plug (2) Fuel shutoff-valve (3) Cup IMPORTANT : • If the fuel contains impurities, such as water, M6L-111 drain the fuel tank at shorter intervals. -
Page 171: Lubricating Grease Fitting (M6S-111 2Wd Only)
2. Lubricating grease fitting (M6S-111 2WD only) 1. Detach the cover, and apply bearing grease. (1) Front wheel hub cover EVERY 500 HOURS 1. Changing engine oil... -
Page 172: Replacing Engine Oil Filter
3. Tighten the filter quickly until it contacts the mounting surface. Tighten the filter by hand an additional 1/2 turn only. (1) Oil inlet (A) Oil level is acceptable within (2) Dipstick this range M6S-111 and M6L-111 (1) Drain plug M6H-101 (1) Drain plug M6S-111,M6L-111,M6H-101... -
Page 173: Replacing Fuel Filter
• To prevent serious damage to the engine, • Allow the engine to cool down sufficiently; oil use only a KUBOTA genuine filter. can be hot and can burn. 1. Remove the 2 oil filters. 3. Replacing fuel filter 2. -
Page 174: Checking Power Steering Line
1. If the hose clamps are loose or water leaks, tighten • To prevent serious damage to the hydraulic the bands securely. system, use only a Kubota genuine filter. 5. Checking power steering line 1. Check to see that all lines and hose clamps are tight and not damaged. -
Page 175: Overheating Countermeasures
(See TROUBLESHOOTING on page 187.) Afterward, restart the engine. 7. Checking fuel line 1. Check to see that all lines and hose clamps are tight and not damaged. M6S-111,M6L-111,M6H-101... -
Page 176: Checking Intake Air Line
2. If the hoses and clamps are found to be worn or damaged, replace or repair them at once. 1. Check to see that hoses and hose clamps are tight M6S-111 and M6H-101 and not damaged. (1) Fuel lines (2) Clamp bands... -
Page 177: Checking Oil Cooler Line
If the front axle pivot pin adjustment is incorrect, front wheel vibration can occur, causing vibration in the steering wheel. Adjusting procedure 1. Loosen the lock nut and screw-in the adjusting (1) Hose (2) Hose clamps screw until seated. 2. Tighten the screw by an additional 1/6 turn. M6S-111,M6L-111,M6H-101... -
Page 178: Adjusting King-Pin Pivot
PERIODIC SERVICE EVERY 600 HOURS 3. Re-tighten the lock nut. 3. Fill with new KUBOTA SUPER UDT fluid up to the upper notch on the dipstick. (See LUBRICANTS, FUEL AND COOLANT on page 140.) (1) Adjusting screw (2) Lock nut 2. -
Page 179: Changing Front Differential Case Oil
(66.6 U.S.qts) M6H-101 With 2030 mm 64 L (80 in.) wide axle (67.7 U.S.qts) M6S-111 and M6L-111 (1) Dipstick (A) Oil level is acceptable within (2) Oil inlet this range. IMPORTANT : • Do not operate the tractor immediately after changing the transmission fluid. -
Page 180: Changing Front Axle Gear Case Oil
PERIODIC SERVICE EVERY 1000 HOURS 4. Adjusting engine valve clearance 5. After filling, reinstall the filling plug and check plug. Consult your local KUBOTA Dealer for this service. M6S-111 7 L (7.4 U.S.qts) M6L-111 EVERY 1000 HOURS OR 1 YEAR Oil ca- 7.0 L... -
Page 181: Replacing Oil Separator Element
2. Fit in a new oil separator element. 3. Tighten the cover. (1) Body (2) Oil separator element (3) Gasket (4) Cover 5. Checking positive crankcase ventilation (PCV) valve Consult your local KUBOTA Dealer for this service. M6S-111,M6L-111,M6H-101... -
Page 182: Checking And Cleaning Egr Cooler
PERIODIC SERVICE EVERY 1500 HOURS 6. Checking and cleaning EGR cooler Consult your local KUBOTA Dealer for this service. EVERY 2000 HOURS OR 2 YEARS Be sure to do the following servicing once every 2000 hours or biennially, whichever comes first. -
Page 183: Antifreeze
• Do not pour waste onto the ground, down a 7. KUBOTA's genuine long-life coolant has a service drain, or into any water source. life of 2 years. Be sure to change the coolant every •... -
Page 184: Cleaning Dpf Muffler
The longer the DPF operates, the more ash (burnt residue) is collected in the filter. Too much ash build-up adversely affects the DPF performance. Consult your local KUBOTA Dealer to clean the filter. IMPORTANT : • The DPF needs to be cleaned with a specific cleaning device. - Page 185 (A) “MOVE” (2) Nut (3) Bolt 5. Clean around the plug and remove the plug. 6. Loosen the top of the filter assembly and remove it from the pump. 7. Replace the filter assembly with a new one. M6S-111,M6L-111,M6H-101...
-
Page 186: Every 9000 Hours
• Do not apply oil to the o-ring of the filter. EVERY 9000 HOURS ® 1. Replacing DEF/AdBlue tank filter Consult your local KUBOTA Dealer for this service. EVERY 1 YEAR 1. Checking antifrost heater for oil separator (if equipped) Consult your local KUBOTA Dealer for this service. -
Page 187: Replacing Boost Sensor Hose
PERIODIC SERVICE 7. Replacing boost sensor hose Bleeding procedure is as follows: 1. Fill the fuel tank with fuel, and open the fuel shutoff- Consult your local KUBOTA Dealer for this service. valve. M6S-111 EVERY 3 YEARS 1. Replacing parking brake cable Consult your local KUBOTA Dealer for this service. -
Page 188: Bleeding Brake System
6. If air still remains and the engine stops, repeat the previous steps. 2. Bleeding brake system Consult your local KUBOTA Dealer for this service. 3. Draining clutch housing water The tractor is equipped with a drain plug under the clutch housing. - Page 189 10 A Spare fuse For specific information dealing with electrical Spare fuse problems, read the troubleshooting section of this manual or contact your local KUBOTA 10 A Engine ECU Dealer. 15 A Loader plug (See TROUBLESHOOTING on page 187.)
-
Page 190: Replacing Slow-Blow Fuses
Never use any substitute, use lamp scratched. If broken, glass may cause only a KUBOTA genuine part. injury. Pay more attention to halogen lamps in particular, which have high pressure inside. - Page 191 (3) Rubber boot (4) Clamping fixture (5) Bulb IMPORTANT : • Be sure to use a new bulb of the specified wattage. • Never touch the bulb surface (glass) with bare hands. Fingerprints, for example, may break the bulb. M6S-111,M6L-111,M6H-101...
-
Page 192: Storage
MUFFLER on page 56.) 10. Keep the tractor in a dry place where the tractor is sheltered from the elements. Cover the tractor. 11. Store the tractor indoors in a dry area that is protected from sunlight and excessive heat. M6S-111,M6L-111,M6H-101... -
Page 193: Troubleshooting
Loose or damaged fan belt. • Adjust or replace fan belt. • Dirty radiator core or grille screens. • Remove all trash. • Coolant flow route corroded. • Flush cooling system. If you have any questions, contact your local KUBOTA Dealer. M6S-111,M6L-111,M6H-101... - Page 194 Stop the engine and then restart it. If the engine fails to restart or the indicator stays on, immediately con- tact your local KUBOTA Dealer. If the warning indicator lights up, the following phenomena may appear de- pending on the engine's trouble spot.
-
Page 195: Power Train Trouble Shooting
If something is wrong with the power train, the master system warning indicator starts blinking and the error code shown in the following table is displayed on the LCD. The error code indicates the location of the trouble. If an error code appears, immediately contact your local KUBOTA Dealer for repairs. (1) Master system warning indicator... -
Page 196: Options
• Rear work light High visibility for night work For M6S-111 • Engine block heater Consult your local KUBOTA Dealer for further details. For extremely cold weather starting • Engine block heater • Double acting remote hydraulic control valve with... -
Page 197: Index
150 adjusting..............159 cleaning air conditioner condenser..... 152 checking.............. 153 cleaning battery mount........152 checking equalizer working level (anti-imbalance cleaning evacuator valve........152 device)............160 cleaning fuel cooler..........152 checking free travel..........159 cleaning grill............152 checking stroke........... 159 M6S-111,M6L-111,M6H-101... - Page 198 116,124,129 fan belt tension adjusting..............158 fender height Easy Checker adjusting..............127 checking.............. 153 float control..............111 Easy Checker indicator flow control valve (option)..........113 checking..............64 flow control valve advantages........113 Easy Checker indicators..........85 flow control valve positions........113 M6S-111,M6L-111,M6H-101...
- Page 199 LCD monitor..............88 checking.............. 153 lifting rod (left)............107 grease fitting (M6S-111 2WD only) lifting rod (right)............107 lubricating............165 light bulb grease fittings replacing..............184 lubricating............157 light switch..............74 grill liquid ballast in rear tires......123,128,136 cleaning...............152...
- Page 200 110 positive crankcase ventilation (PCV) valve safety checking.............. 175 CAB and ROPS............9 positive crankcase ventilation (PCV) valve hose driving tractor on the road........11 replacing..............180 general information..........9 power steering operating PTO............13 directions for use...........98 operating tractor............ 10 M6S-111,M6L-111,M6H-101...
- Page 201 (M6H-101)..........37 specification table (implement)........41 travel speeds (M6L-111)..........35 specification table (M6H-101)........31 travel speeds (M6S-111)..........33 specification table (M6L-111)........29 turbocharger specification table (M6S-111)........27 checking.............. 177 stopper bolt (front wheel) turn signal light adjusting turning angle.........
- Page 202 (4WD, front) adjusting............118,130 wheels tread (front) adjusting..............124 wheels tread (rear) adjusting..........120,126,133 M6S-111,M6L-111,M6H-101...
Need help?
Do you have a question about the M6S-111 and is the answer not in the manual?
Questions and answers