Table of Contents
Advertisement
Advertisement
Table of Contents
Troubleshooting

Related Manuals for Baumatic BTM30SS


Summary of Contents for Baumatic BTM30SS
- Page 1 BTM30SS Microwave oven...
- Page 2 User Instruction Manual for your BTM30SS IMPORTANT : PLEASE READ THESE INSTRUCTIONS CAREFULLY BEFORE USING YOUR MICROWAVE OVEN. IF YOU FOLLOW THE INSTRUCTIONS, YOUR OVEN WILL GIVE YOU MANY YEARS OF GOOD, SAFE SERVICE. PLEASE KEEP THIS MANUAL SAFELY FOR FUTURE REFERENCE.
-
Page 3: Table Of Contents
Safety Information ……..…………….…….…..…4-5 Environmental Note ……………………………………….………..5 Avoiding Exposure to Microwave Energy……….6 Never Use Your Microwave Oven to: ..…..…..…7 Your Baumatic Microwave Oven ...…….…………8 Placing your Microwave Oven ………….……….…9 Installing your Microwave Oven ……….….10-13 Before you Start Cooking with your Microwave….…………………………..……14-15 Materials that you CAN use in your Microwave………16... -
Page 4: Specifications
Outside Dimensions: Oven Cavity Dimensions: Oven Capacity: Cooking Uniformity: Net Weight: Your Baumatic BTM30SS Microwave has: 7 Functions 1. Baked Potato; 2. Beverage; 3. Popcorn; 4. Reheat; 5. Pizza; 6. Meat Skewers; 7. Cake LED full programmer 11 Power levels... -
Page 5: Safety Information
DURING THE GUARANTEE PERIOD ONLY BAUMATIC SERVICE ENGINEERS OR • AN AUTHORISED AGENT OF BAUMATIC SHOULD CARRY OUT REPAIRS ON THIS UNIT. THEREAFTER, IT SHOULD BE SERVICED ONLY BY QUALIFIED TECHNICIANS. DO NOT USE IF THE SUPPLY CORD IS DAMAGED OR IF IT HAS BEEN •... -
Page 6: Environmental Note
Safety Information / Environmental Note GENERAL SAFETY • READ AND FOLLOW THE “PRECAUTIONS TO AVOID POSSIBLE EXPOSURE TO EXCESSIVE MICROWAVE ENERGY” (Page 6). • AS WITH MOST COOKING APPLIANCES, CLOSE SUPERVISION IS NEEDED TO REDUCE THE RISK OF FIRE IN YOUR MICROWAVE OVEN. -
Page 7: Avoiding Exposure To Microwave Energy
Avoiding Exposure to Microwave Energy AVOIDING POSSIBLE EXPOSURE TO EXCESSIVE MICROWAVE ENERGY IMPORTANT NOTES ABOUT MICROWAVE ENERGY – READING THESE PRECAUTIONS WILL HELP YOU TO AVOID POSSIBLE EXPOSURE TO MICROWAVE ENERGY NEVER ATTEMPT TO USE YOUR OVEN WITH THE DOOR OPEN. -
Page 8: Never Use Your Microwave Oven To
Never Use Your Microwave to: A note on the type of energy used by your Microwave Oven Microwaves are electromagnetic waves that transmit energy. When cooking, the microwave energy penetrates food to a depth of 4cm (1½ inches), causing its molecules to vibrate. -
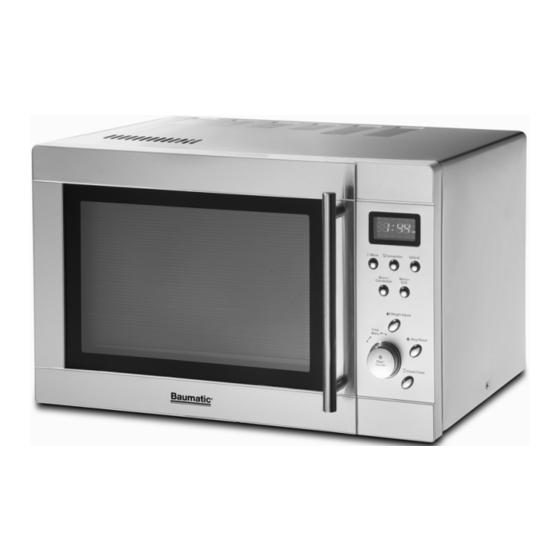
Page 9: Your Baumatic Microwave Oven
Your Baumatic Microwave Oven Door Safety Lock System Oven Window Oven Air Vent Shaft Roller Ring Glass Tray Control Panel Grill Heater Baking Plate... -
Page 10: Placing Your Microwave Oven
Placing Your Microwave Oven ONCE YOU ARE SURE THAT YOUR OVEN IS NOT DAMAGED (EG. DENTS OR A BROKEN DOOR) AND THAT THERE ARE NO PACKING MATERIALS AND ACCESSORIES INSIDE IT, YOU CAN THEN INSTALL IT ON A FLAT SURFACE SUCH AS A COUNTERTOP. BE SURE THAT THE SURFACE CAN HOLD AT LEAST YOUR MICROWAVE’S WEIGHT (22 kg). -
Page 13: Built Under Installation For Your Microwave
Built under installation for your microwave. IMPORTANT: NO OTHER METHODS OF BUILDING UNDER THE MICROWAVE ARE SANCTIONED BY BAUMATIC. - Page 14 2. The ventilation gaps below the support shelf and below the worktop MUST be adhered to. 3. The appropriate Baumatic Microwave Building In Kit MUST be fitted. 4. An induction hob MUST NOT be fitted above the microwave.
-
Page 15: Before You Start Cooking With Your Microwave
Before you Start Cooking with Your Microwave PLEASE REMEMBER: NOT ALL FOODS AND UTENSILS ARE SUITABLE for use in MICROWAVE OVENS. Always check before putting a utensil in your oven. FOODS THAT MUST NEVER BE MICROWAVED: Eggs in their shell or whole hard-boiled eggs since they may explode, even after your... -
Page 16: Before You Start Cooking With Your Microwave
Before you Start Cooking with Your Microwave You can reduce the chances of this happening further by Avoiding using straight-sided containers with narrow necks. Not overheating. Stirring the liquid before placing the container in the oven and again halfway through the heating time. After heating, allow to stand in the oven for a short time, stirring again before carefully removing the container, using a cloth or oven glove. -
Page 17: Materials That You Can Use In Your Microwave
Materials that you CAN use in your Microwave Materials that you CAN use in your microwave: Utensil Remarks Follow manufacturer’s instructions. The bottom of the browning dish must be at least 3/16 Browning dish the turntable. Incorrect usage may cause the turntable to break. -
Page 18: Materials That You Can't Use In Your Microwave
Materials that you CAN’T use in your Microwave Materials that you CAN’T use in your Microwave: Utensil Remark Aluminium trays May cause arcing. Transfer food into microwave- & foil safe dish. Food carton with May cause arcing. Transfer food into microwave- metal handles safe dish. -
Page 19: Setting Your Microwave's Clock
Setting your Microwave’s Clock Before you start using your Microwave, you may want to set the time on the Clock and Preset times for cooking. Each time you press a button, a ‘beep’ will sound. Note that this is a 12 hour clock (1:00 – 12:59). It will read 1:00 when the oven is plugged in. -
Page 20: Notes On Microwaving Food
Notes on Microwaving Food o Whenever possible, always cook food covered (but not sealed!). Only pastry dishes with crust should be cooked without a cover. o There are several types of covering suitable for microwave use. Plastic film or glass lids must always be checked to ensure they can be used for microwaving. -
Page 21: Using Your Microwave Oven
Using your Microwave Oven The Control Panel It’s a good idea to familiarise yourself with your Microwave Oven’s controls before you use it to cook. DISPLAY SCREEN Cooking time, power, indicators and present time are displayed. MICRO Press a number of times to select microwave power level. GRILL Press to set a grill-cooking program. - Page 22 Using your Microwave Oven You cook with your Microwave Oven by first choosing a Power Level and then setting the time you need to cook for. To set the Cooking Power you’d like to use, you need to press the ‘MICRO’ button one or more times. You have several different cooking powers available to you.
-
Page 23: Quick Start
QUICK START The Quick Start feature of your Microwave Oven will make it operate at HIGH power (100% power output). By pressing the START button, you set your microwave to cook for a longer time by up to10 minutes maximum ALWAYS MAKE SURE THE FOOD YOU USE QUICK COOK ON IS SUITABLE FOR 100% MICROWAVE POWER. -
Page 24: To Cook With Convection
Grill Cooking / Convection RILL COOKING meat, chops , kebabs, sausages and pieces of chicken. It is also suitable for hot sandwiches and au gratin dishes. Suppose you want to program grill cooking for 12 minutes. 1. Make sure the system is reset, which means no current cooking program is running, and the system is waiting for instructions. -
Page 25: To Preheat And Cook With Convection
Convection Cooking 2) Suppose you want to cook at 185 a) Press CONVECTION button 4 times. b) Rotate the TIME/MENU dial until the correct cooking time (40:00) is displayed. c) Press START button. NOTE: The maximum time you can use Convection cooking for is 9 hours 30 minutes. -
Page 26: Micro & Grill Cooking
MICRO & GRILL This feature allows you to combine grill and microwave cooking on two different settings. First, press this button once or twice to choose an appropriate combination setting. Then enter the desired cooking time by turning the ‘TIME/MENU’ dial. After you have pushed the ‘START’... -
Page 27: Micro + Convection
Micro & Grill Cooking COMBINATION 2 Note that the longest cooking time is 95 minutes. 55% of the cooking process uses Microwave energy with 45% using grill cooking. Use for pudding, omelettes, baked potatoes and poultry. Suppose you want to set combination 2 cooking for 12 minutes. - Page 28 DEFROSTING Suppose you want to defrost frozen food for five minutes. 1. Rotate the ‘TIME/MENU’ dial until ‘08’ and ‘CODE’ are displayed. 2. Press ‘WEIGHT ADJUST’ button. 3. Rotate the ‘TIME/MENU’ dial to program the defrosting time. 4. Press the ‘START’ button. NOTE: 1.
-
Page 29: Multi-Stage Cooking
Multi-Stage Cooking MULTI-STAGE COOKING Your oven can be programmed for up to 3 automatic cooking sequences. DEFROSTING can only be selected before the cooking stage in the program (IE, so that defrosting is the first stage). Suppose you want to set the following cooking program. -
Page 30: Auto Menu
‘AUTO MENU’ allows you to cook or reheat food automatically without entering a power level or a cooking time. The following cooking times may be updated according to different specifications. BAKED POTATO AMOUNT Press WEIGHT ADJUST Once Twice 3 times 4 times NOTE: Each ‘AMOUNT’... - Page 31 1. Rotate the ‘TIME/MENU’ dial until ‘02’ and ‘CODE’ are displayed. 2. Press ‘WEIGHT ADJUST’ to select the needed amount. 3. Press the START button. POPCORN 1. Rotate the ‘TIME/MENU’ dial until ‘03’ and ‘CODE’ are displayed. 2. Press ‘WEIGHT ADJUST’ once. The cooking time (2min 30sec) will be displayed.
- Page 32 2. Press the ‘WEIGHT ADJUST’ button once. The roasting time (1min 10 sec) will be displayed. 3. Press the ‘START’ button. + + + + + + + + + + + + + + + + + + + + + + + + + To roast a bigger pizza 1.
- Page 33 AUTO MENU 2. Press the ‘WEIGHT ADJUST’ button once – the cooking time (40 min) will be displayed. 3. Press the ‘START’ button. NOTE: To reset the cooking time, rotate the ‘TIME/MENU’ dial until ‘07’ and ‘CODE’ are displayed. Press the ‘WEIGHT ADJUST’ button twice. Rotate the ‘TIME/MENU’...
-
Page 34: Door Open Protection
Stop / Reset - Door Open Protection Stop / Reset 1) If your Microwave Oven is running, press ‘Stop/Reset’ to pause it. Press ‘Start’ to continue operating. Press ‘Stop/Reset’ twice to stop the program altogether. ____________________________________ Door Open Protection When your Microwave Oven is running, you can open the door at any time to check cooking. -
Page 35: Child Lock Function
Child – lock / Notes on Display Child-lock Function To prevent children from using your Microwave Oven, do the following: To Lock Press & hold the ‘RESET’ button and hold for 3 seconds. After a ‘beep’, the display will show the LOCK light‘... -
Page 36: Cleaning
Cleaning Note : never use abrasive cleaning substances or coarse cleaning materials to clean your Microwave. Your Microwave requires a minimum of maintenance. Remember that after you clean the turntable and its ring assembly, you must place them correctly otherwise your Microwave will not work properly. -
Page 37: Troubleshooting
Troubleshooting Troubleshooting Checking your problem against the chart below and trying solutions for each problem could keep you from having to call for service. PROBLEM Oven will not start! Arcing or Sparking! POSSIBLE CAUSE Electrical cord for Plug into the power oven isn’t plugged outlet. - Page 38 Troubleshooting PROBLEM Unsuitable cookware is being used to prepare foods Food is not defrosted completely Unevenly cooked foods! Cooking time & power level are unsuitable for your food Food has not been turned or stirred Cooking time / Overcooked power level is too foods! long / too great Unsuitable...
- Page 39 Troubleshooting PROBLEM Unsuitable cookware is being used to prepare food Improper Cooking time / power level is defrosting! unsuitable Food has not been turned or stirred Noise comes Food debris from turntable grinding between during turntable and oven floor cooking! Noise comes When cooking on from oven...
-
Page 40: Troubleshooting
Turntable or support isn’t correctly connected to the drive Remember that many problems can be avoided if you just follow the guidelines for using your Baumatic Microwave Oven. POSSIBLE CAUSE Next time, set a shorter cooking time or reduce the microwave power output. -
Page 41: Conditions Of Guarantee
Baumatic appliance. * In addition, your appliance is covered by a 5 year parts warranty. Baumatic Ltd will provide free of charge the parts required to repair the appliance, only if they are fitted by a Baumatic engineer, for any defect that arises due to faulty materials or workmanship within a period of 5 years from the original purchase date. -
Page 42: Contact Details
Headquarters Baumatic Ltd. Baumatic Buildings, 6 Bennet Road, Reading, Berkshire RG2 0QX, United Kingdom Sales Telephone +44 118 933 6900 Sales Fax +44 118 931 0035 Service Telephone +44 118 933 6911 Service Fax +44 118 986 9124 Spares Telephone...
Need help?
Do you have a question about the BTM30SS and is the answer not in the manual?
Questions and answers