
Related Manuals for Canon WFT-E7


Summary of Contents for Canon WFT-E7
- Page 1 Wireless File Transmitter WFT-E7 (Ver.2) for EOS R This manual is for the WFT-E7 (Ver.2) installed with firmware version 1.4.0 or later. INSTRUCTION MANUAL...
-
Page 2: Introduction
Introduction What You Can Do with the Transmitter The transmitter is an accessory for EOS cameras that enables LAN functions to be used when attached to the camera. Using the transmitter’s LAN functions enables you to do the following: FTP Transfer (p.31) Transfer images to an FTP server EOS Utility... -
Page 3: Introduction Conventions Used In This Manual
(A, B, C, D, and E) in various areas around the world (see separate sheet). For convenience, the product in this manual is referred to as “WFT-E7 (Ver.2)”, without reference to the versions A, B, C, D, or E. - Page 4 Note that Canon cannot be held liable for any loss or damage to the transmitter from erroneous network or FTP server settings. In addition, Canon cannot be held liable for any other loss or damage caused by use of the transmitter. When using LAN functions, establish appropriate security at your own risk ...
-
Page 5: Table Of Contents
Chapter List Introduction Basic Network Settings Transferring Images to an FTP Server Operating Remotely Using EOS Utility Terminating the Connection and Reconnecting Checking and Operating Connection Settings Troubleshooting Guide Reference... - Page 6 Contents Introduction Conventions Used in this Manual............. 3 Chapter List ..................5 Safety Instructions................8 Nomenclature ................. 10 Installing and Removing the Battery..........12 Using a Household Power Outlet ........... 14 Attaching to the Camera..............15 Basic Network Settings Preparation ..................18 Displaying the Connection Wizard ..........
- Page 7 Contents Checking and Operating Connection Settings Displaying the Connection Settings Screen........58 Changing Settings................60 Saving and Loading Settings ............64 Function Settings Screen..............66 Troubleshooting Guide Responding to Error Messages ............70 Wireless Function Notes ..............86 Security ................... 88 Checking Network Settings.............89 Reference Creating and Registering Captions ..........92 Setting IP Address Manually............
-
Page 8: Safety Instructions
Safety Instructions Be sure to read these instructions in order to operate the product safely. Follow these instructions to prevent injury or harm to the operator of the product or others. WARNING Denotes the risk of serious injury or death. Use only power sources specified in this instruction manual for use with the product. - Page 9 High temperatures may damage the transmitter. Do not wipe the transmitter using cleaners containing organic solvents. For stubborn dirt, take it to the nearest Canon Service Center. Avoid storing the transmitter where there are chemicals that result in rust ...
-
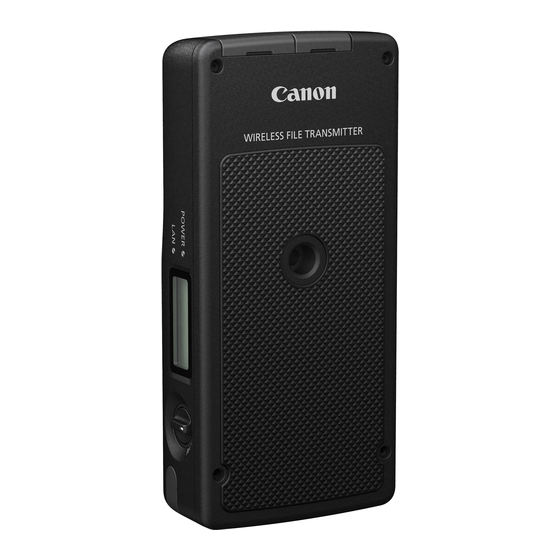
Page 10: Nomenclature
Nomenclature Power lamp Tripod screw Battery compartment (p.15) cover release lever (p.12) Battery compartment <LAN> lamp cover (p.12) LCD panel Power switch (p.15) <a> port (p.15) Ethernet RJ-45 port LCD panel Connection icon Error code number Wireless signal strength Wired LAN connection Bluetooth connection* Battery check... - Page 11 Nomenclature Case and other accessories Belt holder Strap mounts Cap for preventing cable disconnection Case strap Case for tripod screw Interface cables When connecting to the EOS R, use either IFC-40AB III (40 cm / 1.3 ft.; sold separately) or IFC-150AB III (1.5 m / 4.9 ft.; sold separately). The included interface cables cannot be used for the connection.
-
Page 12: Installing And Removing The Battery
Installing and Removing the Battery Use one Battery Pack LP-E6N (or LP-E6) to power the transmitter. When replacing the transmitter’s battery, be sure to turn the transmitter off before opening the battery compartment cover. Also note that the transmitter is not sold with a battery or charger. If you do not own these accessories, they are available for purchase separately. - Page 13 Installing and Removing the Battery Battery Check The remaining battery level is displayed when you turn the transmitter on. A blinking battery icon ( ) indicates that the battery will be depleted soon. Icon Level (%) 100 – 70 69 – 50 49 –...
-
Page 14: Using A Household Power Outlet
Do not connect both the transmitter and camera to a household power outlet and use them simultaneously. It may cause malfunction to the nearby electronic devices. For more information, contact your dealer or nearest Canon Service Center. AC Adapter Kit ACK-E6 (sold separately) can also be used. -
Page 15: Attaching To The Camera
Attaching to the Camera When connecting the transmitter to the camera, always use one of the interface cables included with the transmitter. Turn off both the transmitter and camera. Attach the transmitter’s <a> port cap. Attach the cap for preventing cable ... - Page 16 Attaching to the Camera Before disconnecting the cable, turn off both the transmitter and camera. If you turn on/off the transmitter or connect/disconnect the interface cable during movie shooting, movie shooting will stop. If wireless functions are in use, noise may be recorded regardless of the ...
-
Page 17: Basic Network Settings
Basic Network Settings Complete the basic network settings by using the menu screen on the camera’s monitor. -
Page 18: Preparation
Preparation [FTP trans.] You can transfer captured images to an FTP server. Images can be automatically transferred as you shoot them, or you can select images to be transferred later. Computer Operating Systems Use of [FTP trans.] requires that one of the following operating systems be installed on a computer. - Page 19 Preparation [EOSUtility] You can perform remote shooting over a LAN using EOS Utility (EOS software). In addition to remote shooting, almost all EOS Utility camera operations are supported, because this option utilizes a LAN instead of an interface cable. Requires a computer with EOS Utility (EOS software) installed.
-
Page 20: Displaying The Connection Wizard
Displaying the Connection Wizard This section describes the process following the connection instructions. If an error is displayed, see “Troubleshooting Guide” in Chapter 6 (p.69) and check the settings. Pressing the shutter button or other camera controls during configuration using the connection instructions will close the connection instructions. - Page 21 Displaying the Connection Wizard Select [Connection wizard]. The <LAN> lamp on the transmitter will blink in green. Select the communication method. Select the communication method by referring to page 18. Select [OK] and press <0> to go to the next screen.
-
Page 22: Checking The Type Of Access Point
Checking the Type of Access Point To connect using an access point, check if the access point supports that allows easy connection between Wi-Fi devices. If you do not know if the access point you use is WPS-compatible, refer to the access point instruction manual or other documentation. * Wi-Fi Protected Setup When WPS is supported ... -
Page 23: Connecting Via Wps (Pbc Mode)
Connecting via WPS (PBC Mode) The instructions in this chapter are continued from page 22. This is a connection mode available when using an access point compatible with WPS. In pushbutton connection mode (PBC mode), the camera and the access point can be connected simply by pressing the WPS button on the access point. -
Page 24: Connecting Via Wps (Pin Mode)
Connecting via WPS (PIN Mode) The instructions in this chapter are continued from page 22. This is a connection mode available when using an access point compatible with WPS. In PIN code connection mode (PIN mode), an 8- digit identification number specified on the camera is set at the access point to establish a connection. - Page 25 Connecting via WPS (PIN Mode) Connect to the access point. Select [OK] and press <0> to establish a connection with the access point. When a connection with the access point is established, the [IP address set.] screen (p.29) is displayed.
-
Page 26: Connecting To A Detected Network Manually
Connecting to a Detected Network Manually The instructions in this chapter are continued from page 22. Establish a connection by selecting the SSID (or ESS-ID) of the access point to connect to from a list of active access points nearby. Selecting the Access Point Select an access point. - Page 27 Connecting to a Detected Network Manually Entering the Access Point Encryption Key Enter the encryption key (password) specified for the access point. For details on the specified encryption key, refer to the access point’s instruction manual. The screens displayed in steps 2 to 3 below vary depending on the ...
- Page 28 Connecting to a Detected Network Manually Virtual Keyboard Operation (7) (8) (9) (1) Input area, for entering text (5) Switch input modes (2) Cursor keys, for moving in the (6) Space input area (7) Delete a character in the input area (3) Current no.
-
Page 29: Setting The Ip Address
Setting the IP Address Select [Auto setting]. Select [OK] and press <0> to display the setting screen for the communication method. If [Auto setting] results in an error or if you want to specify the settings manually, see page 94. Completing Settings for the Communication Method The following instructions are for settings screens that vary depending on the communication method. -
Page 31: Transferring Images To An Ftp Server
Transferring Images to an FTP Server By connecting to an FTP server, you can transfer images stored in the camera to a computer. With FTP transfer, you can automatically transfer images to the FTP server as you shoot or transfer a set of shots together. -
Page 32: Configuring Ftp Server Connection Settings
Configuring FTP Server Connection Settings These instructions are continued from Chapter 1. Select an FTP mode. To establish security for FTP transfer using a root certificate, select [FTPS]. For root certificate settings, see page Select [OK] and press <0> to go ... - Page 33 Configuring FTP Server Connection Settings Set the port number. [Port number setting] should usually be 00021. Select [OK] and press <0> to go to the next screen. Set the passive mode setting. Select [OK] and press <0> to go ...
- Page 34 Configuring FTP Server Connection Settings Set the target folder. Select [Root folder] to have images saved in the root folder as specified in FTP server settings (p.47). Select [Select folder] to specify a target folder in the root folder. If no folder exists, a folder will be created automatically.
- Page 35 Configuring FTP Server Connection Settings Importing a Root Certificate for FTPS If the FTP mode is set to [FTPS] when configuring the connection settings, the same root certificate as the FTP server must be imported to the camera. Only the root certificate whose file name is “ROOT.CER”, ...
- Page 36 Configuring FTP Server Connection Settings Select [Set root certif]. Select [Load root certif from card]. Select [OK]. The root certificate is imported. Select [OK] on the confirmation dialog to return to the [Set root certif] screen. Select [Delete root certificate] on the screen for step 5 to delete the ...
-
Page 37: Transferring Images Individually
Transferring Images Individually Automatic Image Transfer After Each Shot An image can be automatically transferred to the FTP server immediately after shooting. You can also continue still photo shooting even while images are being transferred. Before shooting, be sure to insert a card into the camera. If you ... - Page 38 Transferring Images Individually Select [Automatic transfer]. Select [Enable]. Take the picture. The captured image is transferred to the FTP server. Images cannot be erased during image transfer. During continuous shooting, images are transferred to the FTP server in ...
- Page 39 Transferring Images Individually Transferring the Current Image Simply play back an image and press <0> to transfer it. You can also continue still photo shooting even while images are being transferred. Select [Transfer with SET]. On the setting screen of FTP transfer, ...
- Page 40 Transferring Images Individually Selecting the Type of Images to Transfer For RAW+JPEG images, you can specify which images to transfer. Select [Transfer type/size] in step 4 on page 38 to select the type of images to transfer. Select [Transfer type/size]. Select the type of images to transfer.
- Page 41 Transferring Images Individually Auto Retry if Transfer Fails If transfer fails, the <LAN> lamp on the transmitter blinks in red. In this case, press the <M> button, select [WFT settings] under the [55] tab, and press <0>. When the screen shown on the left is displayed, check the error code number and see page 70 to eliminate the cause of the error.
-
Page 42: Batch Transfer
Batch Transfer After shooting, you can select multiple images as desired and transfer them all at once. You can also transfer unsent images or images that could not be sent previously. Additionally, you can add a caption before transferring images. You can also continue still photo shooting even while images are being transferred. - Page 43 Batch Transfer Select images to transfer. Select the image to be transferred with the <Y> <Z> keys, then press <0>. Display the [X] on the screen’s upper left with the <W> <X> keys, then press <0>. If you press the <u> button and turn ...
- Page 44 Batch Transfer Selecting Multiple Images Select Range Under [Multiple] , select [Select range]. Selecting the first and last images of the range marks all the images in the range with a checkmark [X], and one copy of each image will be sent.
- Page 45 Batch Transfer Transferring RAW+JPEG Images For RAW+JPEG images, you can specify which image to transfer. In step 2 on page 42, select [RAW+JPEG transfer], and select the image to be transferred: [JPEG only], [RAW only], or [RAW+JPEG]. The [RAW+JPEG transfer] setting ...
-
Page 46: Transferring Images With A Caption
Transferring Images with a Caption When you select [Transfer with caption], you can add a registered caption to each image before transfer. This is convenient if you want to inform the recipient of the printing quantity, for example. The caption is also added to images stored in the camera. -
Page 47: Viewing Transferred Images
Viewing Transferred Images Images transferred to the FTP server are stored in the following folder as specified in the FTP server settings. Target Folders for the FTP Server Under the default settings of the FTP server, images are stored in [C ... -
Page 49: Operating Remotely Using Eos Utility
Operating Remotely Using EOS Utility Using EOS Utility, you can view images stored in the camera or save them to a computer. Additionally, you can operate the camera remotely to take a picture or change camera settings using EOS Utility. The instructions in this chapter are continued from Chapter ... -
Page 50: Configuring Eos Utility Connection Settings
Configuring EOS Utility Connection Settings These instructions are continued from Chapter 1. To establish a connection, operations on the computer are required. For details, refer to the computer’s instruction manual. Operation on the Camera-1 Select [OK]. Select [OK] and press <0>. The ... - Page 51 Configuring EOS Utility Connection Settings Click [Connect] on the computer. Select the camera to connect to, then click [Connect]. If multiple cameras are displayed, identify the camera to connect to by its MAC address displayed on the camera’s monitor. The MAC address of the transmitter ...
-
Page 52: Using Eos Utility
Using EOS Utility For EOS Utility instructions, refer to the EOS Utility Instruction Manual. In addition to remote shooting, various camera operations are available. While connected, some menu items are unavailable. In remote shooting, the AF speed may become slower. ... -
Page 53: Terminating The Connection And Reconnecting
Terminating the Connection and Reconnecting... -
Page 54: Terminating The Connection
Terminating the Connection Select [55: WFT settings]. Select [Connection settings]. Select [Disconnect]. The connection is terminated. ... -
Page 55: Reconnecting
Reconnecting Select [55: WFT settings]. Select [Connection settings]. Select [SET*]. From the saved settings, select the setting to connect to. Select [Connect]. The connection is re-established. If settings have been changed on the target device, configure the settings again to connect to the camera. -
Page 57: Checking And Operating Connection Settings
Checking and Operating Connection Settings... -
Page 58: Displaying The Connection Settings Screen
Displaying the Connection Settings Screen Check, change, or delete connection settings saved on the camera. Select [55: WFT settings]. Select [Connection settings]. Select [SET*]. From the saved settings, select the setting to check. - Page 59 Displaying the Connection Settings Screen Check or change the settings. Select an item and press <0>, then check or change the settings on the displayed screen. [Connect] (p.55) Select this to re-establish a connection. Select [OK] on the confirmation dialog and press <0>...
-
Page 60: Changing Settings
Changing Settings Settings originally completed using the connection wizard can be changed. You can also configure settings that cannot be set using the connection wizard, such as when an image with the same file name as an existing file is sent to the FTP server. Select [Change]. - Page 61 Changing Settings [FTP server] This is displayed for settings that connect to an FTP server. Configure FTP server settings. IP Security (IPsec) Configured in [TCP/IP] 9 [Security]. IPsec is a set of standards for encrypted communication over the Internet. It provides effective security for both wireless and wired LANs. To use this function, you must enable IPsec in the network settings of the computer.
- Page 62 Changing Settings Directory Structure of the Target Folder Configured in [FTP server] 9 [Directory structure]. Selecting [Camera] automatically creates a folder structure matching that of the camera’s (such as B/DCIM/100EOS_R) in the target root folder for image storage. If you have created a subfolder in the root folder by changing the [Target folder] setting, a folder structure such as “B/DCIM/100EOS_R”...
- Page 63 Changing Settings Passive Mode Configured in [FTP server] 9 [Passive mode]. Enable this setting in network environments protected by a firewall. If an Error 41 occurs (“Cannot connect to FTP server”), setting passive mode to [Enable] may enable access to the FTP server.
-
Page 64: Saving And Loading Settings
Saving and Loading Settings Connection settings can be saved on a card for use with other cameras. In addition, connection settings configured on other cameras can be applied to the camera to be used. Saving Settings Select [Save/load settings on card]. - Page 65 Saving and Loading Settings Loading Settings Select [Save/load settings on card]. On the [Connection settings] screen displayed in step 4 on page 59, select [Save/load settings on card]. Select [Load settings from card]. Select the settings file. Select a settings file that matches ...
-
Page 66: Function Settings Screen
Function Settings Screen On the [Function settings] screen, you can configure FTP transfer settings, set the power saving function, and check the MAC address. Displaying the Function Settings Screen Select [55: WFT settings]. Select [Function settings]. The [Function settings] screen is displayed. - Page 67 Function Settings Screen [FTP transfer settings] (p.35-41) Configure FTP transfer settings. [Power saving] This function works when connected via a wired LAN. When connected via a wireless LAN, the power saving function is enabled regardless of the setting. FTP Transfer ...
-
Page 69: Troubleshooting Guide
Troubleshooting Guide Transfer speed in ad hoc mode may become extremely slow when the transmitter is used with certain types of computer. For more information, contact your dealer or nearest Canon Service Center. -
Page 70: Responding To Error Messages
Responding to Error Messages If transmitter errors are displayed on the camera’s monitor, refer to the examples of corrective actions in this section to eliminate the cause of the error. When an error has occurred, the <LAN> lamp on the transmitter blinks and the error code number is shown on the LCD panel. - Page 71 Responding to Error Messages If [Waiting to retry transfer...] is displayed If image transfer via FTP fails after shooting, the screen on the left is displayed. Also, an error code number is displayed on the transmitter’s LCD panel, and the <LAN> lamp blinks in red. Check the error code number and eliminate the cause of the error.
- Page 72 Responding to Error Messages 21: No address assigned by DHCP server What to check on the transmitter On the transmitter, IP address is set to [Auto setting]. Is this the correct setting? If no DHCP server is used, configure settings after setting the IP ...
- Page 73 Responding to Error Messages 22: No response from DNS server What to check on the transmitter On the transmitter, DNS address is set to [Manual setting]. Is this the correct setting? If no DNS server is used, set the transmitter’s DNS address setting ...
- Page 74 Responding to Error Messages 23: Device with same IP address exists on selected network What to check on the transmitter Is another device on the transmitter network using the same IP address as the transmitter? Change the transmitter’s IP address to avoid using the same address as another device on the network.
- Page 75 Responding to Error Messages What to check on the proxy server Is the power of the proxy server on? Turn on the proxy server. Is the proxy server working correctly? Check the proxy server settings to make sure it is working correctly ...
- Page 76 Responding to Error Messages 41: Cannot connect to FTP server What to check on the transmitter On the transmitter, does the FTP server’s IP address setting match the server’s actual address? Configure the IP address on the transmitter to match the actual ...
- Page 77 Responding to Error Messages What to check on the FTP server Is the FTP server working correctly? Configure the computer correctly to function as an FTP server. If applicable, ask your network administrator for the FTP server address and port number, then enter them on the transmitter.
- Page 78 Responding to Error Messages What to check on the network as a whole Does your network include a router or similar device that serves as a gateway? If applicable, ask your network administrator for the network gateway address and enter it on the transmitter (p.89, 94). Make sure that the gateway address setting is correctly entered on ...
- Page 79 Responding to Error Messages 45: Cannot login to FTP server. Error code received from server. What to check on the transmitter On the transmitter, is the [Login name] entered correctly? Check the login name for accessing the FTP server. The setting is ...
- Page 80 Responding to Error Messages 46: For the data session, error code received from FTP server What to check on the FTP server The connection was terminated by the FTP server. Restart the FTP server. Do the user rights for the FTP server allow reading, writing, ...
- Page 81 Responding to Error Messages 61: Selected SSID wireless LAN network not found Are any obstacles blocking the line of sight between the transmitter and the antenna of the access point? Move the antenna of the access point to a position clearly visible ...
- Page 82 Responding to Error Messages 63: Wireless LAN authentication failed Are the transmitter and the access point set to use the same authentication method? The transmitter supports the following authentication methods: [Open system], [Shared key], and [WPA/WPA2-PSK] (p.22). Are the transmitter and the access point set to use the same ...
- Page 83 Responding to Error Messages 65: Wireless LAN connection lost Are any obstacles blocking the line of sight between the transmitter and the antenna of the access point? Move the antenna of the access point to a position clearly visible ...
- Page 84 Responding to Error Messages 67: Incorrect wireless LAN encryption method Are the transmitter and the access point set to use the same encryption method? The transmitter supports the following encryption methods: WEP, TKIP, and AES (p.22). If filtering by MAC address is active, is the MAC address of the ...
- Page 85 Responding to Error Messages 81: Wired LAN connection lost Is the LAN cable securely connected? Reconnect the LAN cable between the transmitter and server. Because the cable may be severed, try using another cable to connect the devices. Is the hub or router on? ...
-
Page 86: Wireless Function Notes
Wireless Function Notes If the transmission rate drops, the connection is lost, images are not displayed smoothly, or other problems occur when using the wireless functions, try the following corrective actions. Access Point and Antenna Installation Location When using the transmitter indoors, install the device in the same ... - Page 87 Wireless Function Notes Notes for Using Multiple Wireless Transmitters When multiple cameras with a wireless transmitter attached are connected to one access point, make sure that the cameras’ IP addresses are different. When multiple cameras with a wireless transmitter attached are ...
-
Page 88: Security
Security If security settings have not been properly set, the following problems may occur. Transmission monitoring Third parties with malicious intent may monitor the wireless LAN transmissions and attempt to acquire the data you are sending. Unauthorized network access ... -
Page 89: Checking Network Settings
Checking Network Settings Windows Open the Windows [Command Prompt], then type ipconfig /all and press the <Enter> key. The IP address assigned to the computer is displayed, as well as the subnet mask, gateway, and DNS server information. Mac OS ... -
Page 91: Reference
Reference... -
Page 92: Creating And Registering Captions
Creating and Registering Captions Follow these steps to create captions and register them on the camera, as introduced in “Transferring Images with a Caption” (p.46). When creating and registering captions, use a computer on which EOS Utility is installed. See “Operating Remotely Using EOS Utility” on page 49 to enable the use of EOS Utility over a LAN. - Page 93 Creating and Registering Captions Enter the caption or captions. Enter up to 31 characters (in ASCII format). To acquire caption data stored in the camera, select [Load settings]. Register the captions on the camera. Select [Apply to camera] to register ...
-
Page 94: Setting Ip Address Manually
Setting IP Address Manually Set the IP address settings manually. The items displayed will differ depending on the communication method. Select [Manual setting]. Select [OK] and press <0> to go to the next screen. Select the item to be set. Select an item and press <0>. - Page 95 Setting IP Address Manually Select [OK]. When you have completed setting the necessary items, select [OK] and press <0>. The setting screen for the communication method will appear. If you are not sure what to enter, see “Checking Network Settings”...
-
Page 96: Using A Bracket (Sold Separately)
Using a Bracket (Sold Separately) Attaching the optional Accessory Bracket AB-E1 enables you to use the transmitter and a battery grip at the same time. Attach the transmitter and camera to the bracket as shown. Tripod socket... -
Page 97: Specifications
Specifications 9Type Type: Wired and wireless LAN (IEEE 802.11a/b/g/n) IPsec- compatible image transfer accessory with Bluetooth connectivity for GPS devices * Bluetooth connectivity is not supported on the EOS 9Wireless LAN Standards compliance: IEEE 802.11a IEEE 802.11b IEEE 802.11g IEEE 802.11n Transmission method: DS-SS modulation (IEEE 802.11b) OFDM modulation (IEEE 802.11a/g/n) - Page 98 Specifications Connection method: Infrastructure or ad hoc mode * Wi-Fi Protected Setup supported Security: Authentication method: Open system, Shared key, WPA/WPA2-PSK Encryption: WEP, TKIP, and AES 9Wired LAN Ethernet: 10BASE-T, 100BASE-TX and 1000BASE-T 9LAN Functions FTP transfer: Automatic transfer Image selection and transfer Transfer using SET button Transfer with captions * FTPS supported...
- Page 99 Temperature: 0°C–40°C / 32°F–104°F Humidity: 85% or less All the data above is based on Canon’s testing standards and CIPA (Camera & Imaging Products Association) testing standards and guidelines. Transmitter specifications and appearance are subject to change without ...
- Page 100 Trademarks Microsoft and Windows are trademarks or registered trademarks of Microsoft Corporation in the United States and/or other countries. Macintosh and Mac OS are trademarks of Apple Inc., registered in the U.S. and other countries. The Wi-Fi CERTIFIED logo and the Wi-Fi Protected Setup mark are ...
-
Page 101: Index
Index AC adapter........14 Files of same name ......62 Ad hoc..........81 Folders ........34, 47 AES..........22 FTP mode........32 Area of use FTP server........31 .... Areas of Use and Restrictions FTP transfer ......18, 31 Authentication ......22, 61 FTPS ..........32 Automatic image transfer ....37 Function settings ...... - Page 102 Index Pairing..........50 Target folder (for storage)..34, 47 Passive mode ......33, 63 Target folder (for transfer) ..47, 62 PBC mode ........23 TCP/IP..........60 PIN code connection mode.....24 TKIP ..........22 PIN mode........24 Transfer after shooting ....42 Port number ........33 Transfer history ......
- Page 104 The descriptions in this Instruction Manual are current as of August 2018. For information on the compatibility with any products introduced after this date, contact any Canon Service Center. For the latest version Instruction Manual, refer to the Canon Web site.