Table of Contents
Advertisement
Quick Links
Manufacturer: Gogoro Taiwan Limited
Address:
3 3, Dinghu Rd., Guishan Dist., Taoyuan City, Taiwan 33378
Series (Model): Gogoro 2 Utlity, Gogoro 2 Plus Utlity, Gogoro 2 Plus, Gogoro S2, Gogoro S2 ABS, Gogoro 2 Deluxe
iQ Version: 5.1
Copyright© 2020 Gogoro Taiwan Limited
reproduced or copied in any form unless a prior written consent is received from Gogoro Taiwan Limited.
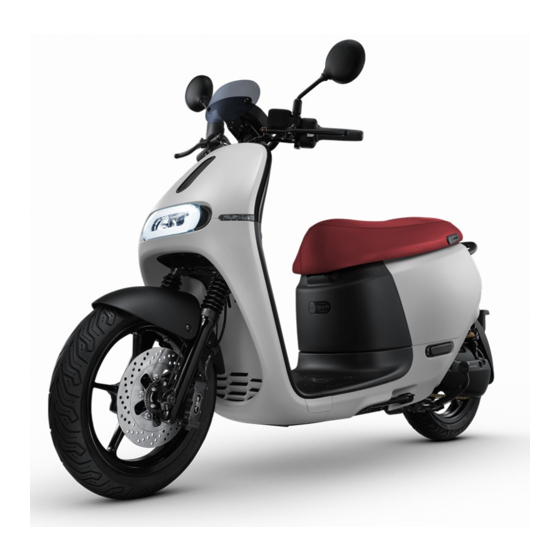
Gogoro 2 Smartscooter
Owner Manual
All rights reserved. Any portion of this user manual shall not be forwarded,
®
Advertisement
Table of Contents

Related Manuals for Gogoro 2 Series


Summary of Contents for Gogoro 2 Series
- Page 1 Address: 3 3, Dinghu Rd., Guishan Dist., Taoyuan City, Taiwan 33378 Series (Model): Gogoro 2 Utlity, Gogoro 2 Plus Utlity, Gogoro 2 Plus, Gogoro S2, Gogoro S2 ABS, Gogoro 2 Deluxe iQ Version: 5.1 Copyright© 2020 Gogoro Taiwan Limited ...
-
Page 2: Table Of Contents
Contents 1.Before You Hit the Road Safety Notice Names and Functions of the Vehicle 4 Figure 1-1: Left View Figure 1-2: Top View Figure 1-3: Left Handle Switches Figure 1-4: Right Handle Switches Figure 1-5: Dashboard Information 7 Figure 1-6: Dashboard Icon Name Table 1-1: Information about dashboard icon 2.Locking, Unlocking, Power On and Opening Trunk Models with iQ System®... - Page 3 27 Pairing Your Phone with Smartscooter® 27 Introduction to Gogoro® App 28 Figure 5-1: The Gogoro® App interface (The actual content might be different due to model or version changes) 6. Maintenance Check the Following Before Your Ride 31 Daily Cleaning and Maintenance 31 ...
-
Page 4: Before You Hit The Road
● Perform basic inspections before every ride, such as headlights, brakes, tire tread and tire pressure, as well as other potentially loose parts. Return to the Gogoro ... -
Page 5: Names And Functions Of The Vehicle
Names and Functions of the Vehicle Figure 1-1: Left View Figure 1-2: Top View ... - Page 6 Figure 1-3: Left Handle Switches High/low beam switch: ● Press to switch the headlight from low beam to high beam. Passing light switch: ● Press to activate passing light, release to turn off. Left/Right turn signal switch: ● Press once - the left turn signal blinks and plays an acoustic note. Press again to turn off. ...
- Page 7 on. The system sets the intensity of regenerative braking based on the setting in the Gogoro® App, but also takes the current speed and remaining battery level into consideration, and makes minor adjustments accordingly. S Button: ...
- Page 8 ● When battery capacity shows a single bar on the dashboard, the odometer display will return to RANGE mode after 10 seconds idle. ● If the battery power is drained, the display will fix at the RANGE mode and the mileage is shown as “-----”...
- Page 9 Attention abnormalities. High beam Lights up along with the high beam. Informs the owner of any system abnormalities. The owner Malfunction should visit a Gogoro designated service center. ...
- Page 10 In the case of motor or battery overheating, the sign lights Over/under up to remind the owner that the system will reduce its ...
-
Page 11: Locking, Unlocking, Power On And Opening Trunk
System® sensor to e asily lock or unlock your Smartscooter®. You can use Gogoro® App and smartphone to unlock and lock the Smartscooter®. (Please refer to 5. Smartphone Application and Personalisation) 1. Please preserve the iQ System® Smart Keycard carefully, do not bend, cut, or expose it under direct sunlight. -
Page 12: Unlocking And Turning On System Power
Unlocking and Turning On System Power Figure 2-2: Unlock and Lock ● To unlock the Smartscooter®, make sure the handlebar is all the way to the left. ... -
Page 13: Opening The Luggage Compartment
Smartscooter® will lock automatically. You can use Gogoro® APP to activate or deactivate this feature. ... -
Page 14: Front Storage Compartment (For Certain Models Only)
Smartscooter® is locked over 3 minutes. ○ When Smartscooter® idles for a long time (Depends on current battery level). ○ When the Gogoro® battery is away from the vehicle for longer than 48 hours. ● The icon on the dashboard will flash for several seconds to confirm release ... -
Page 15: Turning Off System Power
● Insert the mechanical key into the keyhole, press it and turn clockwise from “LOCK” to “OFF” position to open the handle bar lock. ● Turn the key clockwise once again to “ON” position to turn on system power. The key cannot be pulled out now. ... -
Page 16: Moving And Stopping
3. Moving and Stopping Startup and Takeoff An additional startup sequence is needed to enter the Motor Standby Mode and be ready for takeoff. ● Please make sure the scooter is unlocked. ●... -
Page 17: Regenerative Braking
● on the dashboard will show an animation to inform you that the battery is charging. ● The power recovery rate can be adjusted or turned off through the Gogoro® App. ... - Page 18 You can turn on or turn off regenerative braking function by pressing the “Regen” button on the right hand side. (Please refer to 1. Before you hit the road) ...
-
Page 19: Reversing
Reversing Figure 3-2: Reverse button Please follow the instructions below to reverse: ● Make sure the scooter is started and is in motor standby mode. ● Make sure the scooter is in complete standstill and its electronic throttle is not activated. ... -
Page 20: Smart Mode
(Models with iQ System® Smart Key Card) If there is no further operation on the Smartscooter®, t he S martscooter® will automatically lock the handle bar in 3 ... -
Page 21: Low Energy Mode
Low Energy Mode Figure 3-3: Dashboard display in Pre-Crawl Home Mode When the battery level is running low, the battery level indicator on the ● dashboard will flash slowly with a single capacity bar. -
Page 22: Over / Under Temperature Warning
Figure 3-4: Dashboard display in Crawl Home Mode The Smartscooter® will enter “Crawl home mode” when the battery level ● shows no capacity bar. This indicates that batteries are at an extremely low level ... -
Page 23: Fall Down Protection
● When Temperature Warning symbol on the dashboard lights up in blue, indicating that the battery is now under temperature. The Smartscooter® will detune ... -
Page 24: Battery Exchange
4. Battery exchange With Gogoro Network™ battery swap station, Gogoro Smartscooter® relieves you from the lengthy recharging process and makes it convenient to have fully charged batteries. GoStation® ® ● Through the Gogoro App on your smartphone, you can find the locations of the ... -
Page 25: Replacing Gogoro Network™ Smart Batteries
Replacing Gogoro Network™ Smart Batteries ● Park the v e hicle safely besides a GoStation. Shut down the motor by extending the side stand. ● Open the seat. ● Pull out the smart battery by holding the smart battery handles. Support the smart battery with your other hand. - Page 26 Please make sure to swap smart batteries at least once every 30 days, if you plan not to use your vehicle for more than 30 days, please contact Gogoro Network and suspend your smart battery subscription plan.
- Page 27 It’s strictly prohibited to short-circuit the connector with metal objects. ● DO NOT dispose of Gogoro Network™ batteries in fire, heat or water, and DO NOT drop, strike or attempt to disassemble or destroy them. ● DO NOT attempt to dismantle the batteries, or to alter their shape and/or structure.
-
Page 28: Smartphone Application And Personalisation
scooter or inquire about its condition. Downloading and Installing the Gogoro® App ● The Gogoro® App is available for iOS and Android platforms. Please check your ... -
Page 29: Introduction To Gogoro® App
Introduction to Gogoro® App Figure 5-1: The Gogoro® App interface (The actual content might be different due to model or version changes) ● Information Hub: the upper part of the main screen is the push notification area ... - Page 30 ● Diagnostics: Checks and displays health status of major on-board systems. In case of any irregularity, click the related system symbol to locate nearby Gogoro Service Centers for further inspection and services. ● My Ride Status: Displays records of the last 12 trips, including average speeds, ...
- Page 31 Gogoro, Gogoro is not responsible for the integrity, correctness or effectiveness of the information provided. The adjustable speed limit in the overspeed warning function might be higher ...
-
Page 32: Maintenance
Check the Following Before Your Ride ● Make sure the tire pressure is within normal range; recommended tire pressure is 33 psi for the front wheel and 40 psi for the rear (Gogoro 2 Rumbler: Front 30 psi, rear 33 psi). -
Page 33: Regular Service And Maintenance
Regular Service and Maintenance ● Newly delivered Smartscooter® should return to a Gogoro service center for its first inspection after 1,000 kilometers or 2 months. ● It’s recommended to bring your Smartscooter® back to a Gogoro service center for ... -
Page 34: Maintenance Schedule
Gogoro reserves the right to refuse fulfilling warranty obligations. Maintenance schedule It is recommended to bring your Smartscooter® back to a Gogoro service center for regular inspection and maintenance every 3,000 kilometers or every six months (whichever comes first).
Need help?
Do you have a question about the 2 Series and is the answer not in the manual?
Questions and answers