Table of Contents
Advertisement
Quick Links
Advertisement
Table of Contents

Related Manuals for NSA SFDC-30128RC


Summary of Contents for NSA SFDC-30128RC
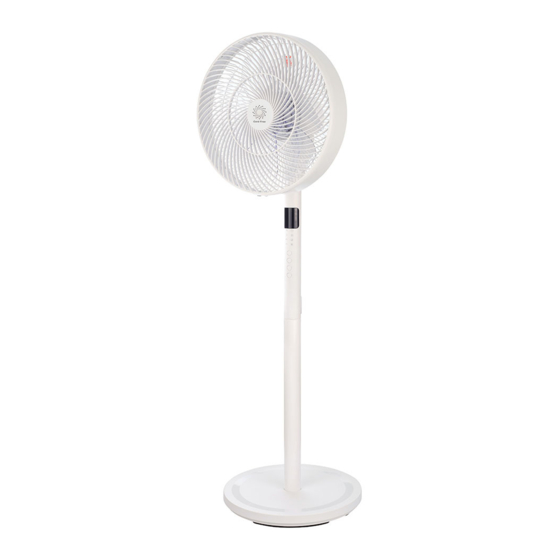
- Page 1 Dual Power COOL 12"/30 cm Stand Fan with DC Motor User manual www.nsauk.com...
- Page 2 Welcome With a clear focus on new technologies, innovation and design, NSA played a leading role in the Air Improvement industry for over 20 years. energy saving DC motors and cordless rechargeability at the forefront. Boasting 8 Quiet Mark accreditations, NSA are the leading brand for build quality &...
-
Page 3: Table Of Contents
Contents with lots of new features and new technologies. This elegant, height adjustable (when compared to traditional 12”/ 30cm pedestal fan with AC motor). Introduction Box contents Parts description Assembly Operation guide Remote Operation Cleaning & Care Maintenance & Storage Recycling &... -
Page 4: Introduction
Introduction • Cord-Free Portability / Dual Power w. 3-pin adapter • Energy Saving DC Motor • Ultra-Quiet 7-Blade 12”/30cm Stand Fan • Remote Control w. 3V battery (CR2032) • Multi position tilt – Vertical to Horizontal • Oscillation - 30° / 60° / 90° / 120° (not available when using a USB power pack) •... -
Page 5: Box Contents
What’s included 1. Stand Fan (see page 6 for details) 2. Power Adapter & Cord 3. USB Cable 4. Remote Control 5. User Guide 6. CR2032 Cell Battery for Remote Control Unpack all items from the box, assemble the fan according to the sequence detailed on pages 8 - 10 and page 21 (Remote Control). -
Page 6: Parts Description
Parts Description 1. Front Grille 2. Blade Cap 10. Carry Handle 3. Fan Blade 11. Motor Casing 4. Clamping Nut 12. Tilt Point 5. Rear Grill 13. Display Panel 6. Guard Ring 14. Function Icons (OSC, Modes,Timer) 18. Riser Pipe 7. - Page 7 Controls Manual controls & Icons 1. Digital Display 2. Oscillation Icons (30° / 60° / 90° / 120°) 3. “+” / “–” Speed / Timer 4. Oscillation control 5. On / Off 6. Timer/Pre-set Timer Icon 7. Eco/AI Mode Icon 8.
-
Page 8: Assembly
Assembly Please assemble correctly according to the following sequence. Refer to parts description on page 6. Please keep the original packaging for future storage. • Unscrew the L-shaped bolt and metal washer from the riser pipe. • Insert the vertical pipe into the center hole of the foot plate assembly. - Page 9 • Before installing the rear grille – remove the blade cap turning clockwise (as indicated). • Remove the protective plastic tube from the motor shaft. This tube is to prevent motor shaft from rusting during storage – so retain for future use if dismantling your fan for winter storage or discard.
- Page 10 • Place fan blade on the motor shaft and align the axle pin with the recess on the reverse side of the fan blade. • Turn the spinner to the left, so that there is no fan blade recess. • NOTE: Don’t forget to remove protective tube before attaching the grilles &...
-
Page 11: Operation Guide
Operation guide The fan can be operated manually by the control panel on the front of the fan or by the remote control. NB: Certain features (eg: Timer ON or Timer OFF, Mode functions) can only be operated via the remote control supplied with the product. On/Off Once the unit is connected to the power supply, press the “On/Off”... - Page 12 speed 12 and one beep will sound. Subsequent uses will remember the previous setting, unless physically unplugged from the power supply. display from speed 1 to speed 32. on the front of the fan until you reach your preferred speed setting..
- Page 13 Timer/Preset To set the timer - with the fan powered ON, press the TIMER/PRESET button on the remote control and then press “ ”to increase or “ ” to decrease timer to set the length of operation or having pressed the TIMER/PRESET on the remote control, use the “...
- Page 14 Timer/Preset (Delayed Start) To use PRESET timer for delayed start – the unit must be OFF. Press the TIMER/PRESET button on the remote control and then press “ ”to increase or “ ” to decrease timer to set the length of delayed start between 1hr and 15hrs – this will be displayed at the top of the main panel.
- Page 15 Oscillation (OSC) • Press OSC on remote control to select oscillation function – horizontal swing - 30° / 60° / 90° / 120°. Keep pressing until the desired angle of oscillation is reached. The selected angle will be lit on the front of the fan. •...
- Page 16 Modes This is the air selection button. Press the mode button once to operate the NATURAL BREEZE mode. Press again to operate the SLEEP mode; Press for a third time to operate ECO/AI mode; press a fourth time to turn-off the wind mode functions and return to normal 32 speeds.
- Page 17 BREEZE Mode simulates natural breezes and rhythms and varies according to the fan speed set - press the MODE button once and use the “ ”or “ ” buttons on the remote control or manual controls to increase or to decrease to the required setting. •...
- Page 18 To select ECO/AI mode – press the MODE button three times on the remote control. Use in conjunction with PRESET; TIMER and OSC. Under the ECO MODE, the stand fan will adjust the fan speed automatically according to the room temperature. When the temperature drops or increases by 1ºC, the fan will correspondingly decrease or increase by 2 speeds.
- Page 19 Tilt Adjustment • Gently tilt the fan head up or down to the desired angle – there are six tilt positions from vertical to horizontal. • NB: Only adjust tilt when the fan is turned off. Adjusting tilt when the fan is operating may damage the tilt mechanism.
-
Page 20: Remote Operation
Remote Operation • Be sure to direct the remote control toward the receiver on the control panel. • Use the remote control within 5 metres from the receiver. • If the remote control is not directed towards the receiver; the effectiveness will be reduced. •... - Page 21 Replacing the Remote Control Battery (1pc x Lithium 3V CR2032) Lock Turn over the remote Install the battery into the Close the battery cover. control. Open the cover battery compartment. Ensure it clicks closed. of battery compartment Take care of the polarity ~ squeeze lock towards of the battery, which NB Please dispose of used...
-
Page 22: Cleaning & Care
Cleaning & Care • Always turn off the power supply and unplug the appliance from the mains socket or disconnect from the USB device before cleaning. • Do not use any chemical-based solutions for cleaning fan surfaces. • Slightly moisten a cloth and then wipe off the surfaces of the fan. •... -
Page 23: Maintenance & Storage
Maintenance & Storage Before cleaning or carrying out routine maintenance on your fan please always • Clean the fan body and fan blade to avoid colour change or damage. • For details on how to remove the front grille for cleaning purposes – reverse the assembly process detailed on Pages 9 &... -
Page 24: Recycling & Disposal
Recycling & Disposal The packaging of your new fan has a recycle mark on it. Please dispose of it as recycled paper or by using the “Dual System”. Please recycle The symbol on the product or on its packaging indicates that this product may not be treated as general household waste. -
Page 25: Troubleshooting
Troubleshooting If any problems occur during use, please check the following: • Check if the adapter is correctly plugged into the mains socket & the power is on. • Check if the fan grille is deformed or touching the fan blade. •... -
Page 26: Safety
Safety Check the household voltage to ensure it matches away from curtains & blinds. Always use this device in accordance with the 14. This fan is intended for indoor, domestic & light commercial use only and is not to be operated instructions. -
Page 28: Technical Data
Technical Data Model No: SFDC-30128RC (12in/30cm DC fan) EAN No: 5 060301 912117 Rated Power: Voltage: 220-240V ~ 50Hz Ref: IM/SFDC30128/2102/GU86AA Product Dims: 1150 (H) x 370 (W) x 350 (D) mm Ctn. Dimensions: 380 (H) x 660 (W) x 190 (D) mm N.W.
Need help?
Do you have a question about the SFDC-30128RC and is the answer not in the manual?
Questions and answers