Table of Contents
Advertisement
Quick Links
Advertisement
Table of Contents

Related Manuals for Bang & Olufsen BeoSound 3200


Summary of Contents for Bang & Olufsen BeoSound 3200
- Page 1 BeoSound 3200 Guide...
- Page 2 CAUTION: To reduce the risk of electric shock, do not remove cover (or back). No User-serviceable parts inside. Refer servicing to qualified service personnel. WARNING: To prevent fire or electric shock, do not expose this appliance to rain or moisture. This symbol indicates that a dangerous voltage constituting a risk of electric...
-
Page 3: Table Of Contents
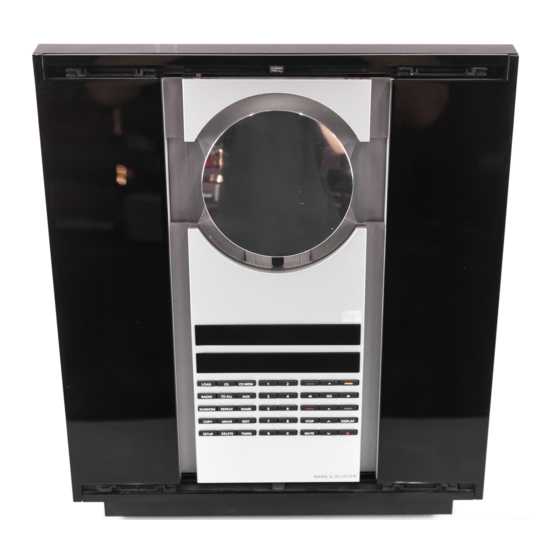
Contents Introducing your Bang & Olufsen music system, 4 Get to know your music system, see how the buttons are organised on the operation panel, understand and change information in the display. Daily use, 9 Find out how to use your music system, play music from the CD memory, use the CD player and the radio, and find out how to use the Beo4 remote control. - Page 4 Reach out as if to touch the glass doors and your BeoSound opens automatically, revealing the music system behind the doors. Use your music system to listen to radio, to play a single CD and to play from the CD memory. Introducing your music system TRACK 1 2 3 4 5 6 7 8 9 10...
- Page 5 The CD memory offers you the possibility to store the contents of your CDs inside the music system. It has four available groups and each group can hold up to 99 CDs. Forget about finding and loading CDs one by one, you have instant access to your CD collection, all stored in the same player.
- Page 6 All the buttons are conveniently grouped according to type of function, so you can easily find your way around the panel while operating the system. The displays on the music system give you various types of information. You choose which type of information is displayed.
- Page 7 Primary functions The buttons on the right-hand side of the panel give you access to all primary functions: switching the system on and off, adjusting volume, muting sound, and operating the radio, CD player, and CD memory. Change the information in the display You can switch between different types of information by pressing DISPLAY repeatedly when the radio, CD player or CD memory is switched...
-
Page 9: Daily Use
This chapter informs you of the basic functions of your music system. How to play back music from the CD memory or a CD, how to use the radio and finally how to use the Beo4 remote control, if you have one. - Page 10 Once you have copied your CDs into the CD memory, they are stored until you delete them. You can now easily play all your music CDs. When you switch on the CD memory, the group and the CD you last played start playing.
- Page 11 If you have named the CD, the name will also be shown in the display* NOTE! BeoSound 3200 automatically switches to standby if idle for 30 minutes. *If the display has been set to show the name of the...
- Page 12 To listen to the radio, you must first find and store the frequencies of the radio stations. You can store up to 60 different radio stations in your music system. Refer to the chapter Tune in radio stations on page 32 for further information.
- Page 13 Activates the source or function in the Beo4 display Pauses playback any time Displays extra ‘buttons’*, e.g. RANDOM or REPEAT Turns the volume up or down, press in the middle to mute speakers, press again to recall sound Switches the BeoSound 3200 to standby...
-
Page 15: Advanced Operation
Find out how to operate your music system beyond daily use. Explore the different ways of playing CDs. Learn how to copy music into the CD memory and find out how to personalise your music system by naming CD memory groups, CDs and radio stations. - Page 16 If some of the tracks on a CD are not to your liking, you can edit the CD, so that only the tracks you like and select are played. Once you have edited a CD and selected your own series of tracks, then, every time you play this CD, the music system starts playing the series of tracks you have chosen.
- Page 17 The random playback function plays all the tracks on the loaded CD or in the chosen CD memory group in random order. The repeat function plays the loaded CD over and over – for up to 12 hours on end. These functions can be used in conjunction or separately.
- Page 18 The easiest way to copy music into the CD memory is to copy the entire CD. Just load the CD and start copying. The duration of the copying depends on the length of the CD. The quality of the music in the CD memory corresponds to the quality of the original CD.
- Page 19 To distinguish between your CDs, both physical CDs and the ones stored in the CD memory, you can name them. You can also name the radio stations and the CD memory groups. When naming a CD or radio station, the CD or radio station you are naming must be playing.
- Page 20 You can copy or move CDs between CD memory groups or rearrange the positions for each CD within a group, for example to make a temporary party play list in one group, or you can copy a CD to a group dedicated to another user.
- Page 21 Give a CD an new position in a group Press to play the CDs in the CD MEM group you last listened to Press to select the group you wish to move a CD from Press to select the CD you wish 0 –...
- Page 22 Timer is stored Press to activate the Timer and TIMER cut in the loudspeakers connected to BeoSound 3200 The green indicator light will show when the Timer function is activated If you do not wish to store your Timer, pressing when STORE ? is displayed, changes the display to EXIT ?.
- Page 23 Check the Timers Press repeatedly until TIMER ? SETUP appears in the display TIMER ? Press to enter the Timer function. NEW ? appears NEW ? Press to change the display to CHECK ? CHECK ? Press to see the Timers Press to step through the programmed Timers If you wish to make corrections,...
- Page 24 When your music system is connected to your video system via the Master Link cable as described in the chapter Audio/Video setup on page 29, you can choose whether to use the speakers connected to the music system, if any, or the speakers connected to the video system.
-
Page 25: Placement, Connections, And Maintenance
This chapter informs you how to place, connect and maintain your music system. We recommend that you follow this procedure when you set up your music system: 1 Place the music system where you want to use it. 2 Set up your speakers and any auxiliary equipment. - Page 26 Do not connect any of the products in your system to the mains, until after you have connected all the cables (see the opposite page). If no permanent FM aerial connection is available, an indoor aerial may be hooked onto the clamp on the back of the BeoSound 3200.
- Page 27 Use the diagram and the graphics imprinted on the socket panel for reference when locating the sockets. Do not connect the music system to the mains until you have finished the setting-up procedure! You can use your music system in a standalone setup or connected to a Bang &...
- Page 28 How to assemble BeoSound 3200 Arrange the cables Arrange the connector cables in the cable cover as shown to the right. You can fasten the cables with tape to keep them in place before you mount the cable cover to the rear of the music system.
- Page 29 You can use your music system as a stand-alone system or as a Audio/ Video system, if you connect the systems with a Master Link cable. If you connect your music system and your video system, you must make sure that they are set up to function together.
- Page 30 Normal maintenance, such as cleaning the music system, is the responsibility of the user. To achieve the best result, please follow these instructions. Before you clean the music system, we recommend that you disconnect it from the mains to prevent the glass doors from opening and closing.
-
Page 31: Tuning And Preference Settings
Find out how to tune in radio stations and how to make your personal preference settings for sound. Find out how to set the clock and how to use the PIN code system. If you want to use the Beo4 remote control with your music system, this chapter tells you how to customise the Beo4 for it. - Page 32 Let the music system find the available radio stations for you, now store them on program numbers of your own choice. You can store up to 60 radio stations and name them as described on page 19. Once a station is stored, you access it directly by keying in the program number or by stepping though all the stored stations.
- Page 33 Delete radio stations Press to switch on the radio RADIO Press one of the number buttons 0 – 9 to select a radio station RADIO 7 Press to delete the radio station DELETE you are listening to. DELETE ? DELETE ? appears Press again to delete the station.
- Page 34 All sound levels are set to neutral values from the factory, but you can make your own sound adjustments and store them. You can adjust the volume, bass and treble levels or alter the balance between the left and right speakers. If you store a volume level, your music system will start playing at this level each time you switch it on.
- Page 35 The music system has a built-in clock with time, date and year. You can call up the time in the display via the SETUP button or via the Beo4 remote control. The clock is not set automatically, you must enter the settings yourself.
- Page 36 You choose whether or not to activate the PIN code system. The use of a PIN code means that if your music system has been disconnected from the mains for more than approximately 30 minutes, it can only be activated again by switching it on and keying in your own personal PIN code via the close-up operation panel.
- Page 37 Change your PIN code Press twice when the set is in standby Press to key in the four-digit PIN STOP code. PIN _ _ _ _ appears _ _ _ Key in your personal PIN code. 0 – 9 The PIN code is not displayed. **** NEW PIN ? appears NEW PIN ?
- Page 38 If you already have a Beo4 remote control, it is possible to reconfigure it for use with your music system. You can also add extra ‘buttons’ to Beo4 which can then be called up by pressing the LIST button. You can rearrange the order in which the extra ‘buttons’, that you yourself have added and the ones that were...
- Page 39 Move extra ‘buttons’ Press and hold the standby • button down Press to get access to the Beo4 LIST setup function Now, let go of both buttons. ADD? appears in the display ADD? Press repeatedly until MOVE? is LIST displayed MOVE? Press to call up the list of extra ‘buttons’.
-
Page 40: Index
Index Assembly How to assemble BeoSound 3200, 28 Mount the glass doors, 28 Mount the cable cover, 28 Audio/Video system Connect your music system to a video system, 27 Option programming, 29 Use an Audio/Video system, 24 Beo4 remote control Add extra ‘buttons’... - Page 41 Hard disc CD memory – hard disc, 30 Headphones Connect headphones, 4 Loudspeakers Connect loudspeakers, 27 Maintenance Looking after your music system, 30 Master Link Audio/Video setup, 29 Option programming, 29 Use an Audio/Video system, 24 Naming Delete CD names, 19 Name a CD, 19 Name a radio station, 19 Name CD memory groups, 19...
- Page 42 For your information… Your needs as a user are given careful consideration during the design and development process of a Bang & Olufsen product and we strive to make our products easy and comfortable to operate. Therefore, we hope that you will take the time to tell us about your experiences with your Bang &...
- Page 43 This product fulfils the conditions stated in the EEU directives 89/336 and 73/23. CLASS 1 LASER PRODUCT The black and yellow label on the compact disc player serves as a warning that the apparatus contains a laser system and is classified as a class 1 laser product.
- Page 44 www.bang-olufsen.com...
Need help?
Do you have a question about the BeoSound 3200 and is the answer not in the manual?
Questions and answers